Not many of us get the chance to ride in a hot air ballon, but the ones who do certainly seem to enjoy it. In fact, some of them even go as far as to get a hot air balloon tattooed on their body forever. These tattoos are not only unique, but they are also very creative, colorful, and appealing to those who view them. And to prove just how neat these designs can be, we have made the list below. It is compiled of 12 hot air balloon tattoos, all sure to blow your mind!
1. A Very Simple, Yet Also Very Colorful Hot Air Balloon Tattoo Design
This one may be rather simplistic, but it is certainly done well, and has a lot of great color!
A Very Simple, Yet Also Very Colorful, Hot Air Balloon Tattoo Design
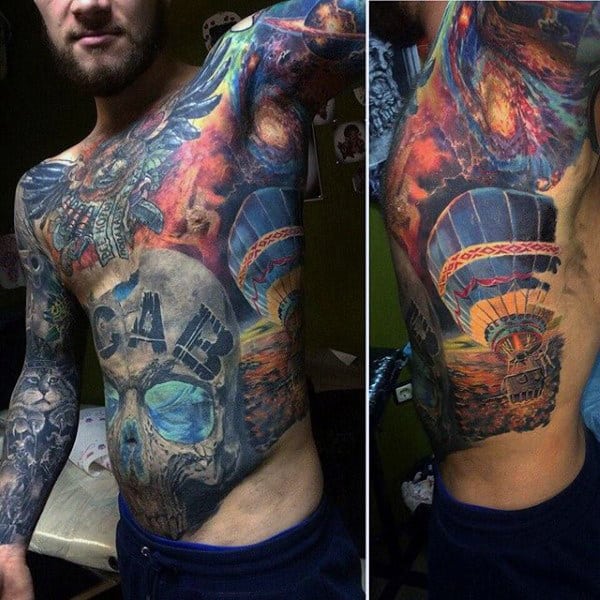
2. A Hot Air Balloon Ribcage Tattoo
This one may have taken a while (and likely more than one session), but it certainly came out nicely, it is very neat to look at!
A Hot Air Balloon Ribcage Tattoo
3. A Lightly Colored, Orange, Pink, And Blue, Hot Air Balloon Tattoo Design For Women
A great choice for women, and of course anyone else who is into lightly colored designs.
A Lightly Colored, Orange, Pink, And Blue, Hot Air Balloon Tattoo Design For Women
4. A Very Unique, And Also Very Detailed, Hot Air Balloon, Done Solely In Dark Grey Ink
Featuring a flag on top, and a horn at the bottom, this tattoo design is extremely unique. It also proves that hot air balloon tattoos looks great, regardless of if they’re colored in or not!
“A Very Unique, And Also Very Detailed, Hot Air Balloon, Done Solely In Dark Grey Ink”
5. A Hot Air Balloon “Freedom” Upper Thigh Tattoo Design
Featuring the word “freedom” and done in a rather traditional tattooing style, this design is certainly one of the best (and most creative) tattoos listed! It is also located along the upper thigh, which is a rather rare spot for these designs.
A Hot Air Balloon “Freedom” Upper Thigh Tattoo Design
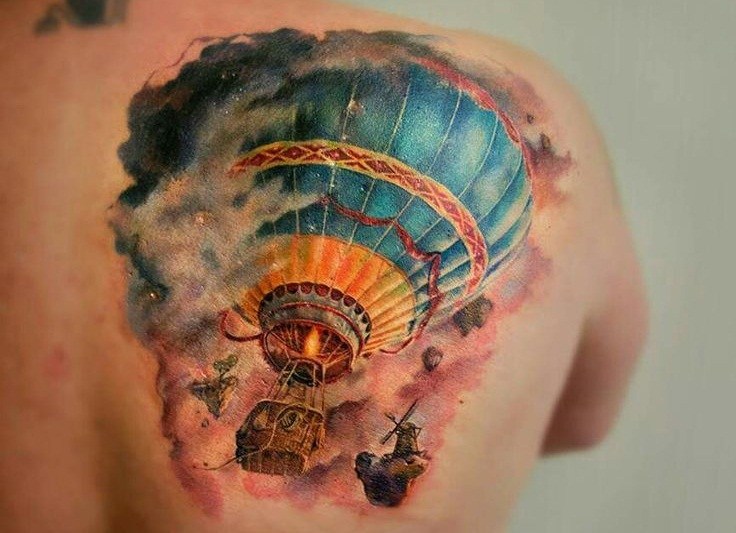
6. An Incredibly Realistic Hot Air Balloon Back Tattoo
Not only is this one extremely detailed, but it is done so well, that it almost looks three dimensional!
An Incredibly Realistic Hot Air Balloon Back Tattoo
7. A Pink And Blue Hot Air Balloon Thigh Tattoo For Women
Also located along the upper thigh, this unique design is a great choice for women, and certainly stands out well! It is also a great choice for those interested in floral tattoo add-ons.
A Pink And Blue Hot Air Balloon Thigh Tattoo For Women
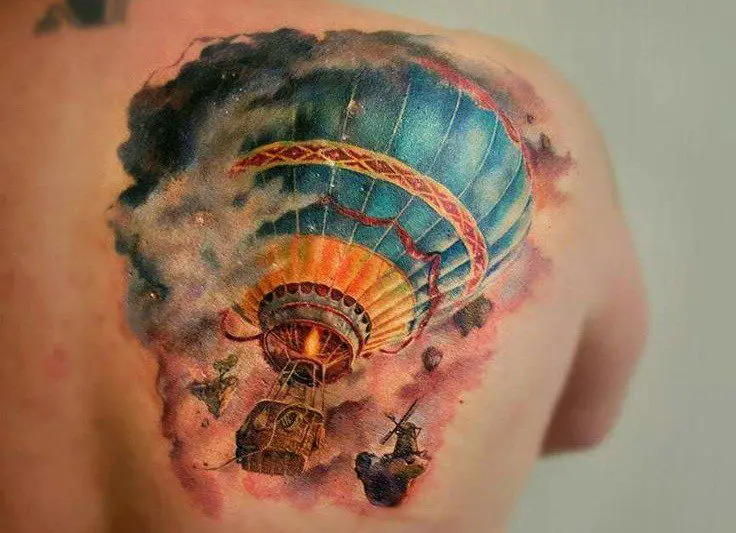
8. A Very Well Done, Three Dimensional Hot Air Balloon Shoulder Tattoo
Believe it or not, this is not a picture or print out of a hot air balloon, it is an actual design, done by a very talented tattoo artist!
A Very Well Done, Three Dimensional Hot Air Balloon Shoulder Tattoo
9. Another Very Realistic, Three Dimensional, Hot Air Balloon Tattoo Design
To be honest, this may just be the most impressive design on the entire list. Due to the amazing detail, and intricate shading, it almost seems to be photoshopped…
Another Very Realistic, Three Dimensional, Hot Air Balloon Tattoo Design
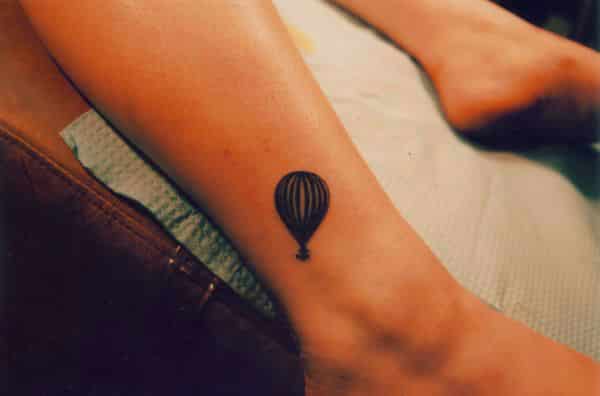
10. A Rather Simple, Black And White Hot Air Balloon Ankle Tattoo Design For Women
In addition to being very nicely placed along the ankle, this tattoo goes to show how sometimes even the simplest designs can be appealing.
A Rather Simple, Black And White Hot Air Balloon Ankle Tattoo Design For Women
11. A Hot Air Balloon Forearm Design, Done Solely In Water Colors
For those who really want their tattoo to stand out, watercolor designs like the one below may be your best choice…
A Hot Air Balloon Forearm Tattoo Design, Done Solely In Watercolors
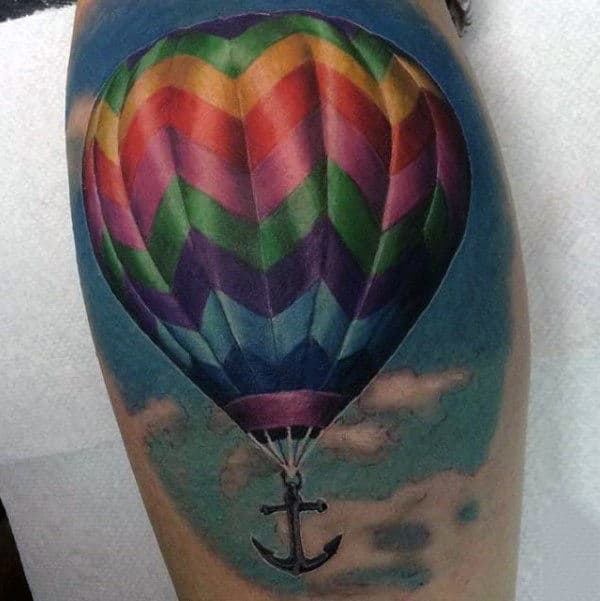
12. A Cartoony Green, Purple, And Yellow Hot Air Balloon Tattoo Design
This one may not look as realistic as some of the others on this list, but it is certainly colorful and unique!
A Cartoony Green, Purple, And Yellow Hot Air Balloon Tattoo Design
Though joking about someone being an idiot can be rather hurtful, the idiot memes that exist online are actually very funny. In fact, some people might even go as far as to say they are some of the funniest memes around today. And fortunately, whether you’re an idiot yourself or not, you should certainly find them funny.
So, to prove just how hilarious some of these memes are, we’ve created the list below. It’s compiled of the 10 best idiot memes we could find, and is something we’re sure you’ll get a kick out of!
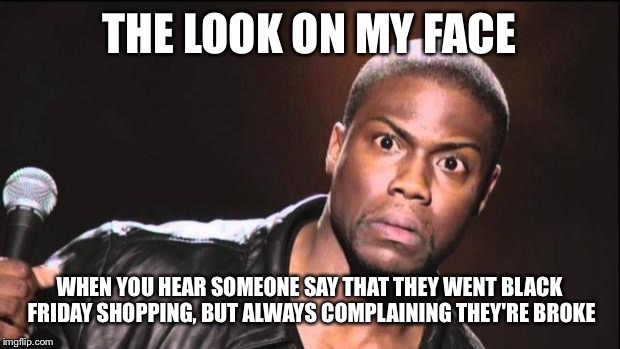
1. “The Look On My Face When You Hear Someone Say That They Went Black Friday Shopping, But Always Complaining They’re Broke”
The look on his face says it all! Have you ever met someone who does this?
“The Look On My Face When You Hear Someone Say That They Went Black Friday Shopping, But Always Complaining They’re Broke”
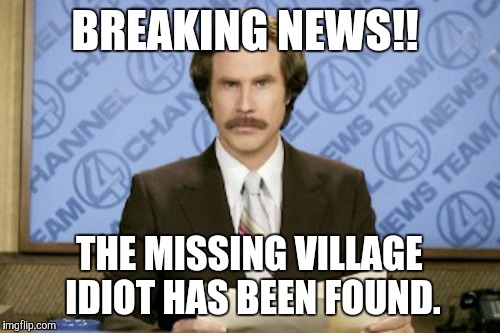
2. “Breaking News!! The Missing Village Idiot Has Been Found.”
Well, at least they found him…
“Breaking News!! The Missing Village Idiot Has Been Found.”
3. “Idiots, Idiots Everywhere”
Depending on where you live, and the people you hang out with, this meme might be very relatable for you…
“Idiots, Idiots Everywhere”
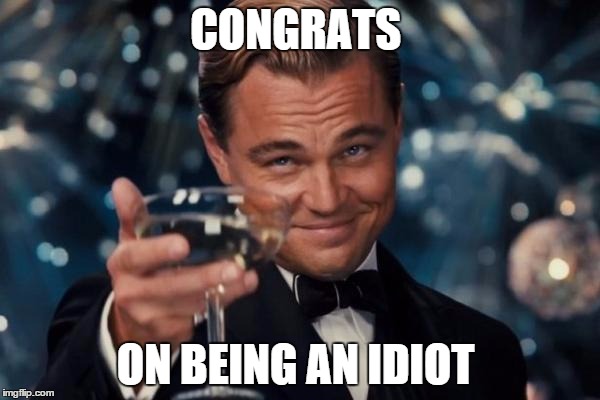
4. “Congrats, On Being An Idiot”
A very simple and straight forward, yet also very funny meme with Leonardo DiCaprio.
“Congrats, On Being An Idiot”
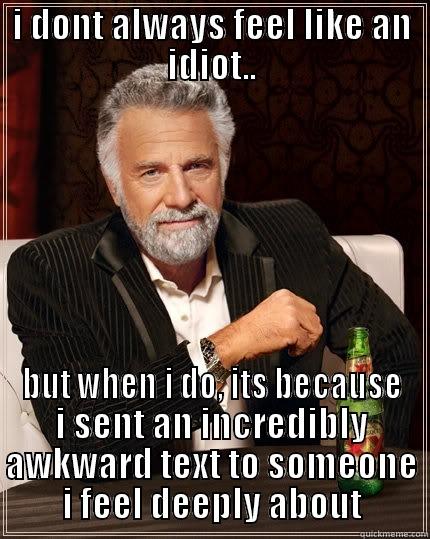
5. “I Don’t Always Feel Like An Idiot…But When I Do, It’s Because I Sent An Incredibly Awkward Text To Someone I Feel Deeply About”
A very relatable situation for most people, that can make just about anyone on the planet feel very, very stupid…
“I Don’t Always Feel Like An Idiot…But When I Do, It’s Because I Sent An Incredibly Awkward Text To Someone I Feel Deeply About”
6. “Somewhere, A Village Is Missing Its Idiot”
Well, to be fair, he does look rather dumb in this photo…am I right?
“Somewhere, A Village Is Missing Its Idiot”
7. “Don’t Argue With An Idiot, They Will Bring You Down To Their Level And Beat You With Experience”
A very funny, and also very intelligent way of looking at arguing with an idiot!
“Don’t Argue With An Idiot, They Will Bring You Down To Their Level And Beat You With Experience”
8. “What An Idiot”
This meme is about as simple as it is funny! Perhaps it is because it involves Brick from the movie Anchorman!
“What An Idiot”
9. “When Asked Where He Would Cut Funding – Department Of Education, Environmental Protection Agency, Even The Military”
An idiot meme that everyone into politics should certainly get a kick out of!
“When Asked Where He Would Cut Funding – Department Of Education, Environmental Protection Agency, Even The Military”
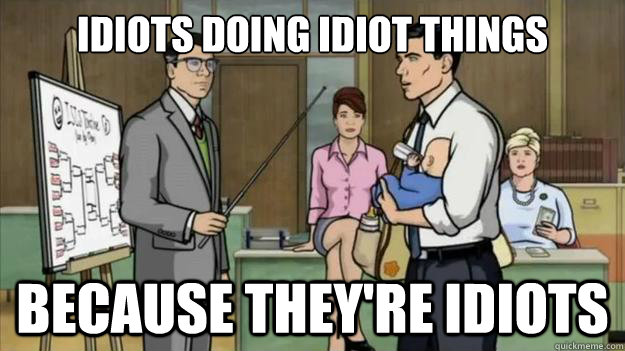
10. “Idiots Doing Idiot Things, Because They’re Idiots”
A very memorable, and very funny idiot quote from the hit show Archer!
“Idiots Doing Idiot Things, Because They’re Idiots”
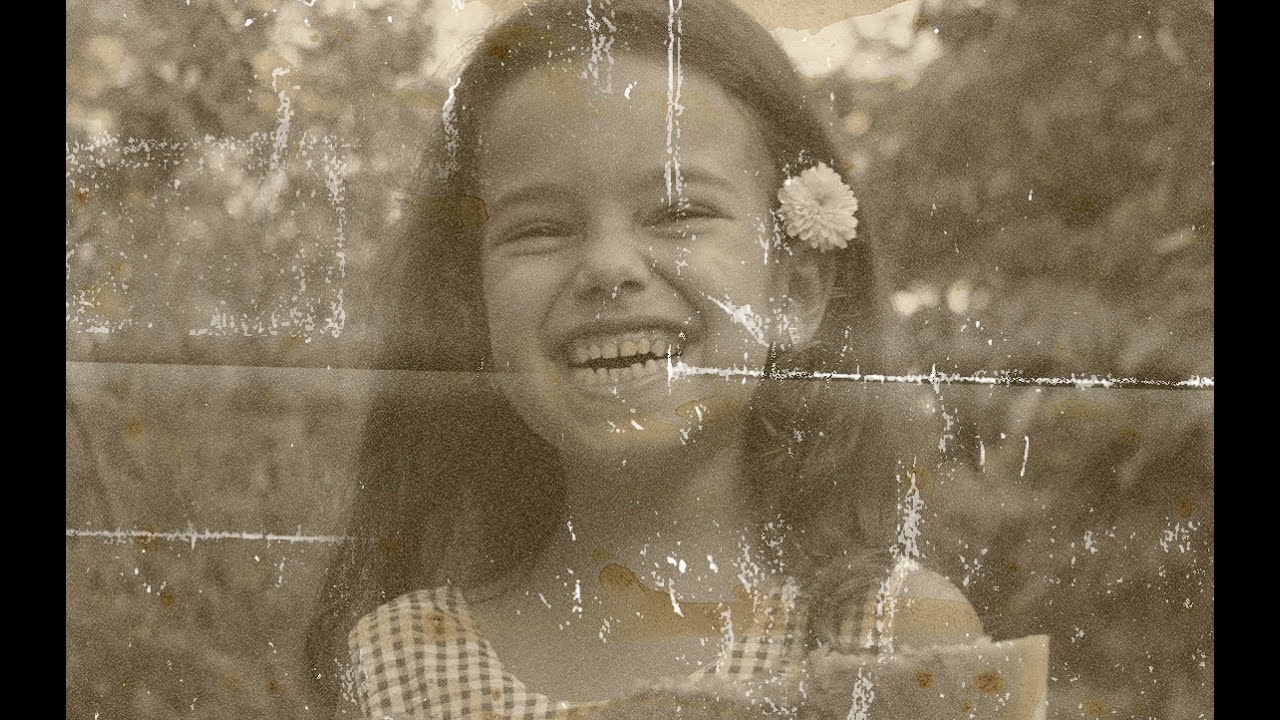
Whether you‘re wanting to make a photo look older, or you‘re just wanting to learn more about the tools of Photoshop, this tutorial should certainly be of interest. Not only will it give you a vast insight on exactly how layer conversions and grayscales work, but it will give you the ability to turn any photo you have into a vintage work of art, within just a few minutes. This useful technique is often implemented by experienced Photoshop users, and is one of the most commonly used strategies. In addition to allowing you to replicate any old photo, it will also help you impress the people who view your work.
Step 1: Choose The Photo That You Would Like To Use
Choose The Photo That You Would Like To Use
The first step is pretty self explanatory, and should be rather obvious. You will need to select the photo you‘re wanting to use, and make it the forefront of your screen. If for any reason you are unsure on what photo to use for this process, self portraits tend to work best and are highly recommended.
Step 2: Add A Black And White Layer To Convert Your Picture To A Greyscale Image
Add A Black And White Layer To Convert Your Picture To A Greyscale Image
Next, you‘re going to want to add a black & white adjustment layer to your photo, in order to turn it into a greyscale image. This is done by selecting the “enlarge image“ icon, and will also allow you to turn the image into sepia.
You should see the option to Create New Fill/Adjustment Layer towards the bottom of your screen. In order to add an adjustment layer to your photo, select this option. You should also choose Black & White, which will immediately transfer your photo into a greyscale image without doing anything else to alter the original photo.
Step 3: Add A Gradient Map Adjustment Layer
Add A Gradient Map Adjustment Layer
Now, you‘re going to want to add a gradient map to your image. This will allow the greyscale‘s tones to be converted properly.
You are going to need to replace all of your black/grey coloring, with some brown hues, then replace the lighter tones with a yellowish coloring. This is sure to give you the aged/vintage look that you are going for.
Step 4: Use The Gradient Editor To Modify Your Colors
Use The Gradient Editor To Modify Your Colors
Fortunately, since the Gradient Editor lets you modify and adjust the colors via Photoshop‘s Gradient Map, this step is fairly simple. Simply click the icon to enlarge the map, and start adjusting.
NOTE: To do this, go to Properties (at the top of your screen), then select Window > Properties. This should present you with the Gradient Map.
Step 5: Choose A Nice Shade Of Brown For Your Image To Replace The Dark Tones
Choose A Nice Shade Of Brown For Your Image To Replace The Dark Tones
You are now going to want to choose a subtle, yet noticeable shade of brown to replace the dark tones that were previously seen in the picture. This will certainly help the image to like more vintage, and should give you a good idea of what the finished product is going to look like.
Step 6: Choose A Nice Shade Of Yellow For Your Image To Replace The Light Tones
Choose A Nice Shade Of Yellow For Your Image To Replace The Light Tones
Next, remove all the light tones from your photo by choosing a shade of yellow to replace them with.
Step 7: Make Your Image “Grainy“
Make Your Image Grainy
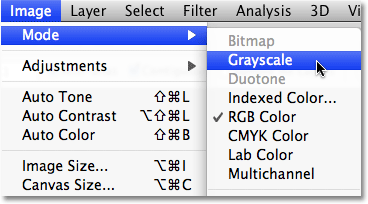
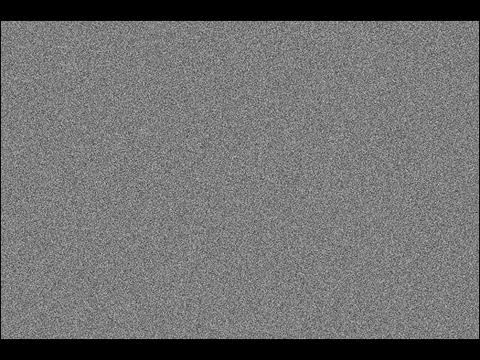
The next, and perhaps the most important step in the entire process, is to make the image grainy. For those who don‘t know what this term means, it will make your picture more rugged and aged, giving it the look you are after. To do this, simply click the icon to enlarge the image, then select the Background layer from your panel.
NOTE: Make sure to also select Noise > Add Noise to get the dialog box to appear.
Step 8: Adjust Your Noise Levels, And Add A Gaussian Blur To Your Image
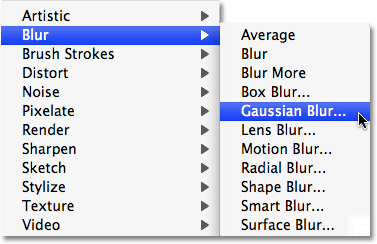
Adjust Your Noise Levels, And Add A Gaussian Blur To Your Image
It is important to choose the right noise levels for your photo, and make sure they look naturally aged. This is a simple step, but much like step 7, it is very important to the overall quality of the image you are wanting to create.
NOTE: This can be done with the slider tool, which is located under the Amount field.
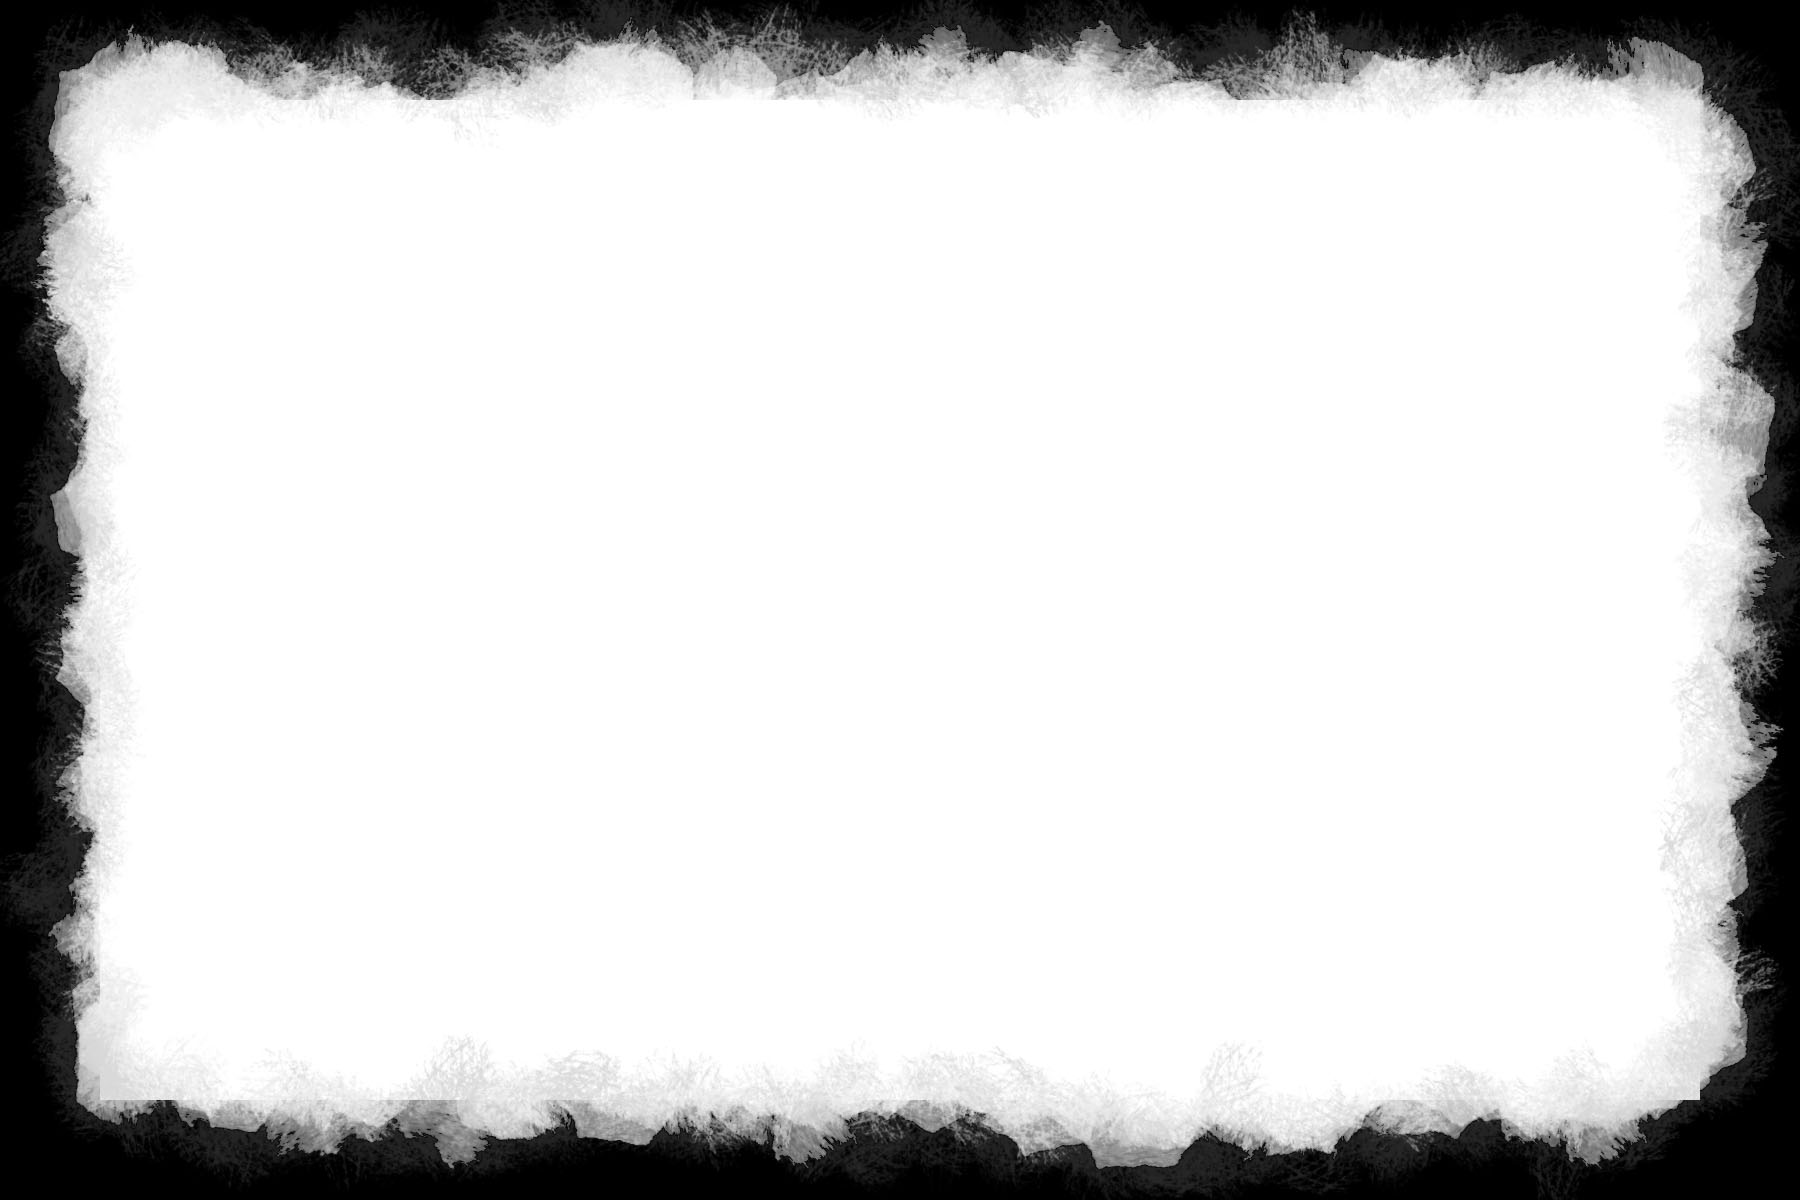
Step 9: Add A Neat Vintage Frame Around Your Image To Make It Look Even Better
Add A Neat Vintage Frame Around Your Image To Make It Look Even Better
Now, try adding a nice frame to your photo. This step is not mandatory, nor will it make or break the image. However, it is sure to help it to appear as an older, more vintage looking photograph.
Serving as perhaps one of the most beneficial tutorials we‘ve ever made, this post will teach novice Photoshop users how to properly implement what is known as the Kaleidoscope effect. In addition to looking amazing and helping your images standout, this effect is extremely useful for those wanting to learn more about the different tools found within Photoshop. Why? Simply because many of the steps below call for multiple different tools, and a lot of different strategies are used throughout the process. So, whether you are looking to brighten up your images or learn more about your Photoshop interface, be sure to keep on reading!
Step 1: Create Both A Hexagon, And A Triangle
Step 1: Create Both A Hexagon, And A Triangle
Create a hexagon
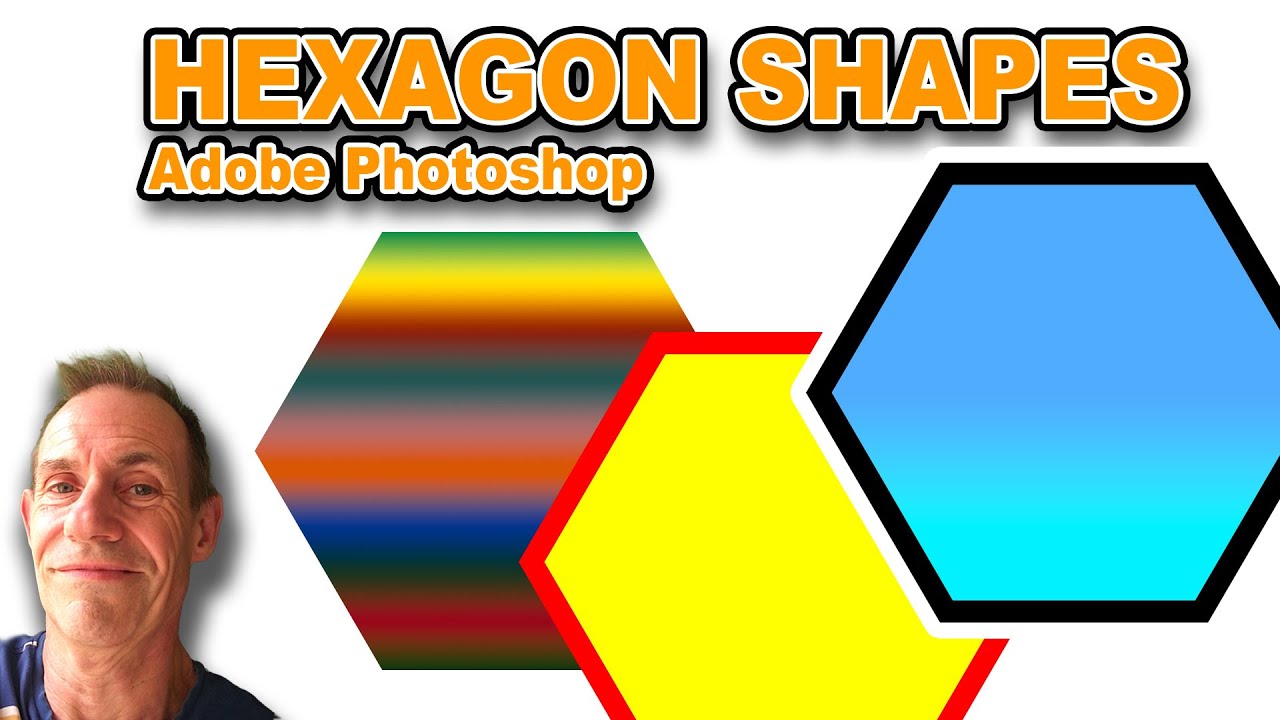
The first step in this process is to create a Hexagon. For those unfamiliar with creating this shape in Photoshop, it is actually fairly easy. Just make sure you create the shape with an A4 document, since the Hexagon will be used as the foundation for your Kaleidoscope.
NOTE: Shapes with more sides and additional features can be used for those wanting to create a more creative look, however, the basic Hexagon is strongly recommended, especially for those just starting out.
Next, you are going to want to create a triangle. This too is fairly simple, and after creating the Hexagon, it should come as second nature to you. The only thing to make sure of is that the triangle is done in a completely different color than that of the previous shape.
NOTE: For the best results with your triangle, be sure to use the line tool, and set it to a 5px setting.
Step 2: Import Your Image
Step 2: Import Your Image
The second step is to import your image onto a new A4 document. To do this, simply open a new A4 in the Photoshop menu, and select a photo to place in the middle.
It is recommended that you use levels (cmd/ctrl+L) to not only increase the brightness of your photo, but to decrease all of the white levels as well. This is sure to add some much needed boldness to your image, and really make sure it stands out well.
Step 3: Drag Over The Triangle And Create A Few Neat Patterns Of Your Own With The Photoshop Spray Paint Tool
Step 3: Drag Over The Triangle And Create A Few Neat Patterns Of Your Own With The Photoshop Spray Paint Tool
As you may have guessed, you are now going to need to drag the Triangle over your Hexagon, in order to intertwine the two shapes, and form the basic structure of your Kaleidoscope.
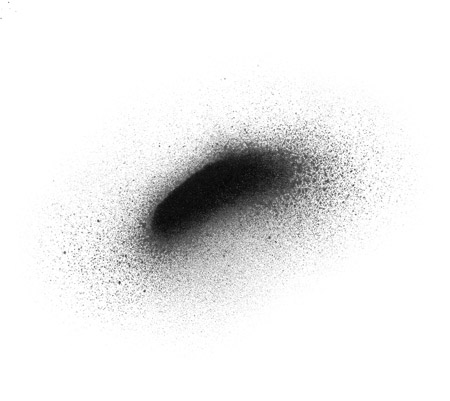
You can also create some neat, fully customized designs to even further better your shape. The tools that are recommended for these designs are Photoshop‘s spray paint and ink.
Step 4: Add Some Final Edits To Your Marks
Step 4: Add Some Final Edits To Your Marks
After completing step 3, it is time to add some finishing touches to the designs you‘ve created. This will enhance the overall image, and also make your Kaleidoscope designs look a lot more professional.
As most experienced Photoshop users know, the Rectangular Marquee tool is the best instrument for this job, and should give you the results you‘re after.
Step 5: Use The Magic Wand Tool To Add A Mark
Step 5: Use The Magic Wand Tool To Add A Mark
Next, you are going to want to add your own customized mark by using the black spray paint, and dragging it over your original photograph. After doing this, make sure to delete all of the white space around your photo, and also invert the color of the mark you make, while also placing it on the corner of your triangle.
Step 6: Rasterise Your Layer
Step 6: Rasterise Your Layer
Now, you are going to want to drag your circular pattern across the photo in order to rasterise the layer. You are also going to want to delete the background in order to place the circles strategically around the model.
NOTE: It is highly recommended that you lower the opacity. This will help you see the pattern better and also brighten up the focus of your overall design.
Now, select the eraser tool and remove any unnecessary parts of your circles that are still there, and make sure to leave some overlapping too. Once you complete this step, you can then increase the opacity of your designs until you‘re happy with it.
Step 7: Use The Gold Spray Paint, And Then Create A Bubble
Step 7: Use The Gold Spray Paint, And Then Create A Bubble
And more…
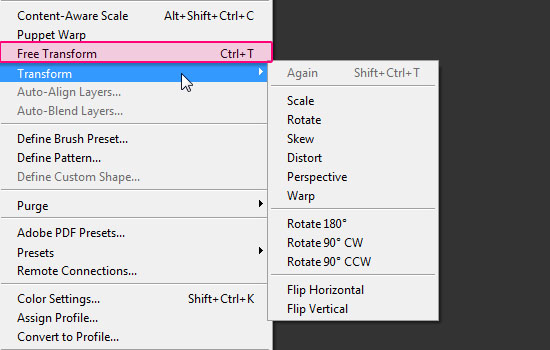
Back to the handmade marks: choose the gold spray paint, drag it over to the photo and erase its background. Use the Free Transform command on this shape (Cmd/Ctrl+T) to alter its size, then position it to mask part of the model’s face. To make it appear more realistic, add an outer glow (Layer>Layer Style>Outer Glow), choosing the Screen blending mode with opacity set at 75% and noise at 25%.
Create a bubble
Open the supplied cloudy sky image in a new document, play with the levels and choose the green channel. Reduce the mid-tones to 1.75 to make the image more vibrant. Then, with the Elliptical Marquee tool and holding down Shift, drag out a circle. Copy this shape and paste it onto the photo. Add a layer style to the shape, choosing Soft Light and setting the opacity to 88%. This creates a bubble-like effect. As before, duplicate the bubble a number of times around the image, altering its size.
Step 8: Add A Very Customized Feel And Some Much Needed Detail
Step 8: Add A Very Customized Feel And Some Much Needed Detail
The next step is to add a handmade look to your creation. This is done by dragging the black splatter shape across your design and selecting the mark with Photoshop‘s Magic Wand Tool.
After doing this, you‘re going to want to choose Select>Similar to make sure that all parts are selected.
NOTE: You can change the color of your shapes by using the Fill Panel, and then the Color Picker to select any tone you‘d like.
Step 9: It Is Finally Time To Create The Actual Kaleidoscope
Step 9: It Is Finally Time To Create The Actual Kaleidoscope
Finally, now you get to create the actual Kaleidoscope!
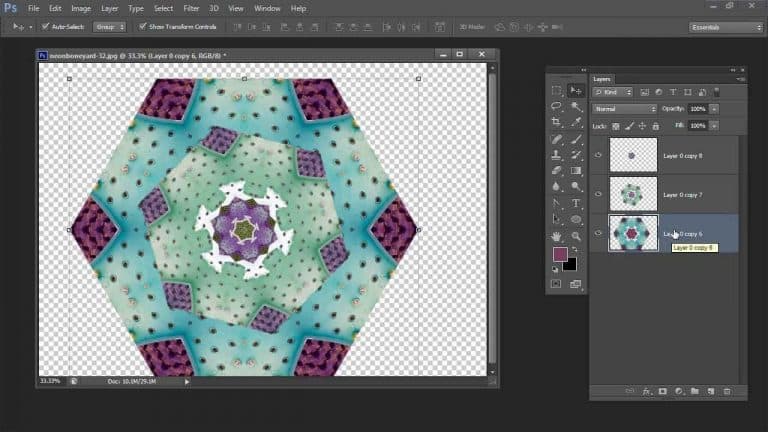
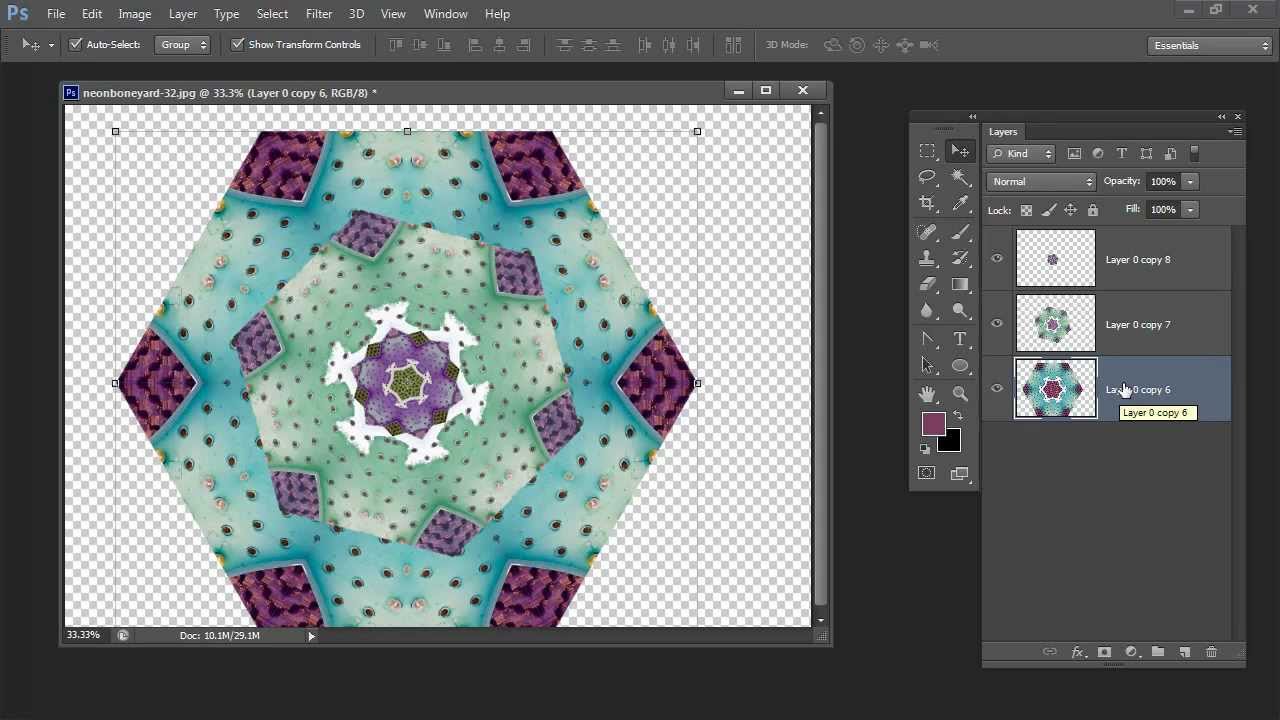
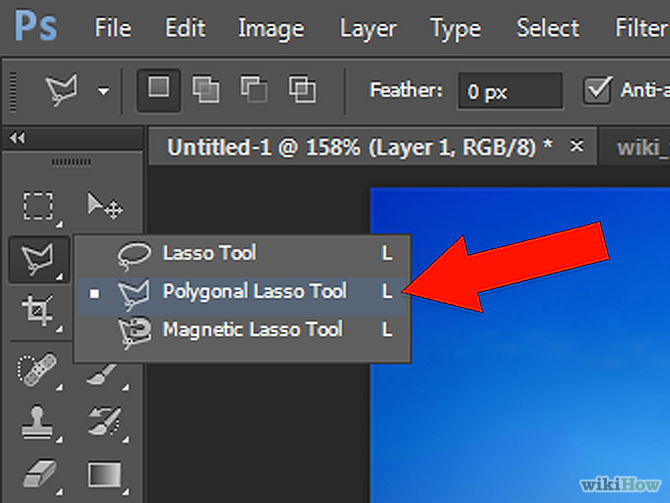
To do this successfully, you‘re going to want to make sure you turn your shape into a Kaleidoscope pattern by making sure the layer of your triangle is towards the top of your design. Then, combine all of the other layers together and use the Polygonal Lasso Tool to trace your triangle. This will not only turn the focus toward the triangle shape, but it will also brighten your entire design.
Step 10: Duplicate Both Your Triangles, And Your Hexagons
Step 10: Duplicate Both Your Triangles, And Your Hexagons
Lastly, you‘re going to want to duplicate your triangles by creating a new document. This will of course be the final pattern, and the best way of going about this is by creating a new document, duplicating the shape, and flipping it vertically. This should give you the Kaleidoscope look you‘re going for, but if you‘re still unsatisfied, you can use the Free Transform command and rotate the shape even further, and duplicate the hexagons to create an even more appealing look.
Whether you‘re just wanting to see how you‘ll likely look in a few decades, or you‘re in need of an older look for a project, the tutorial below will certainly help.
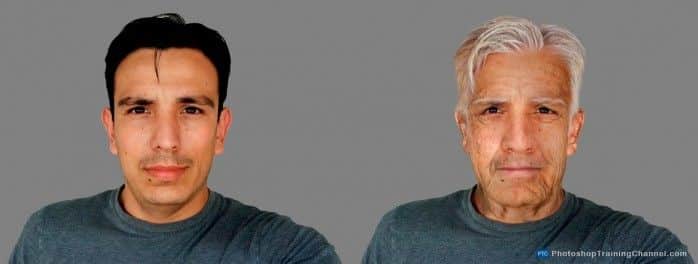
In this post, we will thoroughly explain to our readers exactly how to make yourself look older in Photoshop.
And fortunately, no matter what level of experience you have with the program, these directions are clearly laid out and very easy to follow. So, if you‘re tired of your babyface and want to add some years to your look, be sure to keep on scrolling!
NOTE: Fortunately, you can use the aging effect with just about any portrait or photo. Therefore, whether you are wanting to see how you‘ll look in the future, or how your friends will look in the future, this post will be extremely beneficial.
1. Find A Relatively Similar Looking Old Man/Woman
Find A Relatively Similar Looking Old Man/Woman
Though you may not look too elderly in your photos right now, you should be able to predict and compare some of your current features to that of someone much older. By simply finding a photo of an older man or woman (depending on your gender), with a similar facial structure, you can get an idea of what you‘ll need to edit in order to make this happen.
Some of the most critical factors and key features to look for when aiming to compare yourself to the older model you select, are facial bone structure, height/weight, and the overall style of their appearance.
More Photoshop Tricks
2. Fix Any “Temporary“ Features On Your Current Image
Fix Any “Temporary” Features On Your Current Image
What we mean by this is that – if there are any cuts, scratches, acne marks, or bruises on your current images, make sure to remove them before moving forward. Why? Simply because you‘re not likely to have them decades from now, so leaving these marks might be a bad idea.
NOTE: It is also suggested that you make these edits on a separate background layer. So, to create an additional layer, simply select Layer > New > Layer Via Copy (Control-J). After doing this, you can then use the Spot Healing Brush Tool (J) to edit and heal your current image.
Step 2
3. Create A Realistic “Receding Hairline“
Creating A Realistic “Receding Hairline”
Unless your grandparents are lucky enough to have full heads of hair, then you‘re likely going to need this step. Fortunately, editing your hairline is fairly simple, considering all you need to do is remove the hair from your forehead, and push it back towards the back of your head.
To do this, select the Lasso Tool (L), then set the Patch Tool (J) to Content-Aware, and drag the selected area straight down toward the forehead. This will allow you to use a sample from your current skin and replace the hair with it.
NOTE: When first using these tools, the image may appear somewhat unrealistic, however, you can edit your patchwork and move the hair accordingly, until you are happy with it.
4. Create Some Old-Man/Old-Woman Wrinkles On Your Skin
Create Some Old Man/Old Woman Wrinkles On Your Skin
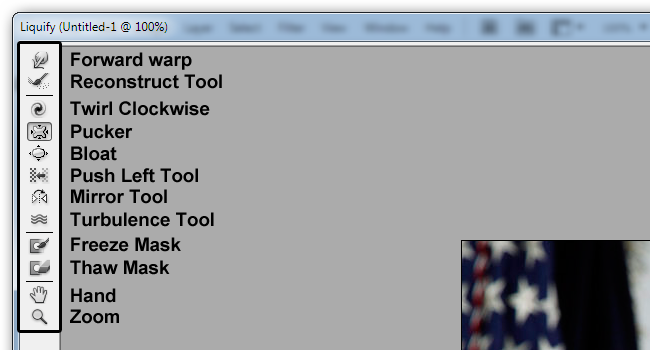
It is common knowledge that as you get older, your skin starts to wrinkle. So, this step should come as no surprise. Fortunately, much like with creating a receding hairline, implementing wrinkles on your skin via Photoshop, is fairly simple. All you will need to do is edit the structure of your face to create some lines throughout the skin. Some of the most common structural changes that come with old age include sunken in eyes, a more pronounced nose, and an almost shrunken neck. Therefore, you will need to use the Liquify filter and implement these structural changes(more in Photoshop Manipulation Tutorial).
Using the Liquify filter is not very difficult, even for novice Photoshop users. If you have experience with this filter already, simply go ahead and start editing, however, if you are new to this tool, you‘ll want to use it as a Smart Filer. This is done by going to Layer > Smart Objects > and then covering it to a Smart Object.
NOTE: You can also launch the liquify feature via Advanced Mode.
When using the Liquify filter for the first time, it is likely that you‘ll have some editing to do afterwards. However, this is normal and shouldn‘t be something that you worry over. In fact, after just a few touchups, your image should look like it has been professionally edited!
NOTE: For those who are wanting to really get their image looking perfect, the Smart Filter is definitely recommended. You can also use the Bloat Tool (B) to adjust the nose. This tool is great for making brush size slightly smaller than the default setting and intricately editing small features, such as the tip of your nose.
You can bloat other features of your face as well, including the ears, lips, and right below the eyes – in order to give them that old, sunken in feeling. Just be careful not to use the Bloat tool too much, as it may start to give your face a rather unrealistic look if you overuse it.
After completing the previous steps, you will want to use the Pucker Tool (S) in order to maximize your brush size, and edit your lips/mouth. This tool is great for giving your lips a very realistic old man/old woman look and will certainly help sink in your face.
NOTE: The Forward Warp Tool (W) is another very beneficial tool for this step, and should help tighten the skin on your face and possibly even further wrinkle your lips. If for any reason, the editing is too prominent and you want to pull back a little bit, you can use the Smooth tool and add a layer of softness to your entire face. The Forward Warp Tool (W) is also good for sharpening/squaring the your face, and thickening the edge of your neck.
5. Edit Your Cheeks, And Make Them Droop Towards The Bottom Of Your Face (For Women)
Edit Your Cheeks, And Make Them Droop To The Bottom Of Your Face
Another very common feature amongst older men (and mostly women), are their drooping cheeks. When approaching older age, your cheeks are bound to droop, so if you want your image to look realistic, then this step is strongly suggested.
To droop your cheeks and really make yourself look older, simply select a large portion of each cheek and pull it down just a tad. Fortunately, only a little bit of downward pulling is needed in order to complete this step.
6. Thin Out Your Hair, And Make Yourself Nearly Bald
Thin Out Your Hair, And Make Yourself Nearly Bald
Though it may sound similar, this step is completely different from the “hairline editing“ we did earlier. The sole purpose of Step 6 is to thin out any hair that you have left on your head. To do this, you will need to use the Push Left Tool (O) and push the pixels to the left while moving the tool in an upward direction, and push them to the right while moving the tool in a downward direction. This may sound a little complex, but rest assured, it is actually very easy, and will certainly give you the look you are after.
NOTE: You will need to move the tool down and to the right for the inside of the hairline, and for the outside of the hairline, you will do the opposite.
At this point, assuming you‘ve done all of the preceding steps correctly, your face should already be looking significantly older.
7. Add Some Much Needed Final Touches To Both The Hair And The Skin With The Color Range Tool
Add Some Much Needed Final Touches To Both The Hair And The Skin With The Color Range Tool
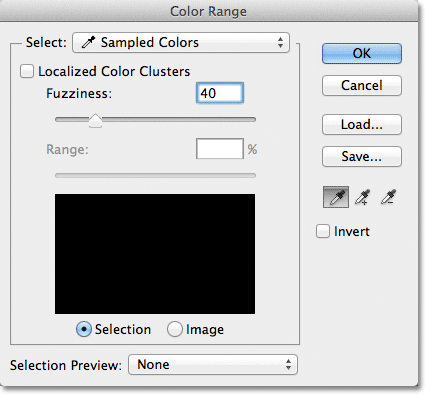
After thinning out your hair to the extent you would like to, you are going to need to focus on the skin, because, as you probably already know, peoples‘ skin tends to change as they age. In the same way that your darker hair should now be turned lighter, you should do the same with your skin. Fortunately, you can lighten your skin tone very quickly and easily by simply altering the tonal value. To do this, simply select Color Range, and then choose the Skin Tones option. Photoshop also allows you to adjust the Fuzziness of your image, and it is highly recommended that you set this as high as possible. At this point, the skin shouldn‘t look perfect, but it should definitely appear more appropriate for an old man/old woman.
NOTE: In addition to that which is explained above, you are going to need to add a Hue/Saturation layer as well. This can be found within the Colorize option panel and you can change the adjustment layer‘s blending in order to reduce the Opacity levels. It is suggested that you set the Hue to 23, the Saturation to 30, and the Opacity to 70%.
To add the finishing touches to your mask, you can use the Soft Round Brush. When using this tool, it is suggested that you paint with black over the neck, hair, and eyes in order to remove the hue/saturation effect. Then, you can use the white paint in order to shadow certain areas, such as the chin.
NOTE: If any part of your image is too Saturated or “red“, it is suggested that you use the Quick Selection Tool (W) to adjust the coloring. You could also choose the “Reds“ option and set the Hue to +6, set the Saturation to -17, and set the Lightness to 0.
NOTE: After completing the steps above, be sure to refine all your edges via the Refine Edge button, then set the Radius to 10 px and the Shift Edge to -30%.
6. Some Finishing Effects To Compare Your Young Self To Your Old Self
Some Finishing Effects To Compare Your Young Self To Your Old Self
Right now, you should have a pretty good idea of what you‘re going to look like as an old man/woman. And fortunately, this last step is going to make it even clearer.
You are now going to add an additional layer to the portrait, by going to Edit > Fill. For the best results with this step, it is strongly recommended that you adjust the Contents to roughly 50% Gray. After making these adjustments, you‘re going to want to edit the blending mode. The best setting to put this on is Overlay, and you should set the Opacity to 50% while you‘re at it.
NOTE: You can also use the Burn Tool to outline each of the wrinkles on your face, while using the Dodge Tool to highlight each of the creases.
Conclusion
After following the steps above, you should be left with an image of you as a much older person. Though there are more steps associated with this technique than there are in most other tutorial posts, the process is certainly worthwhile and definitely recommended to new Photoshop users. Not only will it give you a feel for just how great this program really is, but it will teach you how to learn a lot of the tools that you would otherwise go without trying.
In addition to the strong religious meanings they tend to have behind them, Armor Of God tattoos are also incredibly appealing, often featuring amazing imagery and bright, vibrant color-schemes.
The meaningful symbolism and visually pleasing imagery has not only allowed Armor Of God designs to become incredibly popular amongst followers of Christianity, but it has made them one of the tattoo world‘s more popular styles. In fact, due to how appealing they are, these tattoos can even be seen on people who don‘t follow a specific religion, and individuals who rarely go to church. Therefore, whether you are a follower of Christ or not, you should certainly appreciate the designs below.
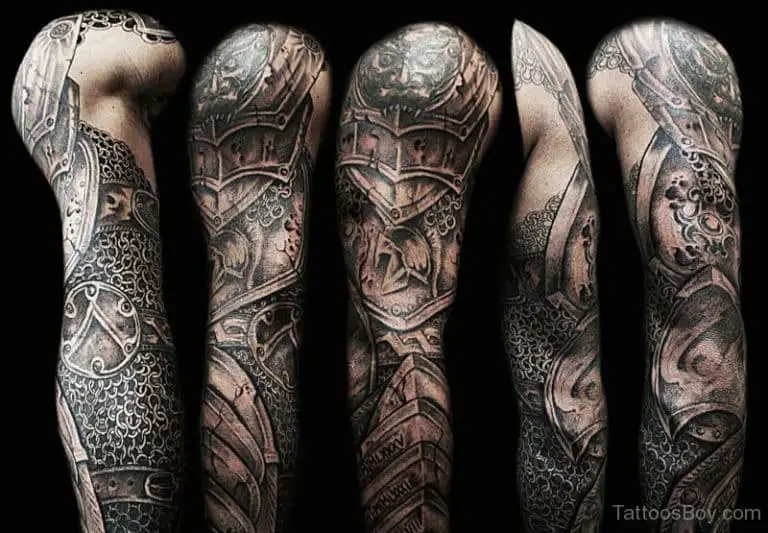
1. A Full Armor Of God Sleeve Tattoo
Done solely in black and white, this amazing Armor Of God sleeve tattoo is a great example of how appealing these designs are – even without color added in!
A Full Armor Of God Sleeve Tattoo
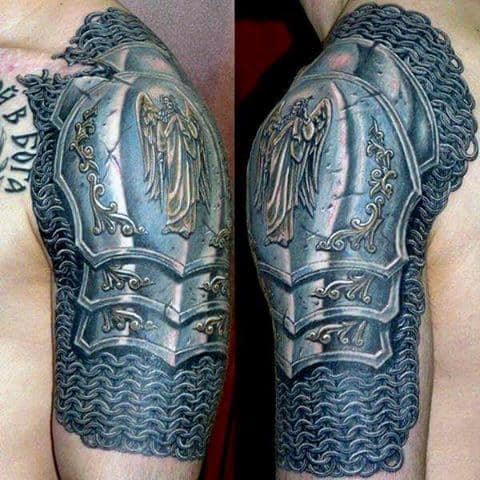
2. A Very Nice Gauntlet Armor Of God Shoulder Tattoo For Men
As you can see, this design is not only incredibly realistic looking, but it is done in a very nice shade of blue and a great choice for those in need of a shoulder tattoo.
A Very Nice Gauntlet Armor Of God Shoulder Tattoo For Men
3. A Skin Colored Armor Of God Tattoo Design
Not only is this design colored similarly to this person’s skin tone, but it appears to be coming through his skin as well – this one is bound to “wow” anyone who looks at it!
A Skin Colored Armor Of God Tattoo Design
4. A Nice Aztec Armor Of God Half Sleeve Tattoo Design For Men
It may be hard to believe, but this is an actual, unedited, three dimensional tattoo design…
A Nice Aztec Armor Of God Half Sleeve Tattoo Design For Men
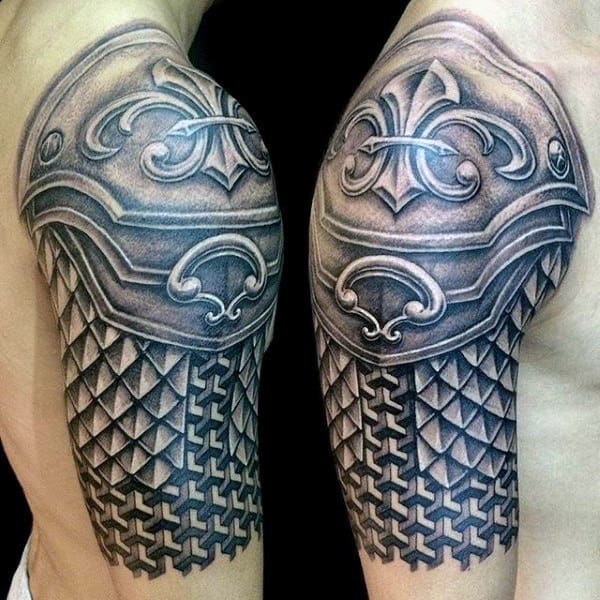
Very well done, highly detailed, and a great choice for those in need of a unique shoulder design!
Another Very Realistic Armor Of God Shoulder Tattoo
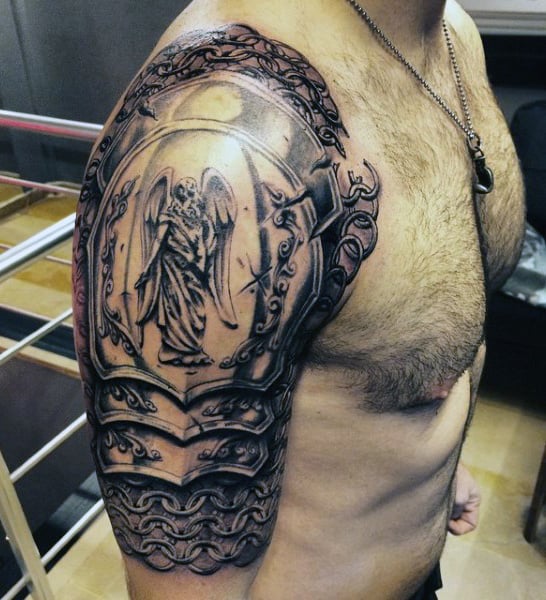
6. An Armor Of God Half Sleeve, With An Angel In The Middle
Much like some of the others on the list, this design is completely colorless, yet very aesthetically pleasing. If you look closely, you can also see a lot of intricate detail!
An Armor Of God Half Sleeve, With An Angel In The Middle
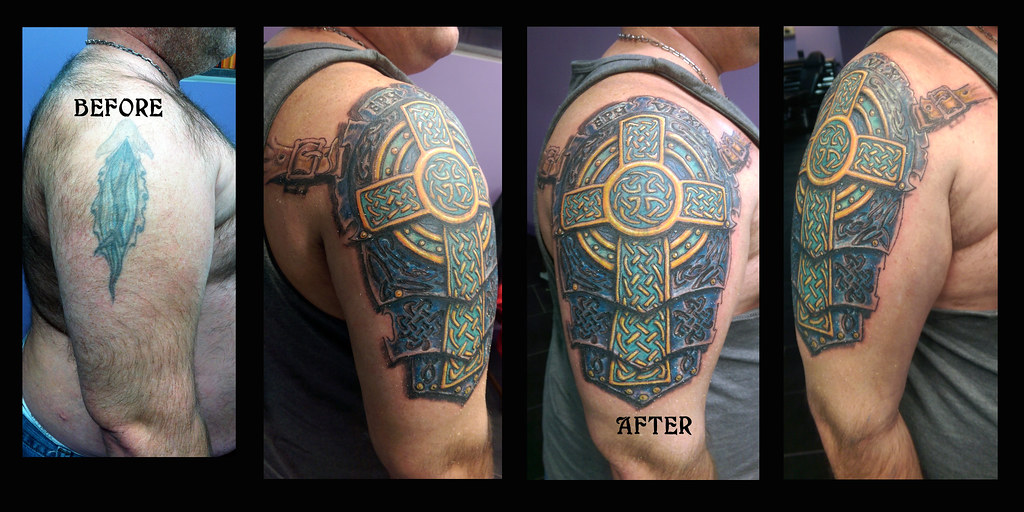
7. A Green, Blue, And Gold Armor Of God Half Sleeve Tattoo
As you can see in the image below, what was once just a small little leave, is now an amazingly appealing Armor Of God half sleeve.
A Green, Blue, And Gold Armor Of God Half Sleeve Tattoo
This forearm tattoo is not only very unique (featuring a helmeted women ready for battle) but it is a great choice for any woman wanting to show off a meaningful, faith-based design.
An Armor Of God Forearm Tattoo For Women
9. A Polynesian Armor Of God Staircase Tattoo
Not only is this tattoo very well done, but it is perhaps the most unique design on the entire list – featuring a polynesian staircase, done in an amazing traditional styling.
A Polynesian Armor Of God Staircase Tattoo
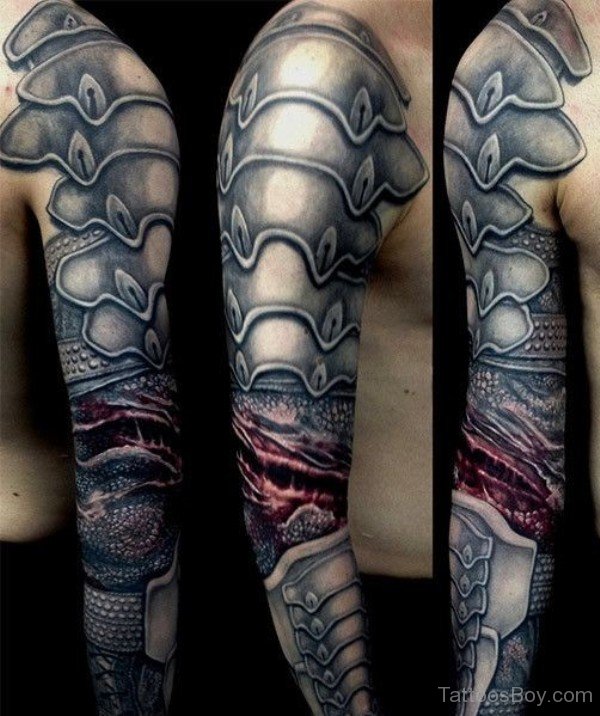
10. An Amazing Three Dimensional Armor Of God Three-Quarter Sleeve Tattoo
Featuring some amazing art and covering almost the entire arm, this tattoo is perhaps as visually pleasing as it is meaningful!
An Amazing Three Dimensional Armor Of God Three Quarter Sleeve Tattoo
11. Two Great Angles Of An Incredibly Well Done Armor Of God Tattoo
Giving you not one, but two different looks at this amazing tattoo, the image below proves just how well this design came out!
Two Great Angles Of An Incredibly Well Done Armor Of God Tattoo
12. An Armor Of God Tattoo Featuring The God Of War Himself
For those unfamiliar with the God Of War, his name is “Ares” and he is the primary feature of this amazing tattoo!
An Armor Of God Tattoo Featuring The God Of War Himself
13. Another Very Unique, And Very Realistic Armor Of God Tattoo Design
Covering the entire arm and featuring a lot of intricate detail, this tattoo is certainly a great choice for those wanting a meaningful full sleeve design.
Another Very Unique, And Very Realistic Armor Of God Tattoo Design
14. A Black And White Armor Of God Tattoo, With A Red Cross And A Family Portrait
Thanks to the amazing artist who did this tattoo, the portrait is incredibly realistic, and thanks to the bright red ink that he used, the cross certainly sticks out well!
A Black And White Armor Of God Tattoo, With A Red Cross And A Family Portrait
15. A Very Well Shaded Armor Of God Tattoo Design, Done Solely In Grey Ink
Not only does this design feature some seriously well done shading, but it also features a very nice Celtic cross, making it a great choice for those with an Irish heritage.
A Very Well Done Armor Of God Tattoo Design, Done Solely In Grey Ink
Conclusion
The list above was not only put together to give tattoo fans some neat designs to look at, but also to prove just how versatile, meaning, and appealing Armor Of God tattoos can really be. Fortunately, in addition to the designs above, there are also many others that can be found on the internet, so if you enjoyed scrolling through the images above, be sure to check online for more Armor Of God tattoos!
Though this may be surprising to most people, chicken nugget memes are actually very popular. And regardless of the fact chicken nuggets themselves are not too funny, the memes they’re featured in certainly are! In addition to the many creative quotes and jokes included in these memes, there are a lot of different versions of them as well, and to showcase some of the best ones, we’ve created the list below. So, if you’re looking to laugh, then look no further!
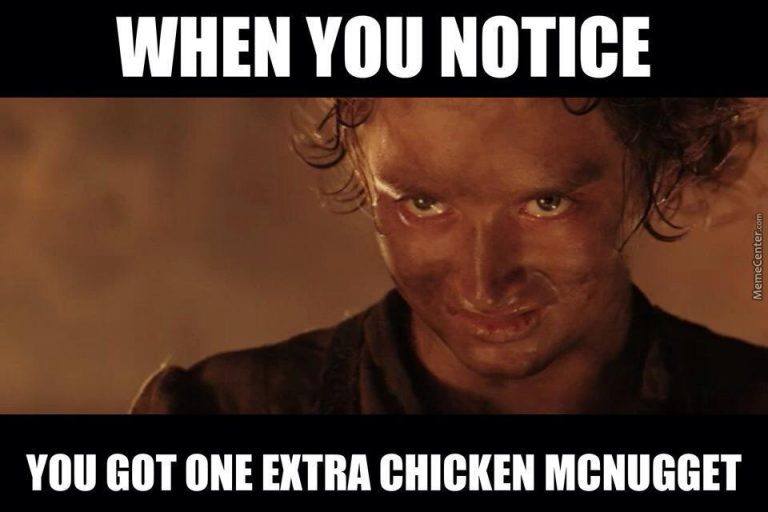
1. “When You Notice You Got One Extra Chicken McNugget”
Has anyone else had this rare but amazing McDonalds experience before??
“When You Notice You Got One Extra Chicken McNugget”
2. “One Does Not Simple Become Too Old For Chicken Nuggets”
Very true – I’m 26, and I still eat them all of the time!
“One Does Not Simply Become Too Old For Chicken Nuggets”
3. “My Success Secret? Chicken Nuggets Is Like My Family”
To be honest, I actually believe him…
“My Success Secret? Chicken Nuggets Is Like My Family”
4. “I Don’t Wanna Be A Nugget…I Don’t Wanna!!!”
Very sad, but still very funny…
“I Don’t Wanna Be A Nugget…I Don’t Wanna!!!”
5. “Eats Nothing But Chicken Nuggets For 15 Years – Dies”
Who knows, maybe she died of happiness?
“Eats Nothing But Chicken Nuggets For 15 Years – Dies”
6. “Oh You Have A Bird? Can I Make Him Into A Chicken Nugget Yet?”
Well, according to the image below, even Willy Wonka loves chicken nuggets…
“Oh You Have A Bird? Can I Make Him Into A Chicken Nugget Yet?”
7. “Works At McDonalds – Puts An Extra Chicken Nugget Into Each Chicken Nugget Box”
What a great guy, I think he deserves a promotion!
“Works At McDonalds – Puts An Extra Chicken Nugget Into Each Chicken Nugget Box”
8. “My Face I Make……When We Have Chicken Nuggets For Lunch”
Does anyone else make this face too?
“My Face I Make……When We Have Chicken Nuggets For Lunch”
9. “When I Found Out She Ate The Last Chicken Nugget”
Well, he certainly doesn’t look too happy…
“When I Found Out She Ate The Last Chicken Nugget”
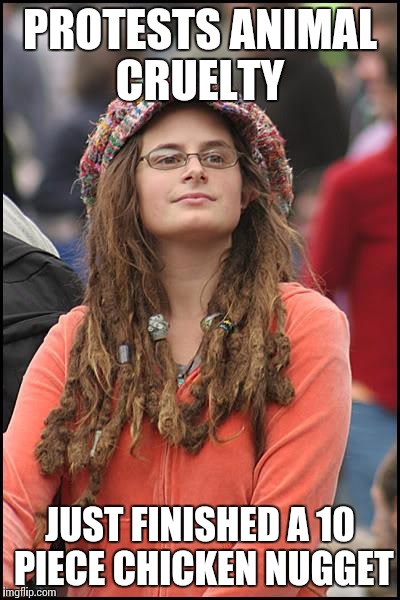
10. “Protests Animal Cruelty – Just Finished A 10 Piece Chicken Nugget”
Even animal cruelty protesters can’t resist the urge of eating chicken nuggets…
“Protests Animal Cruelty – Just Finished A 10 Piece Chicken Nugget”
Not only is Jim Carrey one of the world’s most popular actors, but he is also the face of many hilarious internet memes. In fact, some of the most commonly shared memes online are ones with Jim Carrey’s picture on them. Due to how funny these memes tend to be, we decided to compile the list below, showcasing the best Jim Carrey memes we could find – and whether you’re a fan of his movies or not, you should certainly get a kick out of them!
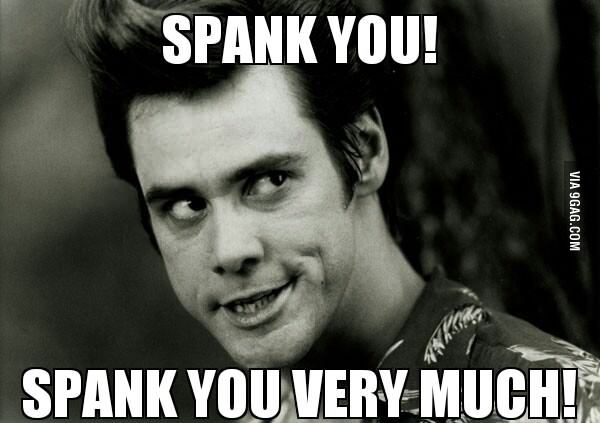
1. “Spank You! Spank You Very Much!”
According to Jim Carrey’s popular movie from the early 90’s “Ace Ventura Pet Detective”, this is how he prefers to thank people…
“Spank You! Spank You Very Much!”
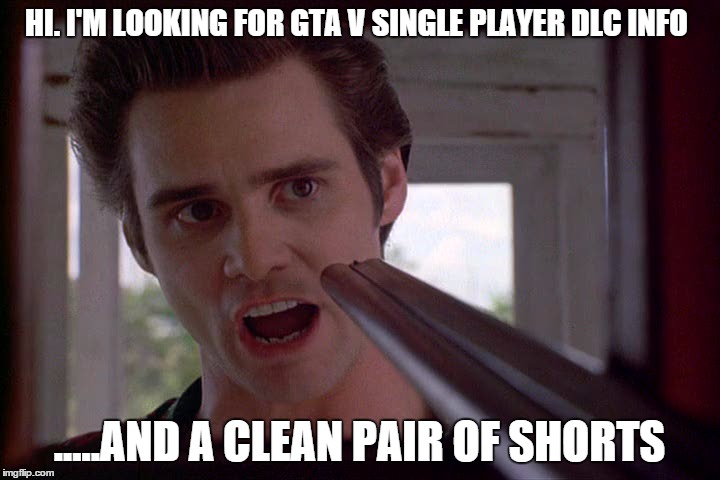
2. “Hi. I’m Looking For GTA V Single Player DLC Info…And A Clean Pair Of Shorts”
In all honesty, I would probably need a clean pair of shorts if I was him too!
“Hi. I’m Looking For GTA V Single Player DLC Info…And A Clean Pair Of Shorts”
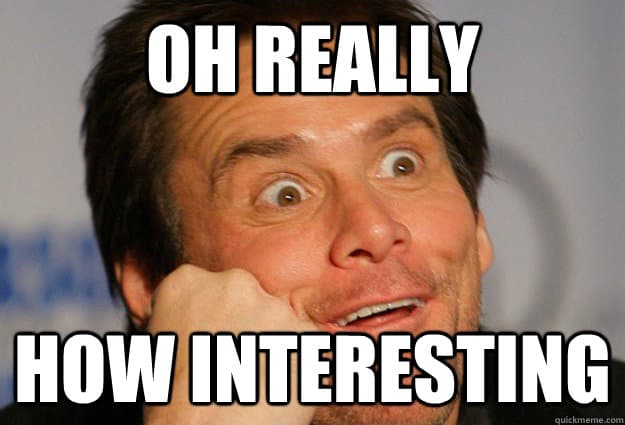
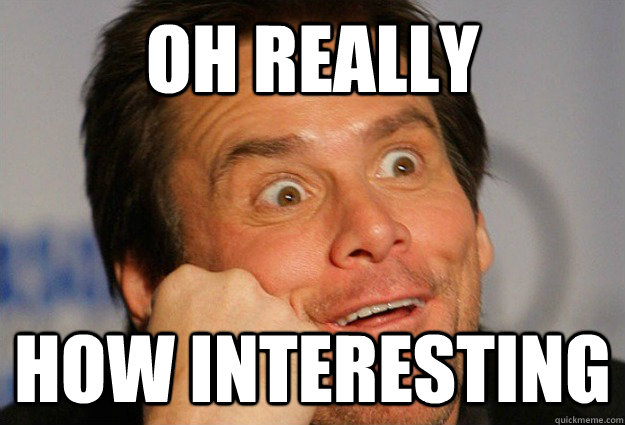
3. “Oh Really, How Interesting”
Proven by the expression on his face in the image below, Jim Carrey is not only very funny, but also very sarcastic…
“Oh Really, How Interesting”
4. “I’m Ready To Go In Coach, Just Give Me A Chance”
Another great (and very memorable) scene from one of Jim Carrey’s most popular movies “Ace Ventura Pet Detective”.
“I’m Ready To Go In Coach, Just Give Me A Chance”
5. “Jim Carrey – Not A Known Giver Of F***s”
Believe it or not, that is actually him in the black bathing suit. And the meme is accurate, he has never really been one to care what other people think of him!
“Jim Carrey – Not A Known Giver Of F***s”
6. “A Good Night Kiss – Where?…Depends On You!”
Not sure exactly what film of his this picture is from, however, it makes for a meme that is about as funny as it is frightening…
“A Good Night Kiss – Where?…Depends On You!”
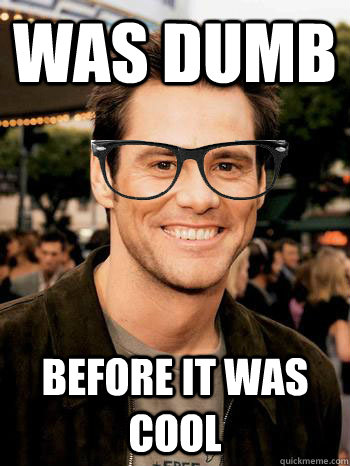
7. “Was Dumb Before It Was Cool”
Apparently Jim Carrey was the one who actually brought back the big glasses trend. And in all honesty, they actually don’t look too bad at all!
“Was Dumb Before It Was Cool”
8. “Jim Carrey Had A Scotch Tape Selfie Before It Was Cool.”
And he also invented the scotch tape selfie. Unfortunately for Jim Carrey, this looks about as painful as it is funny…
“Jim Carrey Had A Scotch Tape Selfie Before It Was Cool.”
9. “As A Child, Jim Carrey Used To Wear His Tap Shoes To Bed Just Incase His Parents Needed Cheering Up In The Middle Of The Night.”
Very funny, and also very true. According to many different sources, he did actually do this as a child!
“As A Child, Jim Carrey Used To Wear His Tap Shoes To Bed Just Incase His Parents Needed Cheering Up In The Middle Of The Night.”
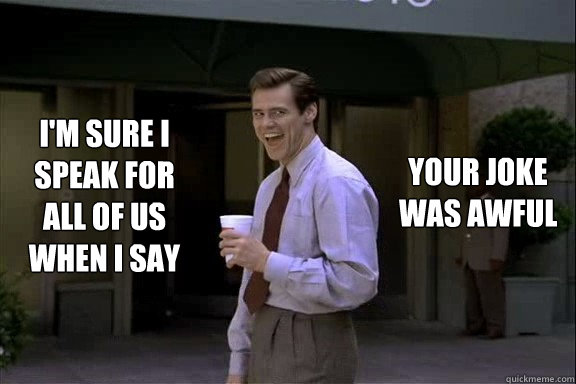
10. “I’m Sure I Speak For All Of Us When I Say – Your Joke Was Awful”
Ouch! Not sure if this should be considered a Jim Carrey meme, or a burn meme…nonetheless, it is still very funny!
“I’m Sure I Speak For All Of Us When I Say – You’re Joke Was Awful”
11. “I Hope Everybody Could Get Rich And Famous And Will Have Everything They Ever Dreamed Of, So They Will Know That It’s Not The Answer.”
This one isn’t exactly “funny”, however, it is definitely one of the better Jim Carrey memes and certainly worthy of making the list!
“I Hope Everyone Could Get Rich And Famous And Will Have Everything They Ever Dreamed Of, So They Will Know That It’s Not The Answer.”
For those who are unfamiliar with the very popular Anubis tattoos – they are Egyptian-based and look amazing when done correctly. In fact, designs featuring Anubis God’s are amongst the most appealing that tattoo artists have to offer. And after looking through this entire list, you will certainly see why so many people enjoy getting them done!
In addition to their cultural backgrounds and appealing designs, Anubis tattoos carry a lot of vibrance and give those getting tattooed an abundance of color combinations to chose from. This allows them to not only stick out well (even from a distance), but to also appear very unique and original to each individual. Given the fact that these tattoos are Egyptian-based, and have to do primarily with Anubis God’s from ancient Egypt, you would think only those with that specific heritage would be seen with them. However, this is not necessarily true, as many people (both Egyptian and non-Egyptian) have Anubis designs tattooed on them. Whether this is because they are ill-informed of the meaning behind this style or because they are obsessed with God’s from this time is not exactly clear, but each tattoo looks great nonetheless.
Since (as you may have guessed) there are a lot of different drawings and sketches of Egyptian Gods, many different styles can be used for Anubis tattoos. In fact, even though traditional and new school are the styles most common used, dotwork, watercolor, and realism is used as well. In addition to the many different styles that are used, there are many different God’s that exist as well. Therefore, if you are someone interested in getting one of these tattoos for yourself, you can choose only the God’s you prefer in order to even further customize your design.
So, now that you know a little about the history of Anubis tattoos, we will present you with our list. Fortunately, since it’s compiled of only the best Anubis designs that we could find online, we’re sure that you will enjoy it!
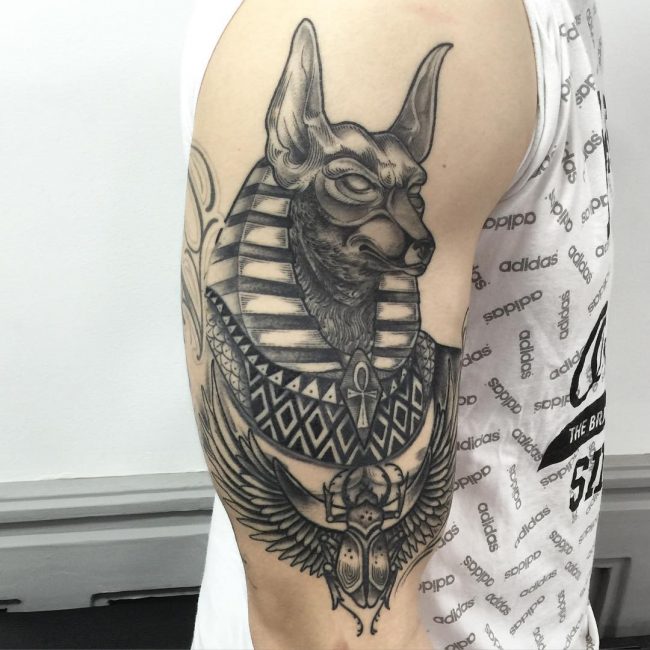
1. A Very Neat Upper Arm Anubis Tattoo
Not only is this design very detailed, but it also looks great without color. And as a matter of fact, the God you see here is one of the most commonly used!
A Very Neat Upper Arm Anubis Tattoo
2. An Extremely Colorful Anubis Design
In addition to appearing almost three dimensional due to the intense coloring, this design features one of the best Anubis tattoo characters – the Egyptian Horus. Not only can you easily hide this one with a shirt, but when showing it off, your friends are bound to be impressed!
An Extremely Colorful Anubis Design
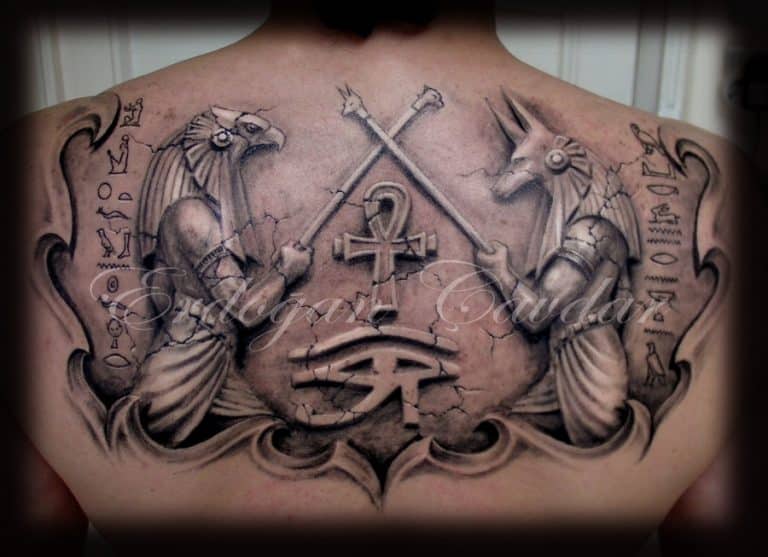
3. An Anubis Themed Upper Back Tattoo
Featuring not one, but two Anubis characters, this design is very appealing and fits perfectly along the upper back.In fact, the only real downside to a tattoo this complex, is the amount of time it takes to get it done. So, if you some have time to spare, then this back piece is certainly a great choice!
An Anubis Themed Upper Back Tattoo
4. A Traditionally Styled Anubis Arm Tattoo
Very appealing, and certainly a great choice for those who love traditional tattoos designs. As you can see, this one also features the same Egyptian God used in a few of the preceding images, it is just done in a different style.
A Traditionally Styled Anubis Arm Tattoo
5. An Evil Looking Anubis Sleeve Design
Due to the creepy red background and angered look on the Anubis’ face, this tattoo is actually rather frightening. So, if you are someone who enjoys freaking out your friends, then be sure to consider this unique design.
An Evil Looking Anubis Sleeve Design
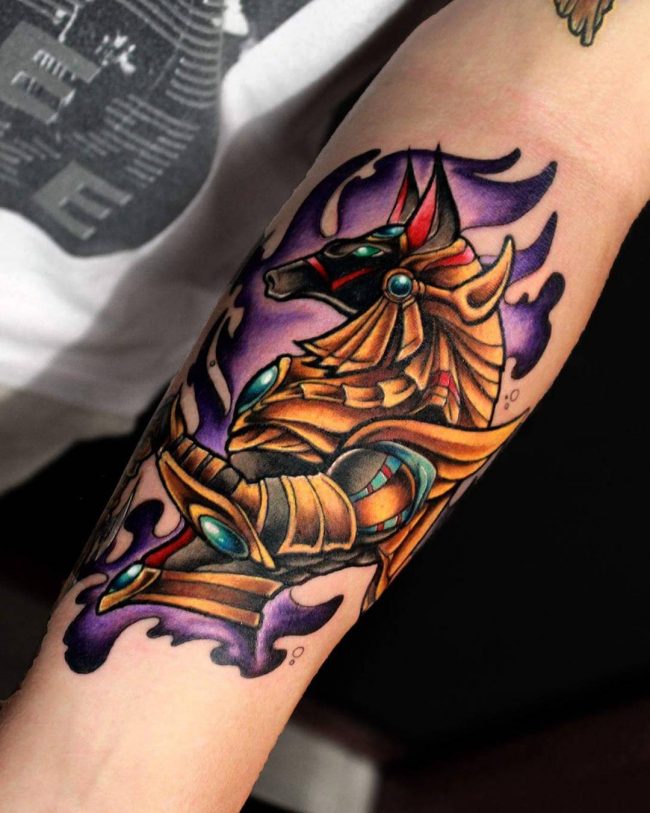
6. A Neat Purple And Gold Anubis Forearm Design
This Anubis design is very detailed, and (much like the vibrant red image above), it is a great choice for anyone really wanting their tattoo to stand out well. As you may have guessed, this one can certainly be seen from a distance!
A Neat Purple And Gold Anubis Forearm Design
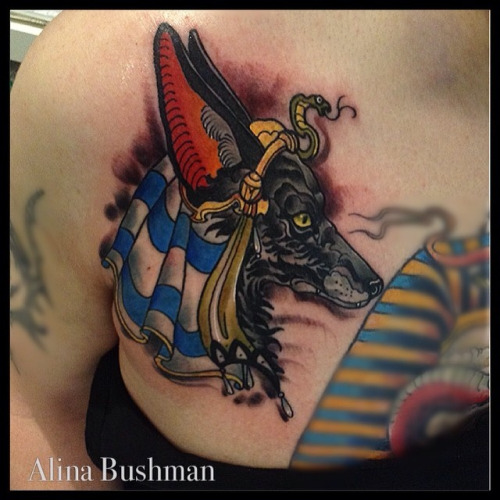
7. A Colored Anubis Head On The Front Right Shoulder
Though most Anubis designs feature only Egyptian God’s, additional imagery also looks great alongside them. As you can see when looking at the image below, this Anubis tattoo was done next to some other Pharaoh related designs, and certainly looks amazing!
A Colored Anubis Head On The Right Front Shoulder
8. A Traditional Black And White Anubis God Forearm Design
Although this design is also color-free, it looks amazing and features the most popular Anubis God. Proving that these tattoos look great both with or without vibrance added in!
A Traditional Black And White Anubis God Forearm Design
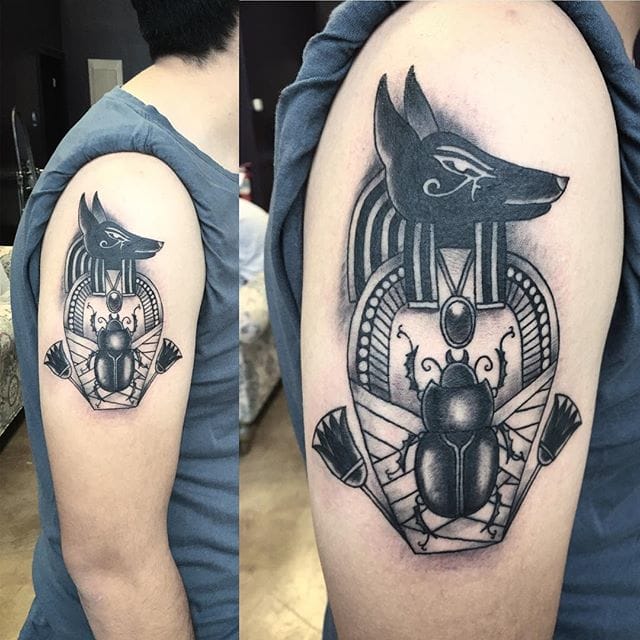
9. An Anubis And Horus Egyptian Canopic Jars Tattoo
Featuring not just an Anubis, but a Horus Egyptian as well, this is perhaps the most creative design on the entire list. If you’re someone interested in the history of ancient Egypt and want to make it known to the world, then this is certainly a great choice for you!
An Anubis And Egyptian Horus Canopic Jars Tattoo
10. A Brightly Colored Anubis Arm Design
This one fits perfectly along the upper arm, and is quite possibly the most colorful tattoo on the list. A great example of how nice vibrant, watercolor based Anubis designs tend to look.
A Brightly Colored Anubis Arm Design
11. A Smiling Anubis
It may not be the most appealing smile in the world, however, considering the fact that 99 percent of Anubis’ are completely straight faced in tattoos, this design is actually very unique!
A Smiling Anubis
12. A Black Ink Anubis Arm Tattoo
Although this is considered a “black ink design”, there is some yellow coloring added in as well. In addition to helping the tattoo really “pop out”, the yellow also adds some uniqueness and creativity to the image.
A Black Ink Anubis Arm Tattoo
13. A Very Angry Anubis God
Not only is he angry, but he’s also carrying a giant gold weapon! From afar, this one may appear to not be filled in too well, however, when looking closely at the image, you can tell just how detailed it really is.
A Very Angry Anubis God
14. Two Amazing Anubis Foot Tattoo Designs
Very appealing, and perhaps the best spot for those wanting to cover up their designs from time to time. As long as you’re wearing shoes, no one can see these designs, and as long as you’re barefoot, you can impress your friends!
In addition to being very appealing to those who like to travel, airplane tattoos are a great way of expressing your need to fly – in either a literal, or a metaphoric way. And though there are a lot of great airplane tattoos online, we believe that the 12 below are certainly amongst the best. So, if you’re a fan of traveling, be sure to check out the images below!
1. A Grey Ink Airplane Forearm Tattoo
Though it may be somewhat standard, this is very well done, and certainly a great choice for those who like to travel!
A Grey Ink Airplane Forearm Tattoo
2. A Small, Black Airplane, Making A Heart In The Sky
Not only does this one express the love to travel, but it expresses the need for love as well!
A Small, Black Airplane, Making A Heart In The Sky
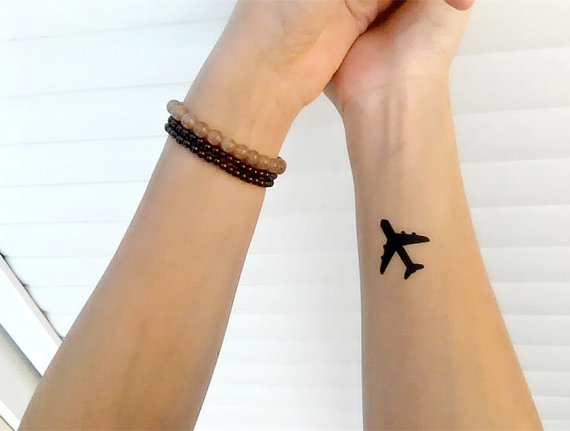
3. A Small Airplane Outline Wrist Tattoo
This one is as simplistic as it is well done, in all honesty, it couldn’t have been outlined much better!
A Small Airplane Wrist Tattoo
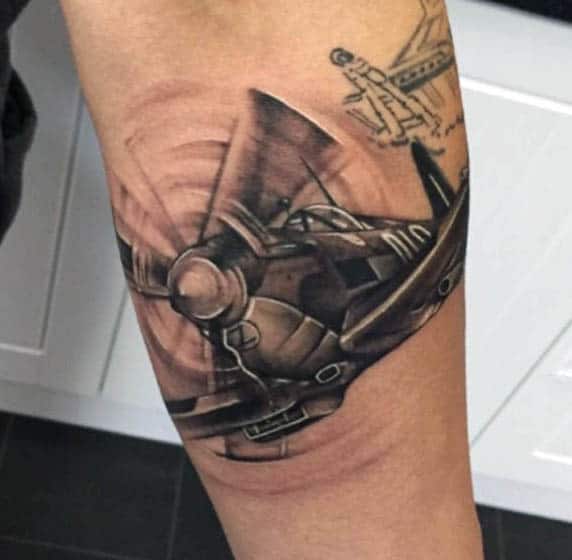
4. A Darkly Colored Fighter Plane
Unlike the preceding images, this tattoo features a plane used for war!
A Darkly Colored Fighter Plane
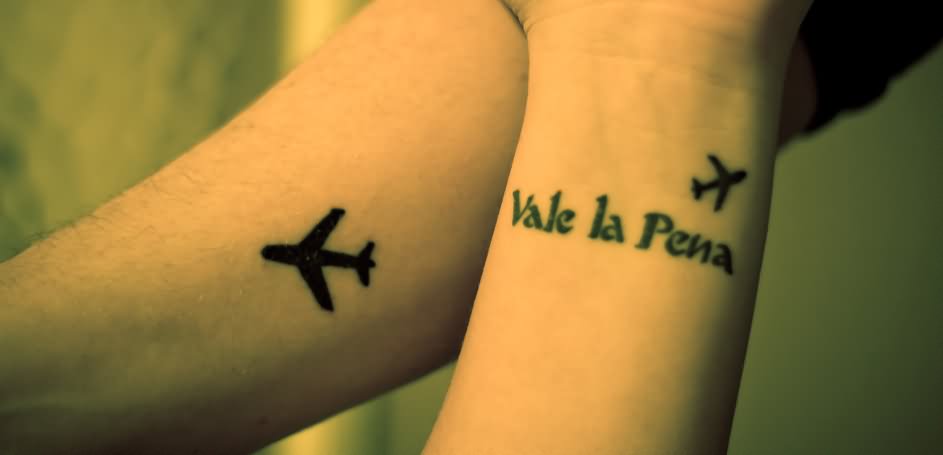
5. “Vale La Pena”
A plane on one wrist, and a nice quote (with an additional plane) on the other!
“Vale La Pena”
6. A Very Colorful, And Very Appealing, Inner Arm Airplane Tattoo
Not only is this one full of color, but it also features an older style plane.
A Very Colorful, And Very Appealing, Inner Arm Airplane Tattoo
7. A Paper Airplane, Traveling Around The Globe
Proven by the image below, even paper airplanes look great in tattoo form!
A Paper Airplane, Traveling Around The World
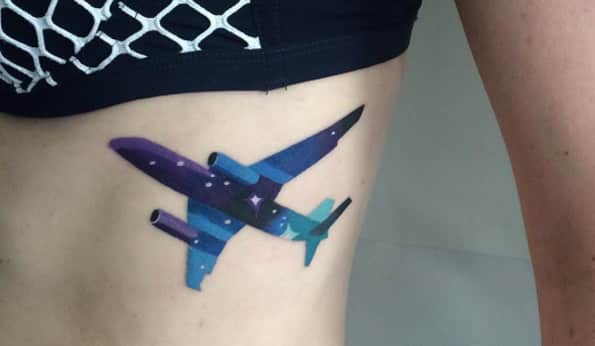
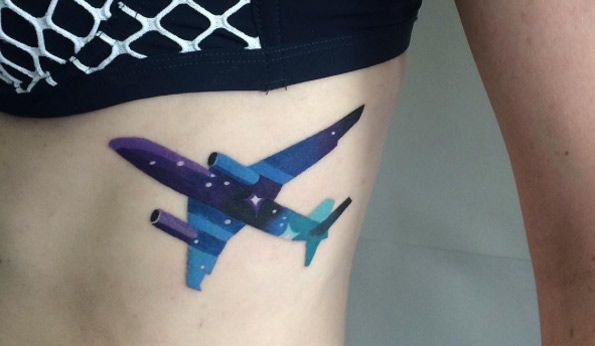
8. A Very Neat Watercolored Airplane Rib Tattoo For Women
Though they look great in black and white, airplane tattoos stand out best when done in watercolors.
A Very Neat Watercolored Airplane Rib Tattoo For Women
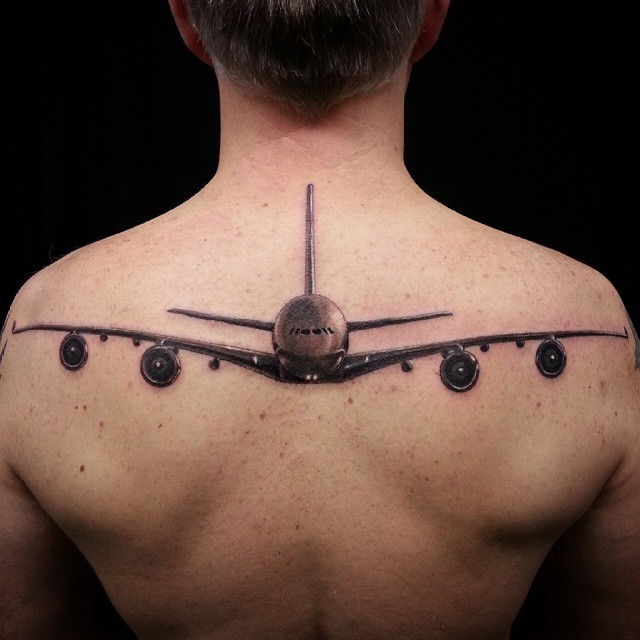
9. A Grey Ink Airplane Upper Back Tattoo
Not only is the shading in this tattoo done incredibly well, but it fits perfectly across the upper back!
A Grey Ink Airplane Upper Back Tattoo
10. Another Great Watercolored Airplane Tattoo For Women
This one features a small paper airplane, and fits very nicely along the collarbone!
Another Great Watercolored Airplane Tattoo For Women
11. A Colorless, Old Fashioned, Airplane Back Tattoo
Despite having no color, this tattoo looks great and features a neat old fashioned plane model!
A Colorless, Old Fashioned, Airplane Back Tattoo
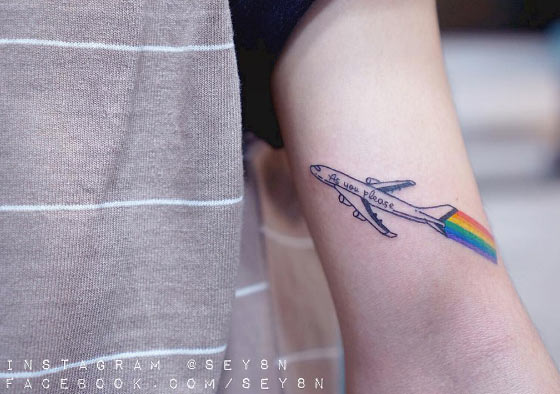
12. A White Airplane, Spraying Out Some Rainbow Colored Smoke
Very well done, and also very unique. In fact, this is perhaps the most creative design on the entire list!
A White Airplane, Spraying Out Some Rainbow Colored Smoke