Home Blog Page 8

96 Day of the Dead Tattoos (Dia de Los Muertos)

We all know how Halloween is celebrated – with costumes, candies and horror movies, right? What about All Souls’ Day? To remember the dead, many cultures prepare meals for dead relatives and loved ones, light candles or cheap flowers on the graves. But the Mexicans go a leap further: they celebrate the Day of the Dead (Dia de Los Muertos) in an unmatched explosion of colors and festivities to honor and celebrate not only death but surprisingly, also life.

One of the significant elements of the celebration is the Day of the Dead Tattoos, featuring skulls and skeletons in vibrant colors. Some people find skeleton and skull tattoos repulsive because they do not understand the profound meaning attached to them. In ancient cultures, skeletons are revered and treated with respect since they are imprints of the person’s existence in this world. Skeletons are also reminders that everyone is equal in the end.

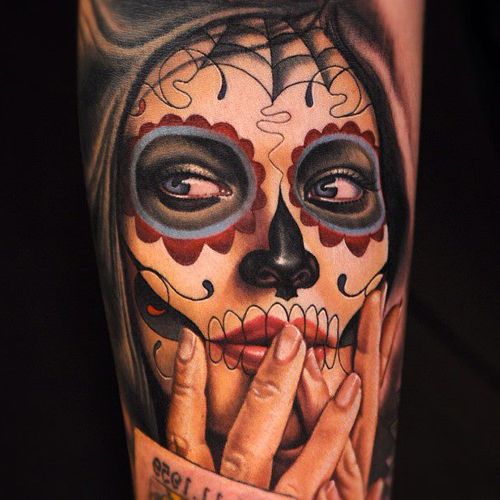
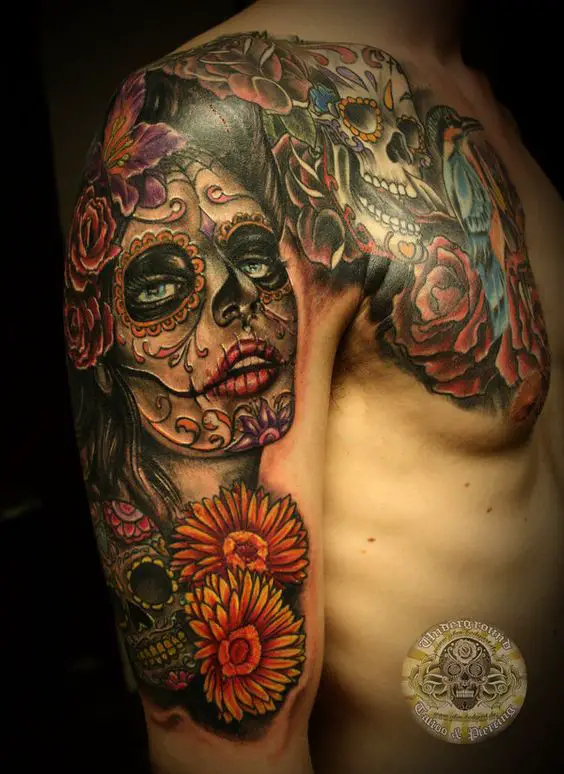
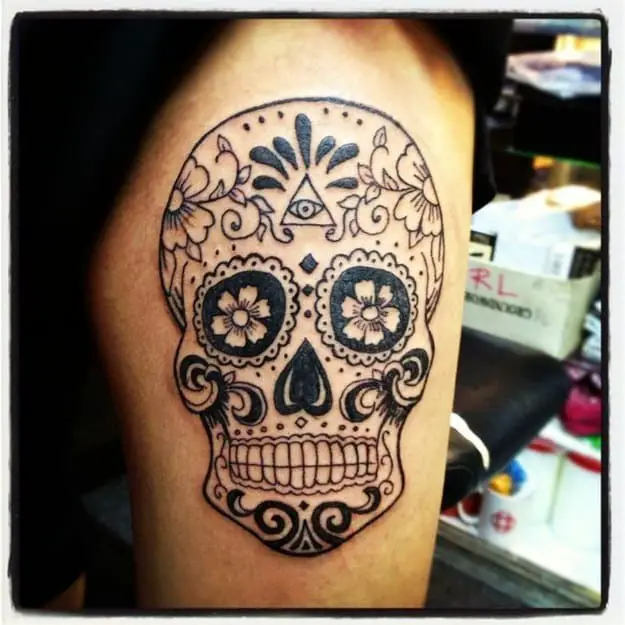
Day of the Dead Tattoos come in many forms and designs. Each pattern has its unique meaning. Flowers around the eyes, for example, signifies life, while a sugar skull with lit candles implies reminiscence.

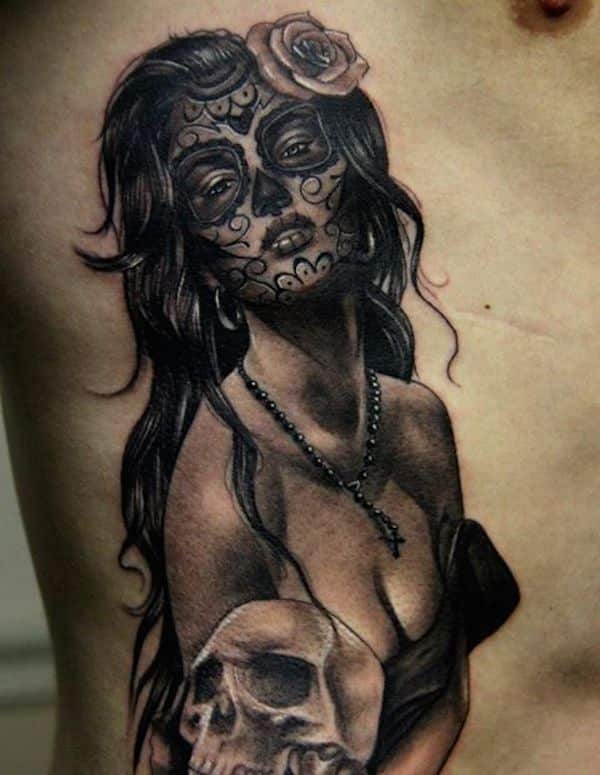
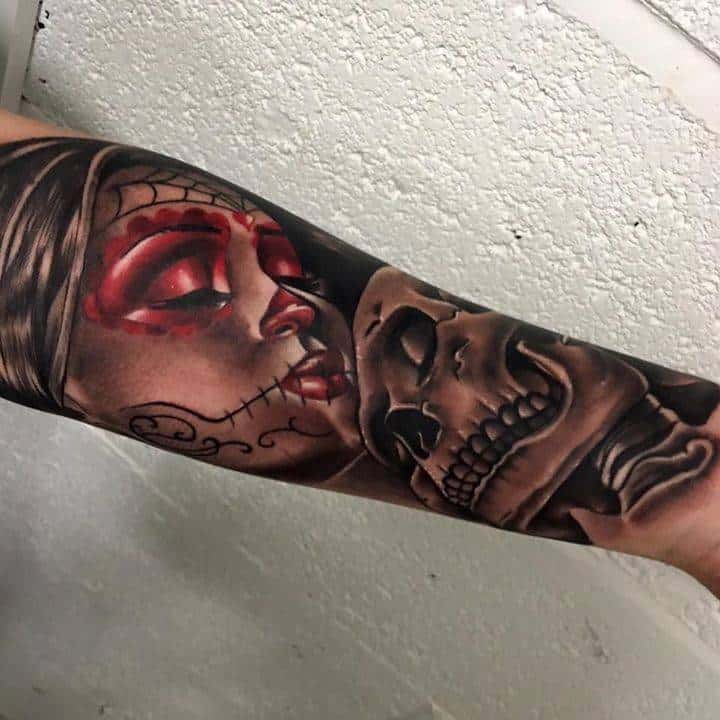
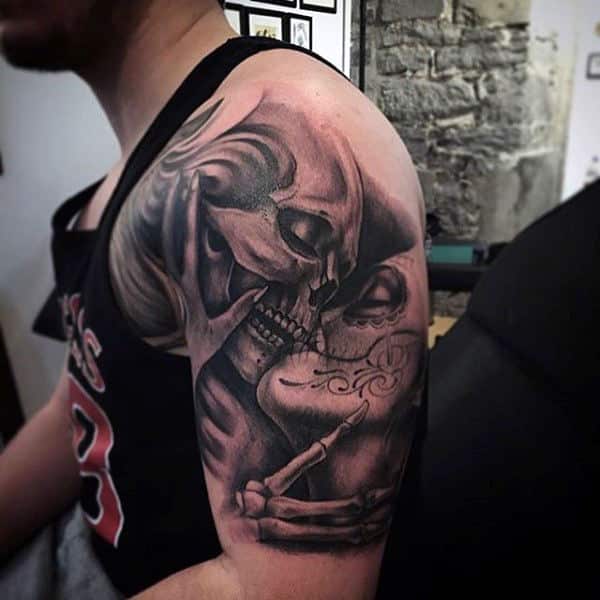
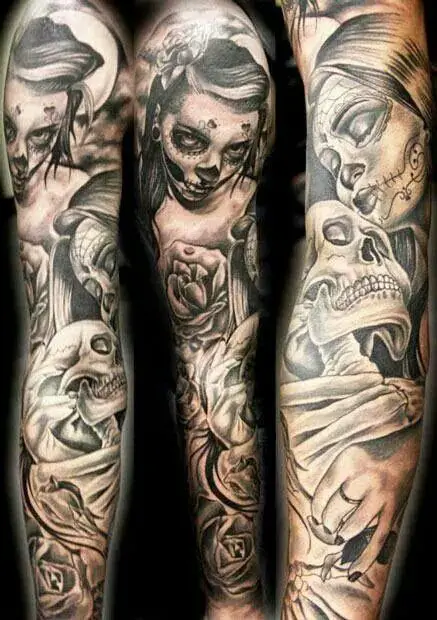
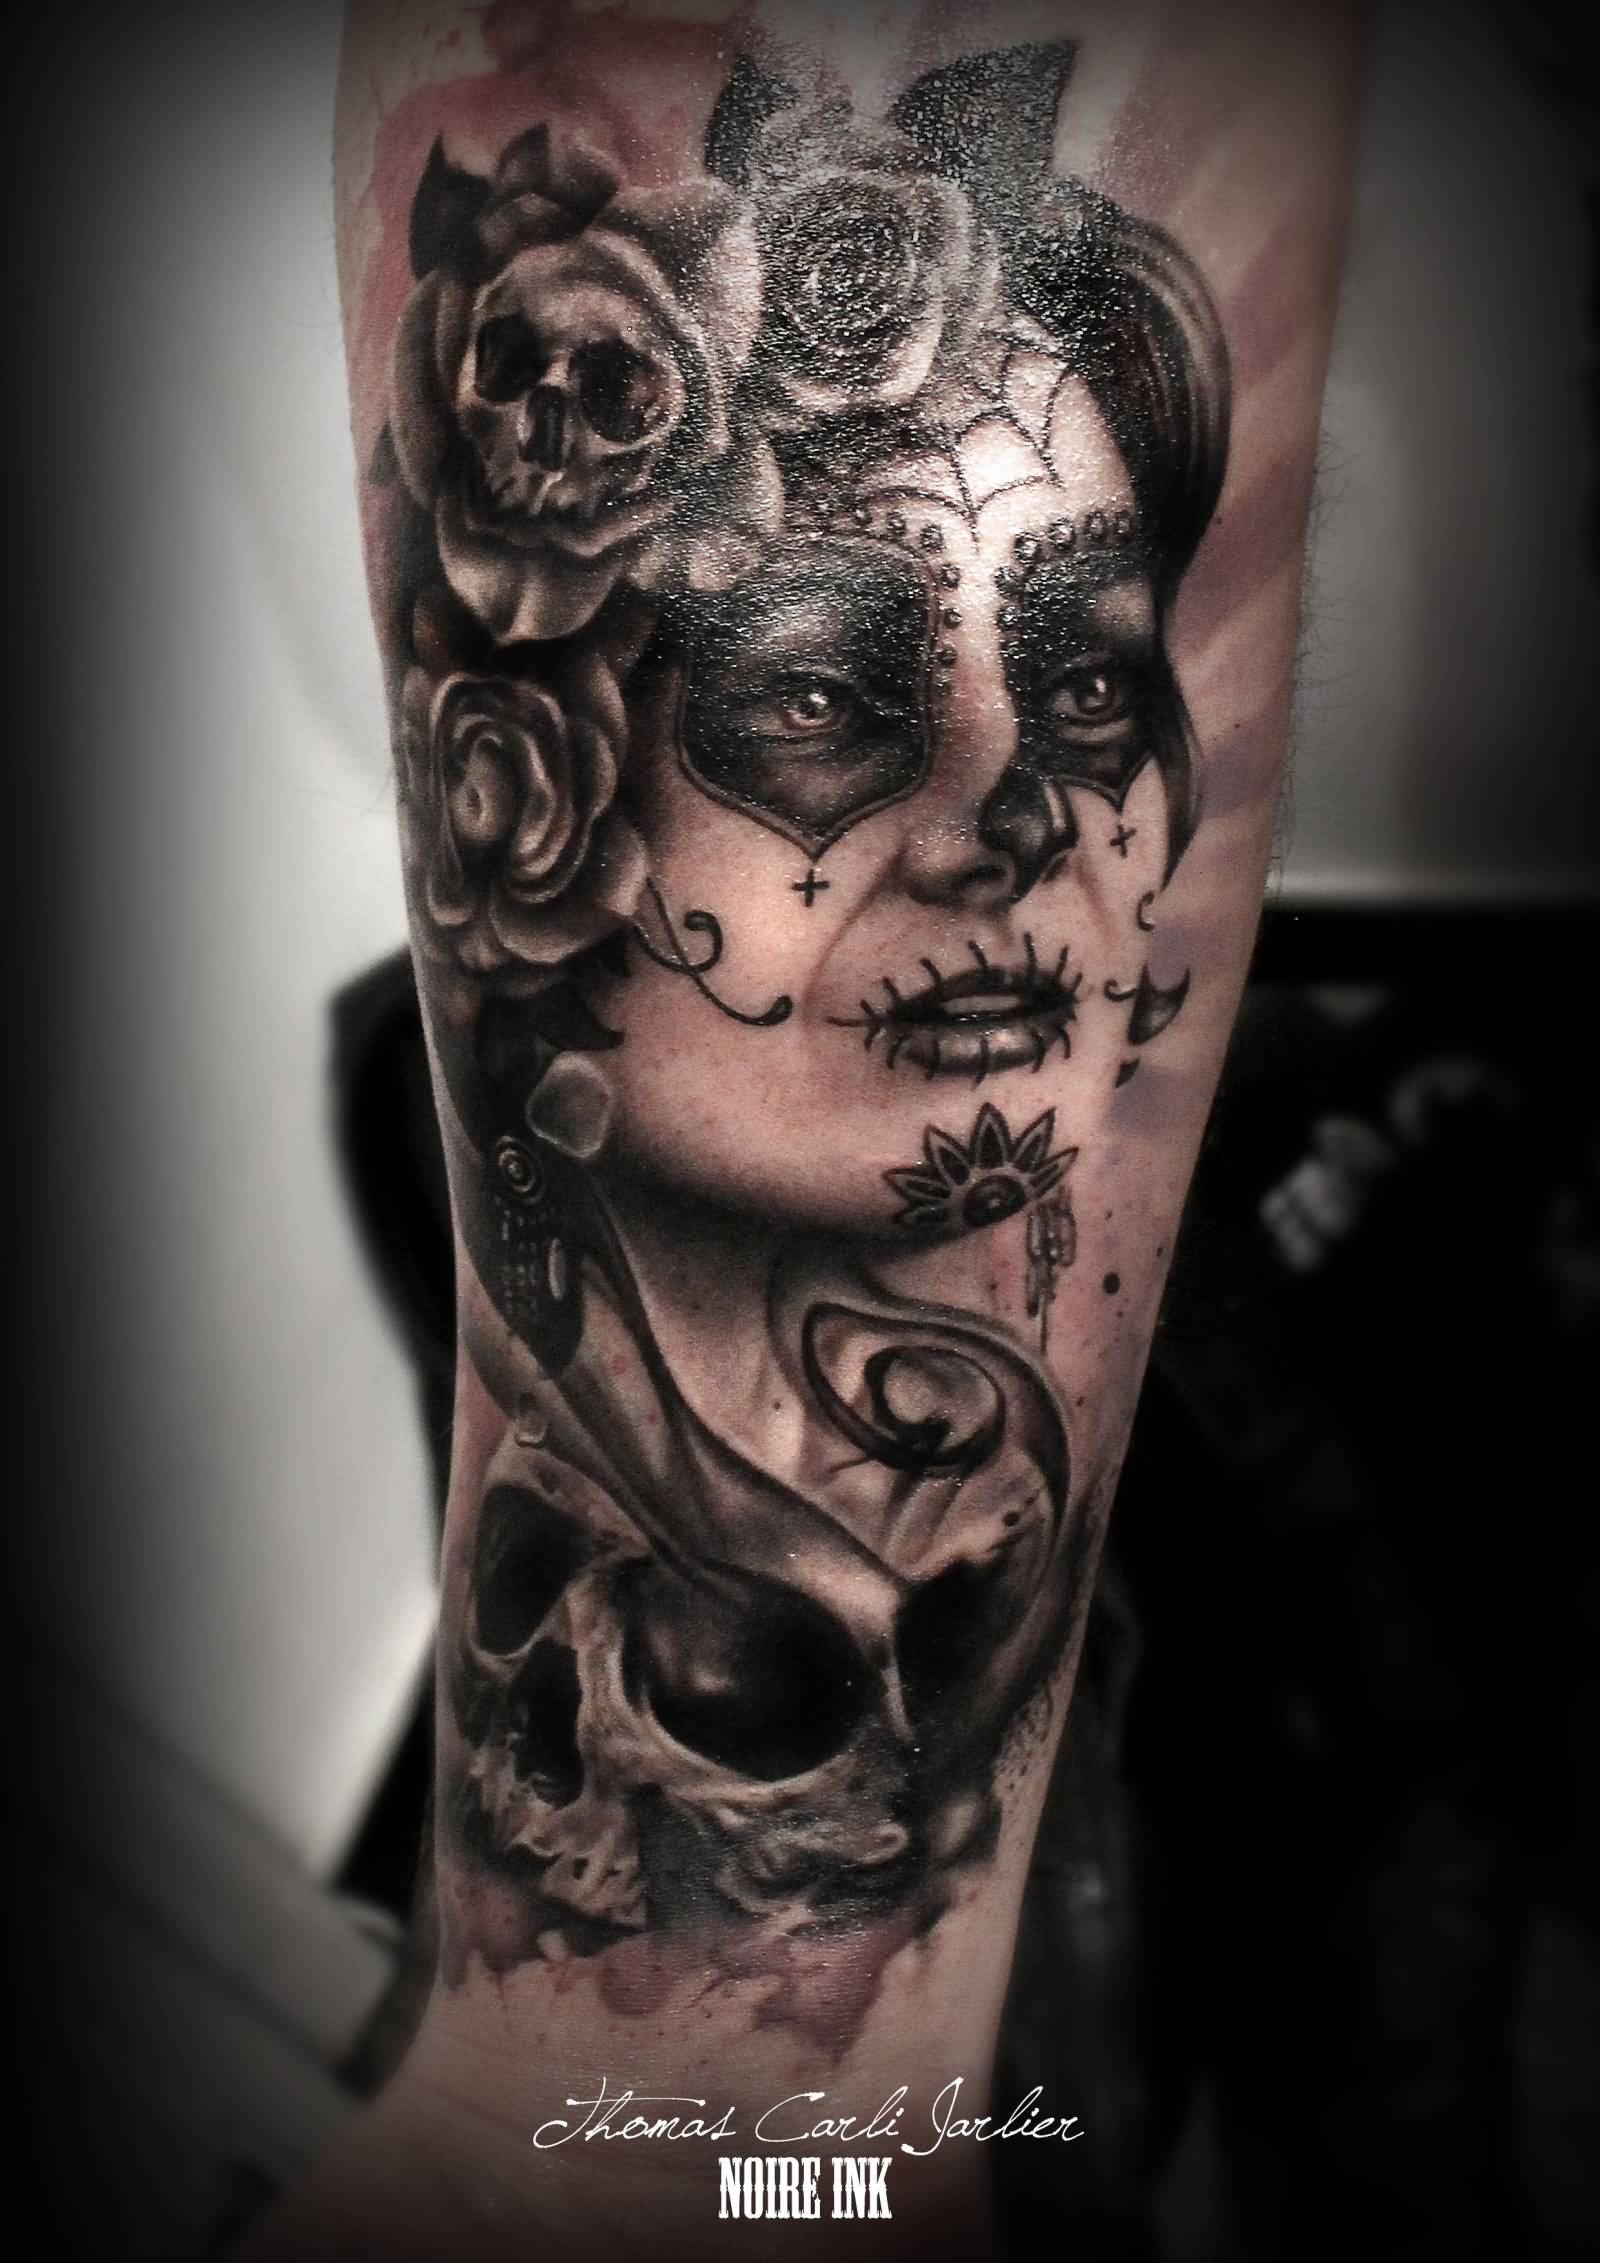
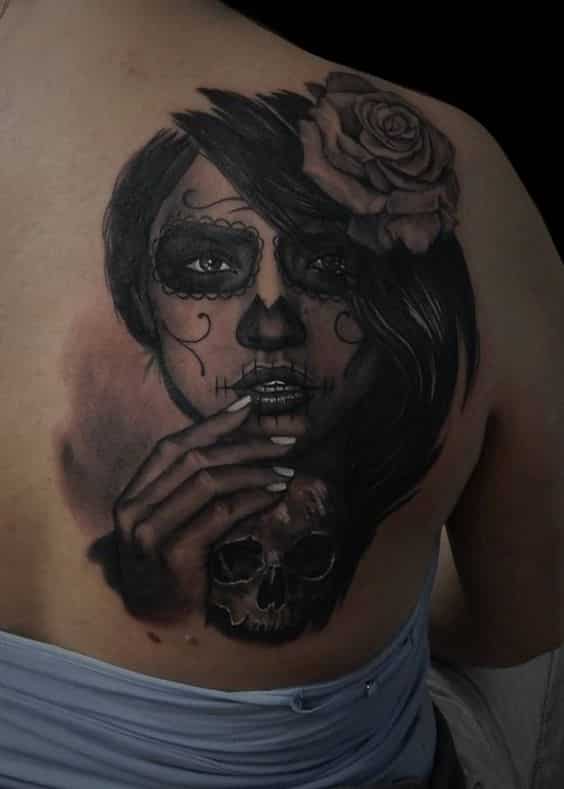
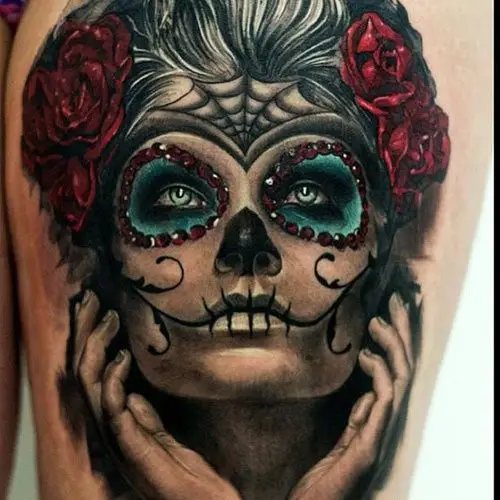
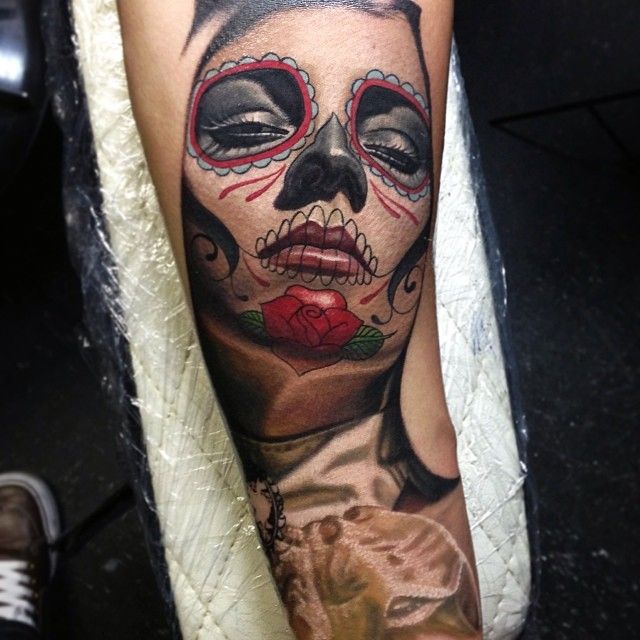
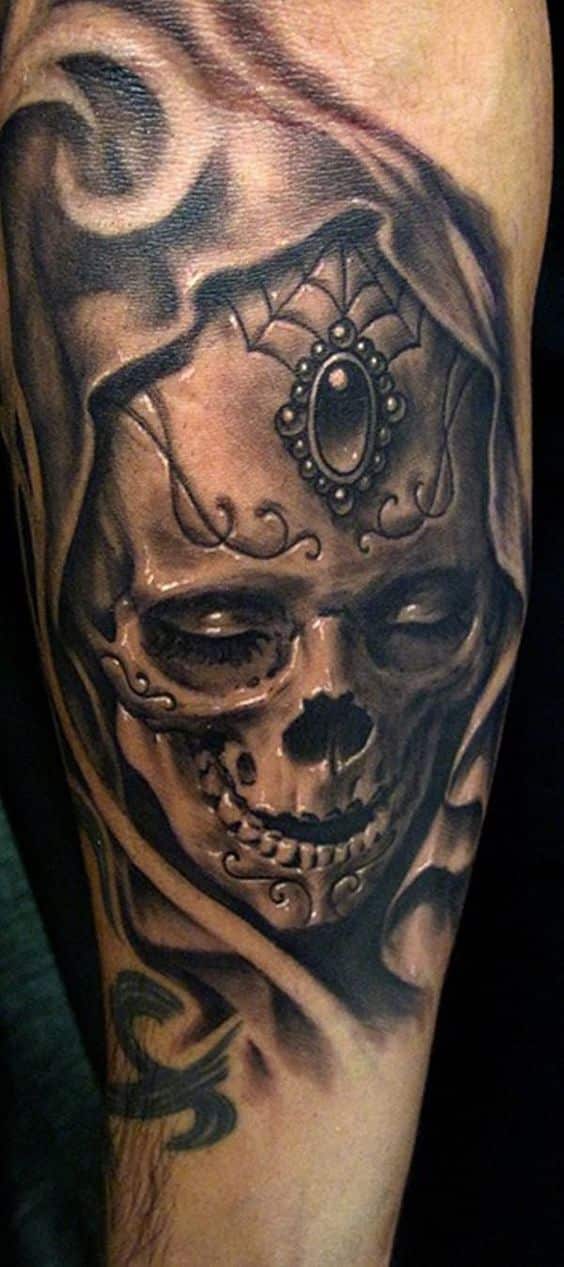
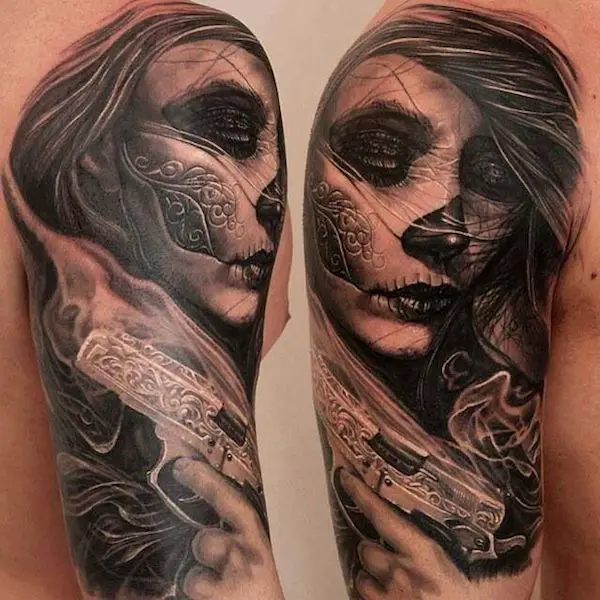
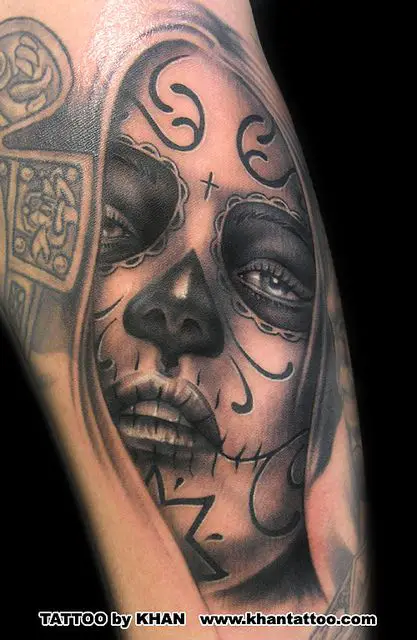
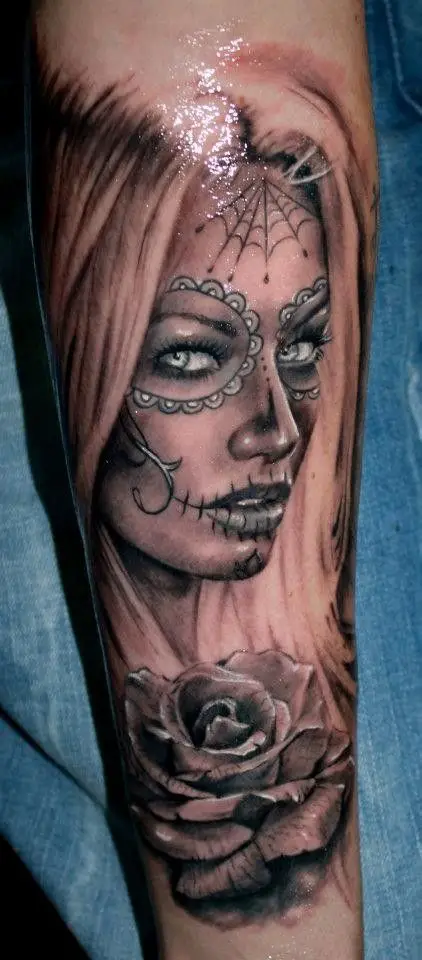
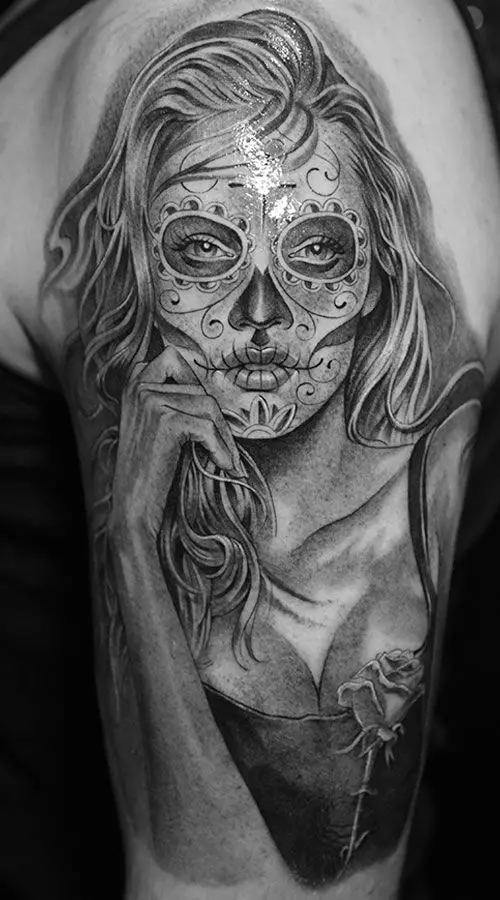
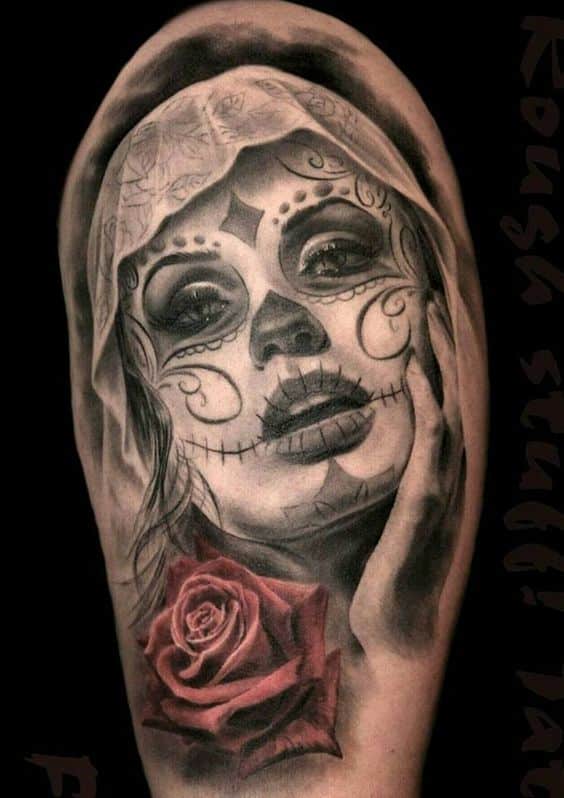
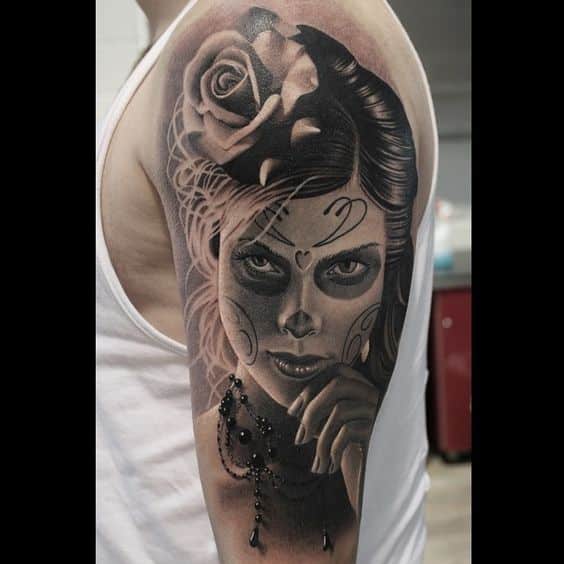
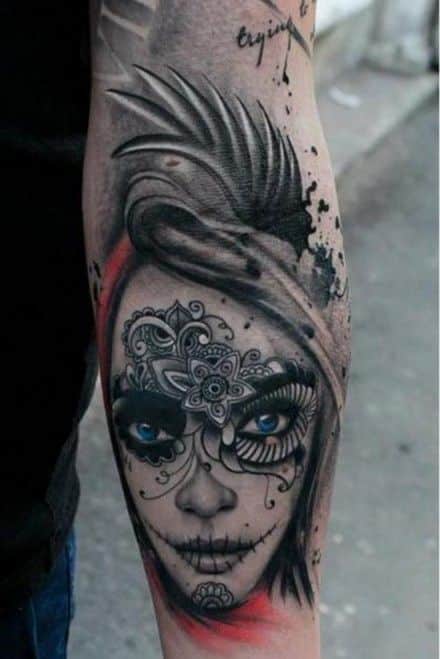
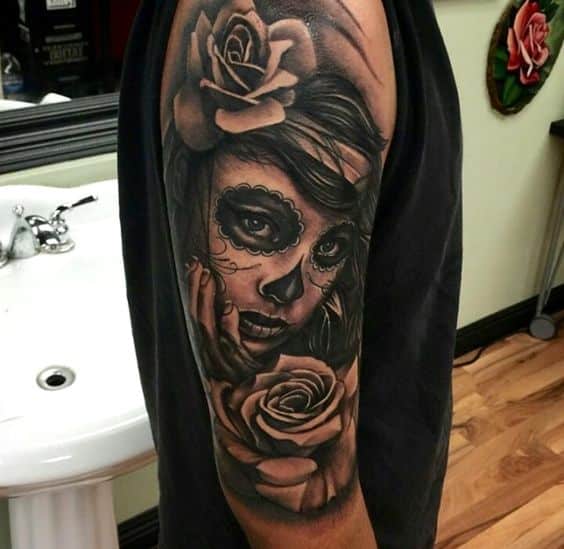
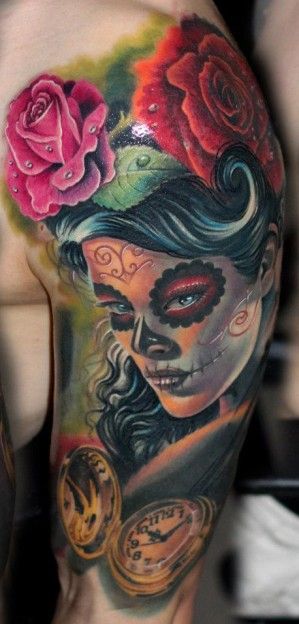
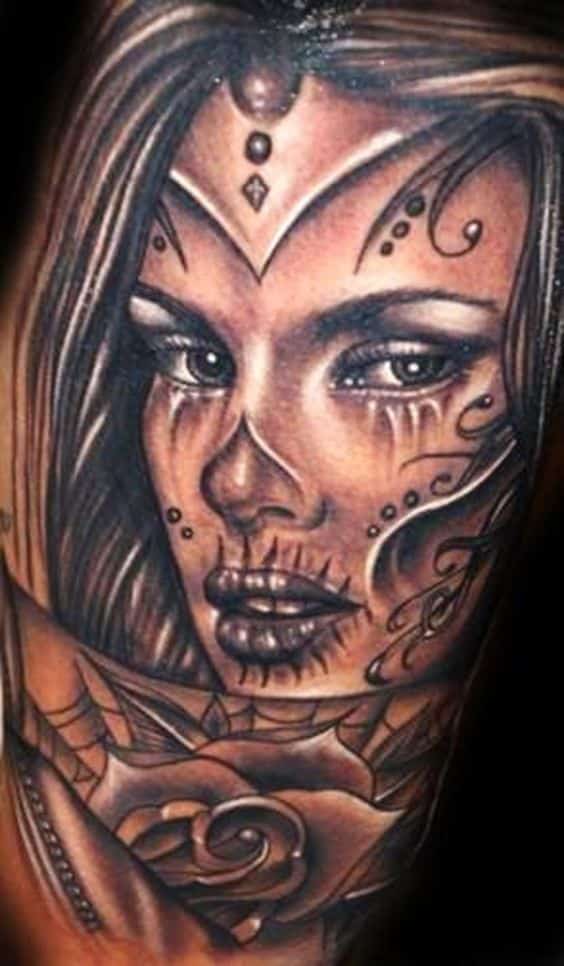
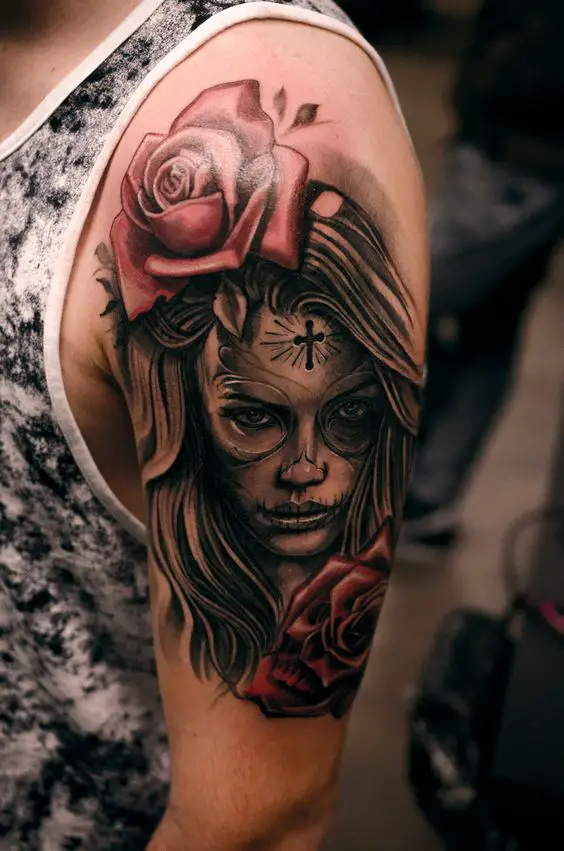
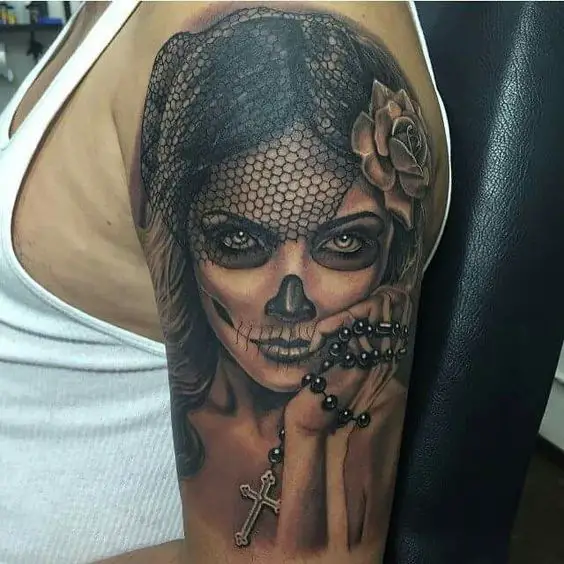
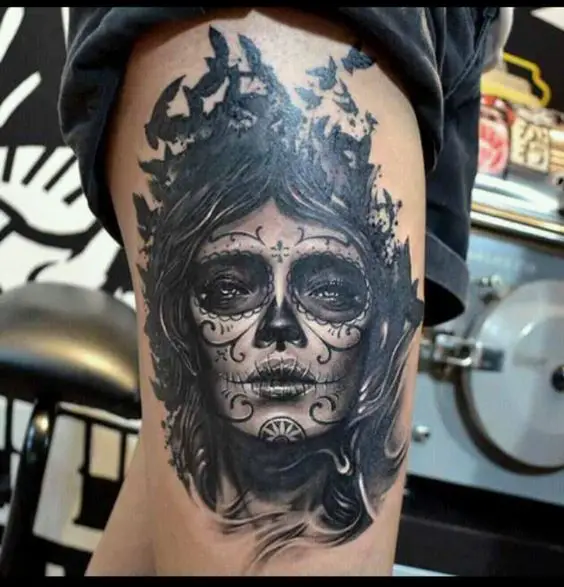
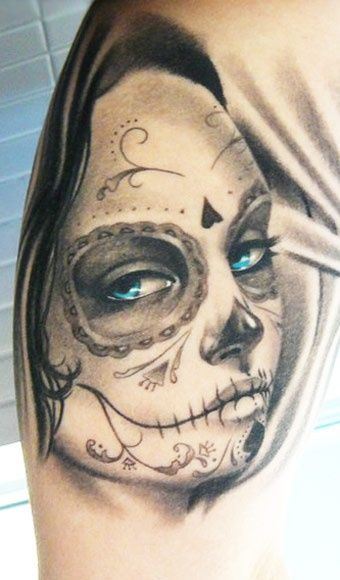
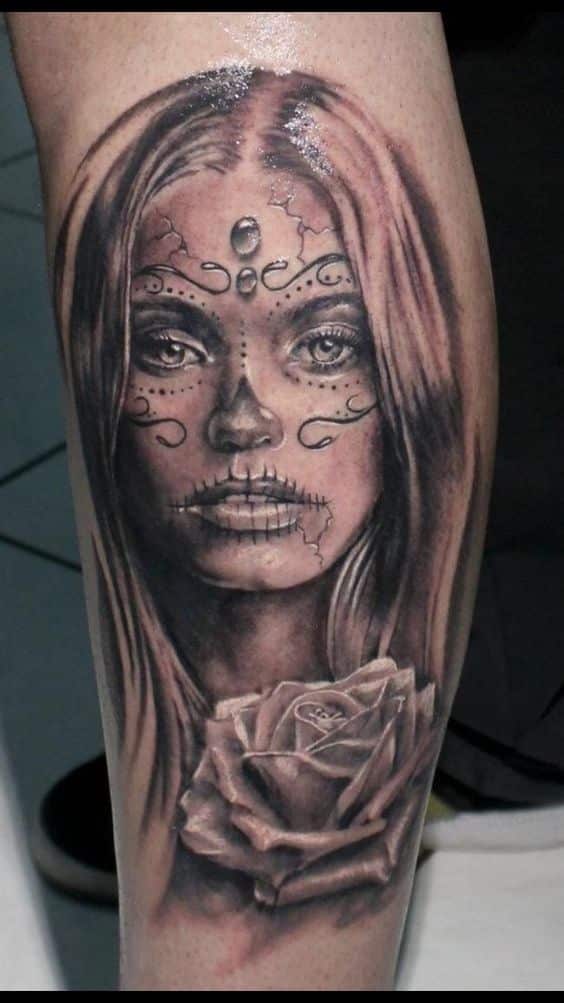
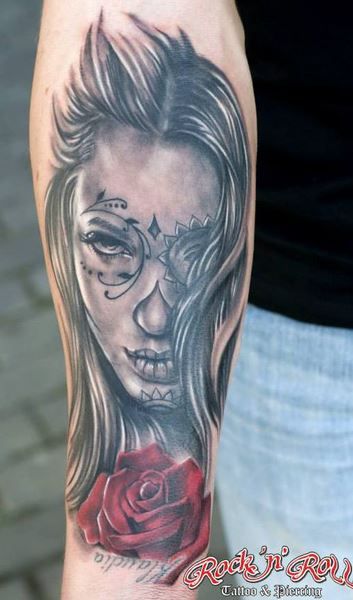
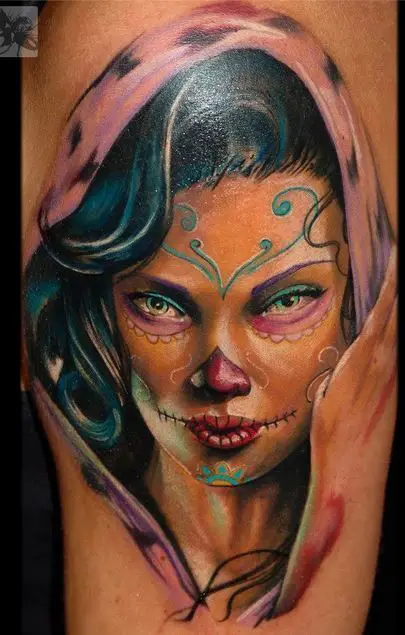
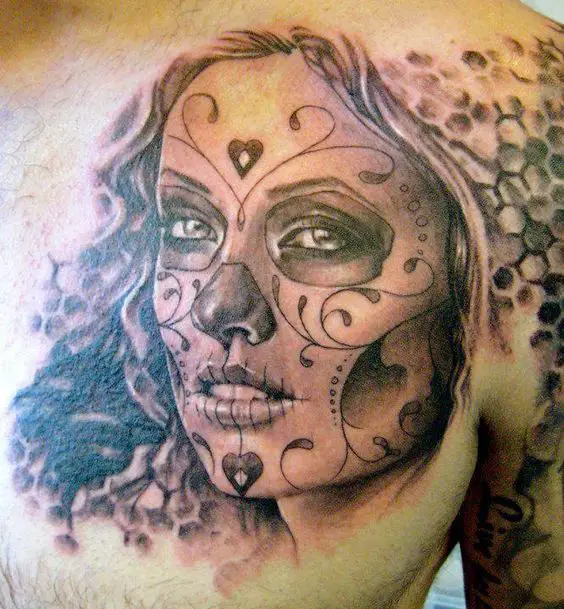
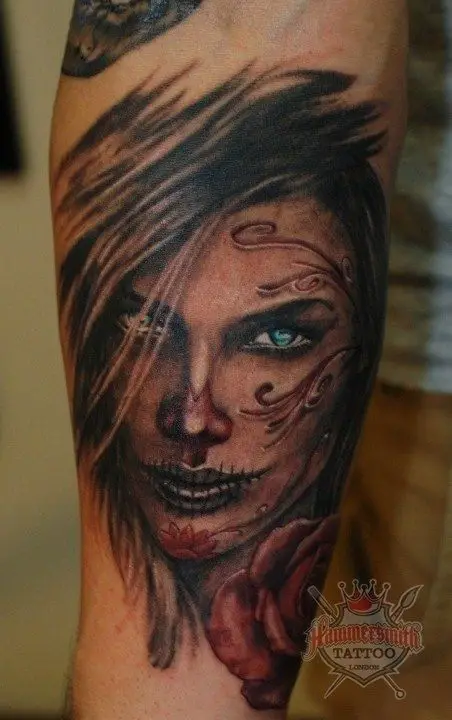
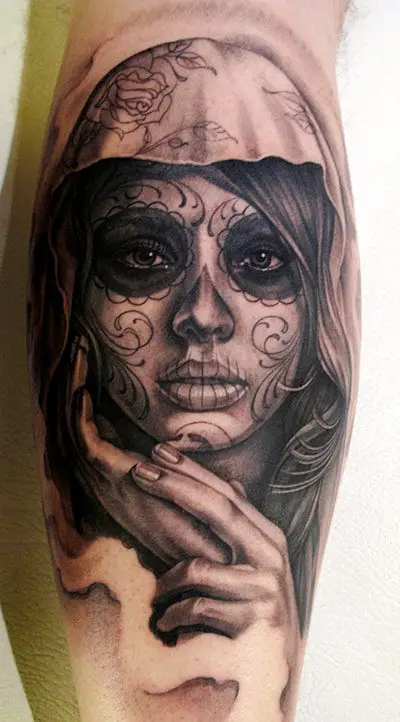
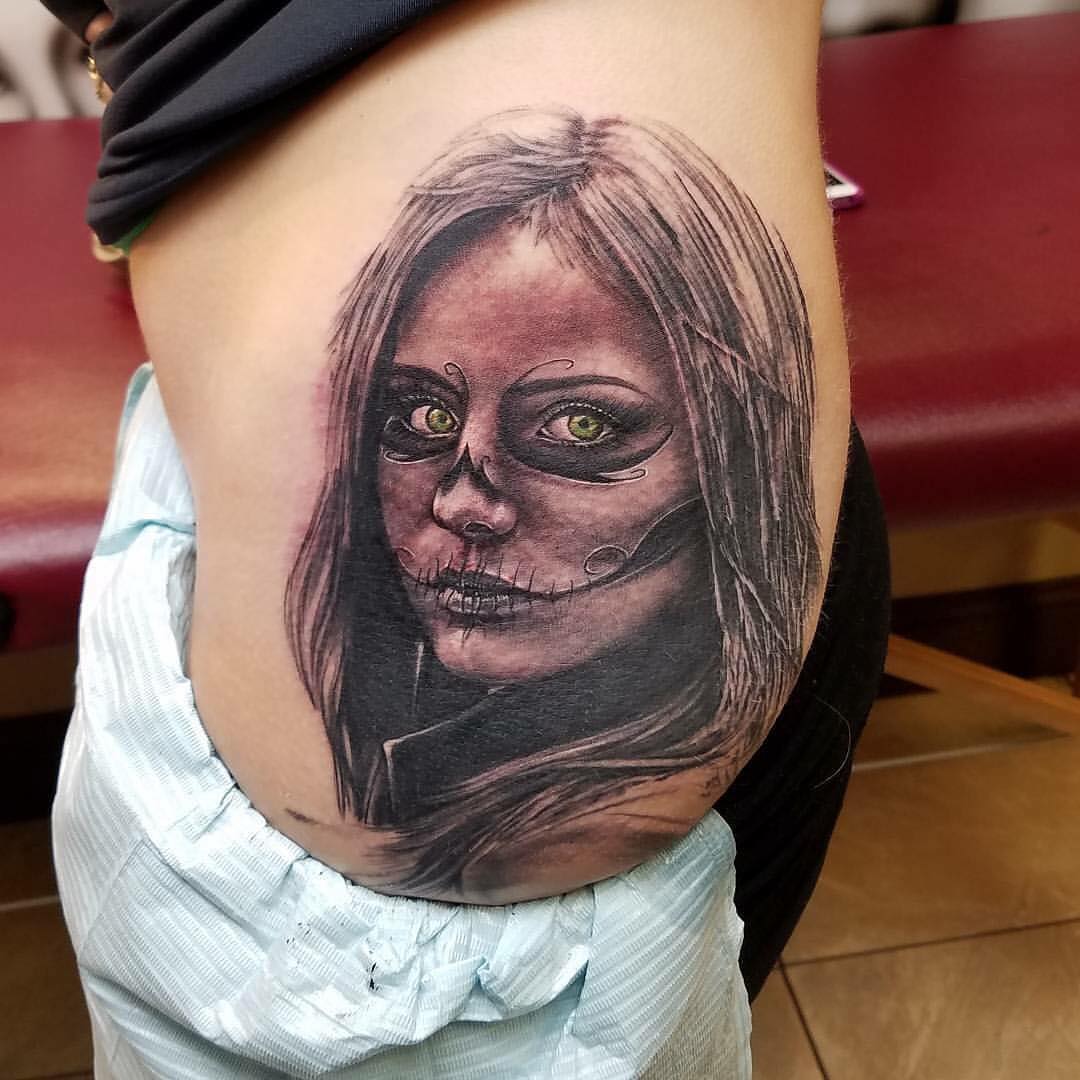
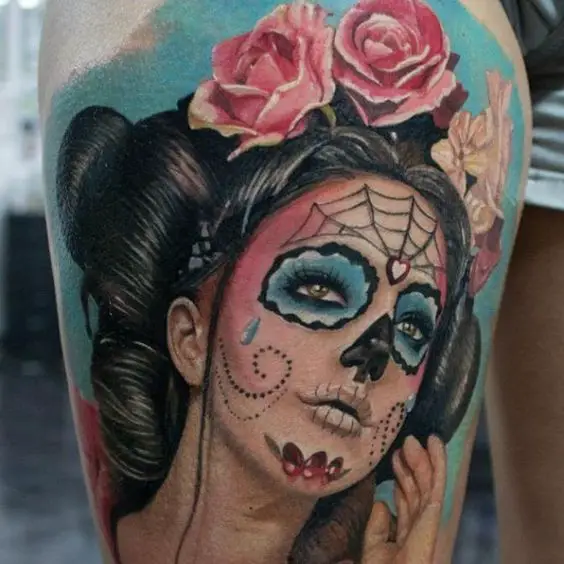
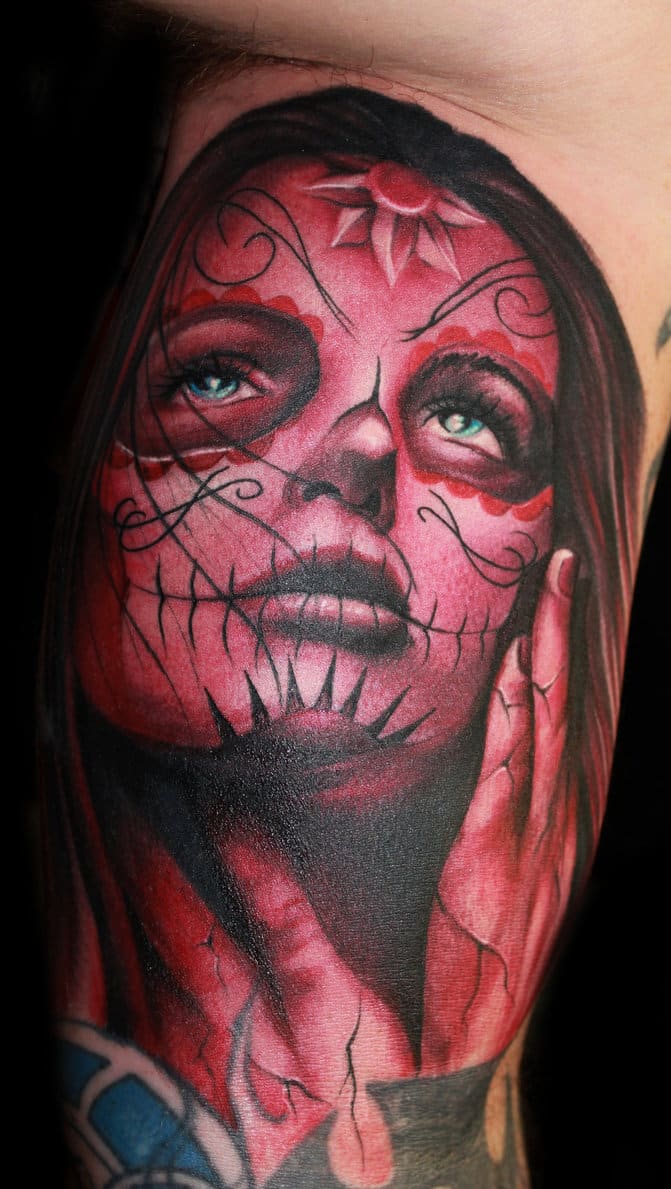
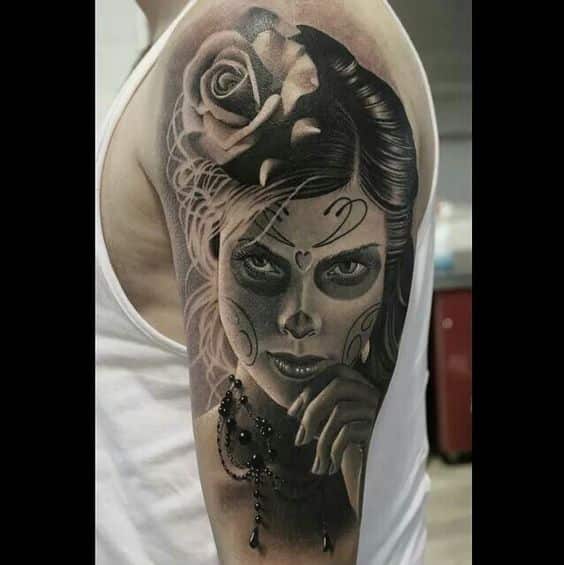
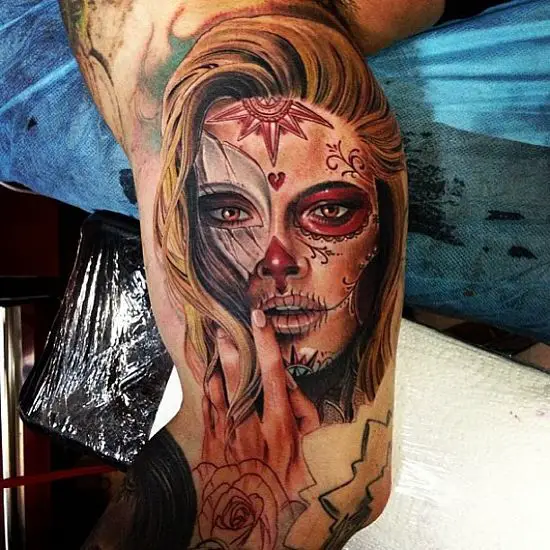
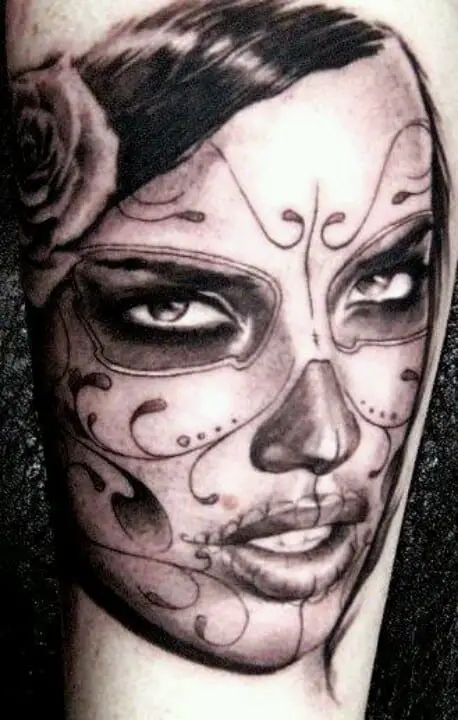
Here are the most popular 96 Day of the Dead Tattoos designs, most of them centered on the Lady of the Dead or La Calavera Catrina.

Lady of the Dead with a Skull Tattoo

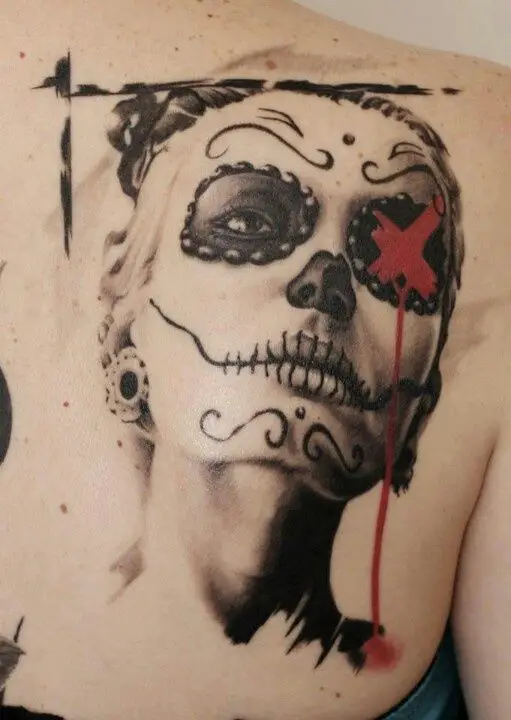
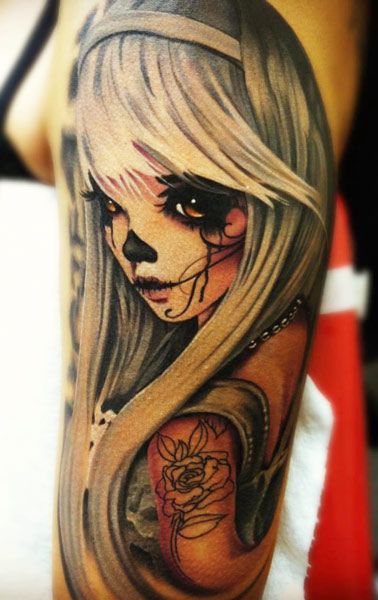
This features the goddess, Lady of the Dead with a skull, a stunning w/ a touch of horror tattoo and a fixed gaze, done in red hues, black and white.

1.  La Calavera Catrina
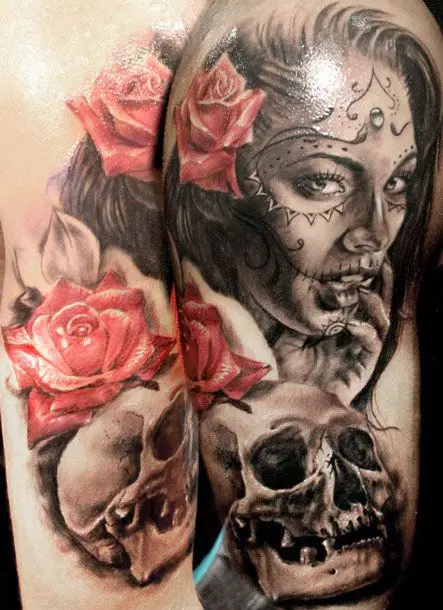
La Calavera Catrina

2. The Dreadful Sight
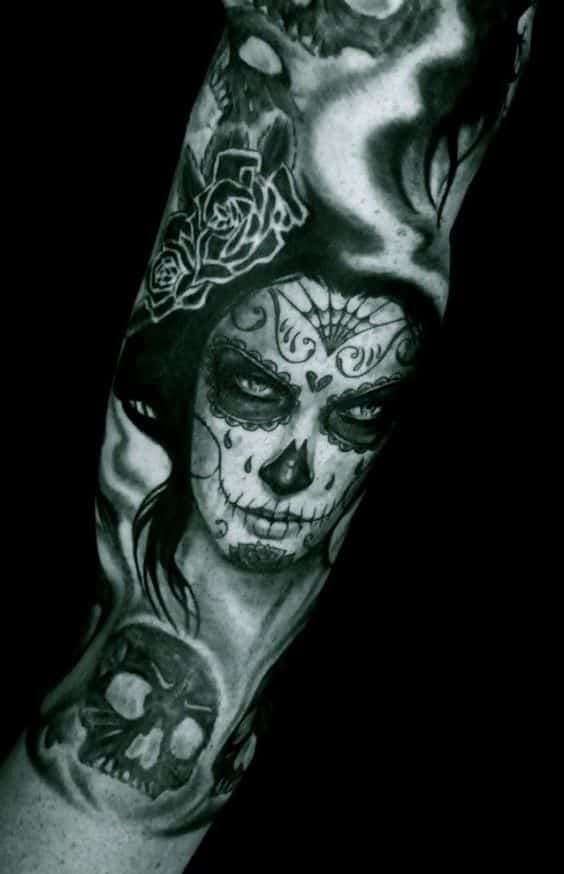
The dreadful sight

3. Sexy Cleavage

Sexy Cleavage

4. La Catrina Mais

La Catrina Mais

5. Catrina with Skull
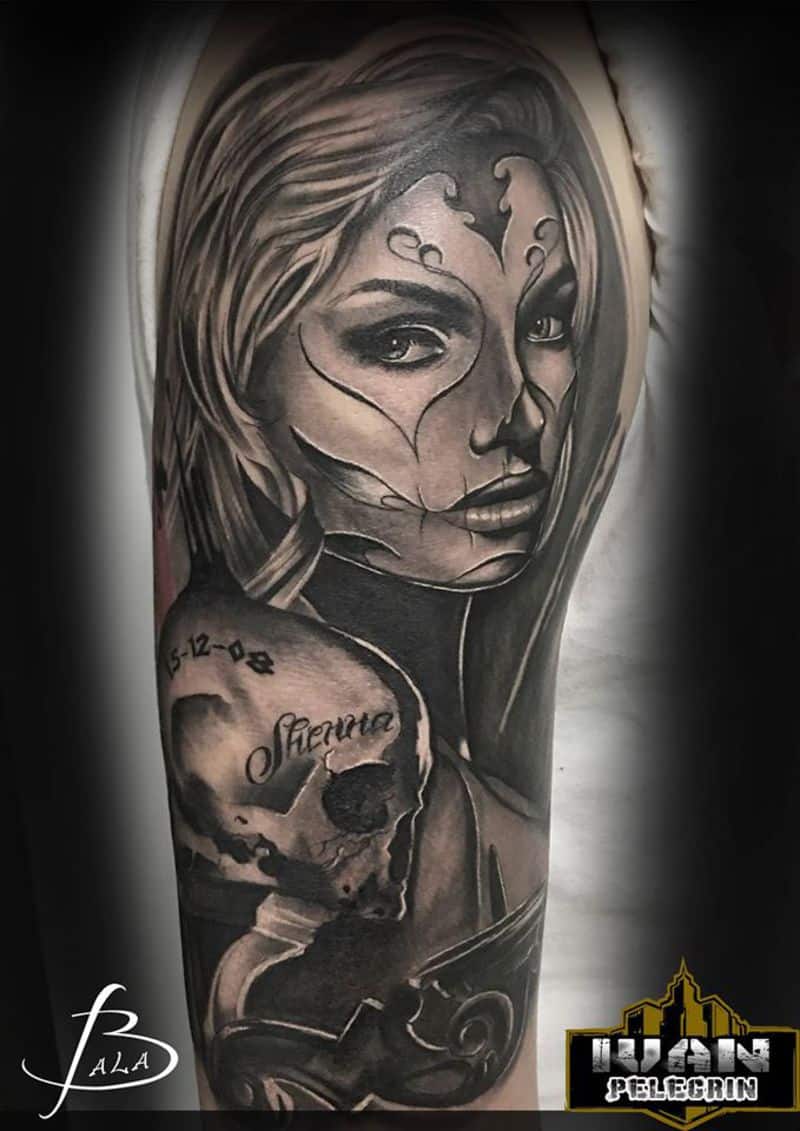
Catrina with skull

6. The Beloved

The beloved

7. Die with Memories not Dreams
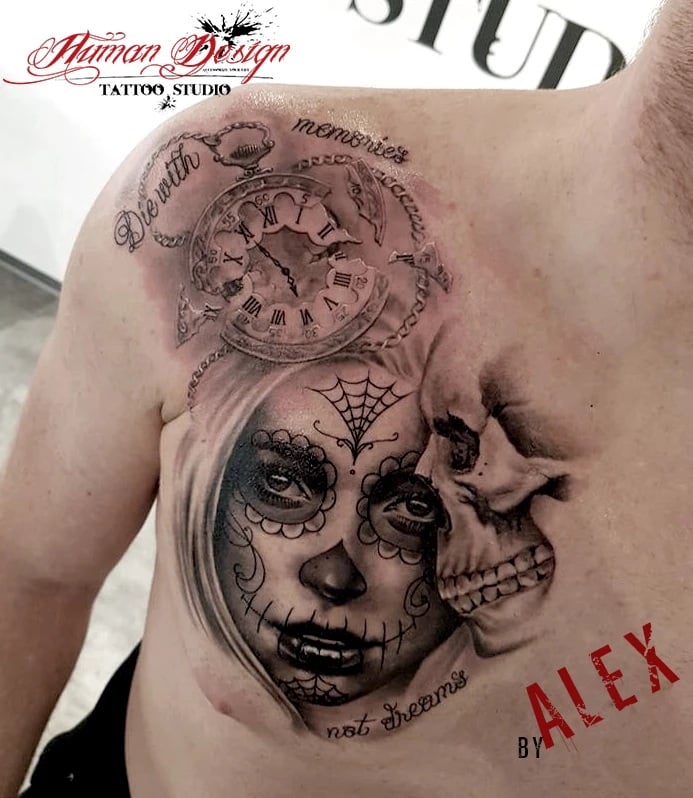
Die with memories not dreams

8. The Eternal Kiss 

The eternal kiss

9. Eternal Love

Eternal love

10. Catrina with Skull Rose

Catrina with skull rose

11. La Catrina Holding Skull

La Catrina holding skull

 Lady and the Sombrero Tattoo

This tattoo features the Lady of the Dead in a playful mood, wearing a traditional Mexican Sombrero hat.

12. La Señora
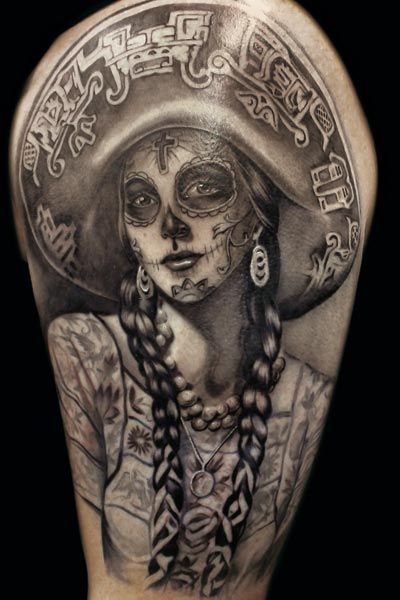
La Señora

In the Presence of the Goddess Tattoo

– This particular tattoo treats death as a positive thing, leading to rebirth.

13. The Rebirth

Bloodcurling day of the dead tattoo

14. Angelina Jolie

Angelina Jolie

15. The Proud

The Proud

16. Trash Polka

Trash Polka

17. Vicious

vicious

18. The Fairy Godmother

fairy godmother

19. The Bride

The bride

20. The Agony

The agony
by Nikko Hurtado based on Artwork by Sylvia

21. Stunning Beauty

Stunning beauty

22. Skeleton Bride

Skeleton Bride

23. Silent Killer

Silent killer day of the dead tattoo

24. Side Day of the Dead Tattoo

Side tattoo
By Karl Stevens

25. Dirty Shmoney

Shmoney

26. Sensuality

Sensuality

27. Seductive Look

Seductive

28. Santa Muerte Tatuagem

day of the dead tattoo

29. Rosalinda

Day of the dead tattoo

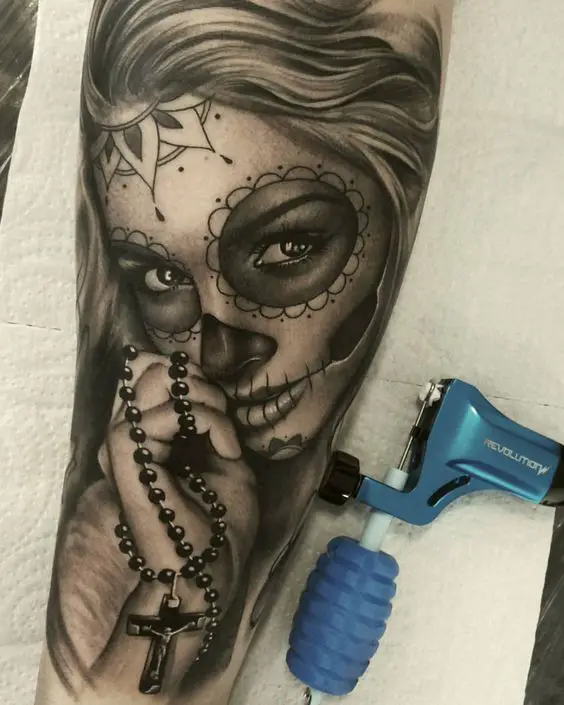
30. Rosario

Rosario

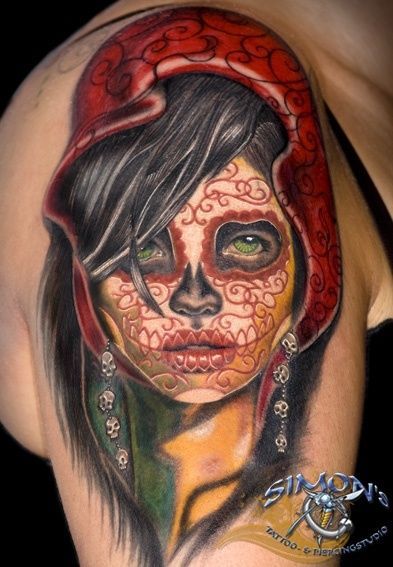
31. Red Riding Hood

Day of the dead tattoo

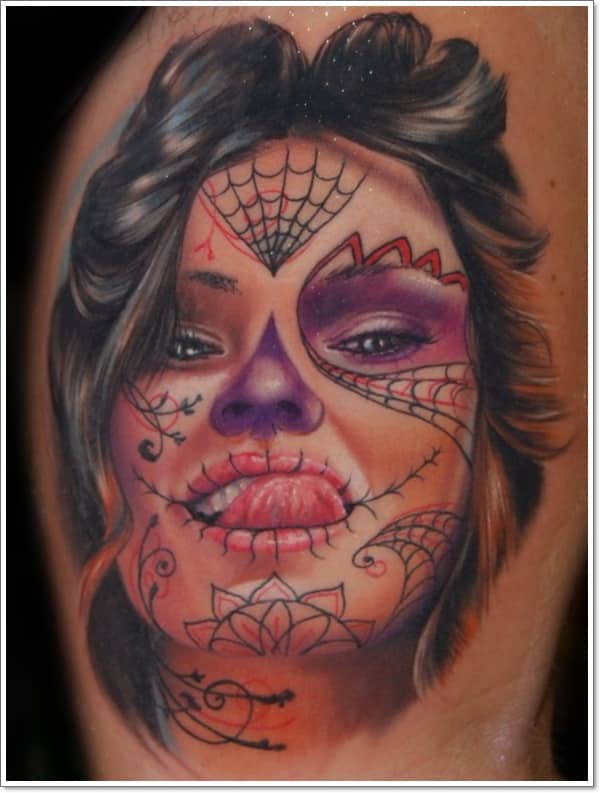
32. Naughty

Naughty

33. Ravishing Look

Ravishing look

34. Provocative

Provocative

35. Muerte Girl

Muerte girl

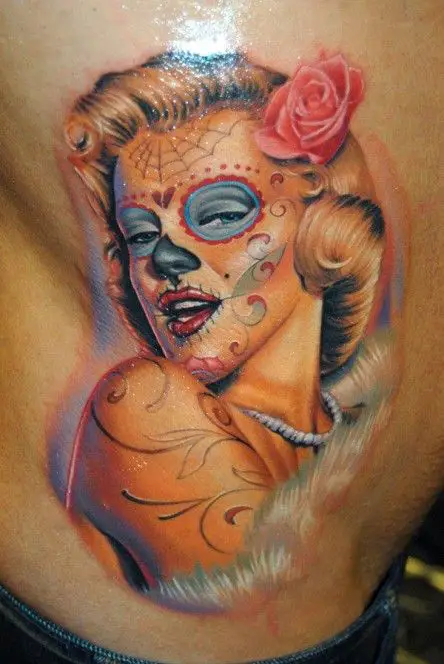
36. Marilyn Monroe

days of the dead tattoo

37. Mandala

Mandala

38. La Catrina

La Catrina

39. Japanese Princess

Japanese Princess day of the dead tattoo

40. Inhibited

Inhibited

41. Timeless Beauty

Timeless beauty

42. Hot Stuff

hot stuff

43.  Horrifying Half Skeleton Catrina

Horrifying half skeleton Catrina

44. Hoping He’d Come

hoping he'd come

45. Mysterious

day of the dead tattoo

46. Half Sleeve Day of the Dead Tattoo

half sleeve

47. Half Dead

half dead

48. Gothic Bride

Gothic Bride

49. Goth

Goth

50. Gloomy

day of the dead tattoo

51. Glamorous

Glamorous

52. Floral Sugar Skulls

https://www.pinterest.com/pin/421016265158700393/

53. Fierce Look

Fierce look

54. Erotic

Erotic

55. Dirty Looks

Dirty looks

56. Dia De Los Muertos

Dia De Los Muertos day of the dead tattoos

57. Determined to Take You Down

Determined

58. Day of the Dead Nun Tattoo

Days of the dead Nun

59. Day of the dead Full Sleeve Tattoo
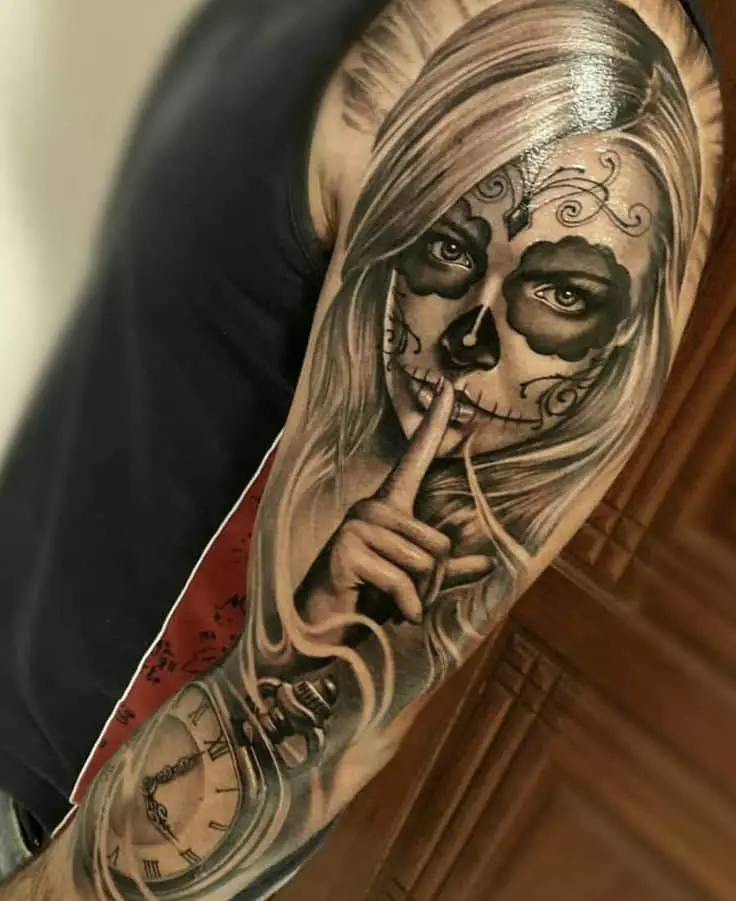
Day of the dead full sleeve tattoo

60. Green Eyed Girl

Green Eyed Girl Day of the Dead Tattoo

61. Gangsta Santa Muerte Girl

Gangsta Santa muerte girl day of the dead tattoo

62. Chill and Fiery

Cool and fiery

63. Chinese Princess

Chinese Princess

64. Chicano Chicana Estilo Los Muertos
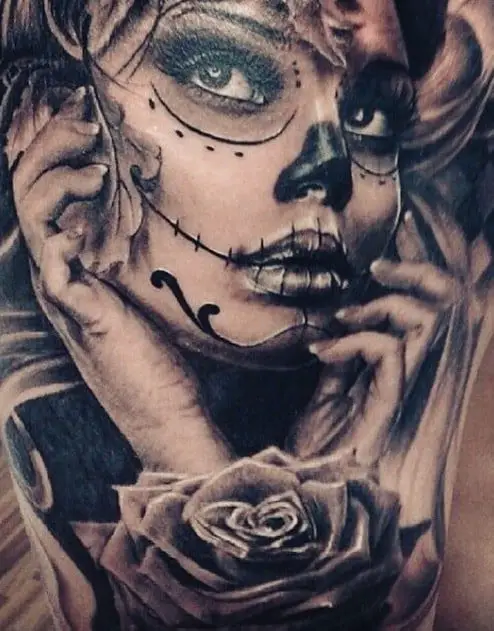
Chicano Chicana Estilo Los Muertos days of the dead tattoo

65. Bloody Nurse

BLoody Nurse

66. Bloody

Bloody

67. Bewitching

Bewitching

68. Beauty in the eyes of the beholder
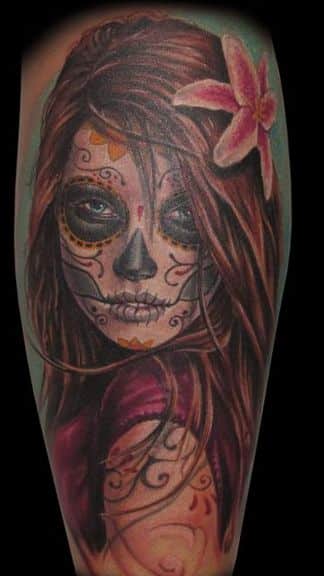
Beauty is in the eyes of the beholder days of the dead tattoo

69. Beauty

Beauty days of the dead tattoo

70. Can’t Hide From Me

Can't hide from me day of the dead tattoo

71. Back and Side Day of the Dead Tattoo

Back and Side days of the dead Tattoo

72. Armoured Face

Armoured Face day of the dead tattoo

73. Anime Day of the Dead Tattoo

https://www.pinterest.com/pin/424816177321295531/

74. Adriana Lima

Adriana Lima

 Day of the Dead Lovers Tattoo

This tattoo is done on lovers as a token of their love and commitment towards each other. Each of the lovers gets a skeleton featured on their forearms which would seem to lock into an embrace when the couple stands close together.

75. Catrina

Catrina days of the dead tattoo

 The Day of the Dead Mariachi Tattoo

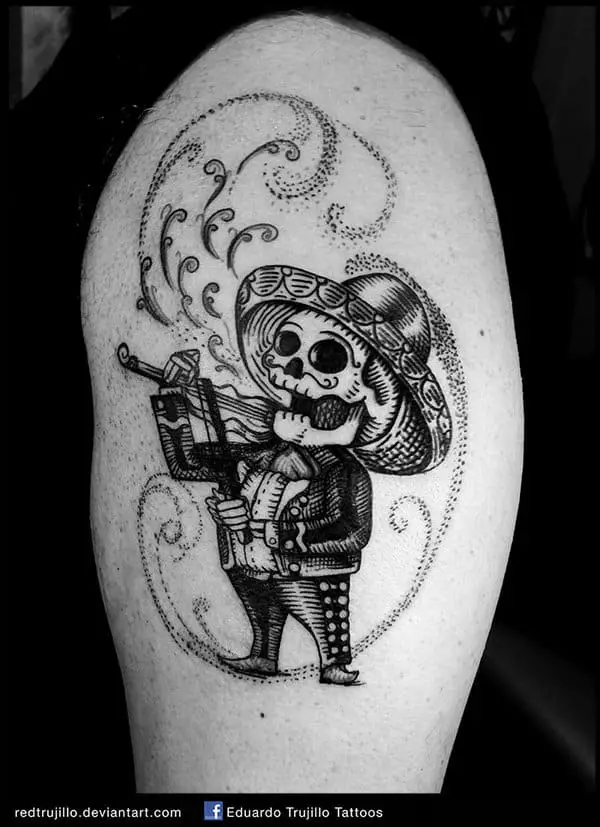
This features the skeleton of a dead mariachi playing his guitar, symbolizing that existence and joy does not end with death.

76. Mariachi

Mariachi day of the dead tattoo

77. Music Never Dies

Music Never dies day of the dead tattoo

78. Mariachi Skull

Mariachi Skull

79. Mariachi in the Desert

Mariachi in the Desert

80. Super Fun Mariachi
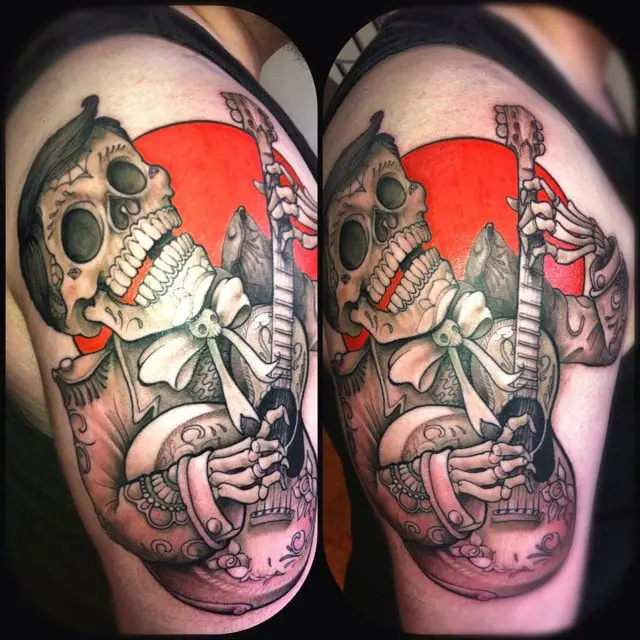
Super Fun Mariachi day of the dead tattoo
Photo credit: Pinimg.com

81. Dead Mariachi
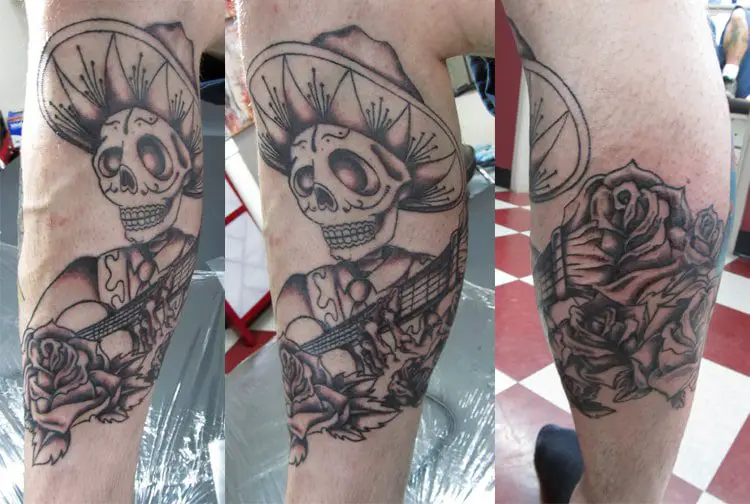
Dead Mariachi

82. Romantico

Romantico
Photo credit: Pinimg.com

83. Psyched

Psyched
Photo credit: Jeremylifseytattoo.com

84. Plurabella Skull Skeleton Day

Plurabella Skull Skeleton 172 Day of the dead tattoo
Photo credit: Pinimg.com

85. Romantic Mariachi
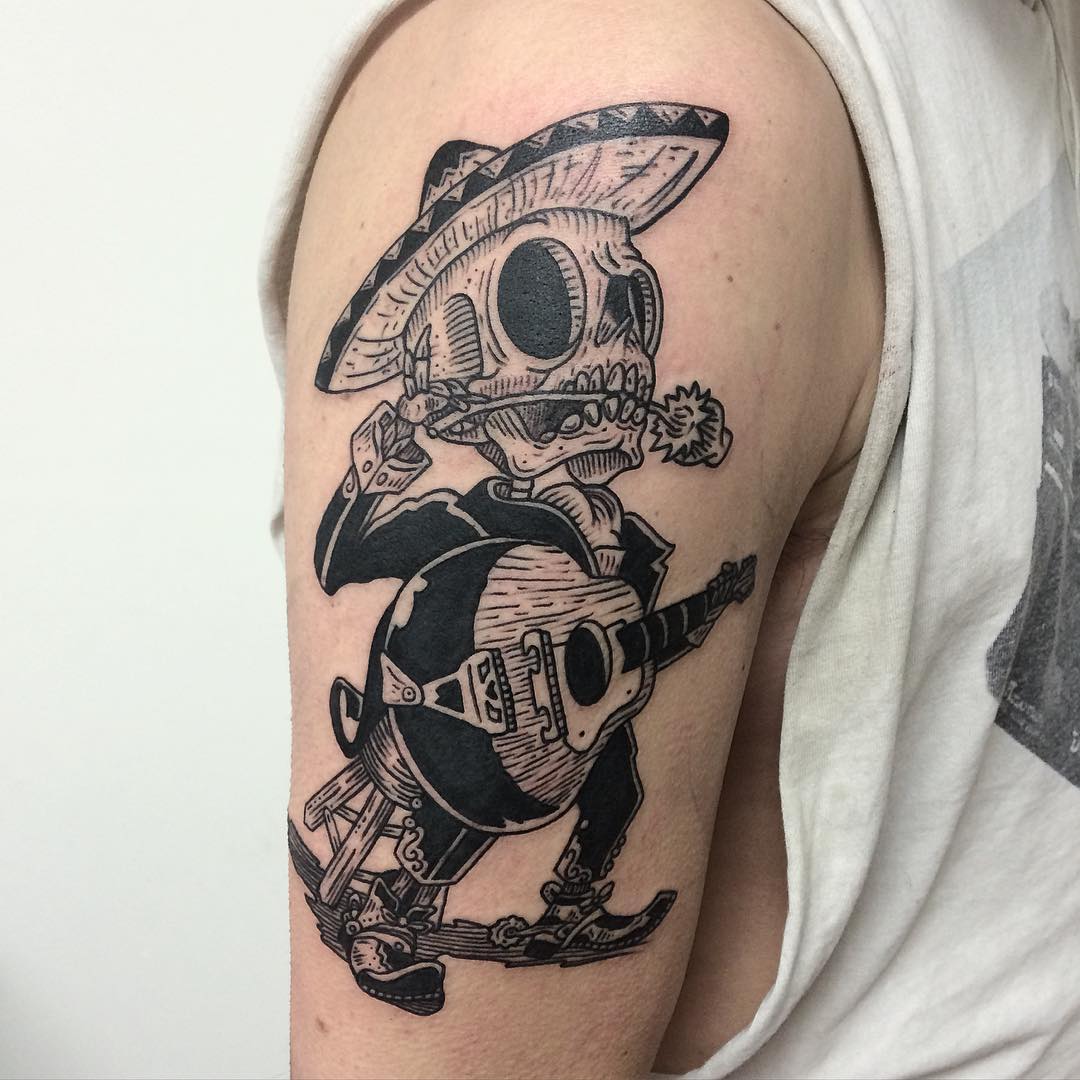
Romantic Mariachi Day of the dead tattoo
Photo credit: Redd.it

86. Guitar and Roses

Guitar and Roses Day of the dead tattoo
Photo credit: Staticflickr.com

87. A Song For You

A song for you day of the dead tattoo
Photo credit: Pinimg.com

87. Mariachi Thigh Tattoo
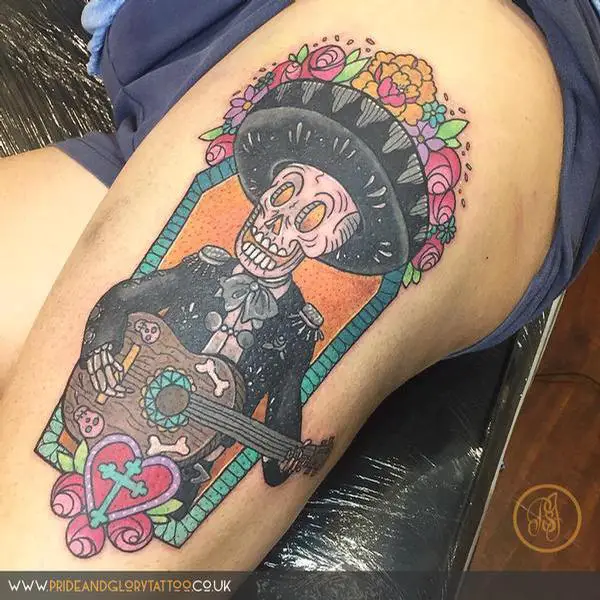
Mariachi thigh day of the dead tattoo
Photo credit: Co.uk

88. Melodic Mariachi

Melodic Mariachi day of the dead tattoo
Photo credit: Loudmeyell.com

89. Mariachi with Sombrero
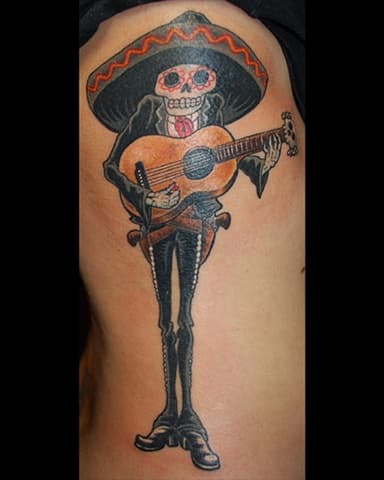
Mariachi with Sumbrero day of the dead tattoo
Photo credit: Otherpeoplespixels.com

Painted Skull of the Dead

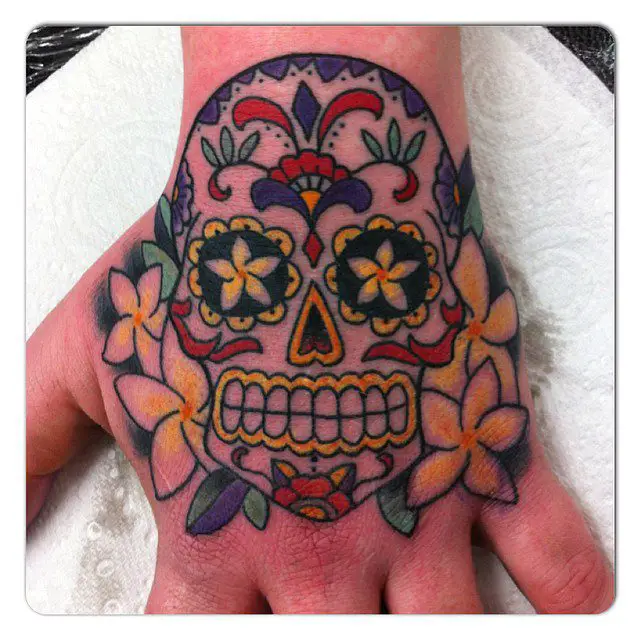
This particular tattoo presents a happy picture of death, depicting a wide array of vibrant colors.

90. Badass Sugar Skull
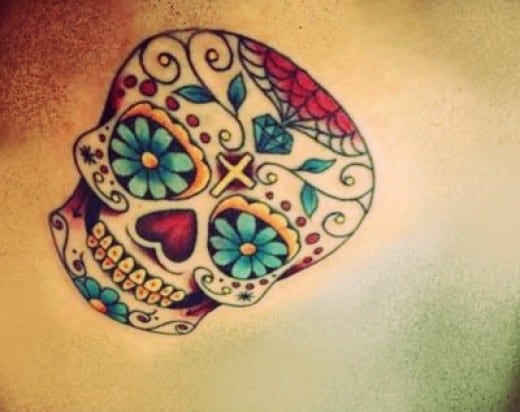
Badass Sugar Skull day of the dead tattoo
Photo credit: Hubstatic.com

91. Sugar Skull and Roses
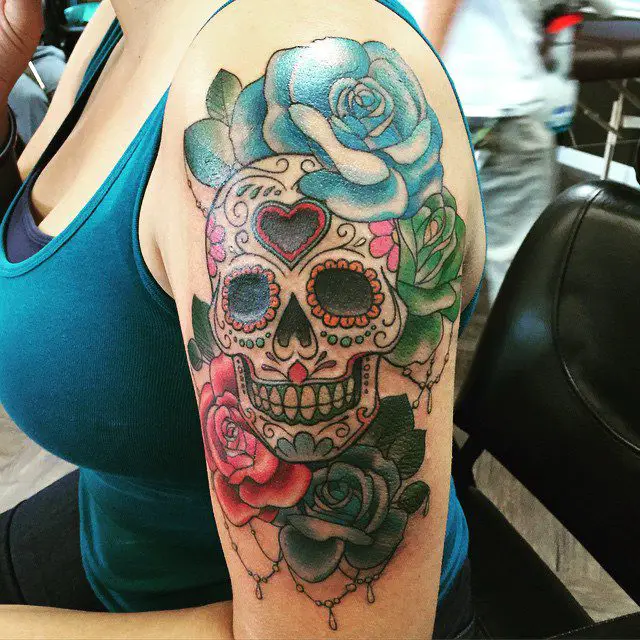
Sugar Skull and Roses
Photo credit: Tattoo-journal.com

92. Calavera
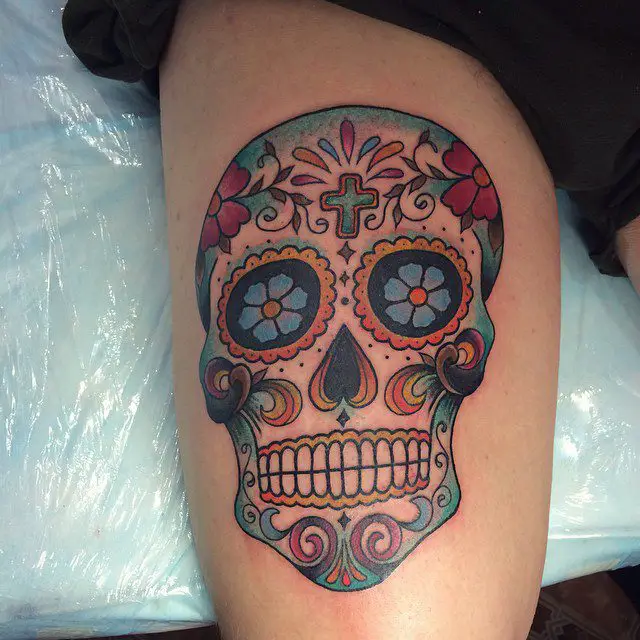
Calavera day of the dead tattoo
Photo credit: Tattoo-journal.com

93. Calavera Girl Version

Calavera girl version day of the dead tattoo
Photo credit: Blogspot.com

94. Skull Heads
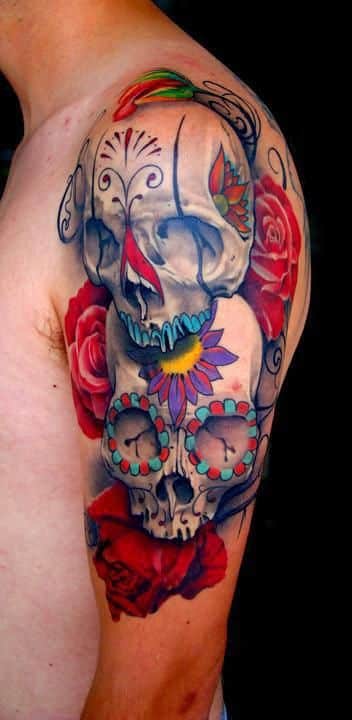
Skull Heads days of the dead tattoo

95. Sugar Skull Hand Tattoo

Sugar Skull Hand days of the dead tattoo
by alisonsidgwick via Instagram

96. De Los Muertos Skull

De Los Muertos Skull
Photo credit: Buzzfed.com

Whether you sport a Day of the Dead Tattoo for symbolic or aesthetic reasons, it would be nice to understand its meaning, symbolism and the traditions connected with it. In many ways, this practice’s deep significance can be summarized as a celebration of life and triumph over death.
41 KickAss Army Tattoos to Show Your Pride

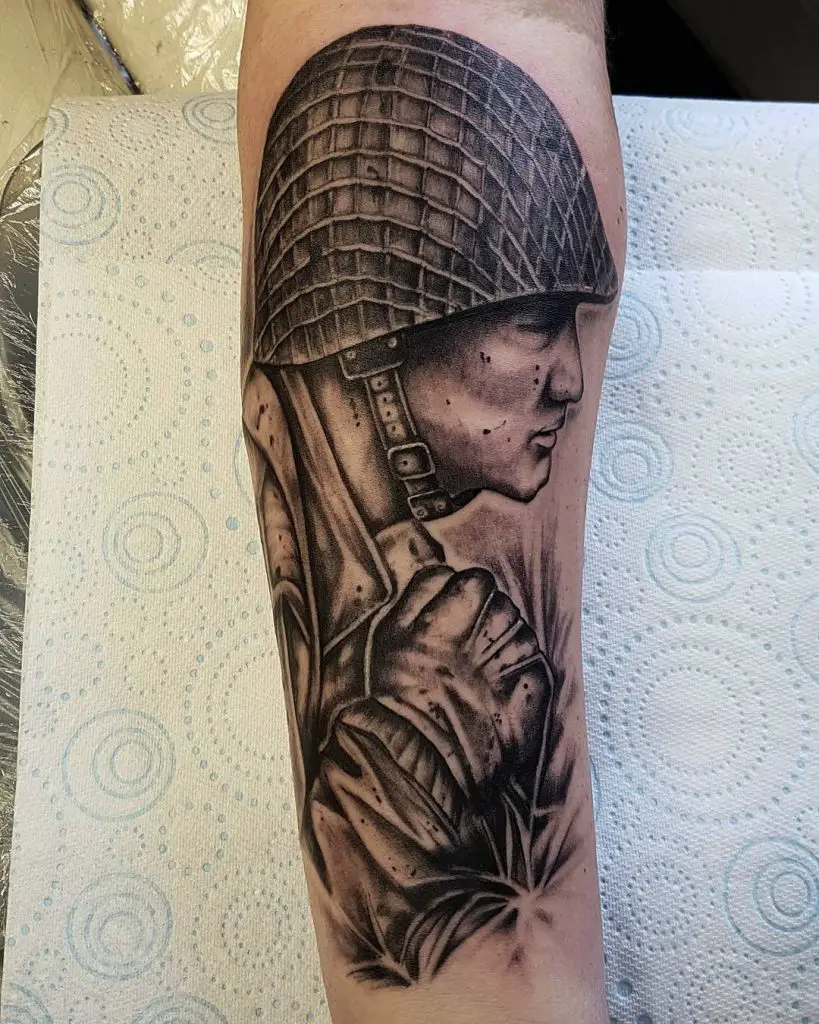
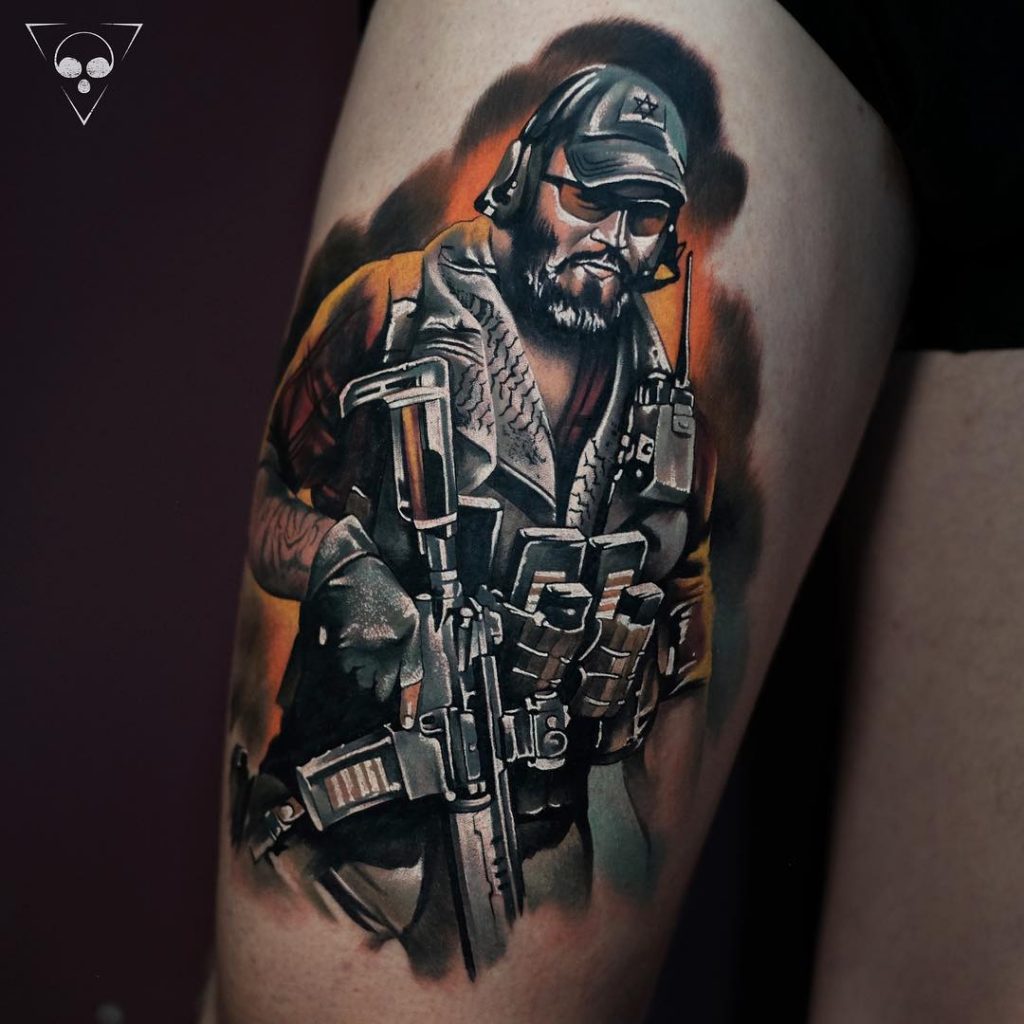
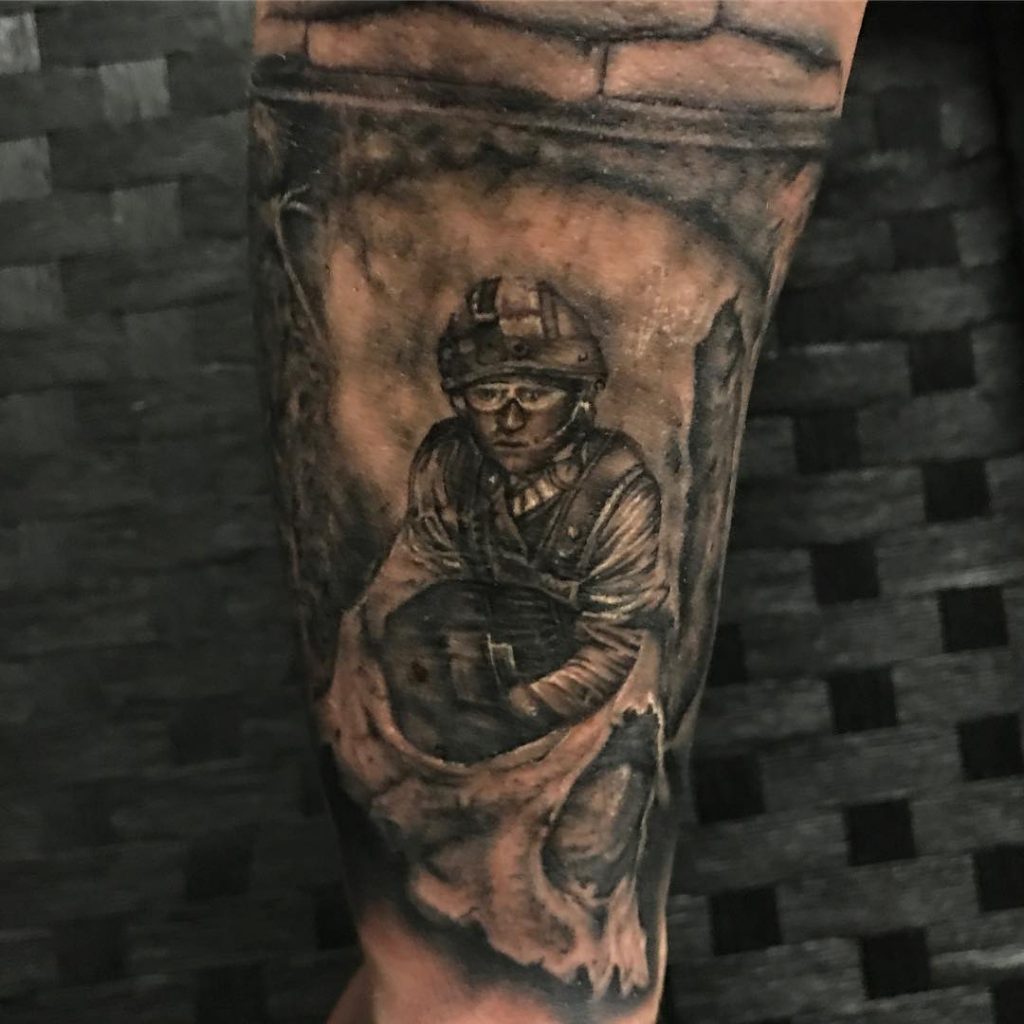
One of the reasons you are here trying to check out our kick ass army tattoo is either you work for the military or you have a family member or friends or acquaintance who works for the military or maybe you are aspiring to be one. To successfully join the army is a thing to be proud of. The requirements and tests you have to pass is nothing compared to the benefits of serving for something greater than your own.

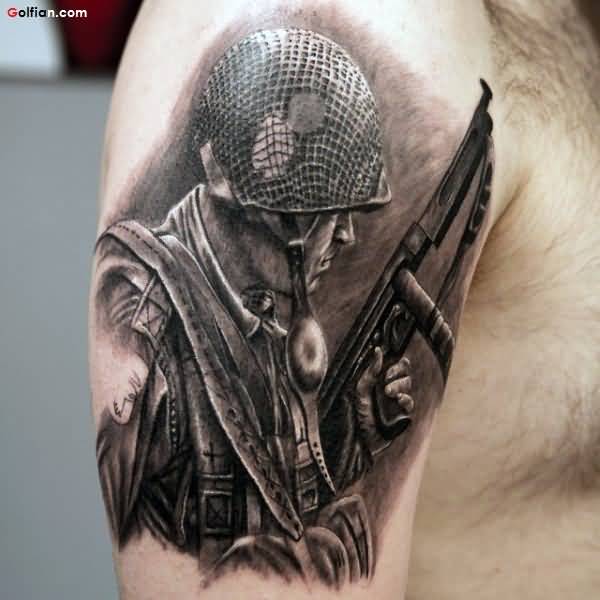
One way to show your pride as an Army is to get inked with these kickass army tattoo design and show the world who you really are. Especially when you get inked on your bulky biceps and triceps, will definitely catch not just women’s eyes but also hearts!

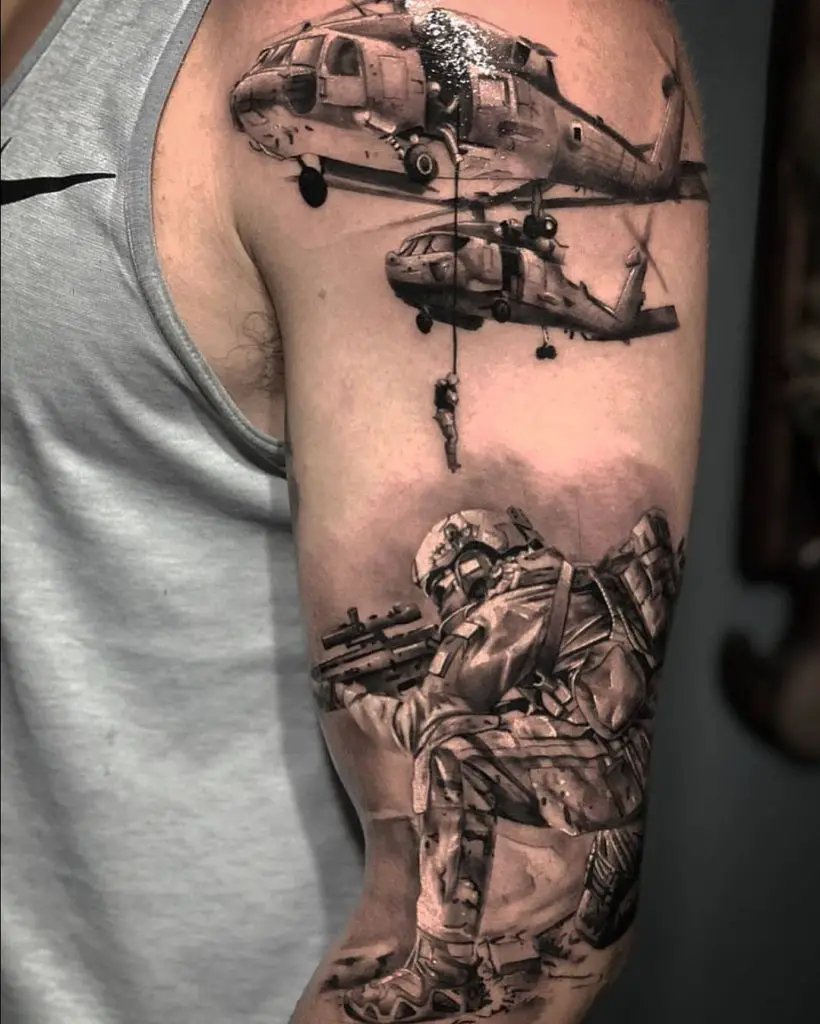
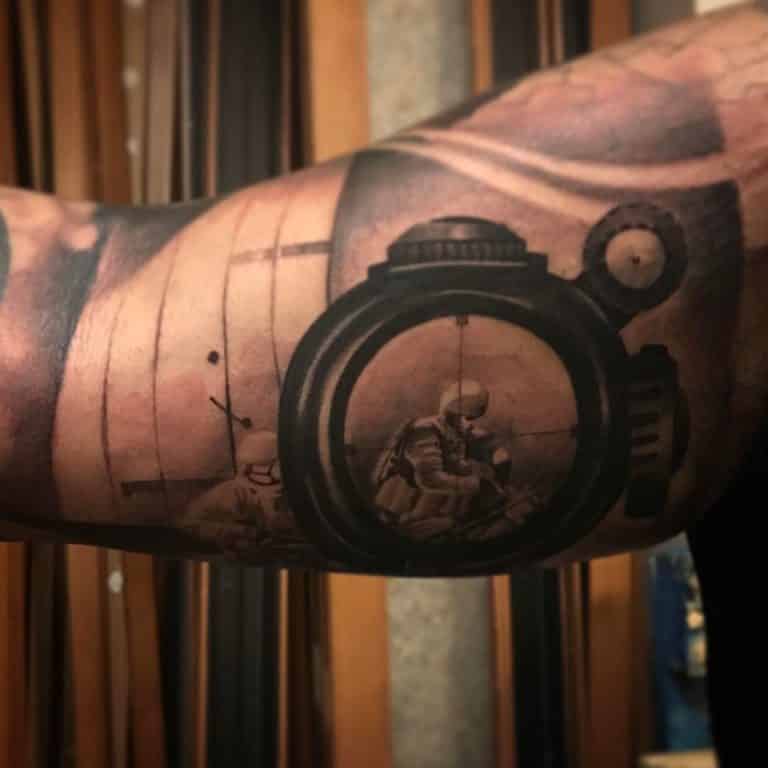
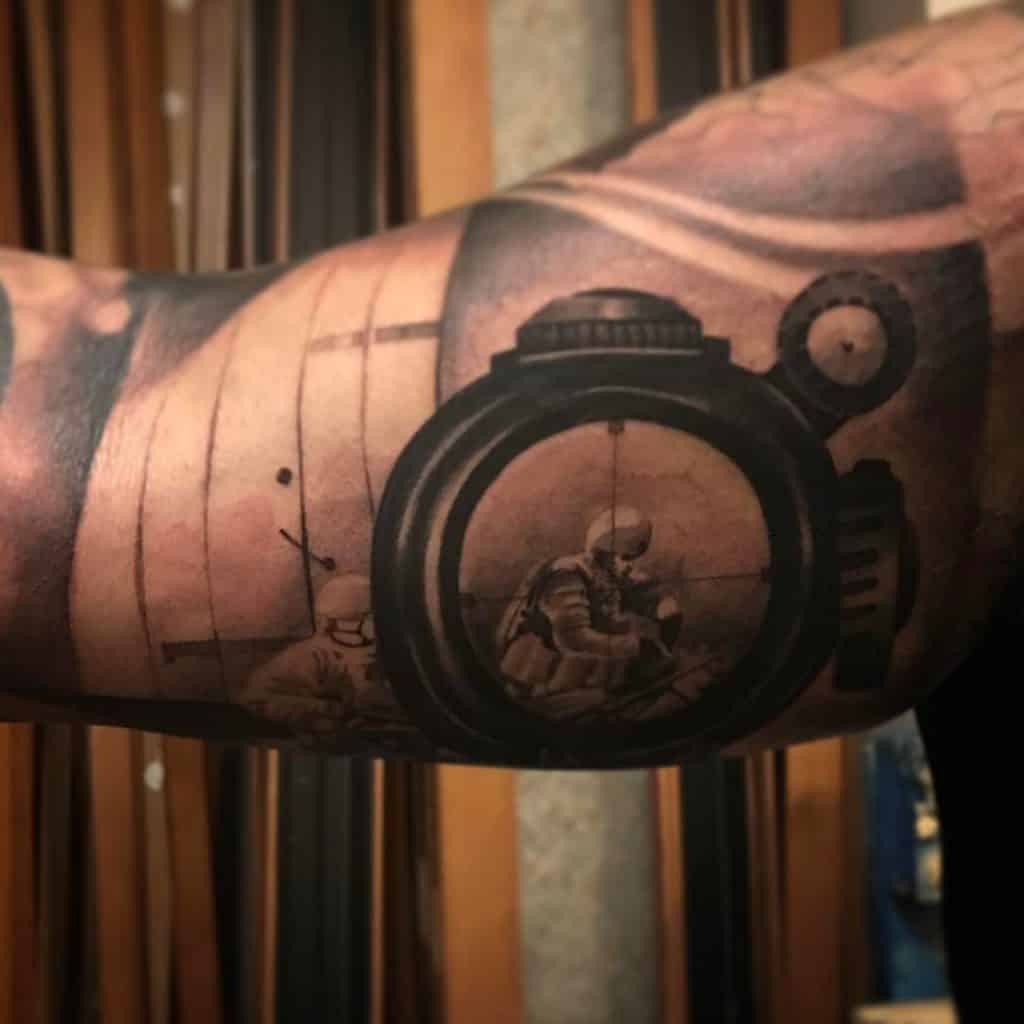
1.  Sniper Sleeve Tattoo
Sniper
by k12tattoos via Instagram


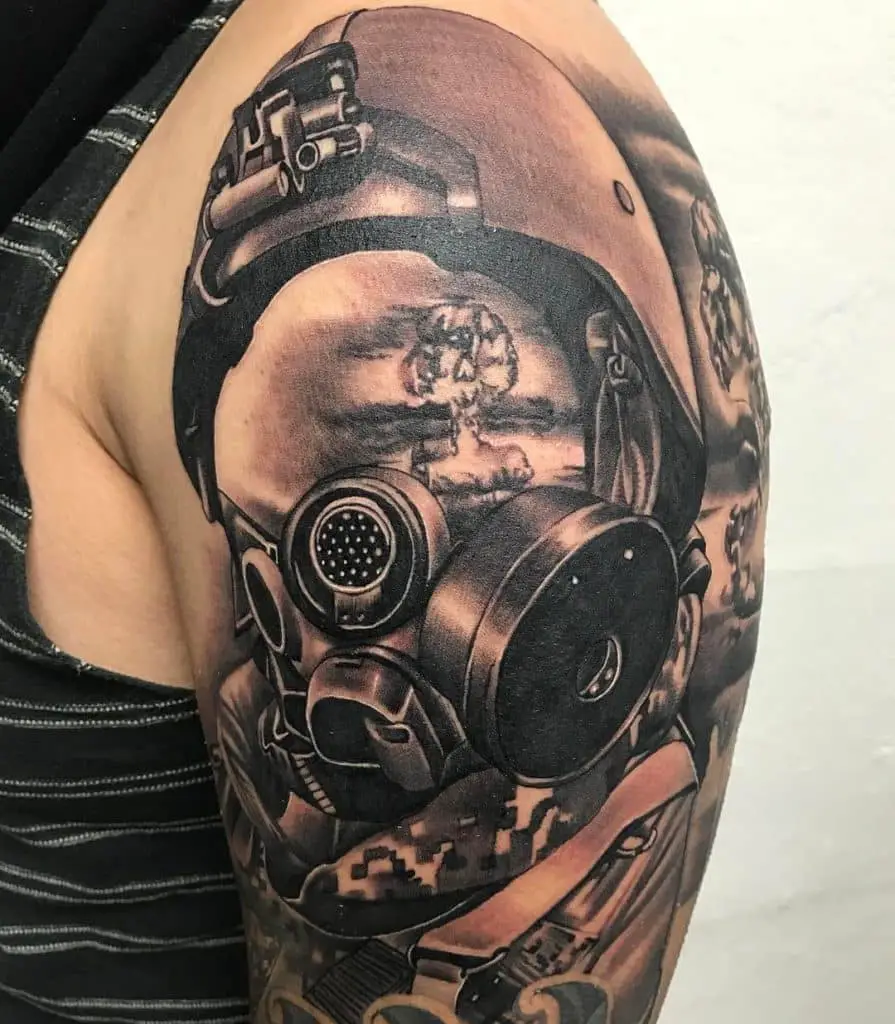
2.  Soldier’s Nuclear Mind Sleeve Tattoo
Soldier's Nuclear Mind
by rebelkolors via Instagram


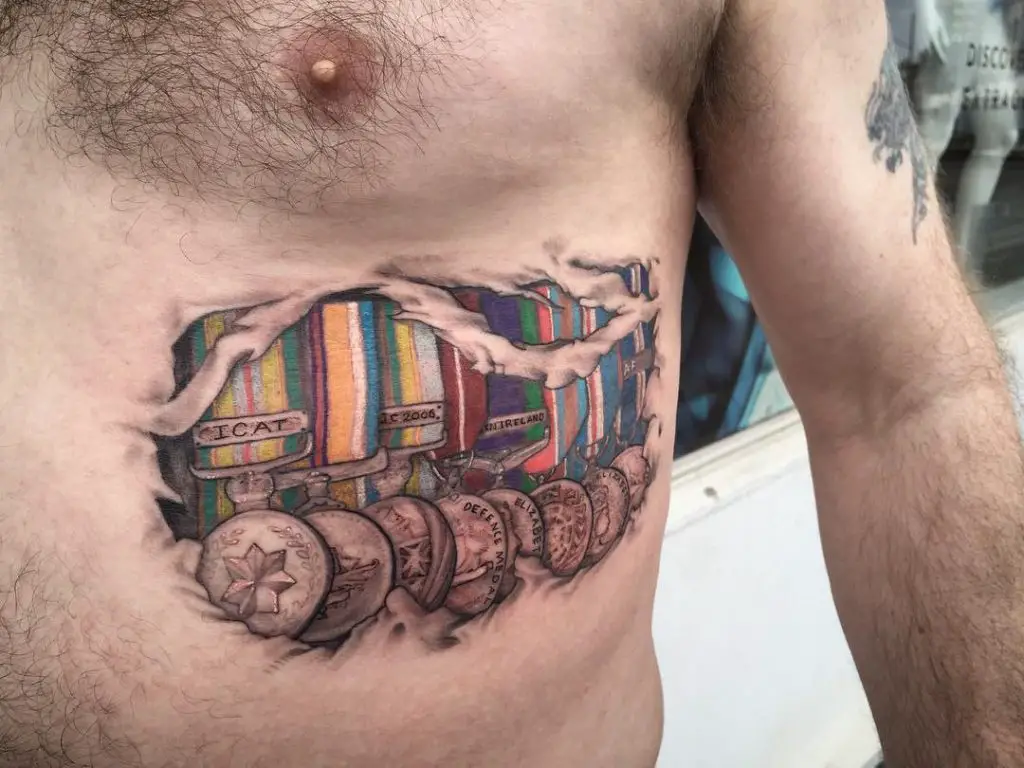
3. Army Service Medals Rib Tattoo

Army service medals
by johnbtattoos via Instagram


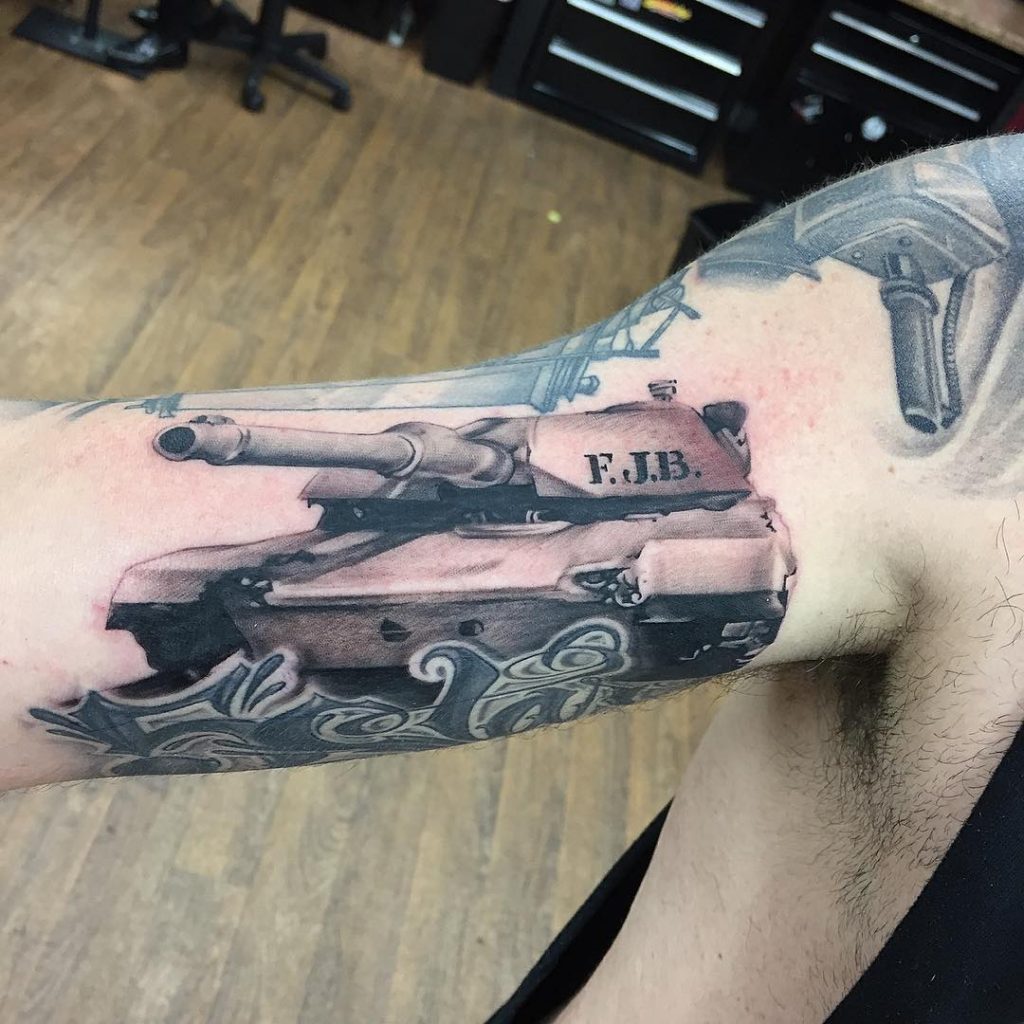
4. Army Tankers
Army Tanks
by fatboy_tattoos via Instagram


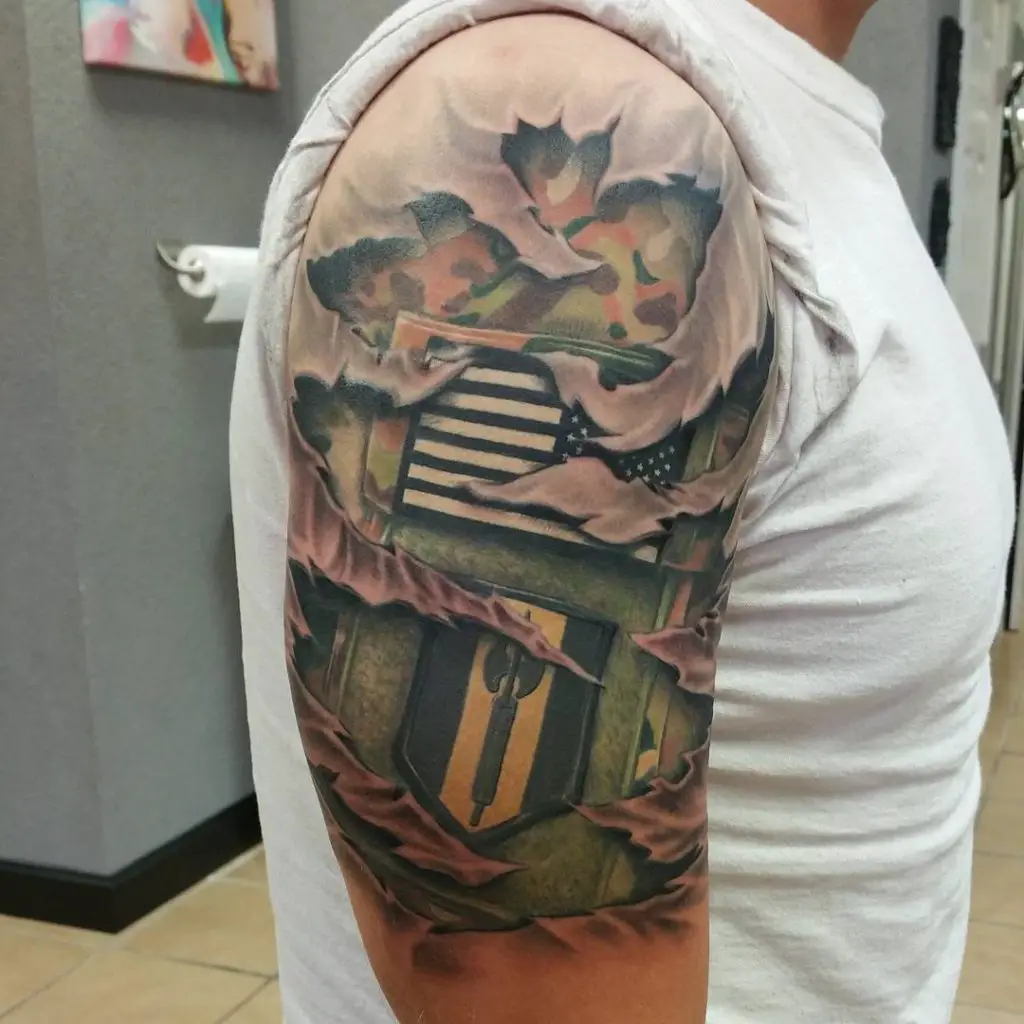
5. Scratched Army Uniform Skin
by tattooseanohara via Instagram


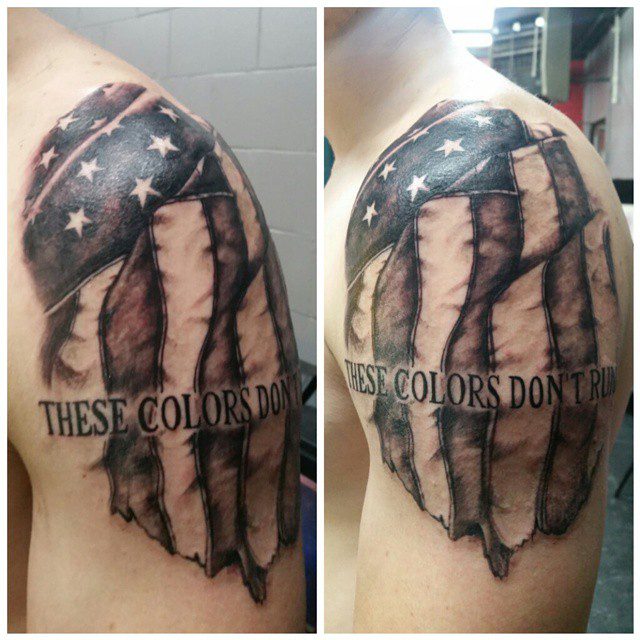
6. American Flag Tattoo ( These Colors Don’t Run )

by brittney_vnvink via Instagram


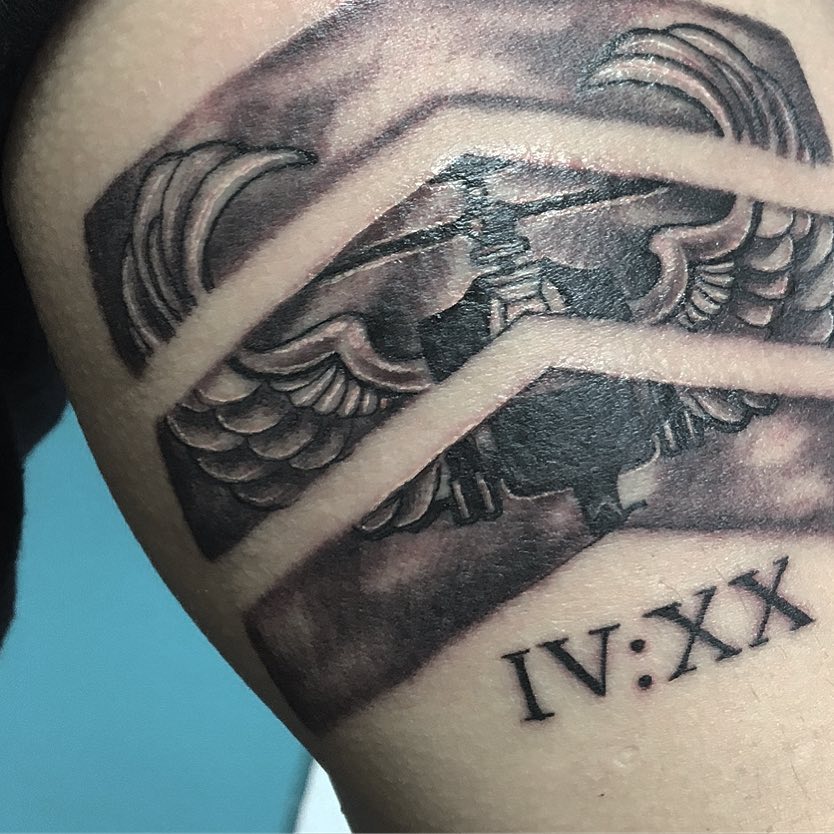
7. Chevron Stripes
by kill_lustrator via Instagram


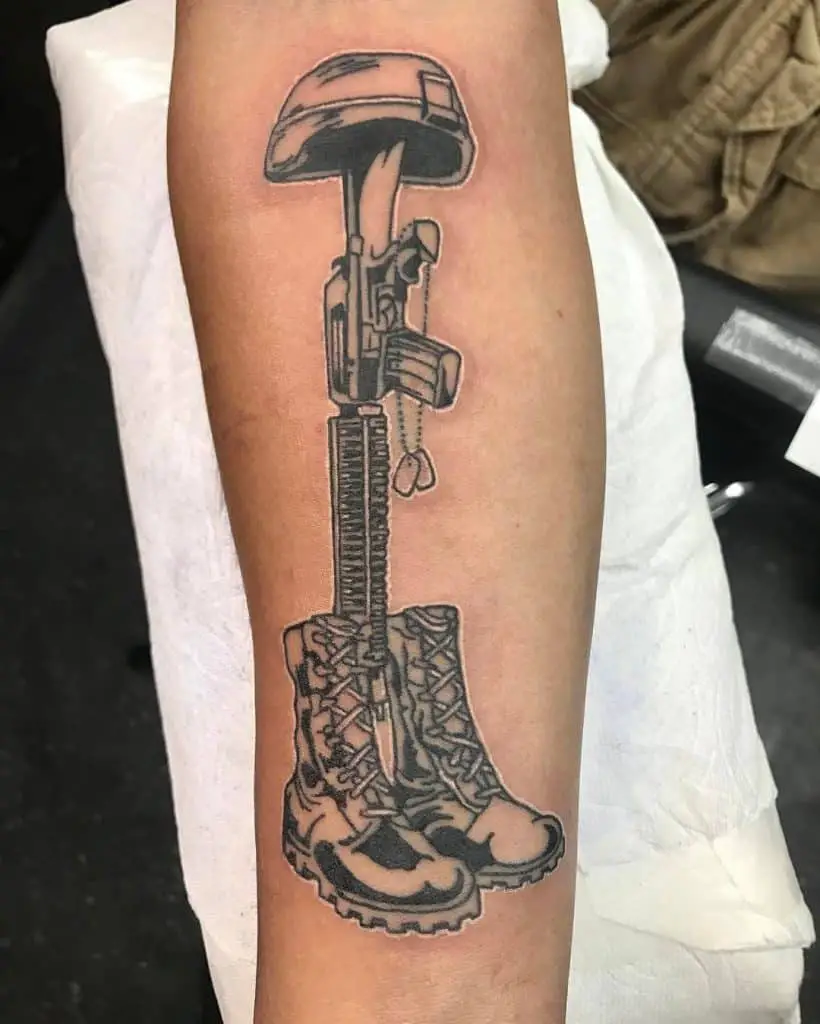
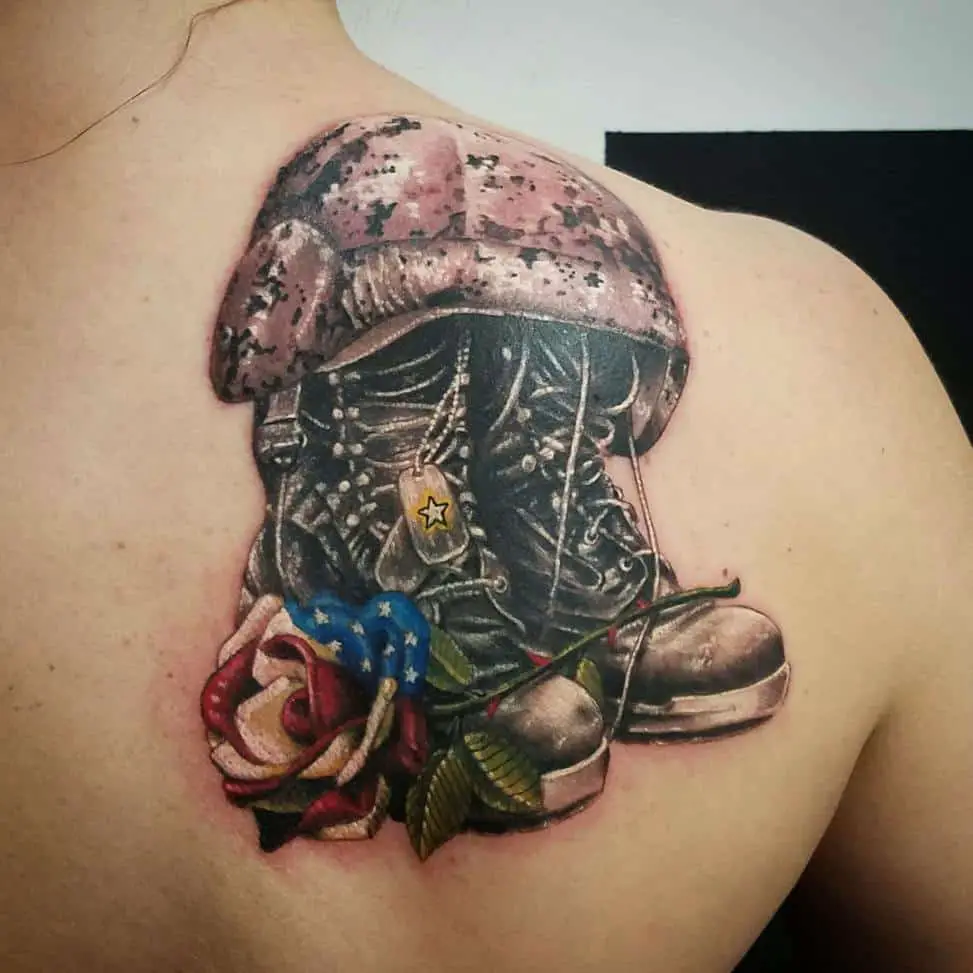
8. Army’s Gun, Helmet, and Boots Tattoo
by emotattoos via Instagram


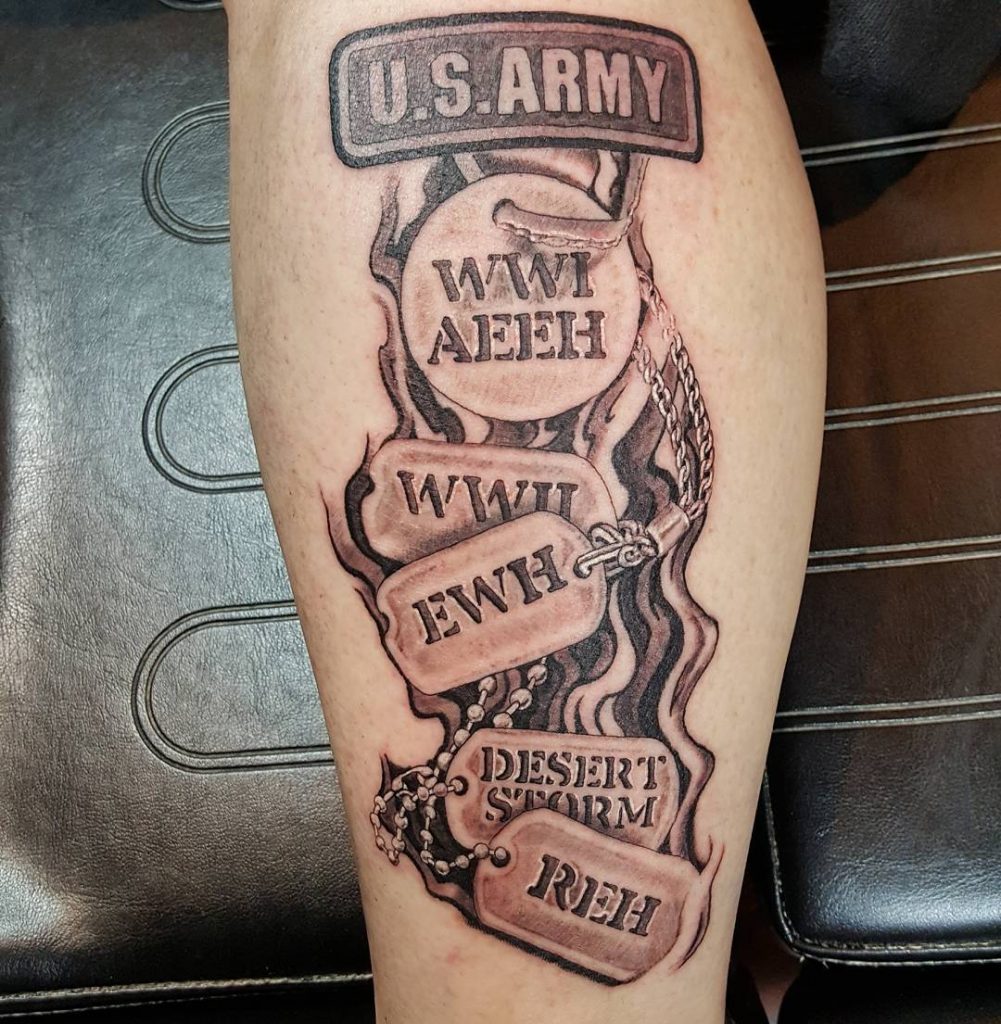
9. Memorial Dog Tag Tattoo
Memorial Dog Tag
by paultattoos via Instagram


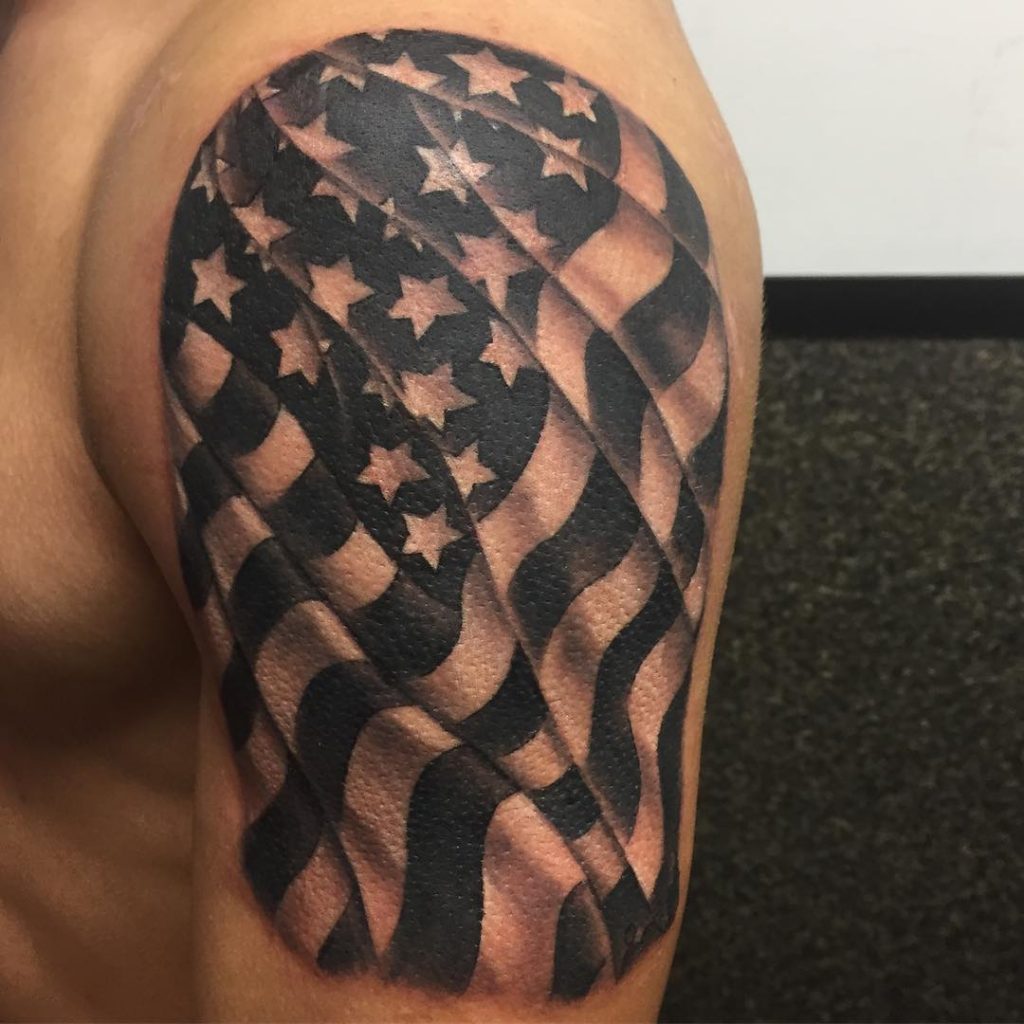
10. Freestyle Flag
by jasonbullingtonbctw via Instagram


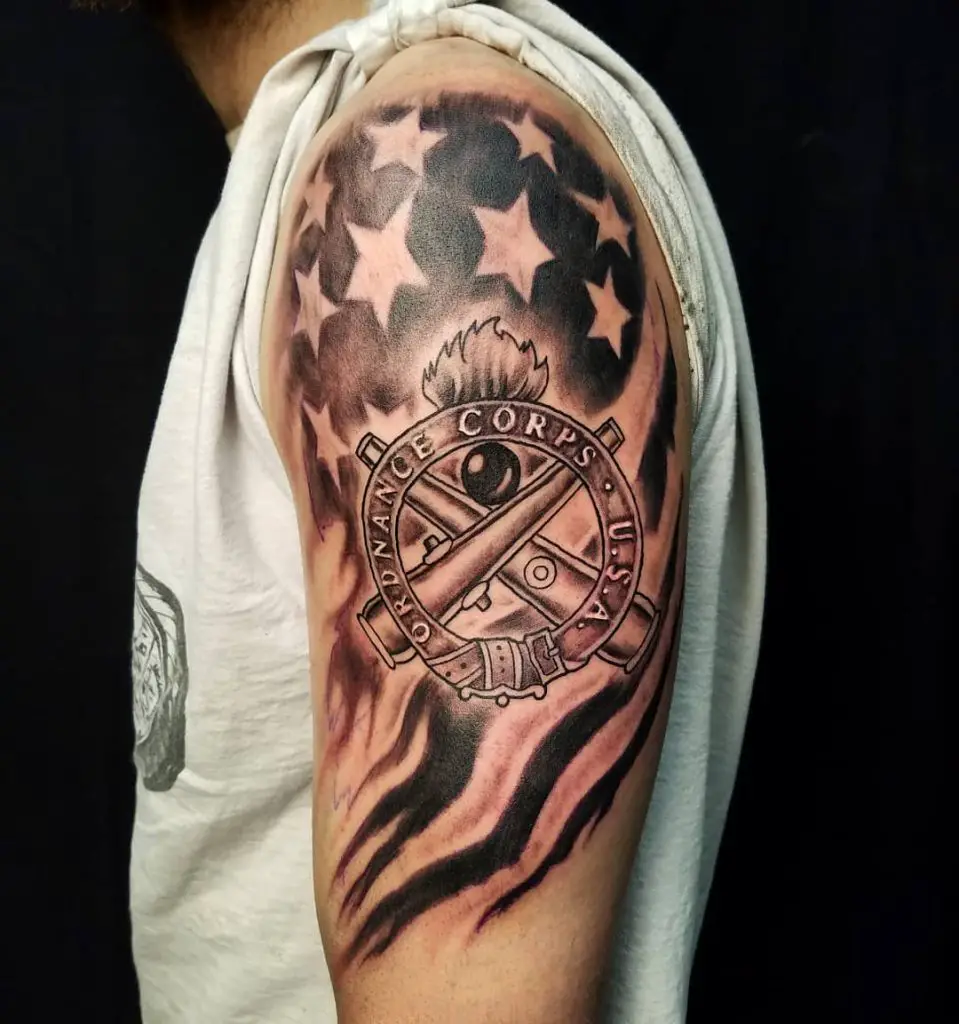
11.  Ordnance Corps
Ordinance Corps
by erike_lunatics via Instagram


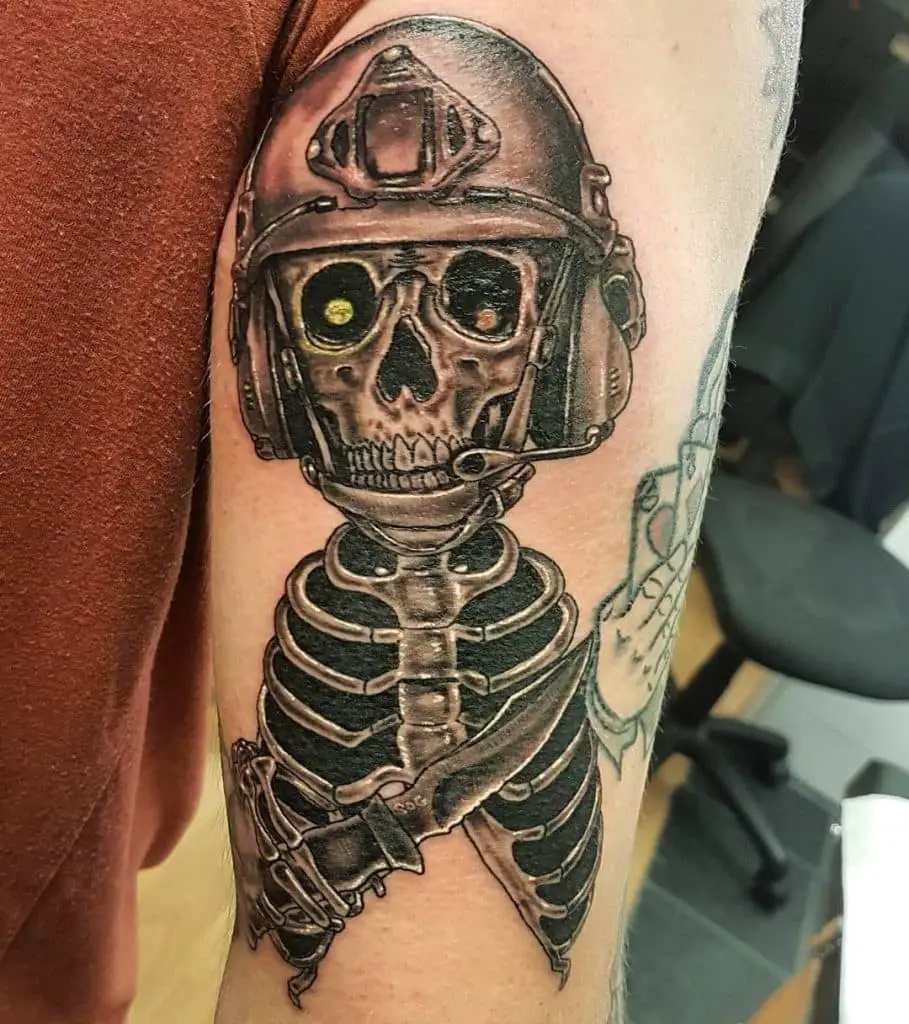
12.  Army Skull
Army Skull
by body_mods_by_dave via Instagram


13.  Military Half Sleeve Tattoo
Military half sleeve
by world_tattoos_magazine via Instagram


14. Combat Memorial Tattoo
Combat Memorial
by iron__cobra via Instagram


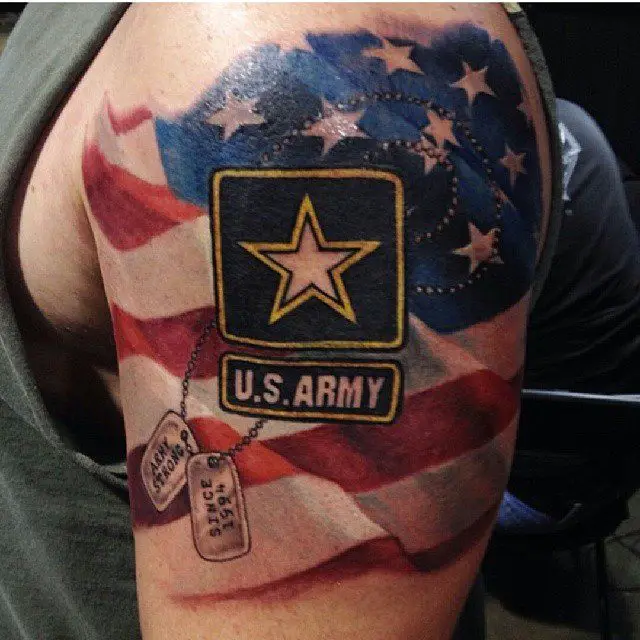
15. American Flag and Dog Tag Army Tattoo
by inkhousetattoosbx via Instagram


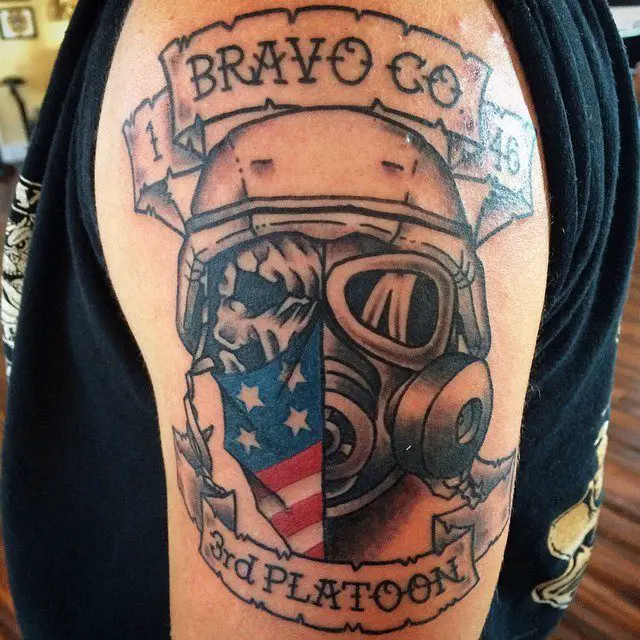
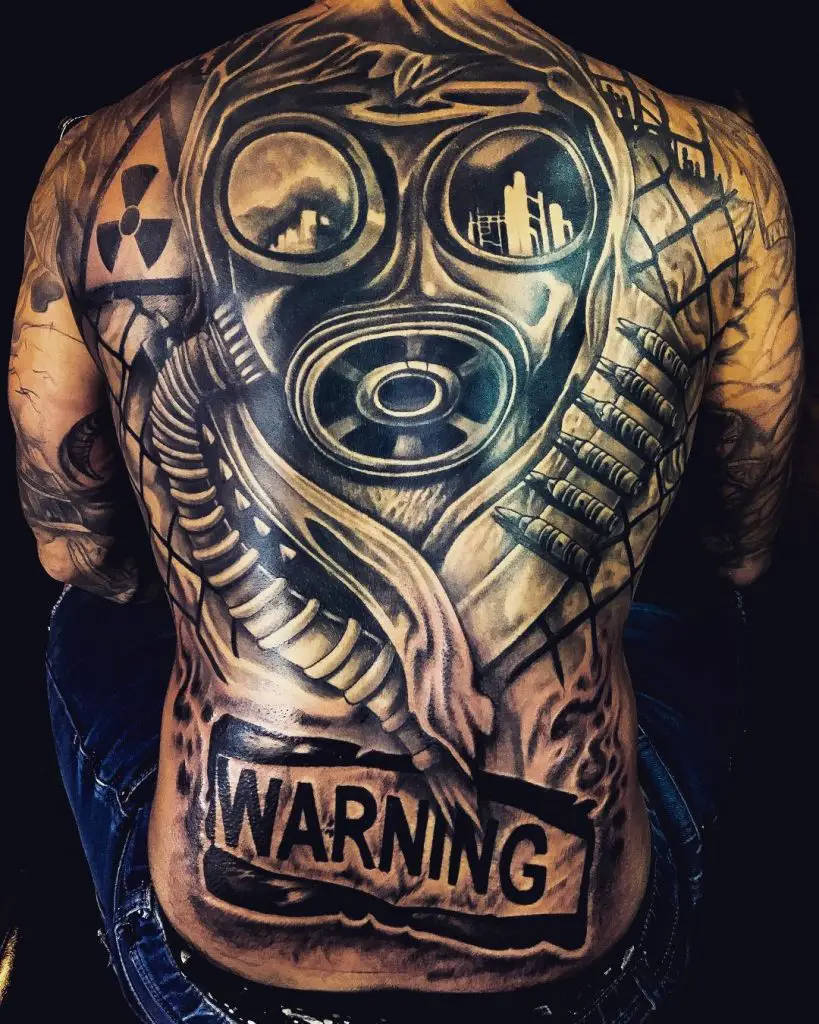
16. Gasmask Tattoo
by lotustattooparlor via Instagram


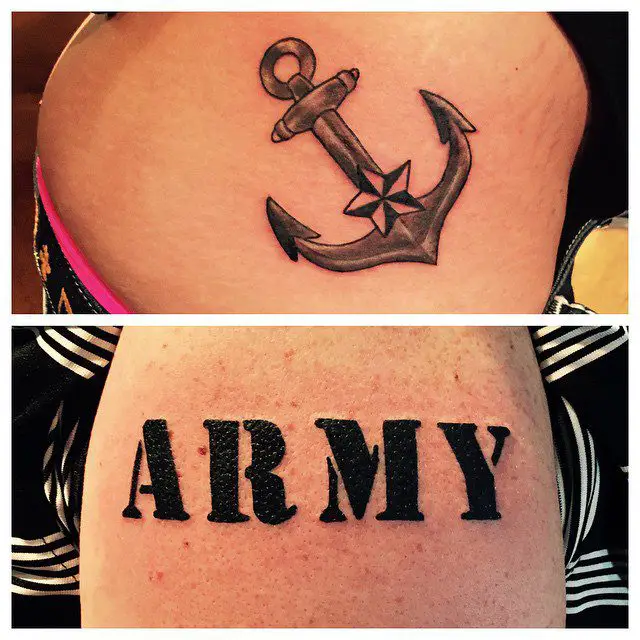
17. ARMY Tattoo
by sadisticink via Instagram


18. Rock Army Tattoo
by albertshiu via Instagram


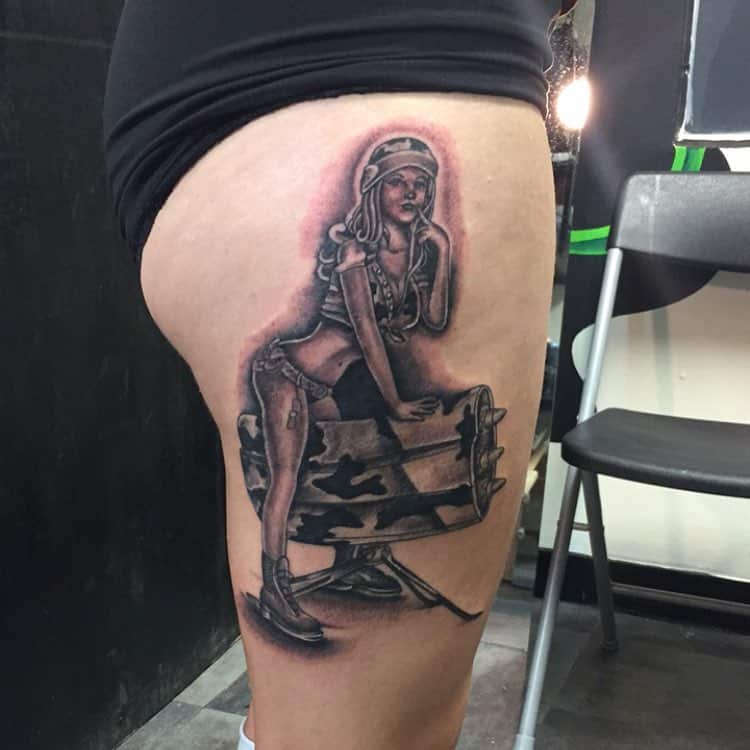
19. Sexy Army Girl
by jlynntattoos317 via Instagram


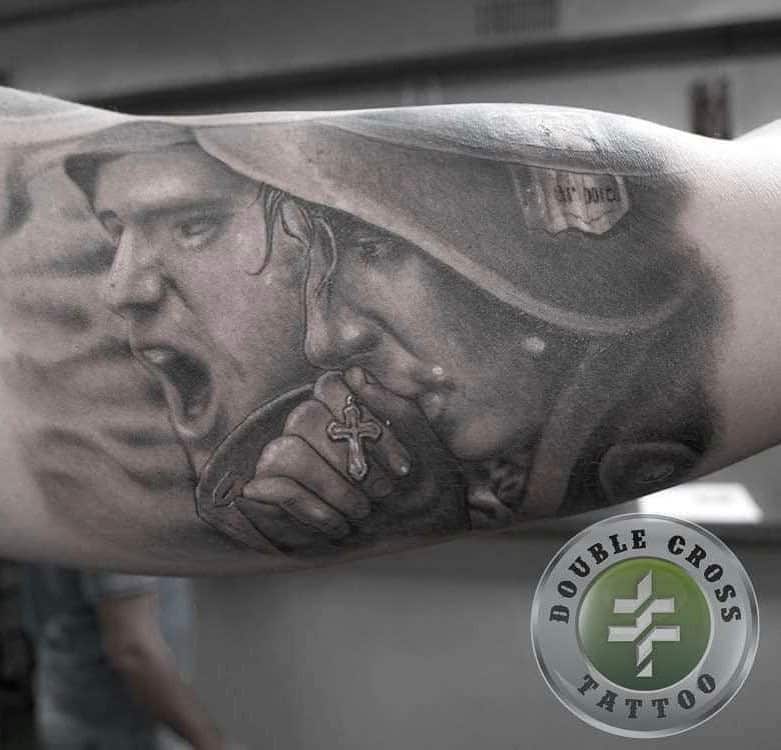
20. Army Praying to Rosary Tattoo
by peter_photelo via Instagram


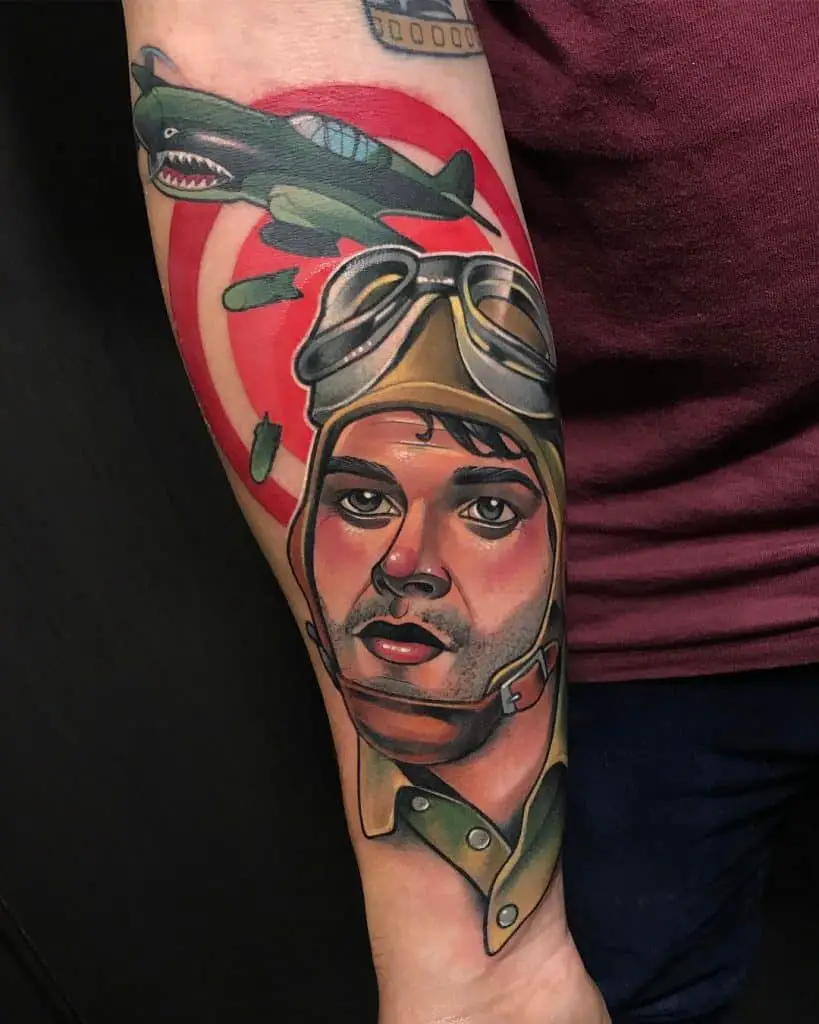
21. Air Bombs Tattoo
by deboracherrys via Instagram


22. Gas Masked Tattoo
by xplicittattoo via Instagram


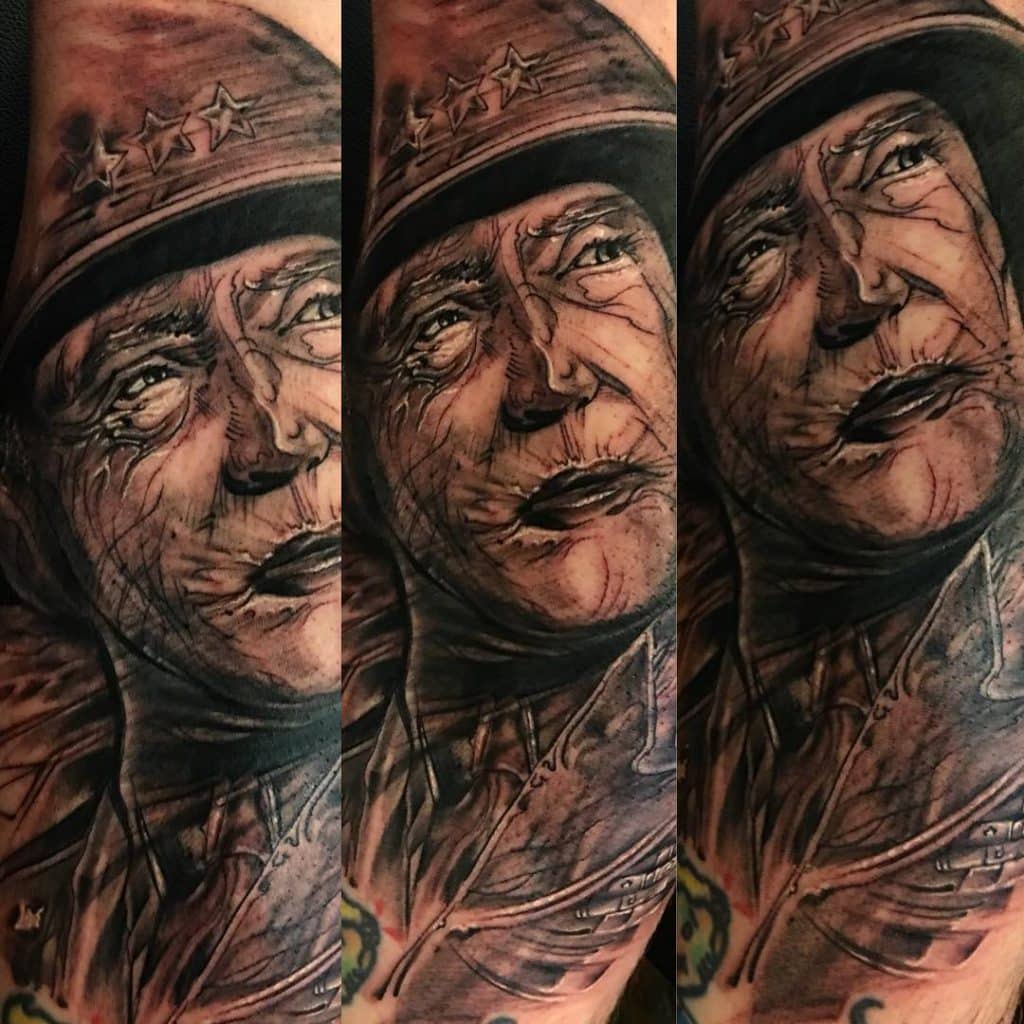
23. General George S. Patton Tattoo
General George S. Patton
by brianbrenner via Instagram


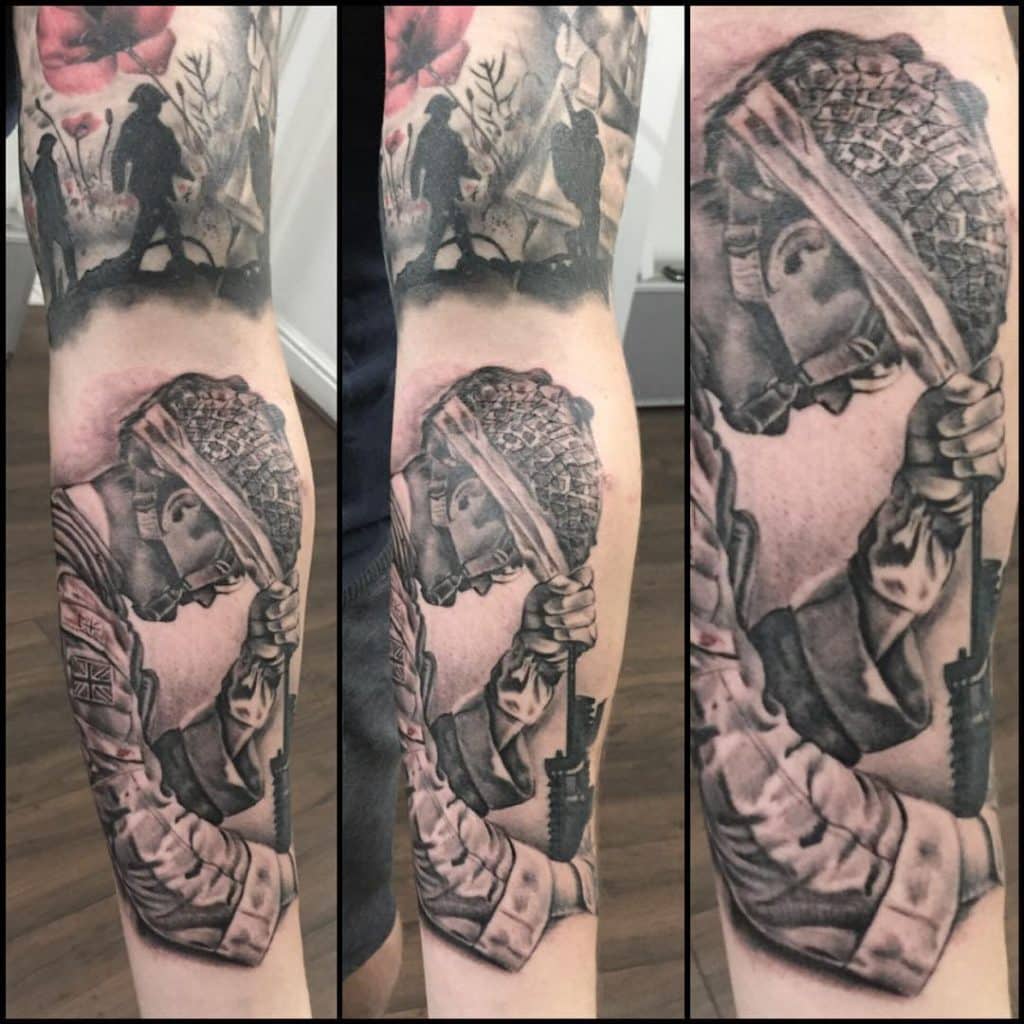
24. British Army Tattoo
by joanneleslietattoo via Instagram


25. British Military Tattoo
British Millitary
by joanneleslietattoo via Instagram


26. Chinese Army Tattoo
chinese army
by naomilistertattoos via Instagram


27. Badass Army
by michael_litovkin_tattoo via Instagram


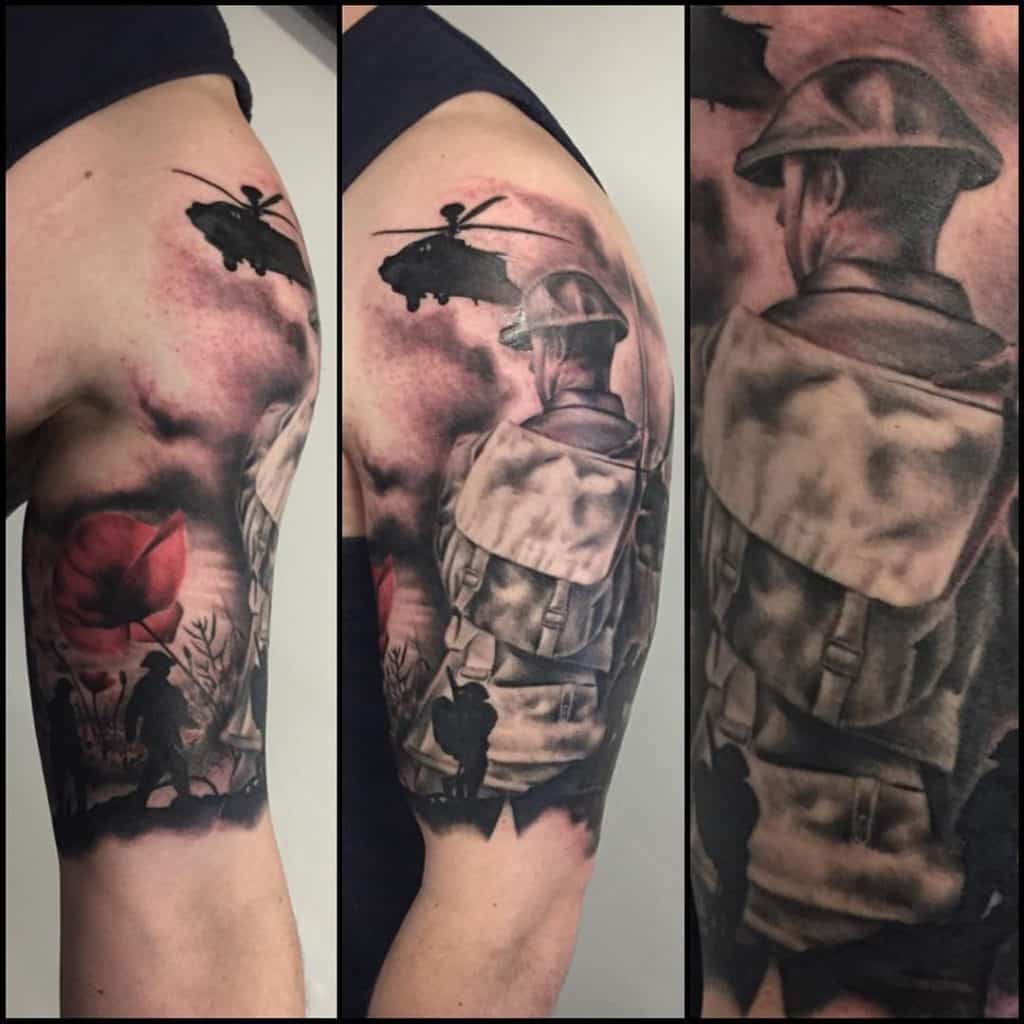
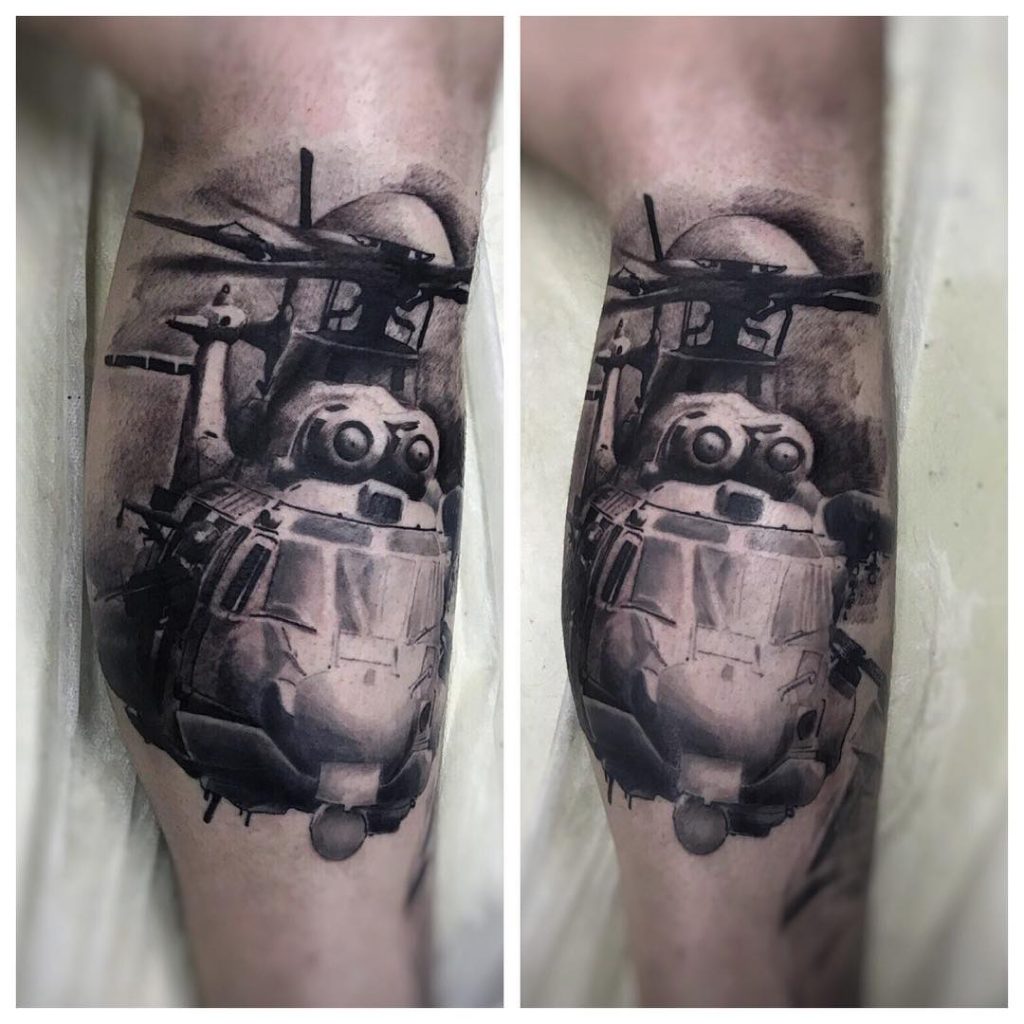
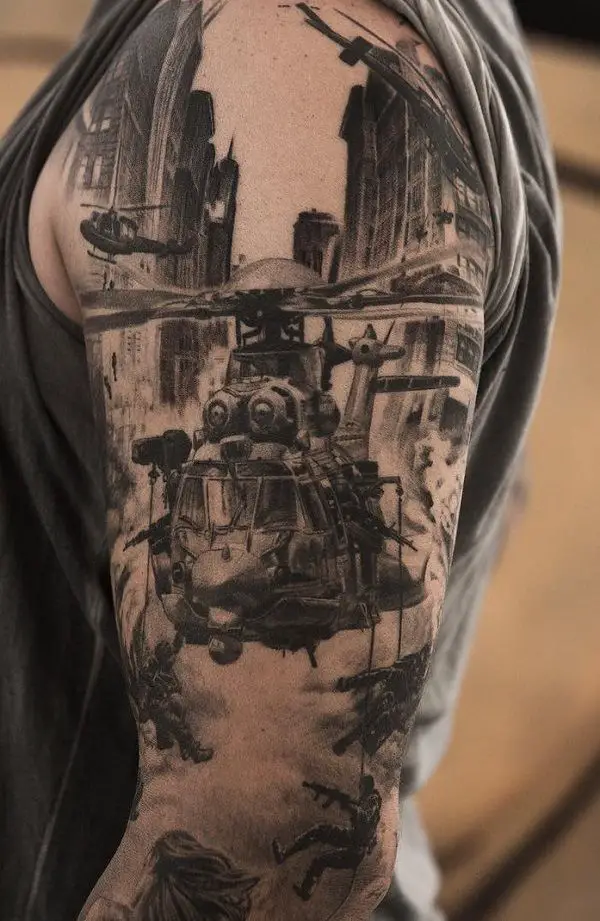
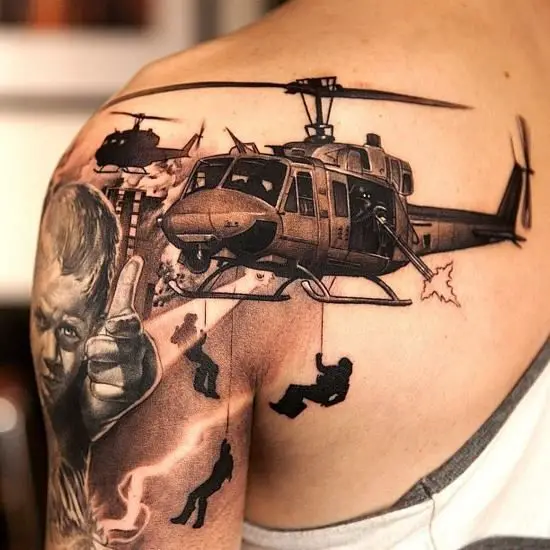
28. Army Helicopter
by boris_tattoo via Instagram


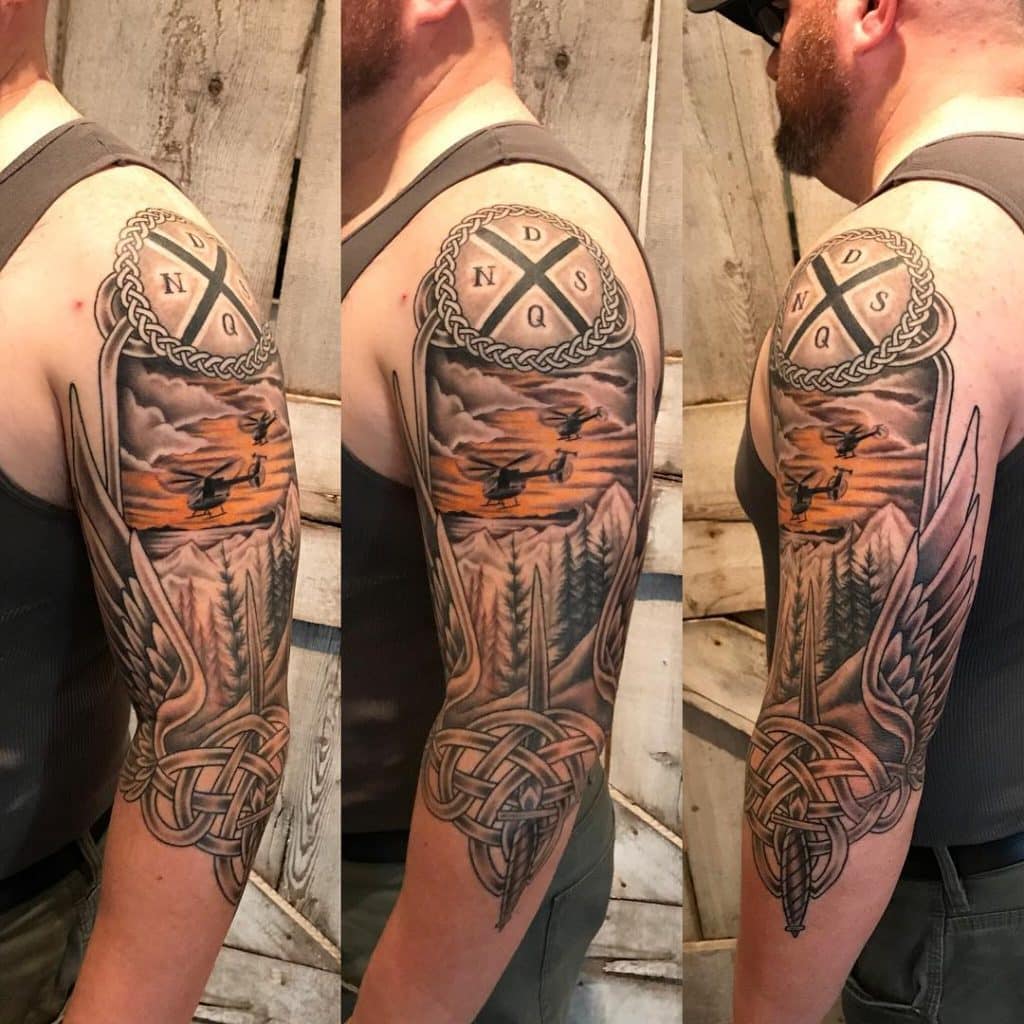
29. War Themed Sleeve
by ruffsketchez via Instagram


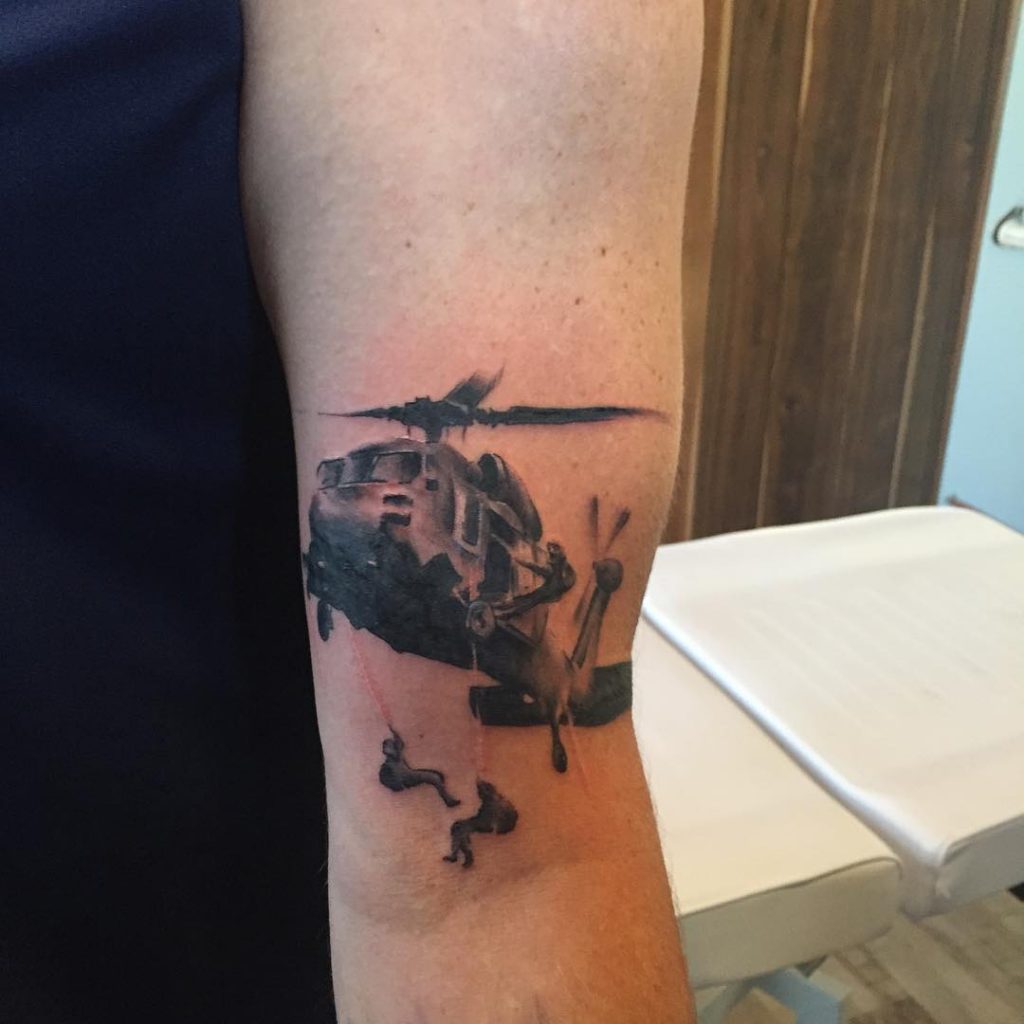
30. Black and Grey Helicopter
by coreystarling via Instagram


31. Nightstalkers
by rootyroo via Instagram


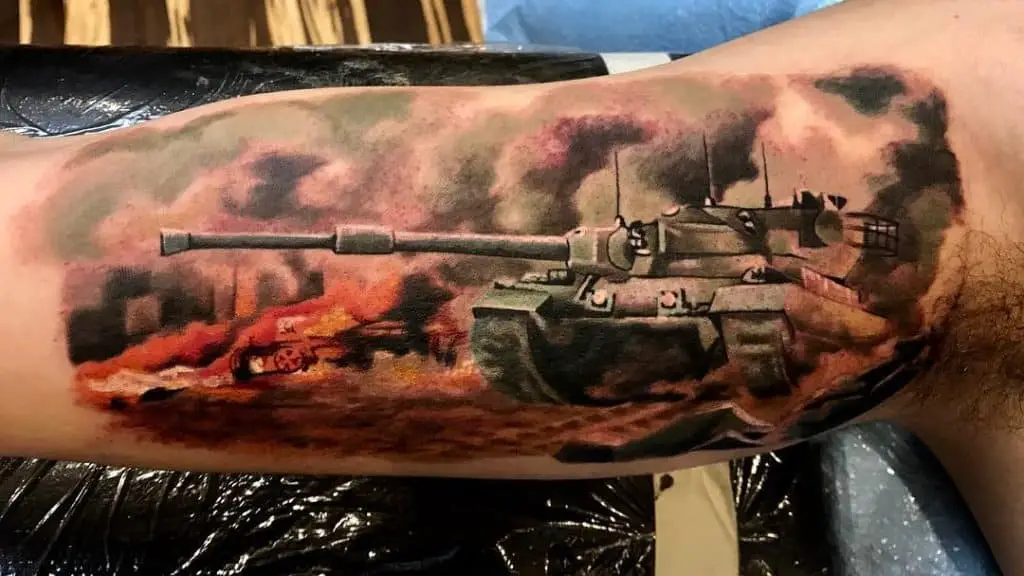
32. Military Tank
by followthetrainhat via Instagram


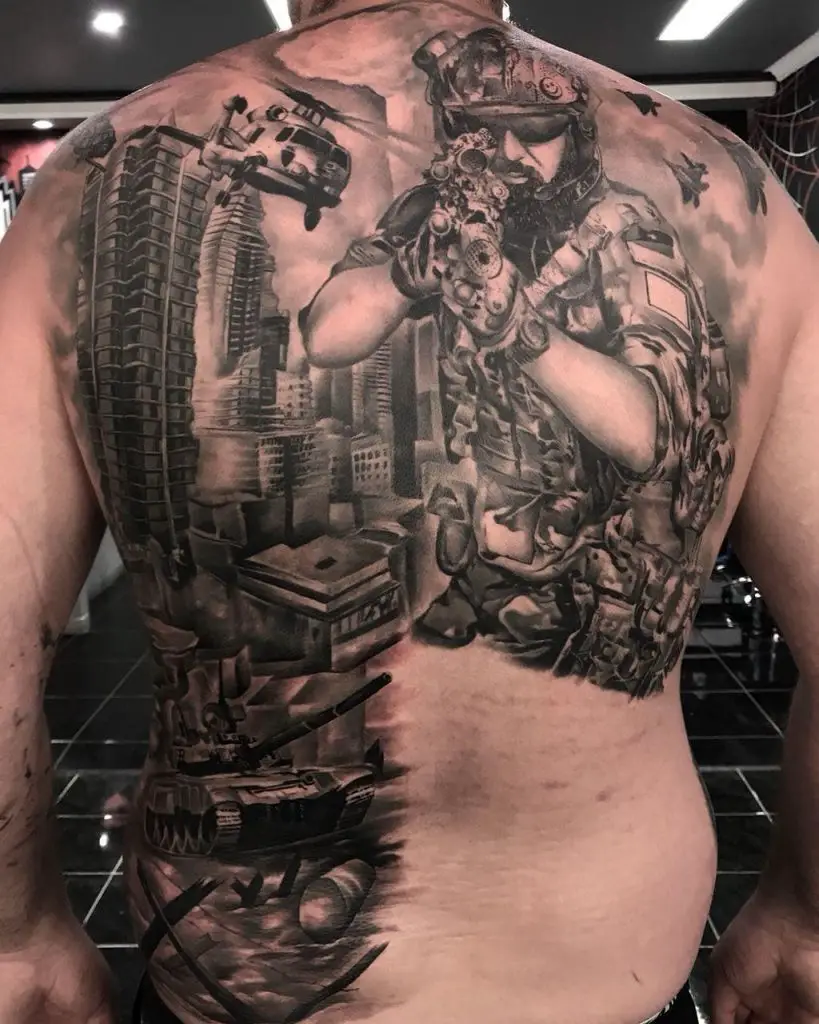
33.  War of the Ages

by flashinkbali via Instagram


34. Military Sleeve Tattoo


35. Rescue Operation

City on Fire


36. Sexy Army Girls Tattoo
via Pinterest


37.  Airborne Forces Tattoo

Airborne Forces


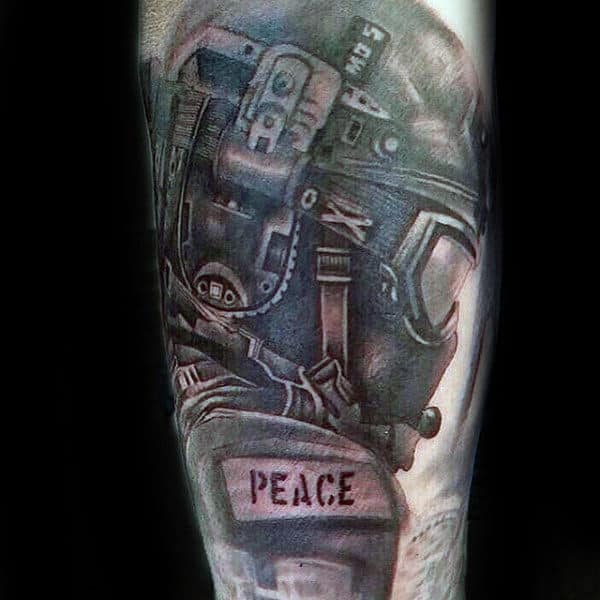
38. Peace Army Patch Tattoo

Peace Army Patch


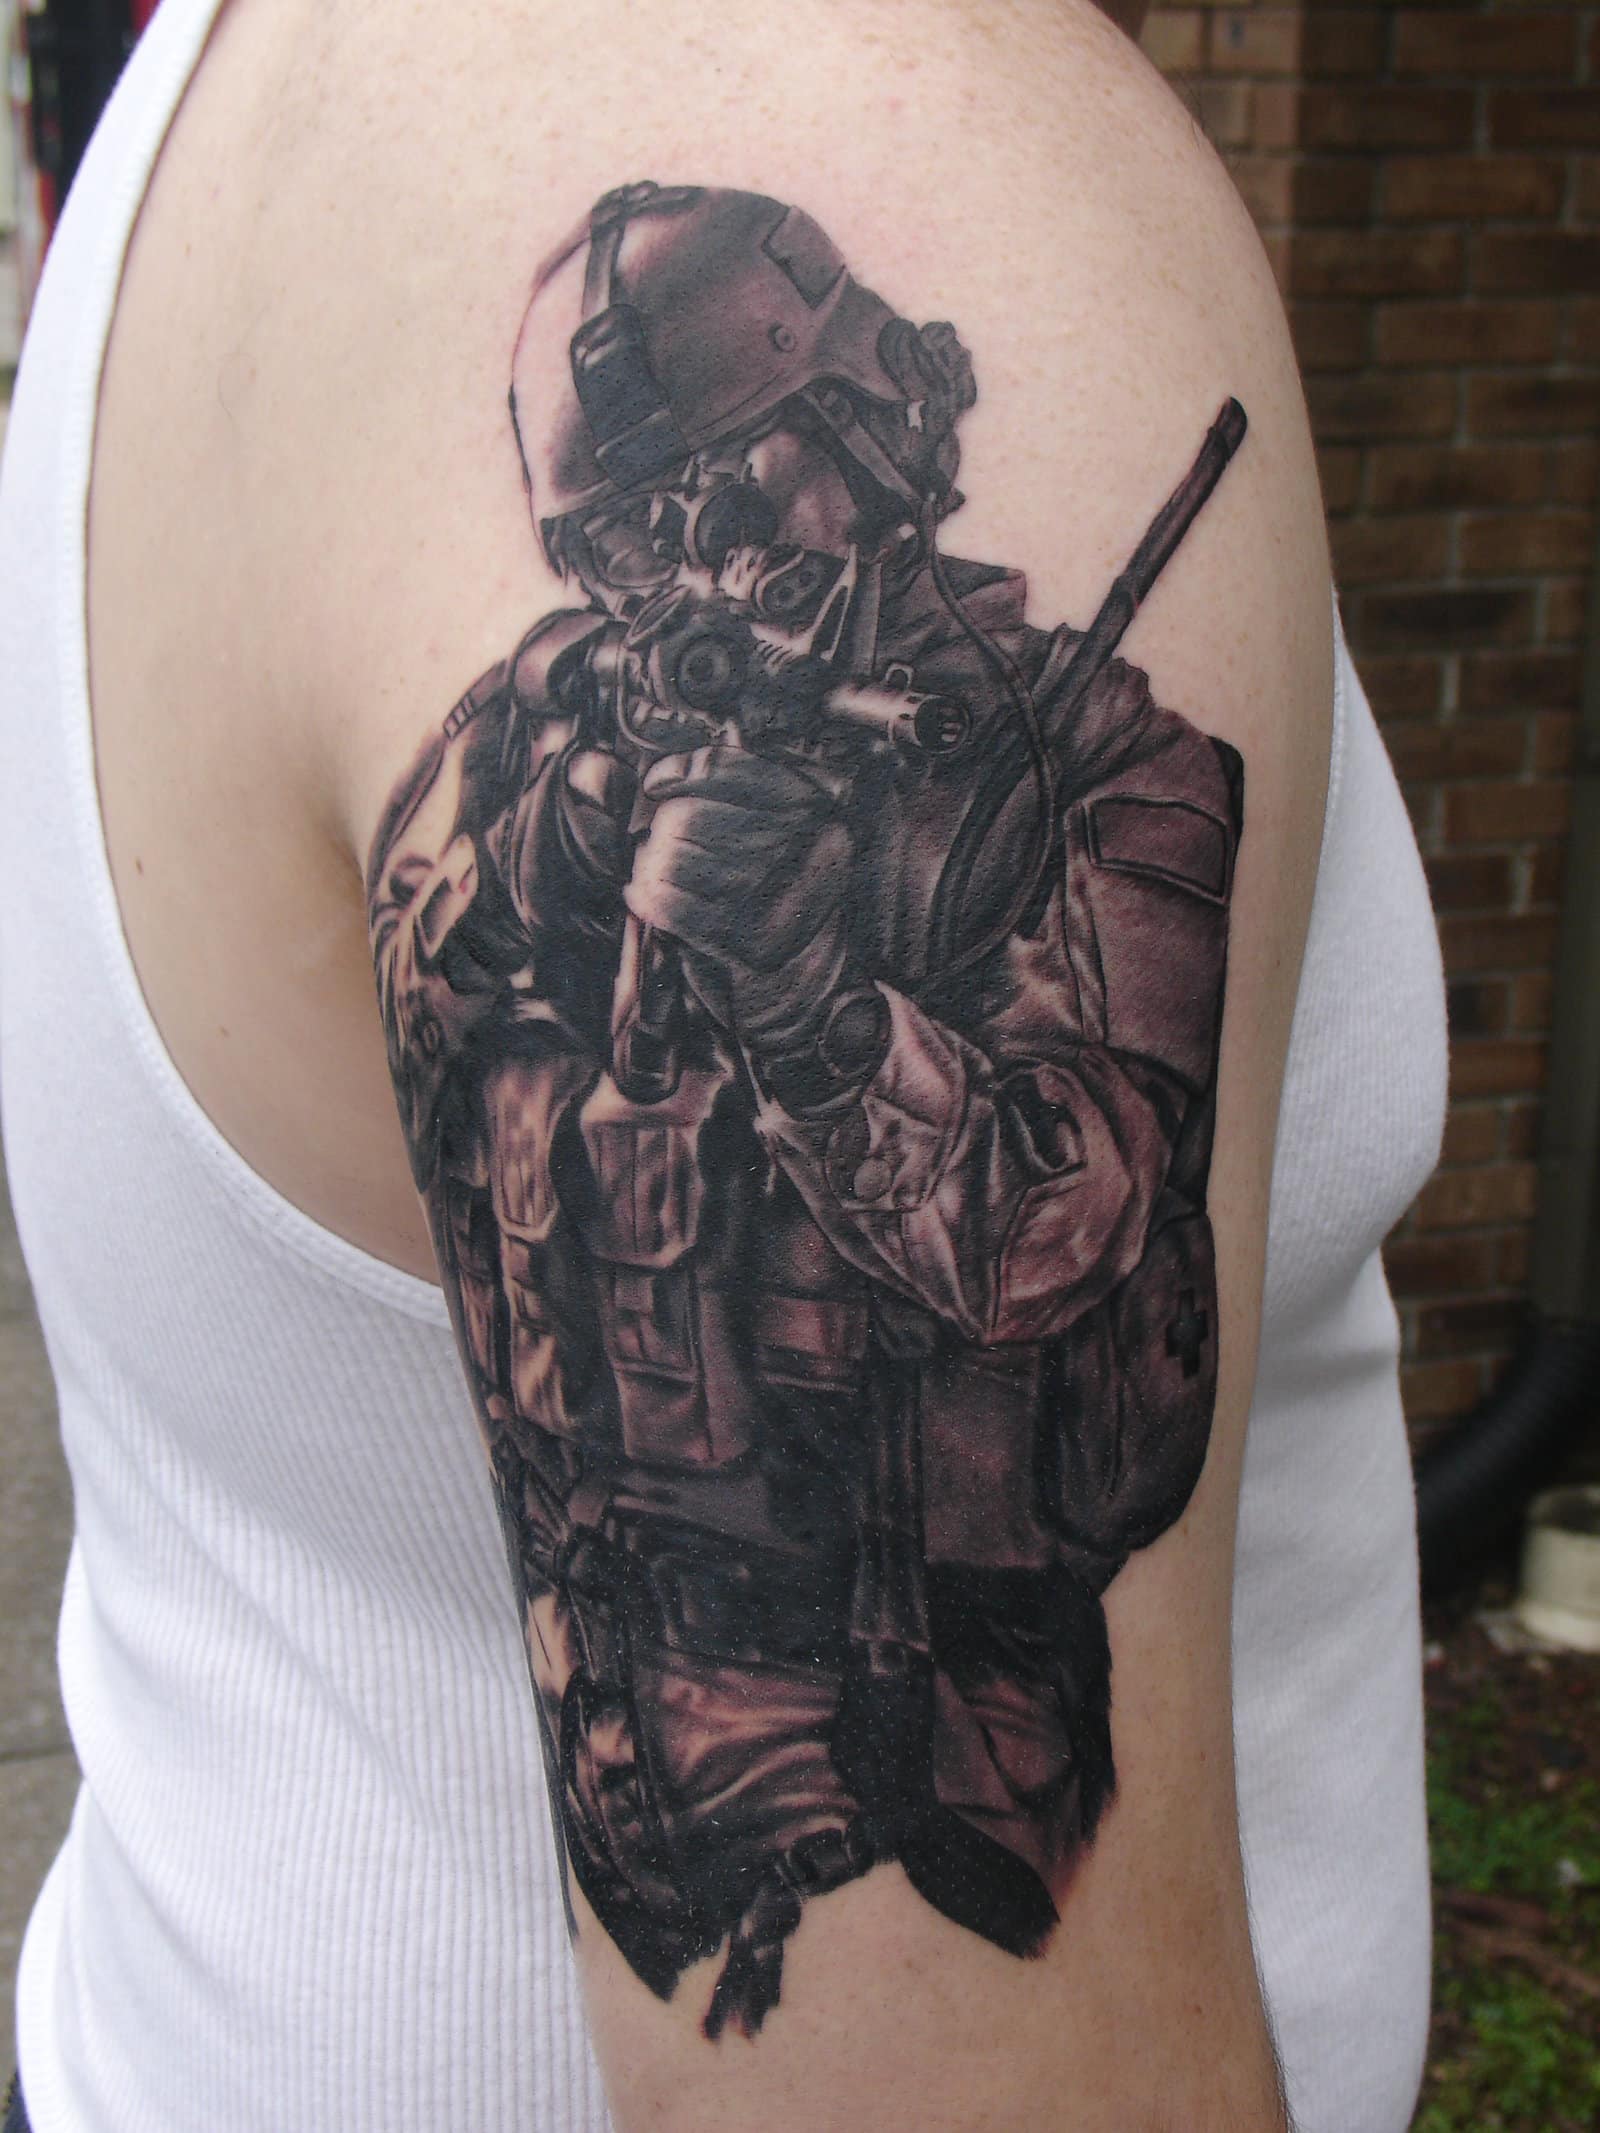
39. Army Special Forces Kickass Army Tattoo

Army Special Forces kickass army tattoo


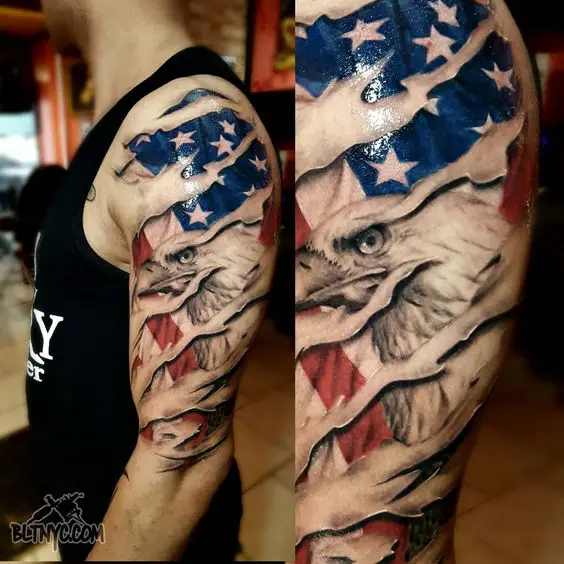
40.  Shredded US Flag Tattoo

Shredded US Flag


41. Army Sniper

Army sniper


14 Interesting Sasuke Curse Tattoo Variations

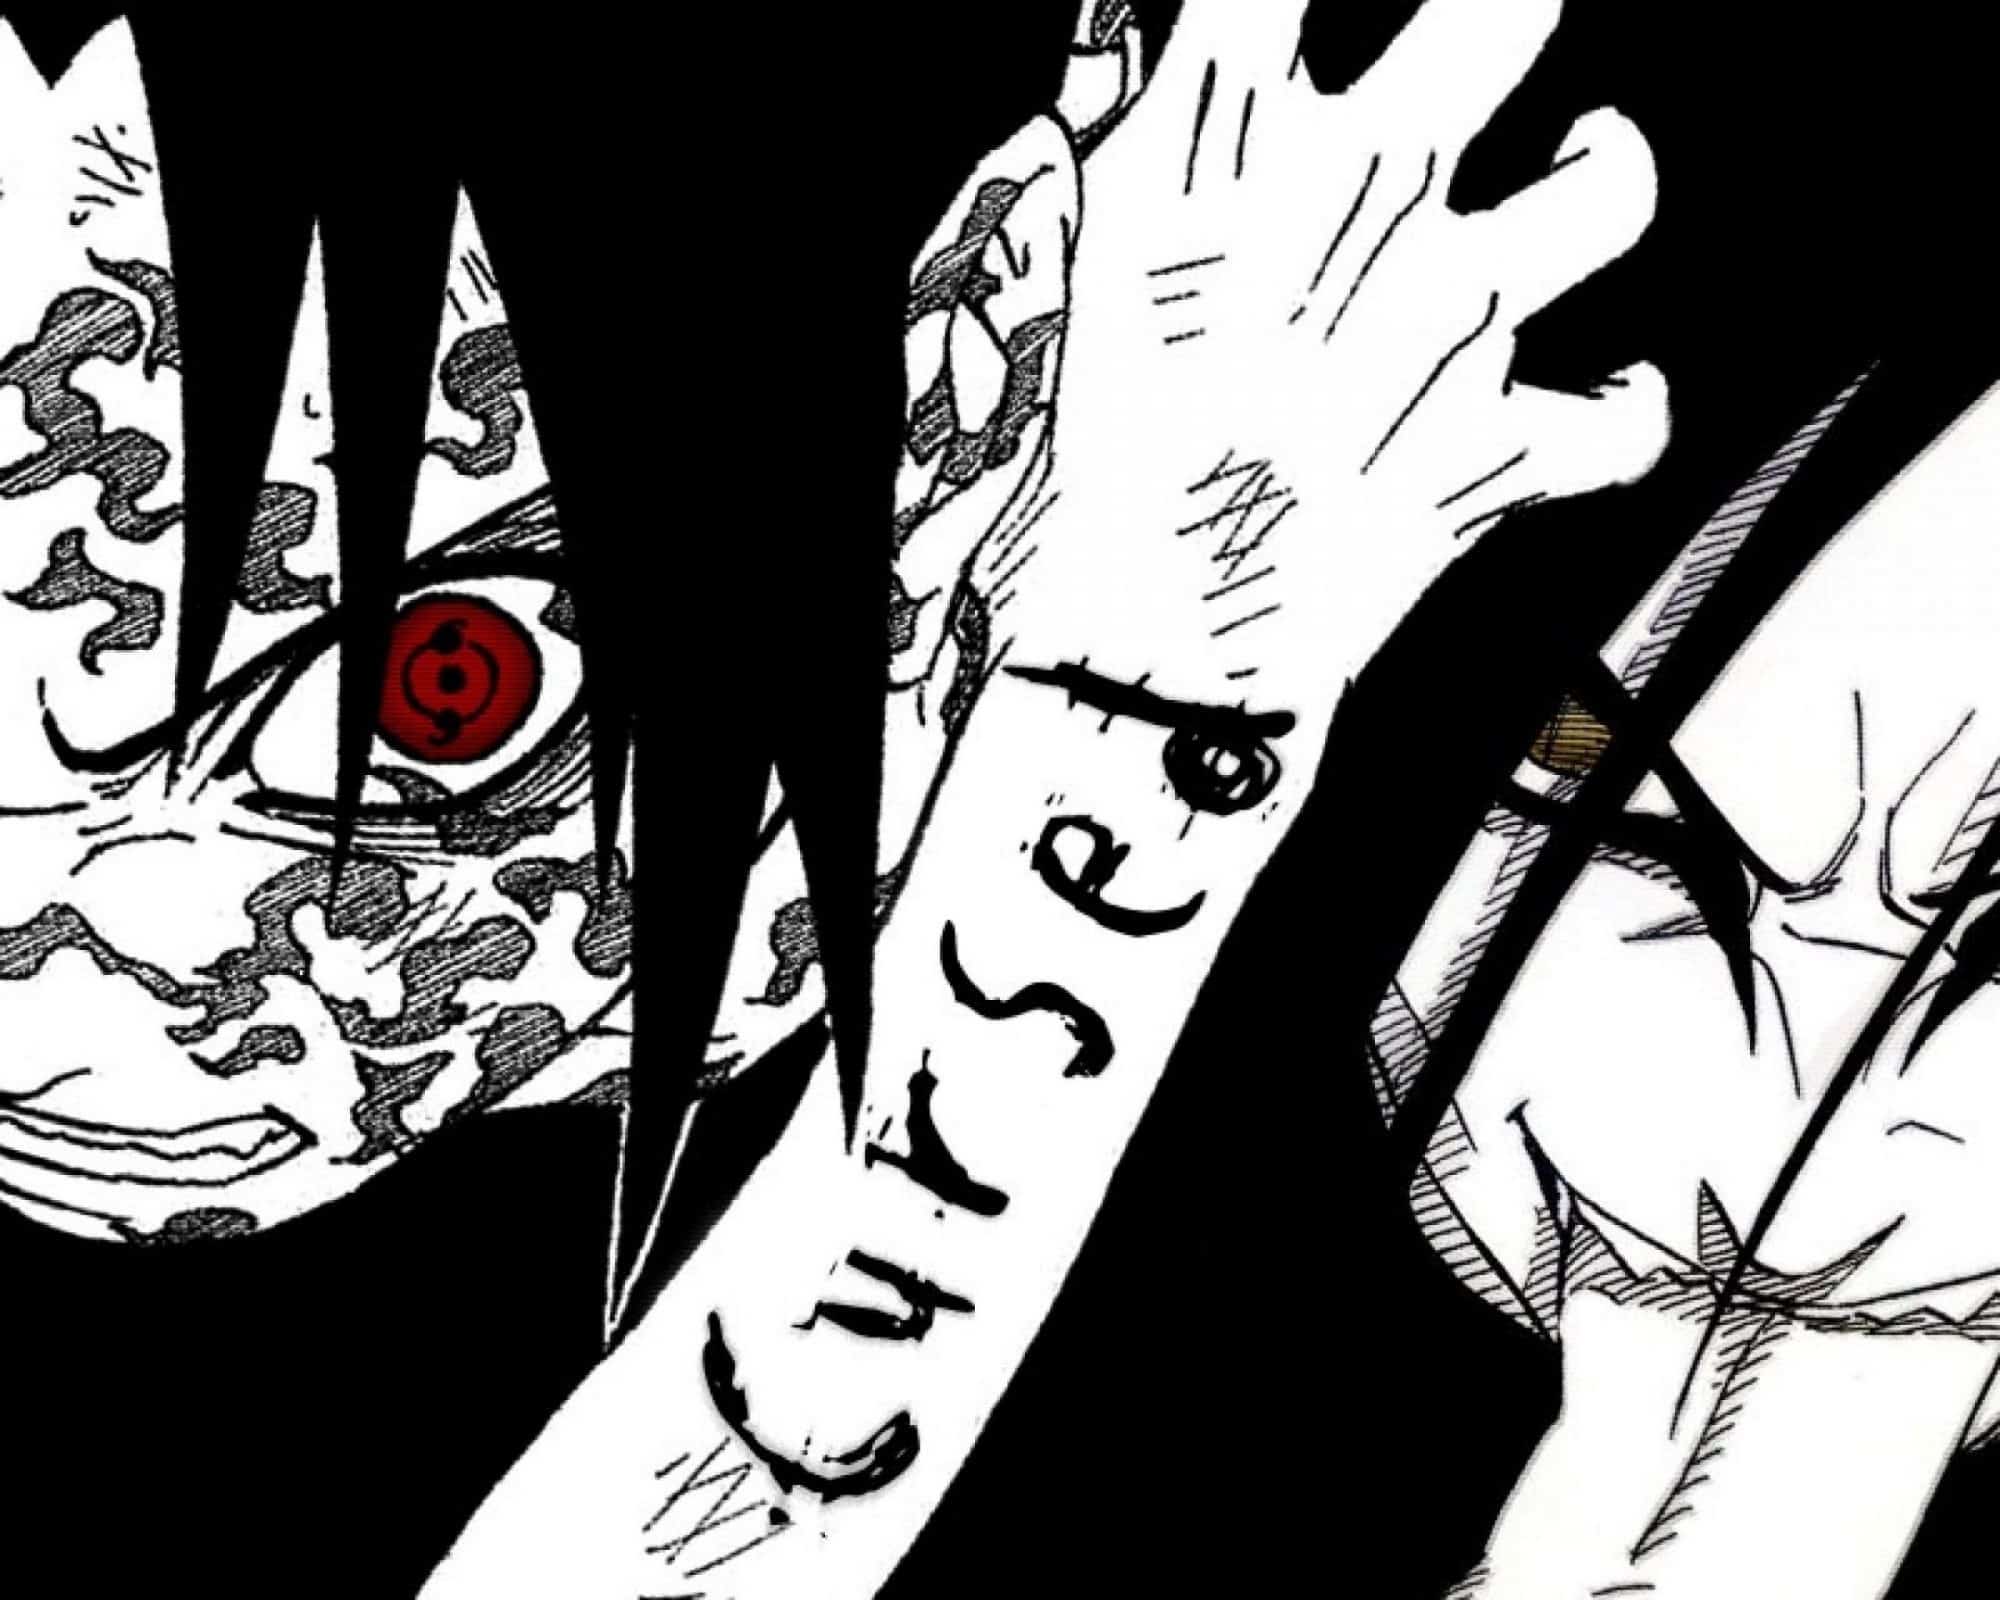
Just to recall the Naruto manga series, Sasuke is one of the main characters of this series and let’s talk about why Sasuke had the curse mark in the first place.  Sasuke had a cursed mark that he usually used as his trump card. But later on, disappeared with the help of his brother Itachi get rid of it using the Sword of Totsuka.

Anyways, you might be reading this now because you want to see the 14 interesting Sasuke Curse Tattoo Variations, or you got curious what is it about, or you might be a Sasuke fan.

But if you’re not and just curious, you might wanna know who is Sasuke and how he got the curse – just read below.

14 Interesting Sasuke Curse Tattoo Variations

The Story Behind Sasuke’s Curse

Sasuke born on July 23, was a cheerful child, eager to please and be worthy of his family name. This changed after his entire family and village got massacred by Itachi – his older brother, the person he looked up and most admired in the world. Itachi spared him and explained that Sasuke, isn’t worth killing yet – only by becoming stronger, such as by acquiring his own Mangekyō Sharingan, could he prove a worthwhile challenge to Itachi’s abilities. Itachi encouraged Sasuke to hate him, to desire revenge, and to gain power from that.

His only goal in life became to take revenge for his family’s deaths and, by extension, acquire the power needed for that revenge, even if it meant acquiring an external power that wasn’t his own – that’s when Orochimaru stepped in. With Orochimaru’s Juinjutsu – is a transformation-based cursed seal that Orochimaru can apply to others for various purposes.

One of this curses is the Cursed Seal of Heaven and is one of the strongest of Orochimaru’s cursed seals that could help the user increased their chakra levels and physical capabilities when the seal is active to the point where with the second level, Sasuke was equal in power to Naruto’s one-tailed form when he first used it.  14 Interesting Sasuke Curse Tattoo Variations

To apply a cursed seal, Orochimaru bites the recipient’s neck, causing the seal to appear near the puncture wound. Recipients are rendered unconscious while their body either accepts or rejects the cursed seal. From extensive practice, Orochimaru established a 10% compatibility rate for the cursed seal; those whose bodies aren’t compatible with the cursed seal will die. If they do survive, the recipient will have access to the cursed seal’s power boosts, access that grows through repeated use, and that’s how Sasuke ended up getting the cursed seal to achieve his goals.

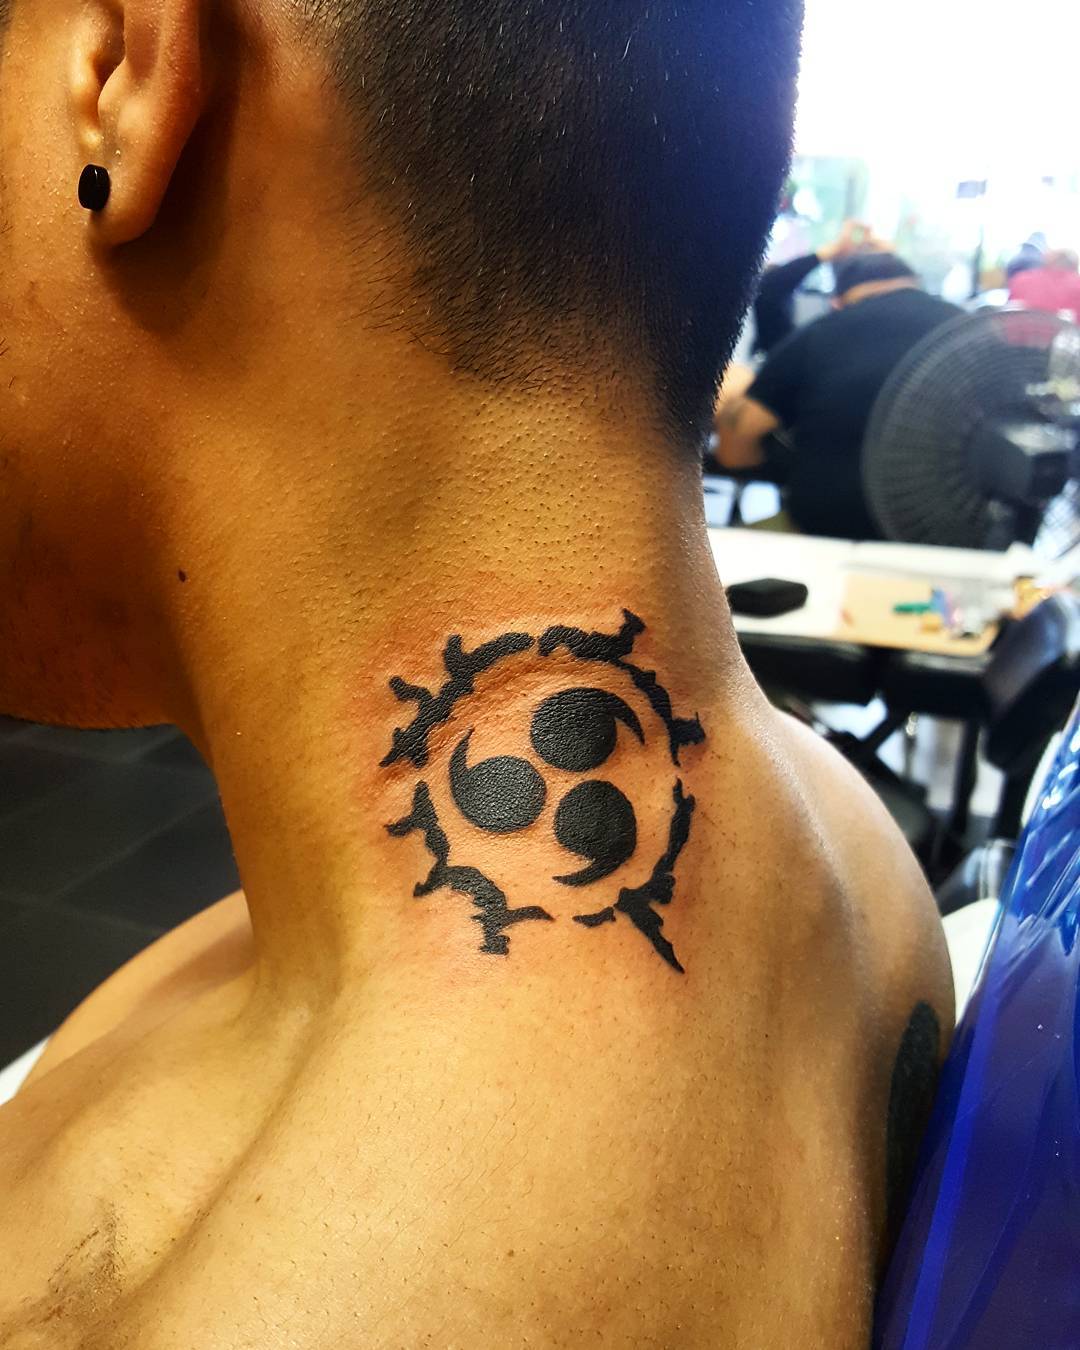
No wonder we have a lot of Sasuke’s fan having the curse’ of Sasuke tattooed on the left side of the back of their neck as a reminder of the darkness Sasuke was willing to delve into just for his goals.

Now, I’ve compiled 14 Interesting Sasuke Curse Tattoo Variations that you can get inspiration from in case you might want one.

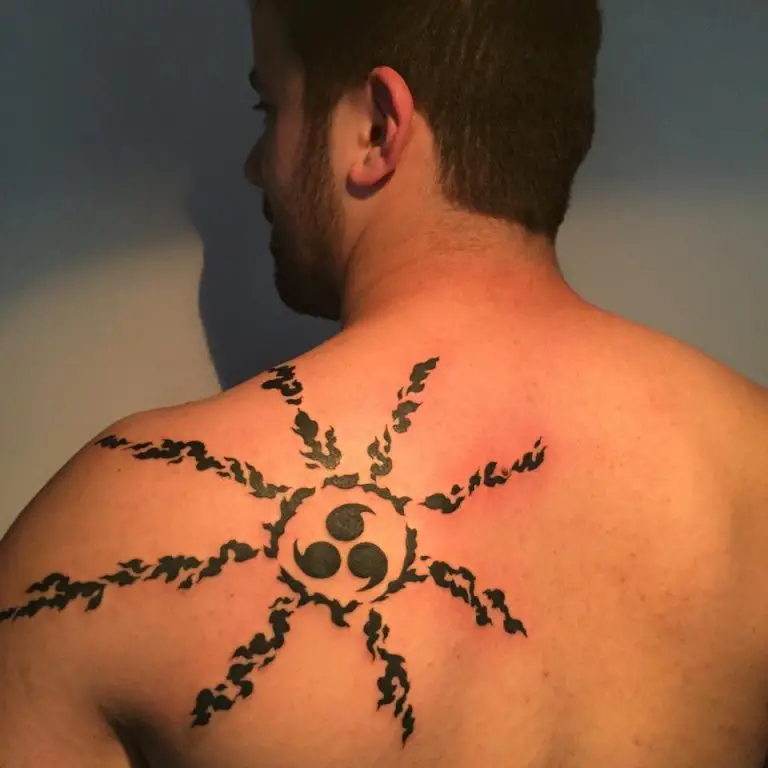
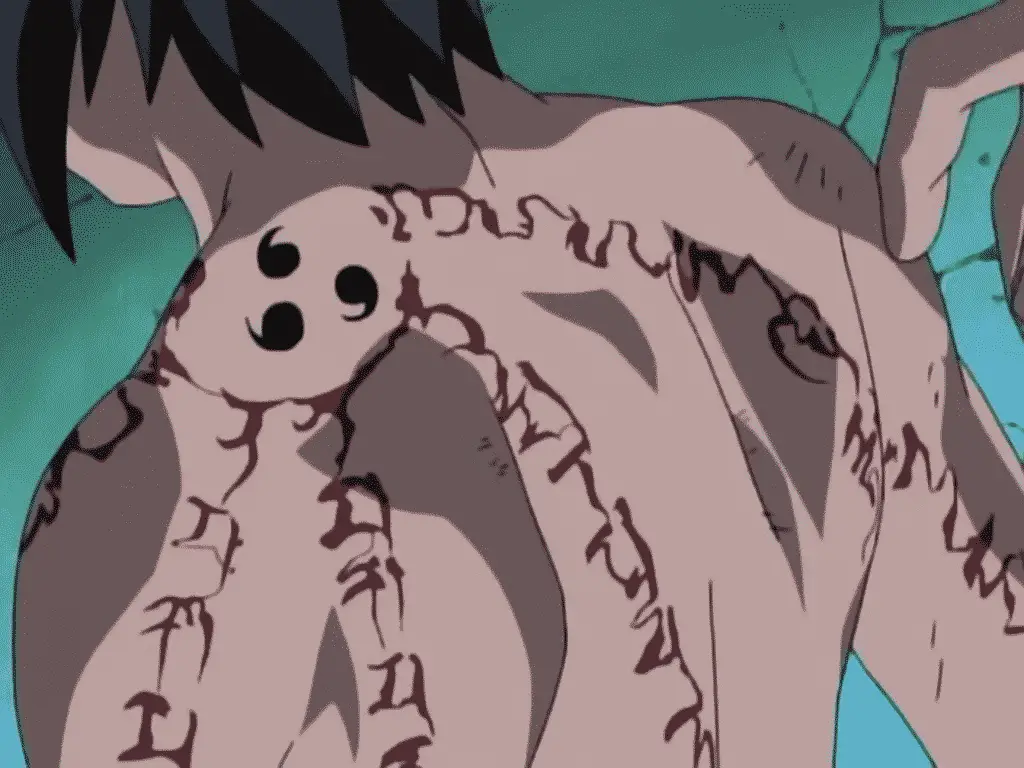
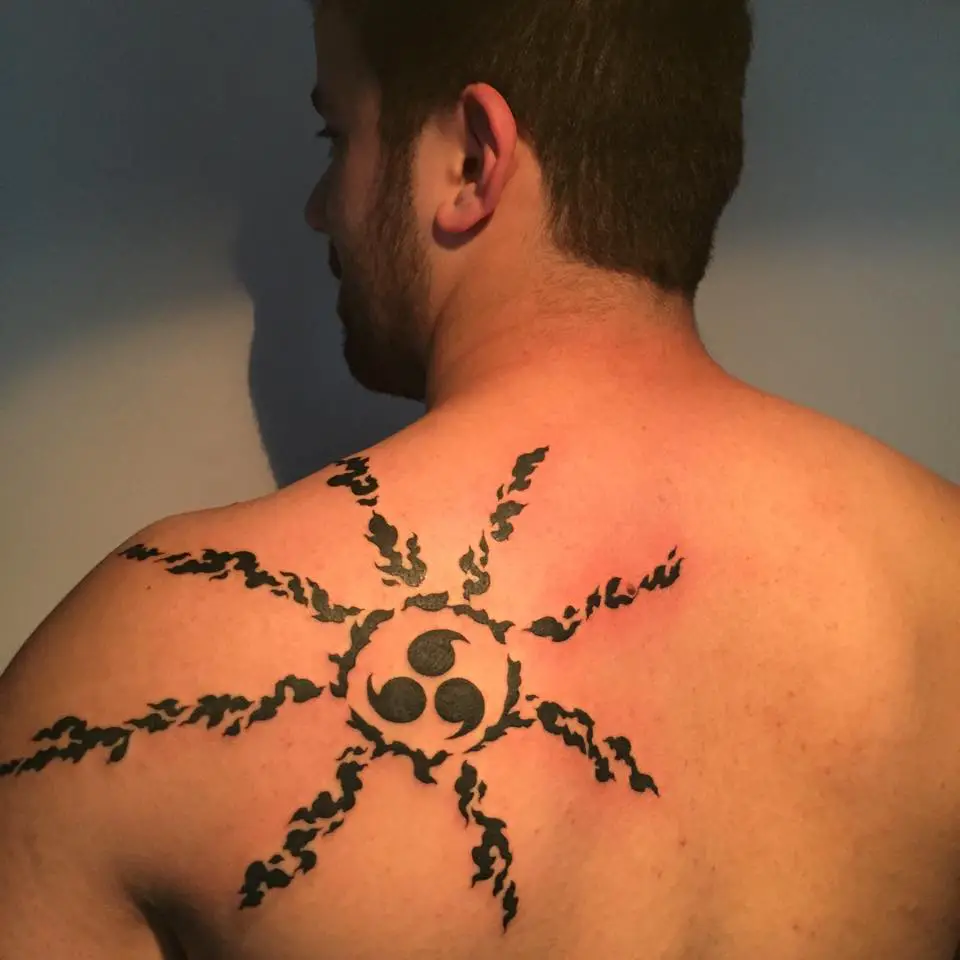
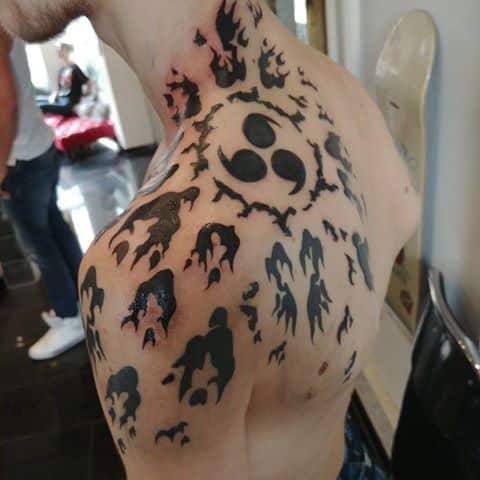
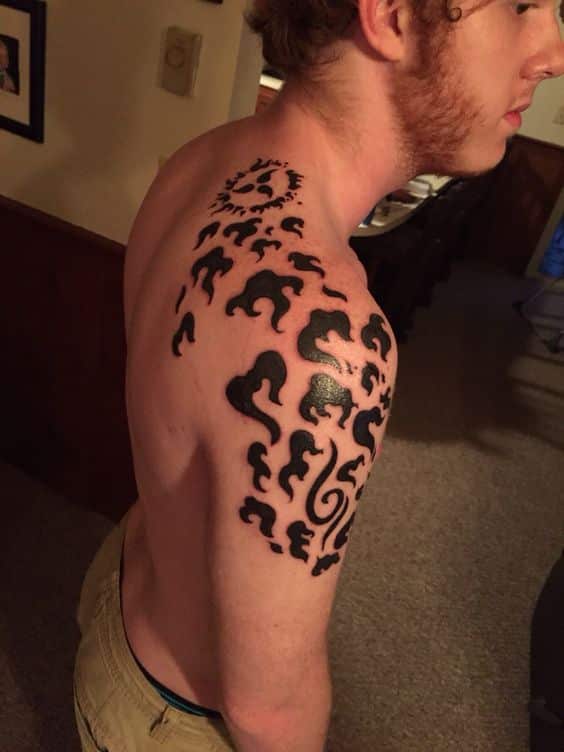
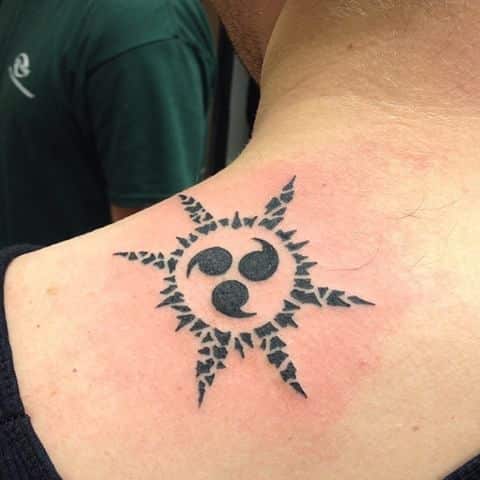
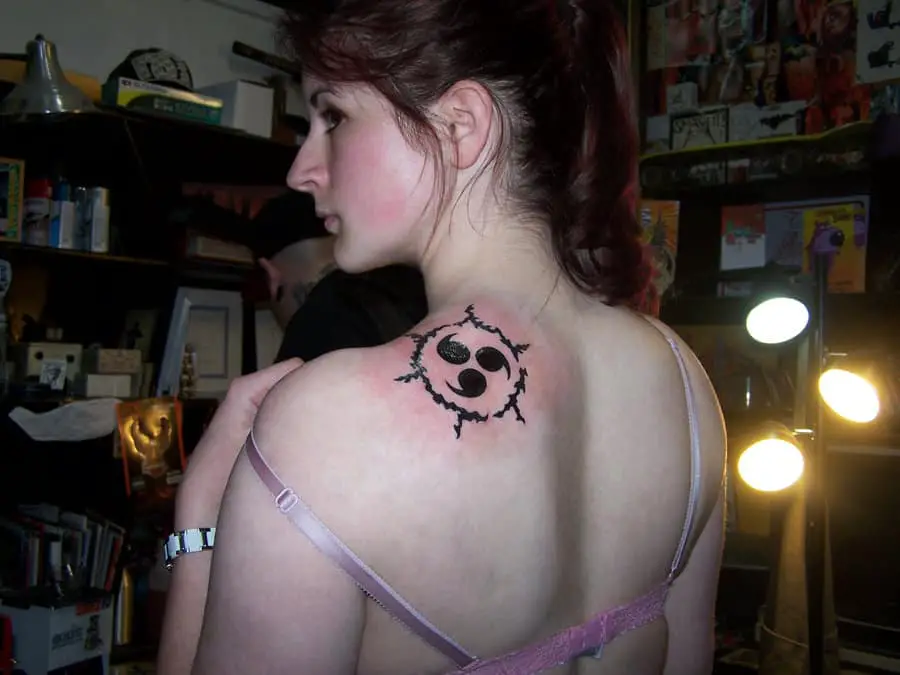
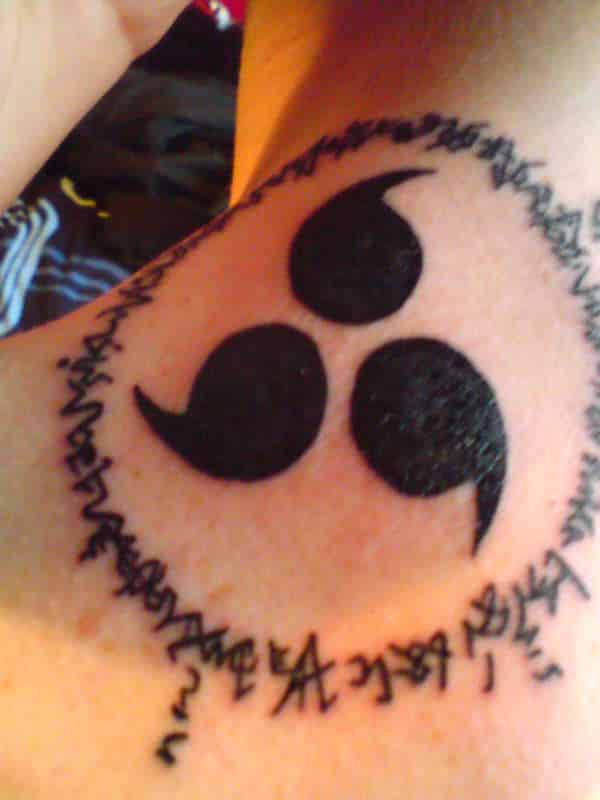
1.  The seal consists of three tomoe (the design known as mitsudomoe), similar to the Sharingan, which when activated, the seal turns orange-red and spreads flame-like markings across Sasuke’s body.

14 Interesting Sasuke curse Tattoo Variations

2. Sasuke is able to draw Orochimaru’s vile chakra through it, becoming a twisted hideous version of himself, but also getting stronger and faster.

14 Interesting Sasuke curse Tattoo Variations

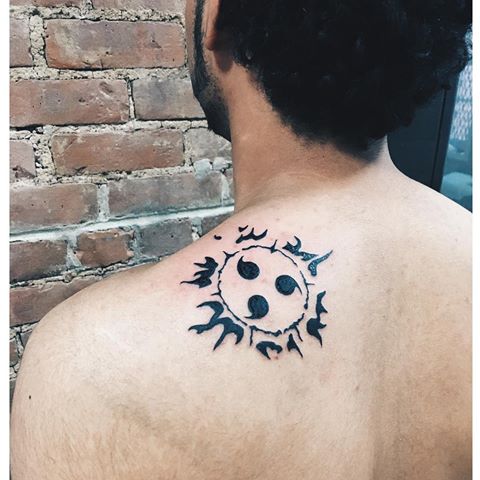
3. The seal was applied on the left side of the back of Sasuke’s neck.

14 Interesting Sasuke curse Tattoo Variations

4. When inactive, the seal will simply be a black tattoo somewhere on the user’s body.

14 Interesting Sasuke curse Tattoo Variations

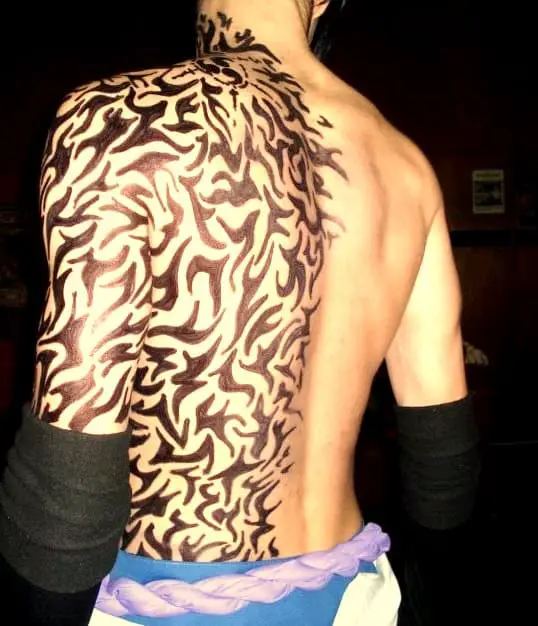
5. The second and final level of the seal causes the black marks to completely envelop the user.

14 Interesting Sasuke curse Tattoo Variations

6. But you can also try this different style tattooed on the center and not on the left side of your neck.

.14 Interesting Sasuke curse Tattoo Variations

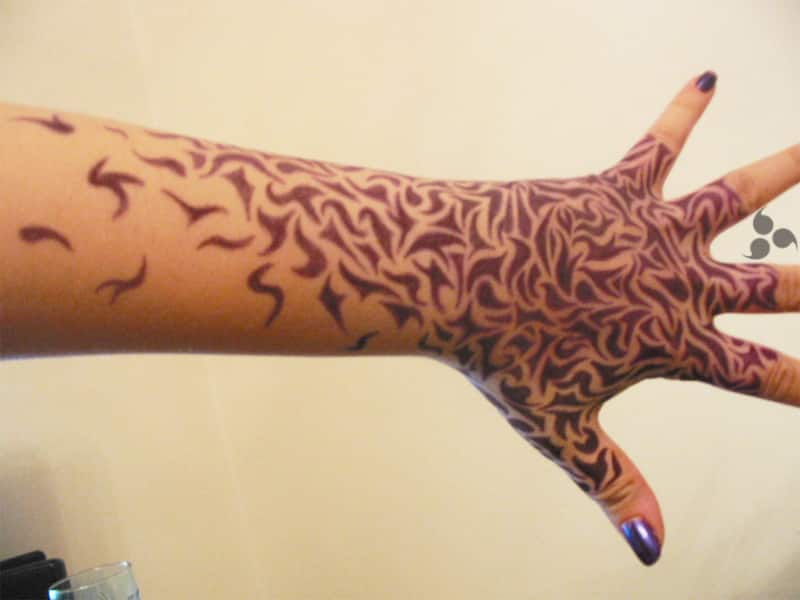
7. Or you can try Sasuke’s Curse tattooed on your hand and arms.

14 Interesting Sasuke curse Tattoo Variations

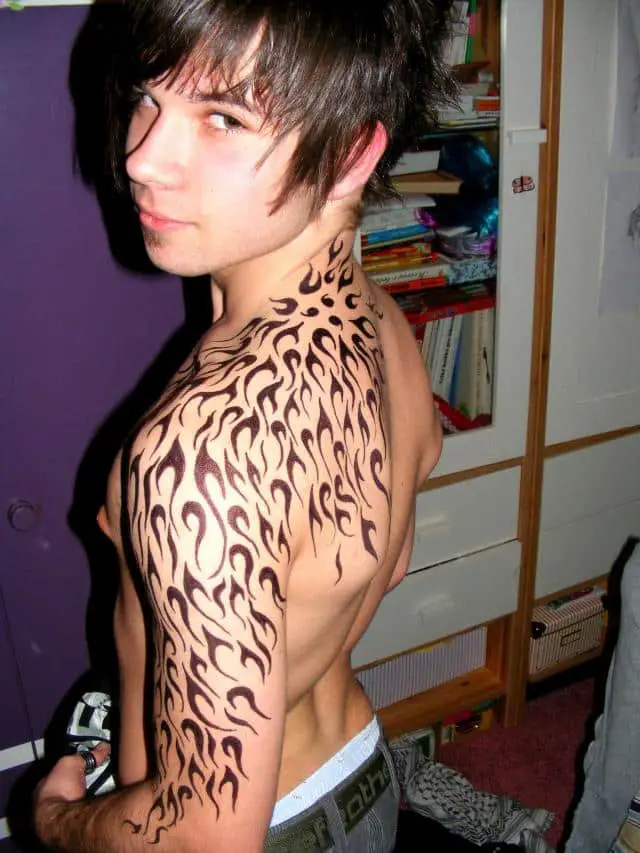
8. Or you can also try getting inked on the right side of the back of your neck spreading to your arms. 14 Interesting Sasuke curse Tattoo Variations

9. Orochimaru intended to have the seal corrode Sasuke’s mind so that he could become his next body, one of the reasons why the mark is located at the side of the neck, very close to the brains.

14 Interesting Sasuke curse Tattoo Variations

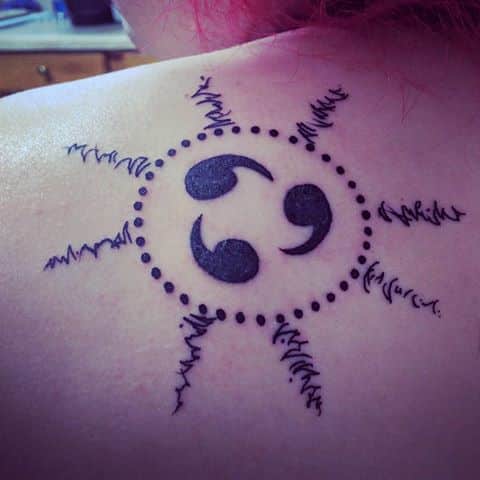
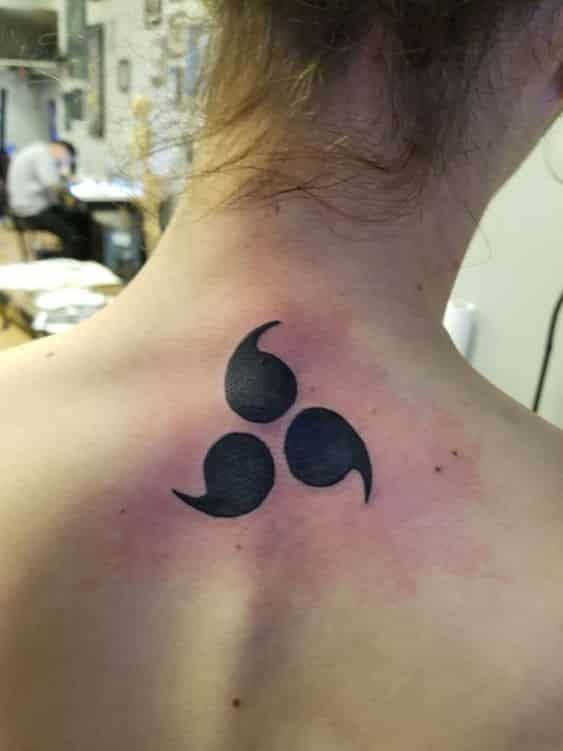
10. Three identical marks arranged in a circular pattern.

14 Interesting Sasuke curse Tattoo Variations

11. Sasuke Cosplayer to the next level. 14 Interesting Sasuke curse Tattoo Variations

12. The Minimalistic Sasuke Curse.

14 Interesting Sasuke curse Tattoo Variations


13. A lot of people admired Sasuke’s personality and how he was able to delve deep into darkness and how he got redemption later even when others thought he was beyond salvation thanks to Naruto who didn’t give up on him.

14 Interesting Sasuke curse Tattoo Variations

14. You might want this big curse mark.14 Interesting Sasuke curse Tattoo Variations

21 Inspirational Quotes for Nurses

Nursing jobs are not just about treating patients who are sick, but also giving emotional support and advice to patients and their families and taking care of lots of paper works. Nursing is a career that requires a lifetime of dedication, and compassion.

But what happens when the emotional challenge of nursing is more than you expected? Is it more than you anticipated that even your education was not enough to  prepare you to cope with the challenges of conflict resolution, managing challenging behavior and stress/emotional self-management?

Most of the time you have a hard time on your shift that you’d be questioning God why the heck you have turned out a nurse.

Now these 21 Inspirational Quotes for Nurses can help you be reminded on why you chose to be who you are now and will help you keep back on track.

1. Save one life, you’re a a hero. Save a hundred lives, you’re a nurse.

2. Finding your passion will lead you to finding work that motivates and satisfies you.

21 Inspirational Quotes for Nurses

3. When you are a nurse, you know that everyday you will touch a life or a life will touch yours.

21 Inspirational Quotes for Nurses

4. No matter how difficult the days may get, never forget the reason you became a nurse.

21 Inspirational Quotes for Nurses

5. Be patient with patients who are not patient.

21 Inspirational Quotes for Nurses

6. Do you want to speak to the doctor in charge or the Nurse who really knows what is going on?

21 Inspirational Quotes for Nurses

7. The best way to find yourself is to lose yourself in the service of others.

21 Inspirational Quotes for Nurses

8. The best nurses are those that go the extra mile, even when no one is on the sidelines watching.

21 Inspirational Quotes for Nurses

9. It takes a lot of brains to be a Nurse

21 Inspirational Quotes for Nurses

10. Behind every great doctors is an even greater Nurse.

21 Inspirational Quotes for Nurses

11. A kind gesture can reach a wound that only compassion can heal.

21 Inspirational Quotes for Nurses

12. Nursing is a work of heart.

21 Inspirational Quotes for Nurses

13. Wherever you go, go with all your heart.

21 Inspirational Quotes for Nurses

14. I will be the best nurse I can be.

21 Inspirational Quotes for Nurses

15. Be a rainbow in someone else’s cloud.

21 Inspirational Quotes for Nurses

16. Never say never, because limits, like fears, are often just an illusion.

21 Inspirational Quotes for Nurses

(You might wanna check these 22 Adorable Nurse Tattoos)

17. We make a living by what we get, we make a life by what we give.

21 Inspirational Quotes for Nurses

18. The character of the nurse is as important as the knowledge she possesses.

21 Inspirational Quotes for Nurses

19. What’s your superpower? I’m a nurse.

21 Inspirational Quotes for Nurses

20. Be fearless in the pursuit of what sets your soul on fire.

21 Inspirational Quotes for Nurses

21. Nurses are the heart of healthcare.

21 Inspirational Quotes for Nurses

How to Create Watercolor Effects – 11 Steps Photoshop Tutorial

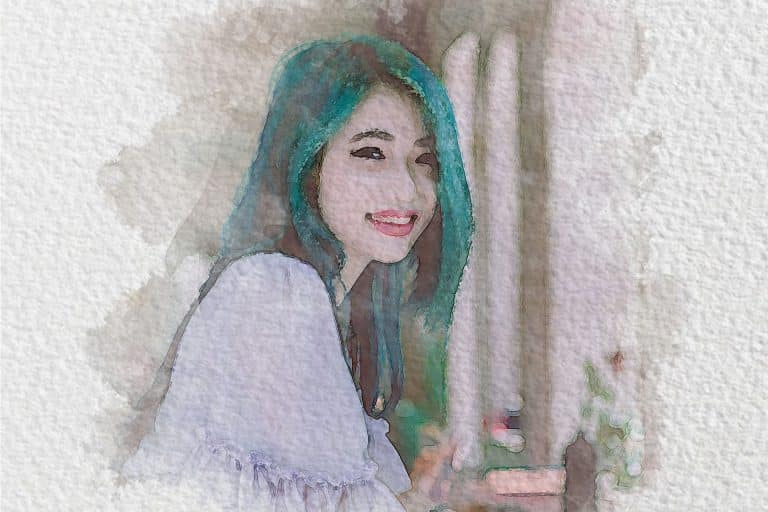
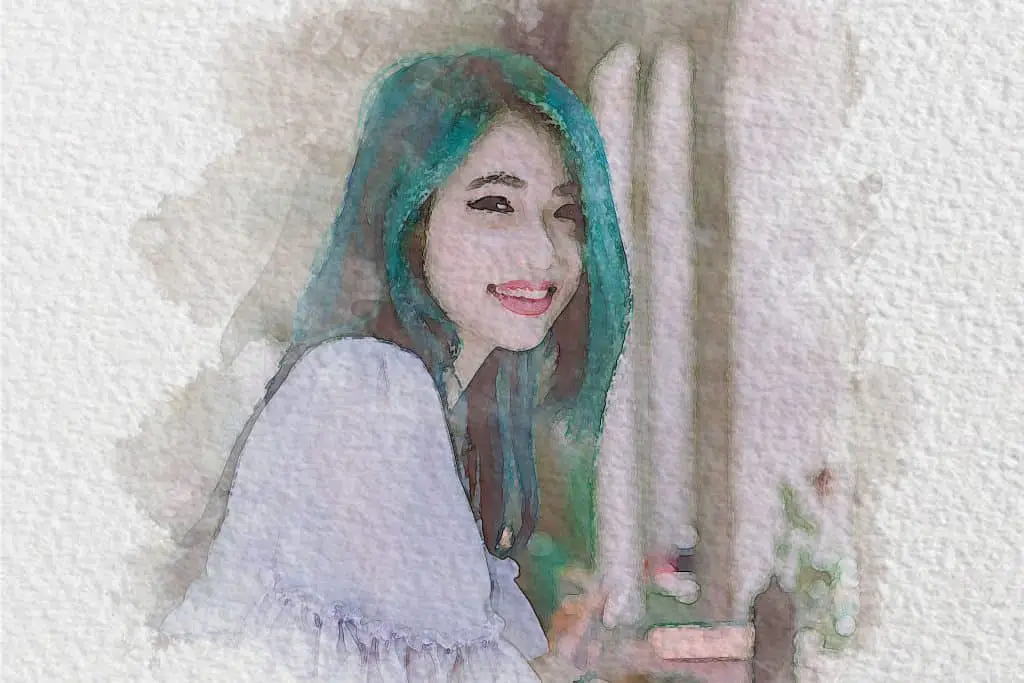
How to Create a Watercolor Effect - 11 Steps Photoshop Tutorial

Have you been wanting to create a watercolor painting but never had watercolor skills? It could be frustrating to have something in mind which is so difficult to implement especially when you are lacking in skills. But I have a solution to your problem, we can do it in Photoshop because nothing is impossible in Photoshop!

In this article, I will teach you how to create a watercolor effect in photoshop in 11 steps!

Btw, if you want to download the images and Brush that I’m using, you can download it here:

Model
Watercolor Paper
Watercolor Brushes

Are you ready? Now let’s get started.

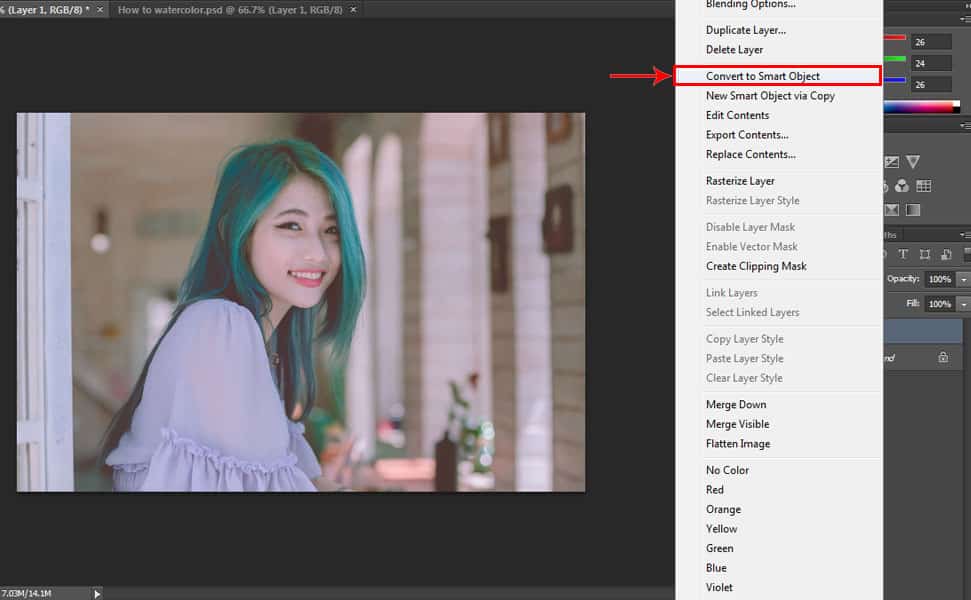
1. Duplicate the Layer

How to Create a Watercolor Effect - 11 Steps Photoshop Tutorial
First, open the image that you want to use. Then make a copy of the model layer by pressing CTRL + J. Then right-click the duplicate layer and select ‘Convert to Smart Object’.

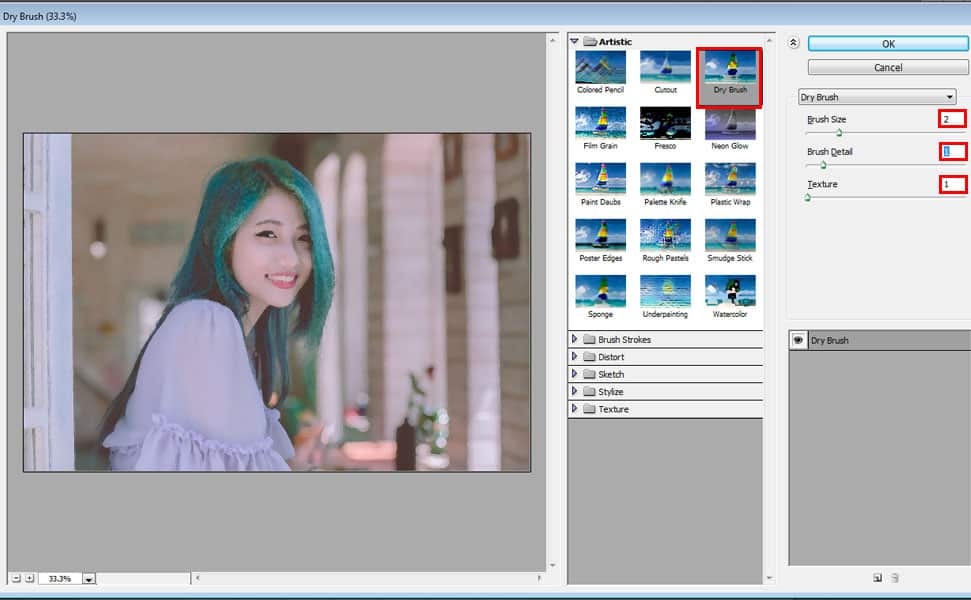
2. Add Dry Brush Filter

How to Create a Watercolor Effect - 11 Steps Photoshop Tutorial
Go to ‘Filter’ menu then select ‘Filter Gallery’. Once you’ve opened the Filter Gallery, select Dry Brush in ‘Artistic’ tab. Then adjust the Brush Size to 2, Brush Detail to 1 and Texture to 1 then press Ok.

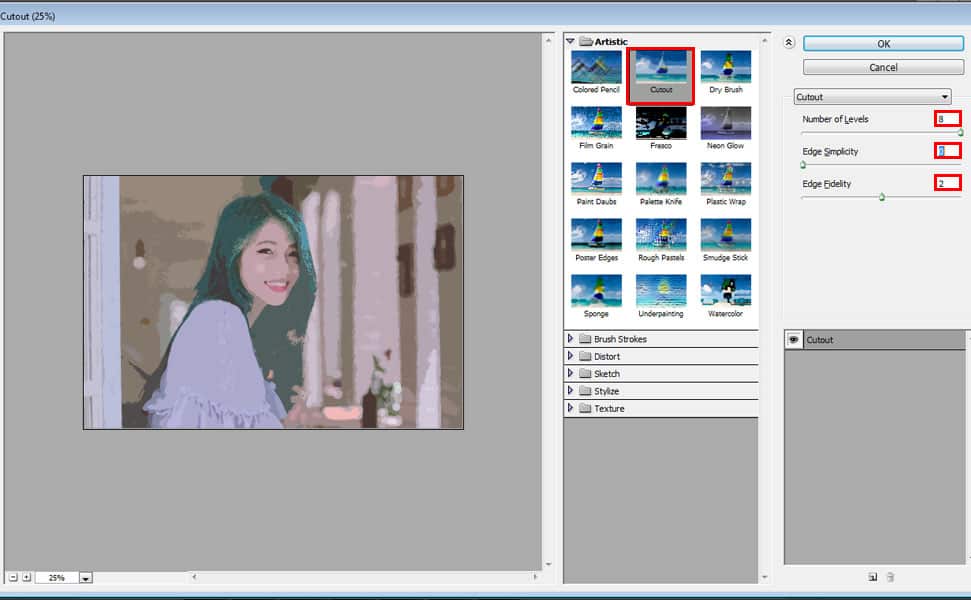
3. Add Cut out Filter

How to Create a Watercolor Effect - 11 Steps Photoshop Tutorial
Go to ‘Filter’ menu again then select ‘Filter Gallery’ and select the ‘Cutout’ Filter under the ‘Artistic’ tab and adjust the Number of Levels to 8, Edge of Simplicity to 0 and Edge Fidelity to 2.

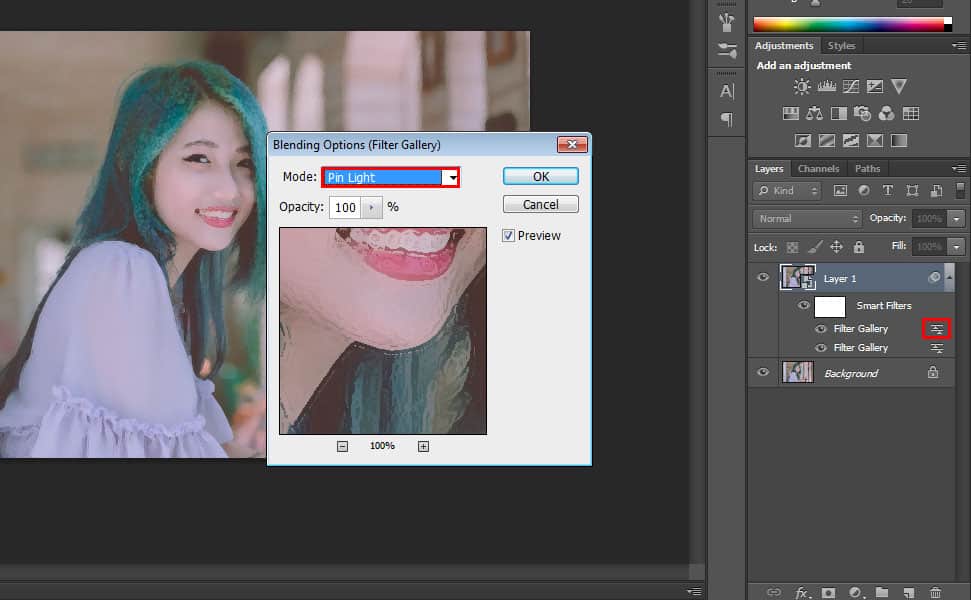
4. Change the Blending Mode

How to Create a Watercolor Effect - 11 Steps Photoshop Tutorial
On your duplicate layer, double-click the ‘Blending options’ icon located below the Smart Filters, as shown in the image. Then once the Blending options box appears, change the Mode to ‘Pin Light’ then press OK.

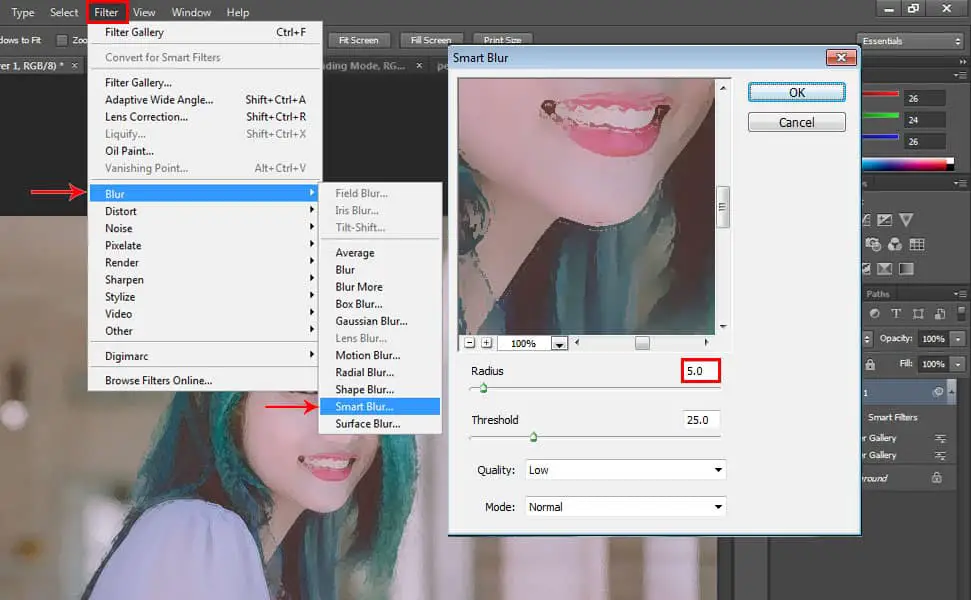
5. Add Smart Blur Filter

How to Create a Watercolor Effect - 11 Steps Photoshop Tutorial
Go to ‘Filter’ menu then select ‘Blur’ then choose ‘Smart Blur’. Then adjust the ‘Radius’ to 5.0 then press Ok.

See related article: 15 Step by Step Typography Effects Tutorial in Photoshop

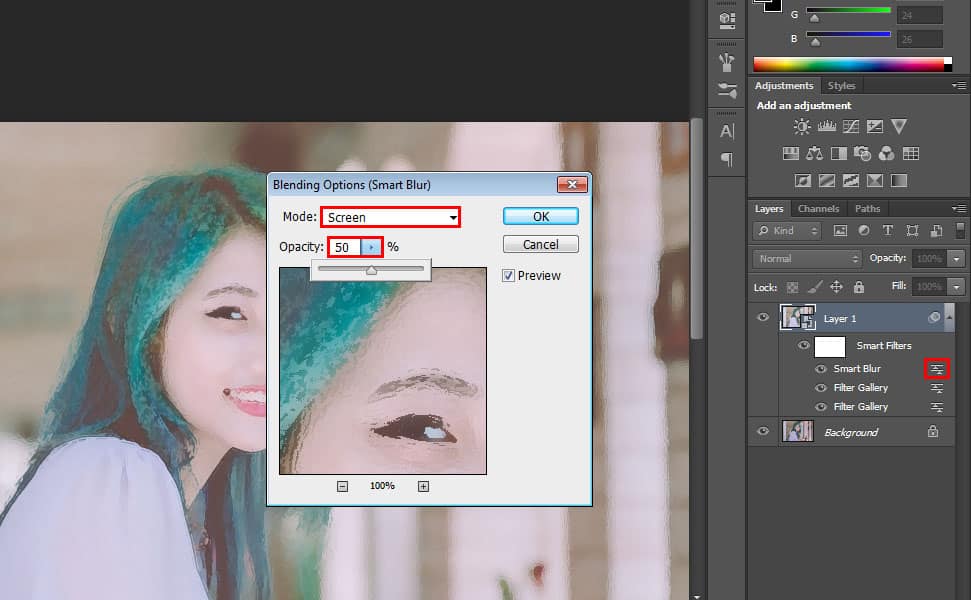
6. Change the Blending Mode to ‘Screen’

How to Create a Watercolor Effect - 11 Steps Photoshop Tutorial
Under the duplicate layer beside Smart Blur, double-click the ‘Blending Option’ icon then change the Mode to ‘Screen’. Then adjust the ‘Opacity’ to 50%.

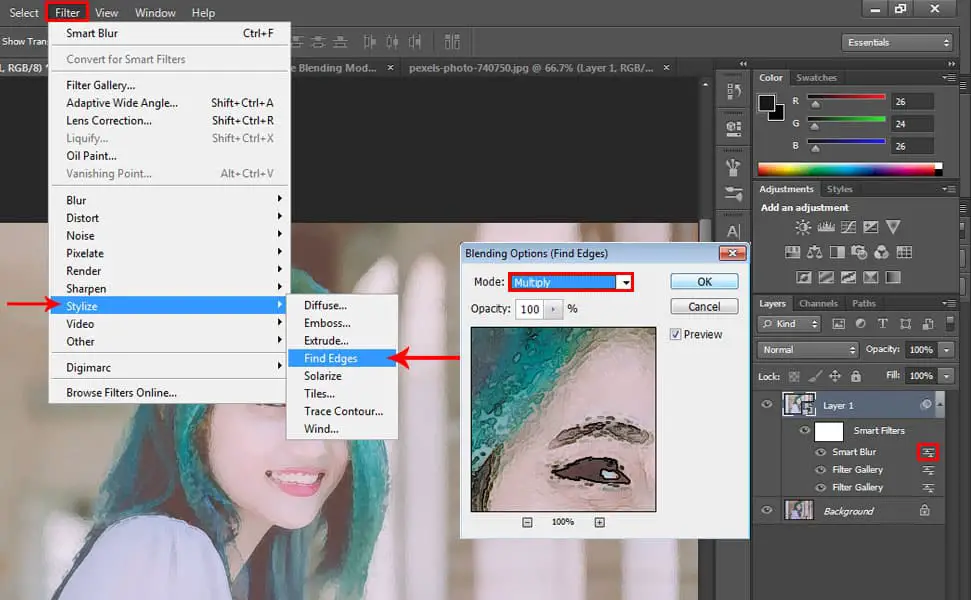
7. Add Stylize Filter

How to Create a Watercolor Effect - 11 Steps Photoshop Tutorial
Go to ‘Filter’ menu then select ‘Stylize’ then choose ‘Find Edges’ and then change the ‘Find Edges’ blending mode to Multiply, same as you did with step 6 but this time it’s set to ‘Multiply’.

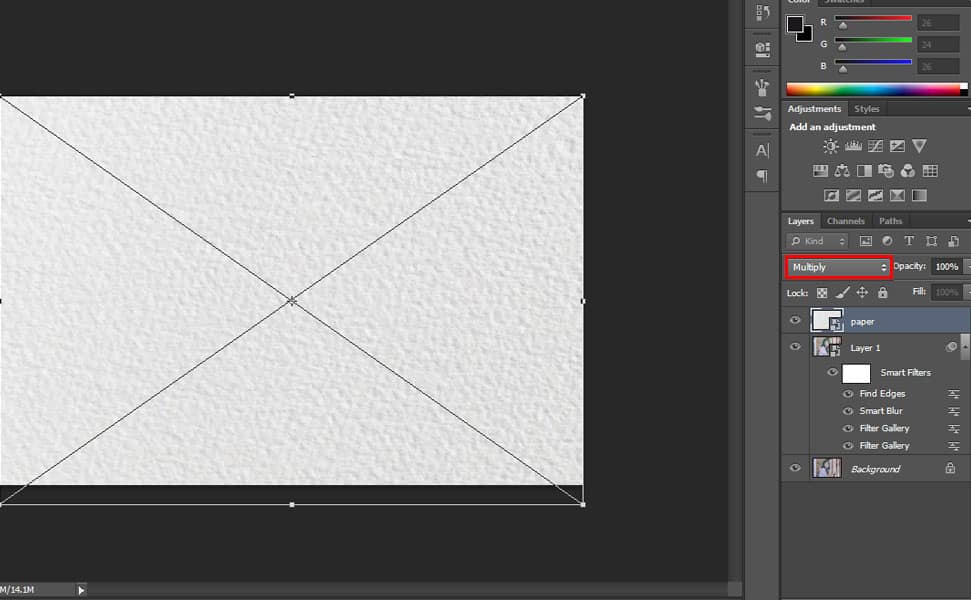
8. Open the Watercolor Paper

How to Create a Watercolor Effect - 11 Steps Photoshop Tutorial
Drag the watercolor paper to your subject and press CTRL + T to resize it and expand it by dragging the corners while holding ‘Shift’ to retain its proportion then press Enter, make sure the whole area is covered with Watercolor paper. Then change its layer’s blending mode to ‘Multiply’.

9. Add Layer Mask to the Duplicate Model Layer

How to Create a Watercolor Effect - 11 Steps Photoshop Tutorial
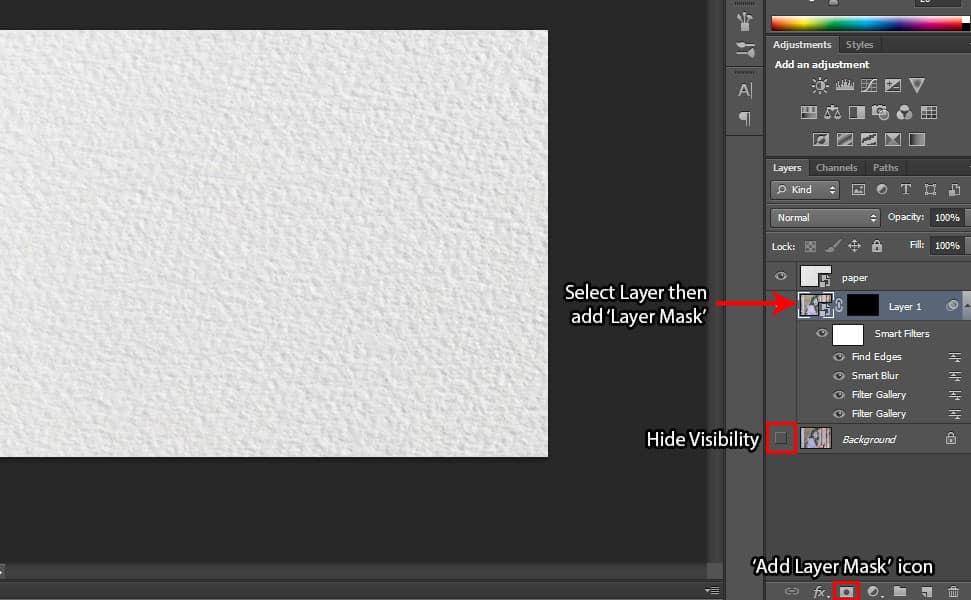
Select the Duplicate Model Layer first, then click the ‘Add Layer Mask’ icon located below the Layer panel. Then press CTRL+I to invert it. Also, hide the visibility of the Background Layer by clicking the ‘Eye’ icon located beside the Background Layer.

See related article: 17 Step by Step Double Exposure Effect Tutorial in Photoshop

10. Load the Brushes

How to Create a Watercolor Effect - 11 Steps Photoshop Tutorial
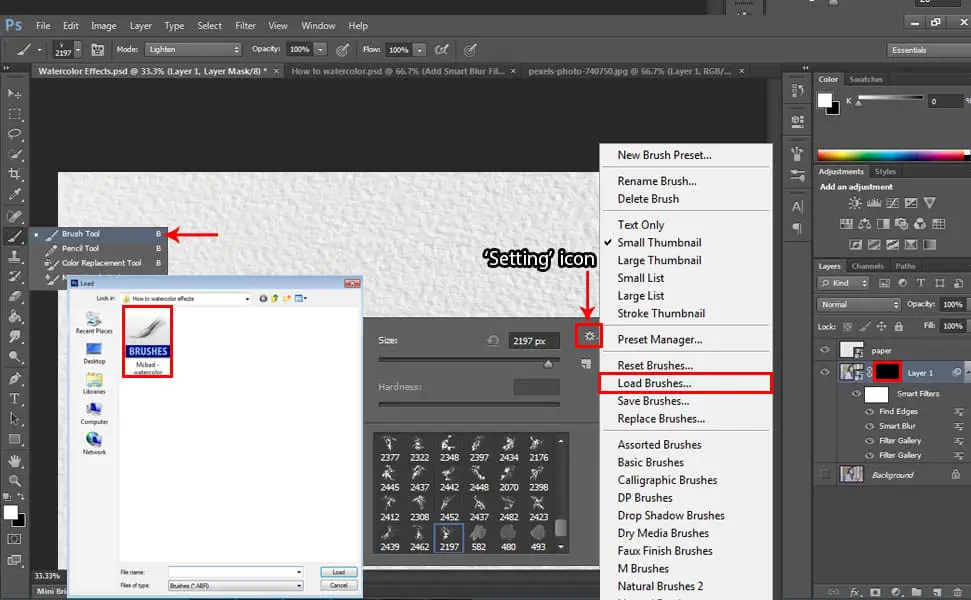
Click the Layer Mask thumbnail of the duplicate Model Layer, then click the Brush Tool then right click on the watercolor paper and click the ‘Setting’ icon and select ‘Load Brushes’ then select the brush you downloaded from here then click Load.

11. Brush off the Model Area

How to Create a Watercolor Effect - 11 Steps Photoshop Tutorial
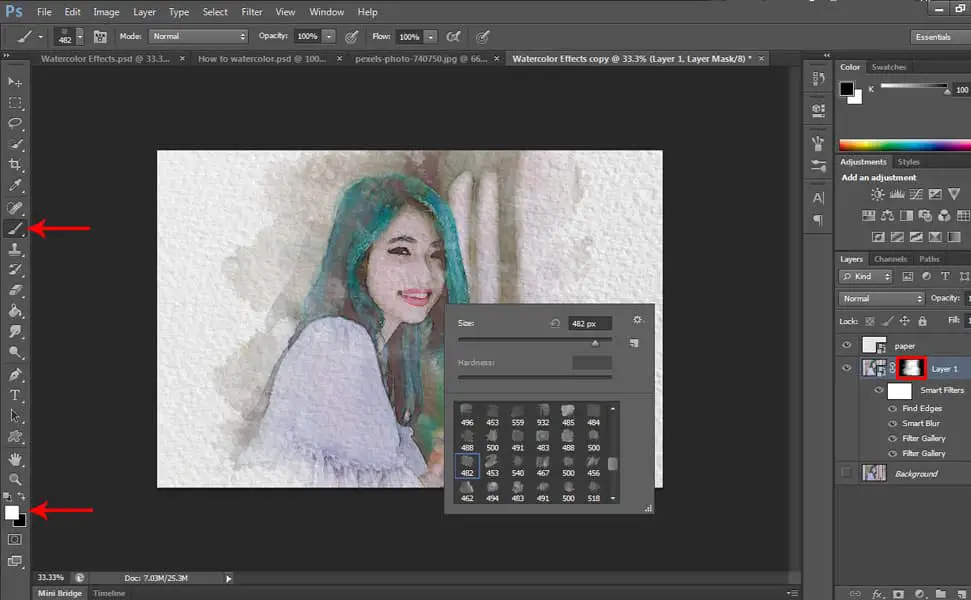
After loading the Brushes, make sure your foreground color is set to White then select the Brushes that you loaded and randomly brush off the area using random brushes until you create your masterpiece. Make sure you are still selecting the Layer mask thumbnail of the duplicate model layer so it will be effective.

So that’s it, I hope you enjoyed the tutorial and got the awesome results that you’ve been wanting to create!

22 Step by Step Word Cloud Effect Tutorial in Photoshop

22 Step by Step Word Cloud Effect Tutorial in Photoshop22 Step by Step Word Cloud Effect Tutorial in Photoshop

Have you ever been motivated by an inspiring quote or poem or even lyrics that resonates a lot with you that you’re wanting to integrate it into your picture? See, I’m gonna teach you 22 step by step Word Cloud Tutorial in Photoshop to turn your text into a beautiful portrait. It is so hard to find photoshop tutorials that go straight to the point. Instead, we are left with “How to use Photoshop” videos that take an hour when the actual lesson could’ve been taught in less than five minutes. You don’t have to worry though for this one will take less than that for you to read.

Btw, if you wanna use the image that I’m using, feel free to download here: 

Model Image: https://www.pexels.com/photo/woman-in-red-tank-top-638700/

So let’s get to it!

1. Crop the Photo

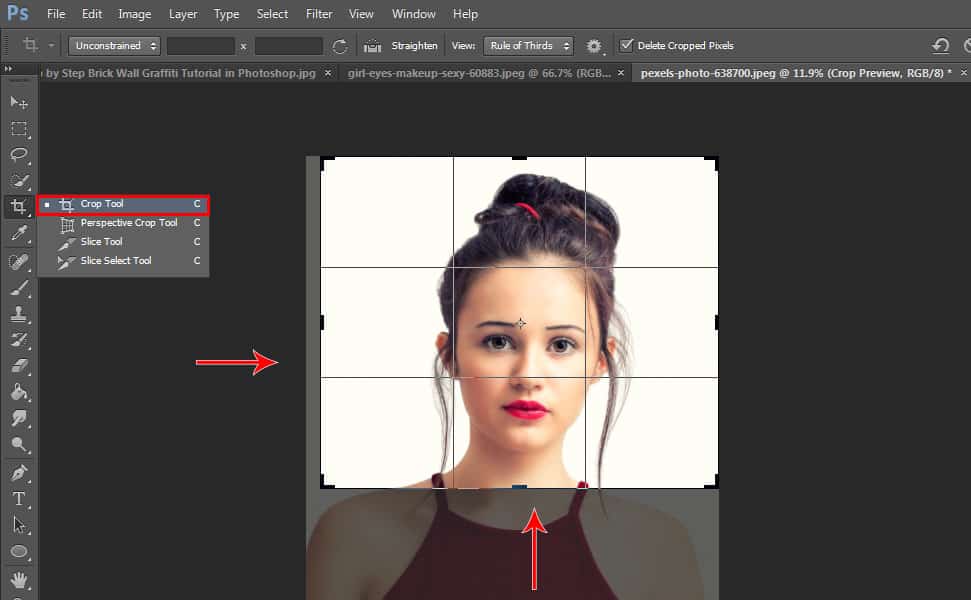
22 Step by Step Word Cloud Effect Tutorial in PhotoshopOpen the photo you’d like to use for this project. The first step is to crop the photo cuz we need to focus on the face. So select the ‘Crop Tool’ and drag the corners in, to size the subject within the crop bounding box.


2. Quick Selection 

22 Step by Step Word Cloud Effect Tutorial in Photoshop
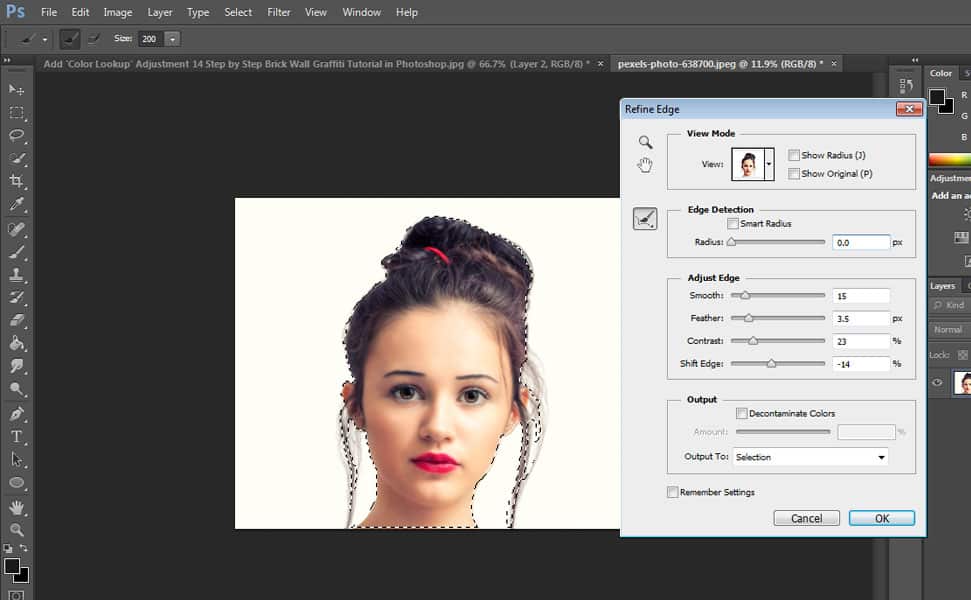
Then remove the background from the subject by making a selection of your subject. There are actually many ways to do this, but for this example, we will use the ‘Quick Selection Tool’. Drag the tool over your subject to make a selection around it. Make sure you trace it well. Then press Alt + Ctrl + R to refine the edges. You can see that the Refine Edge box pops up, so set the ‘Smooth’ to 15, Feather to 3.5px, Contrast to 23 and Shift Edge to -14 then press OK, but you can also experiment on it, depending on what picture you are using or how you traced it. Then click ‘Add Layer Mask’ icon to remove the background.


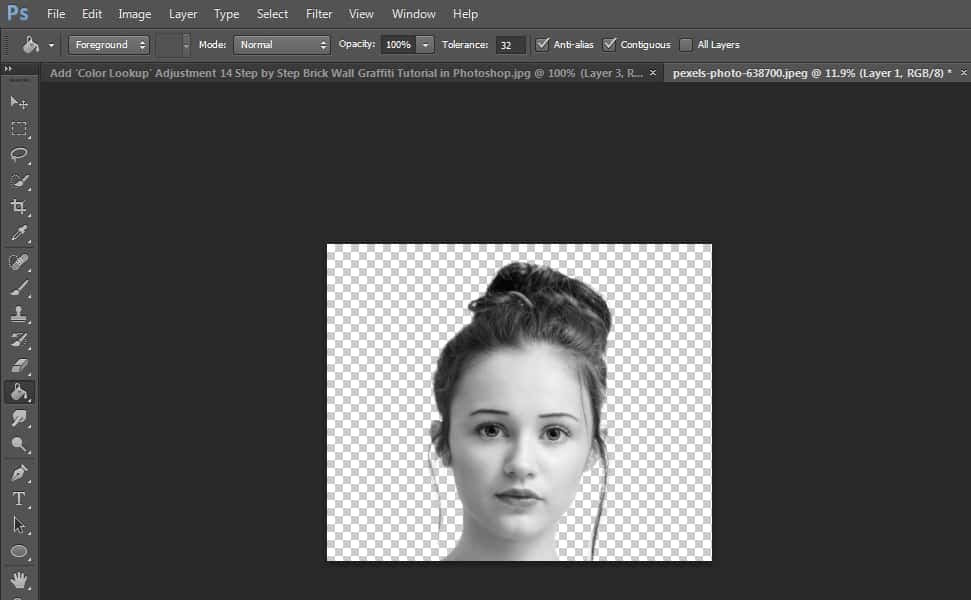
3. Make it Black and White

22 Step by Step Word Cloud Effect Tutorial in Photoshop
Press CTRL + Shift + U to remove its color.


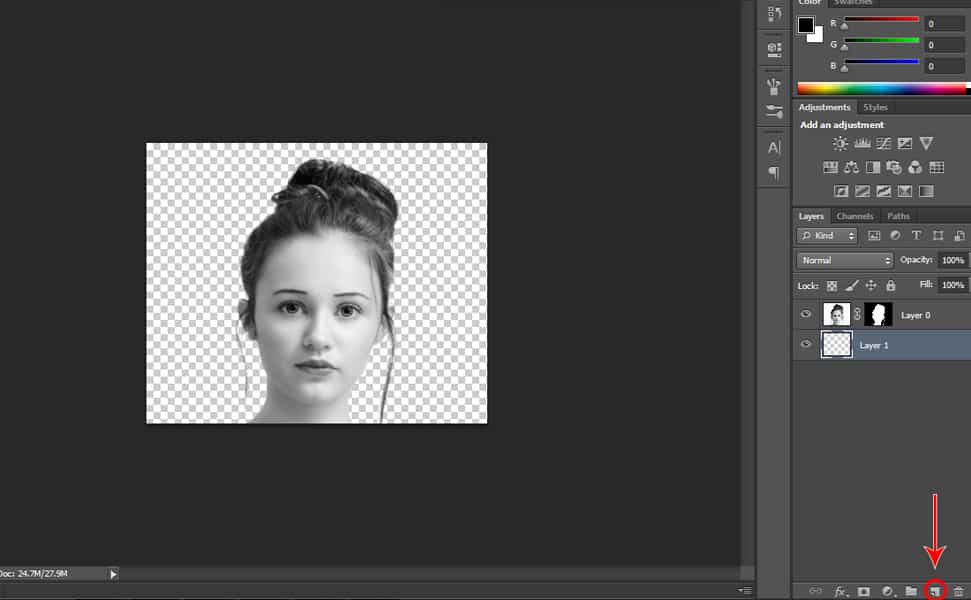
4. Create a New Layer 

22 Step by Step Word Cloud Effect Tutorial in Photoshop
Click the ‘Create a New Layer’ icon located below the Layer tab. Drag the new layer that you created below the subject layer.


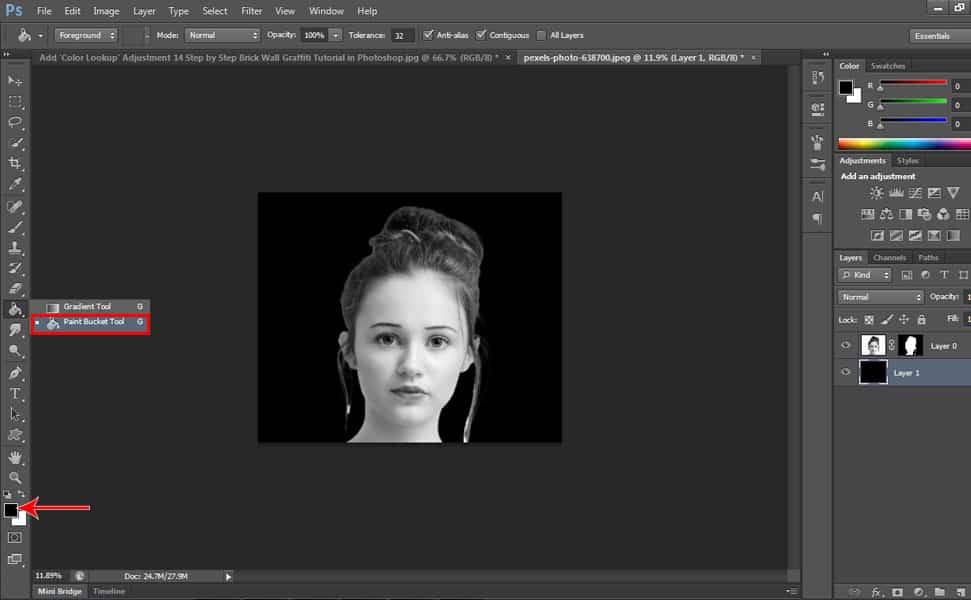
5. Make the New Layer Black 

22 Step by Step Word Cloud Effect Tutorial in Photoshop
Before we make the layer black, make sure your foreground color is ‘Black’ then select the ‘Paint Bucket Tool’ and click on the blank layer to make fill it w/ black.


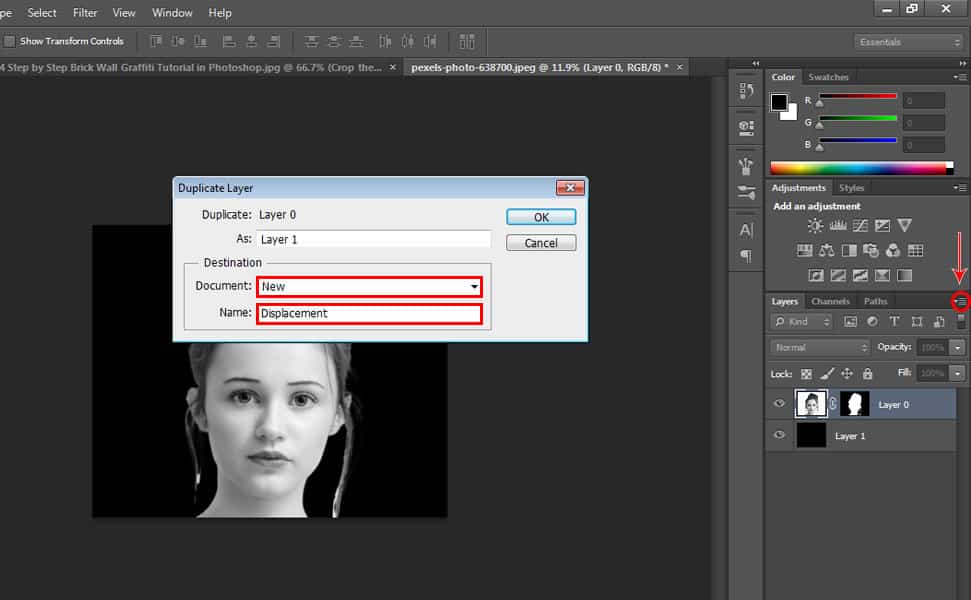
6. Duplicate the Layer for Displacement Map 

22 Step by Step Word Cloud Effect Tutorial in Photoshop
Make sure your top layer is active then click the icon in the upper right corner and select ‘Duplicate Layer’. Click the ‘Document’ list and select ‘New and name it Displacement and click OK. We’re gonna use it later.

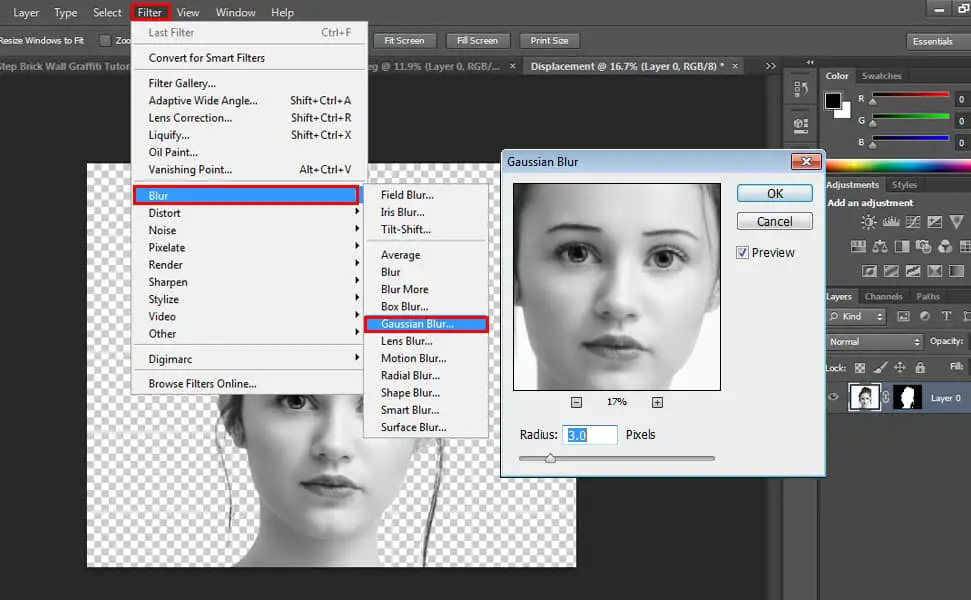
7. Use Gaussian Blur Filter

22 Step by Step Word Cloud Effect Tutorial in Photoshop
You will be redirected to your duplicate layer that you created in step 6 so let’s blur it. Go to Filter, select ‘Blur’ then ‘Gaussian Blur’ and make it 3.0 pixels.


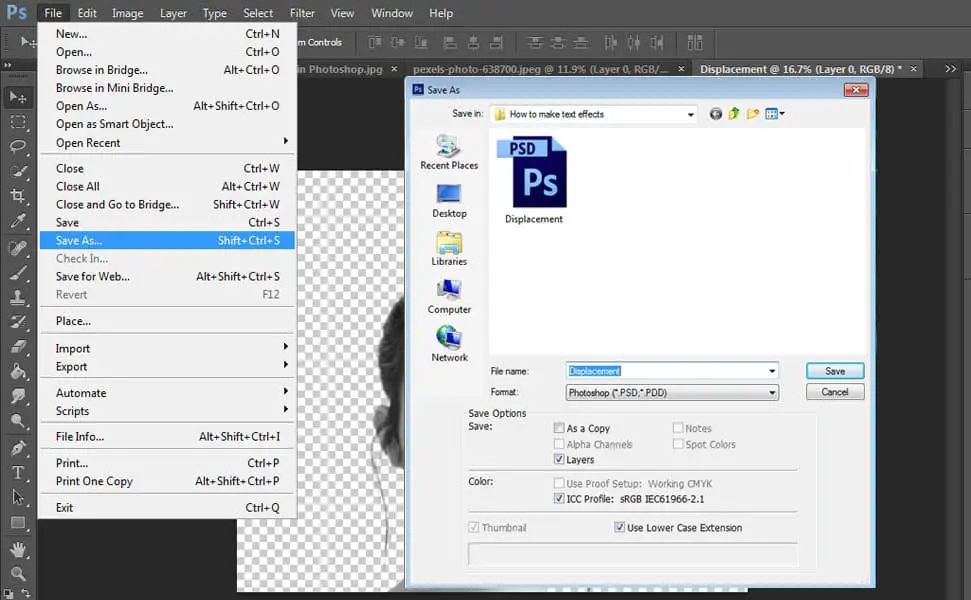
8. Save the Duplicate Layer 

22 Step by Step Word Cloud Effect Tutorial in Photoshop
Go to ‘File’ then ‘Save as’, name it Displacement and save it as a Photoshop PSD file and click Ok. So you can close the PSD file now because we already saved it. Now let’s go back to the original file.


9. Add Text 

22 Step by Step Word Cloud Effect Tutorial in Photoshop
Now we’re ready to add text. You can either type it out on a notepad application or find a poem or a lyrics you can ultimately copy and paste. You can highlight it and press CTRL + C to copy it.


10. Create Word Cloud

22 Step by Step Word Cloud Effect Tutorial in Photoshop
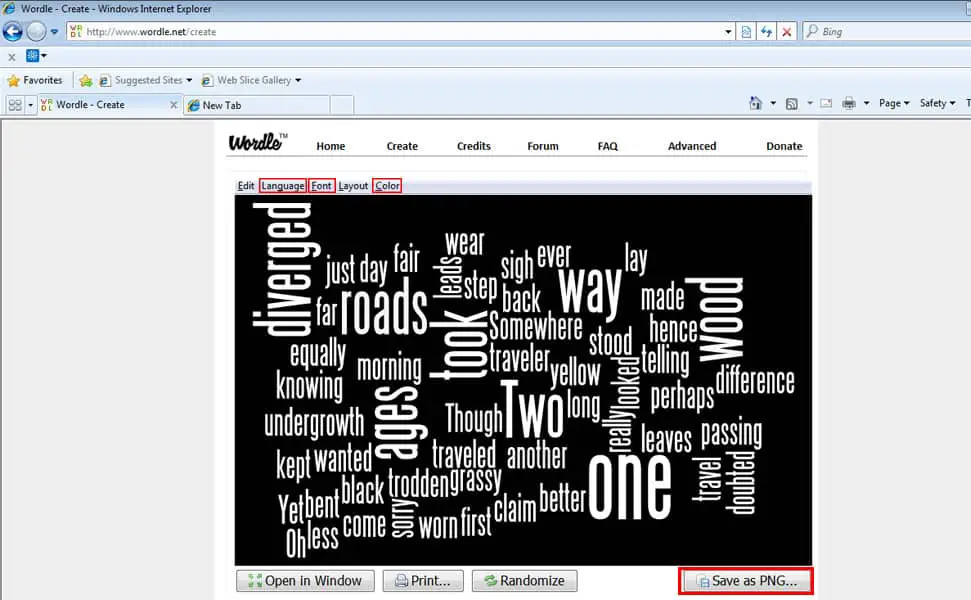
We’re going to create a Word cloud from our text. There are many free websites that do this, however, the site I used is called Wordle.net. Unfortunately, sometimes Chrome or Firefox has trouble creating word clouds in Wordle but it works well in Explorer. So click ‘Create’.

After clicking ‘Create’, paste the text inside the text box by pressing CTRL + V then click ‘Go’. Click ‘Language’ then choose Leave Words as Spelled and Remove Common English Words. Then open ‘Font’ and select ‘Steelfish’ font. Then open ‘Layout’ and choose ‘Straighter Edges’ and ‘Mostly Horizontal’. Then open ‘Color’ and select ‘WB’. Then click ‘Save as PNG’then save it.


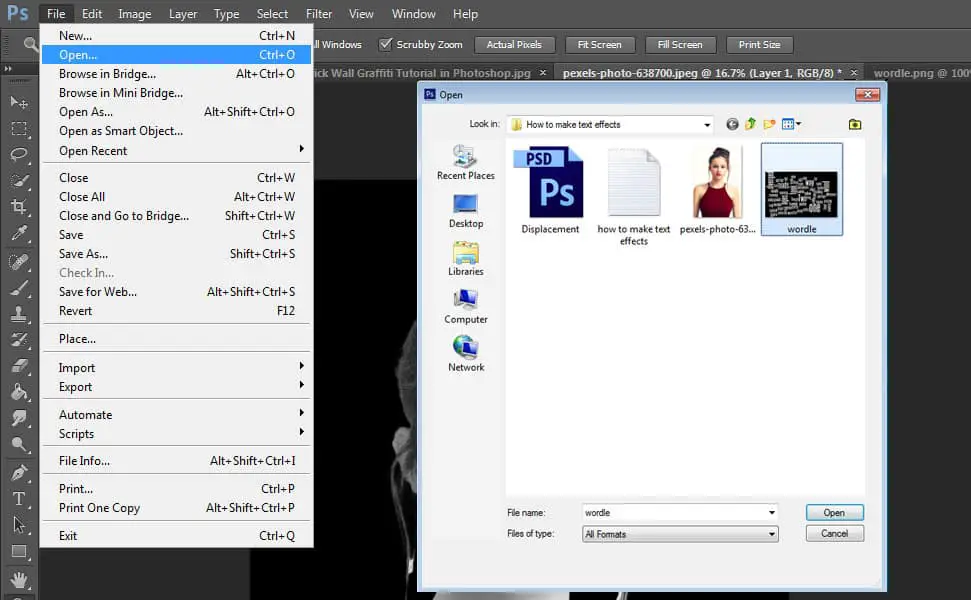
11. Open your Wordle File

22 Step by Step Word Cloud Effect Tutorial in Photoshop
Click ‘File’ then select ‘Open’ and locate your Wordle File.


12. Make a Selection of the Text

22 Step by Step Word Cloud Effect Tutorial in Photoshop
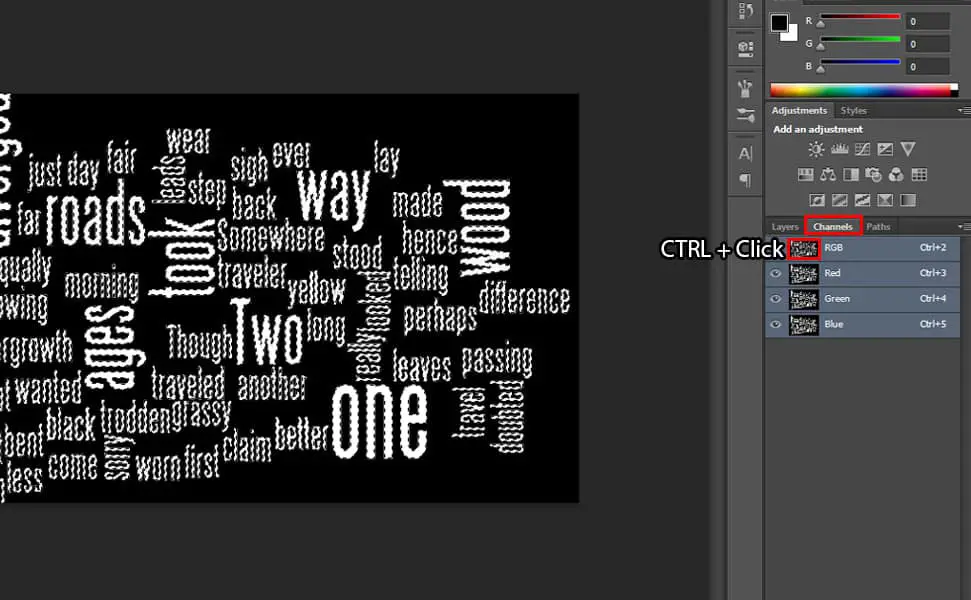
Open your ‘Channels’ panel and CTRL + click the thumbnail of the ‘RGB’ channel to make a selection of the text. And go back to ‘Layer’ panel to paste it there by pressing CTRL + J. Then press CTRL + A to select it and press CTRL + C to copy it then go to your subject tab then click your subject and paste it by pressing CTRL + V.


13. Duplicate the Word Cloud

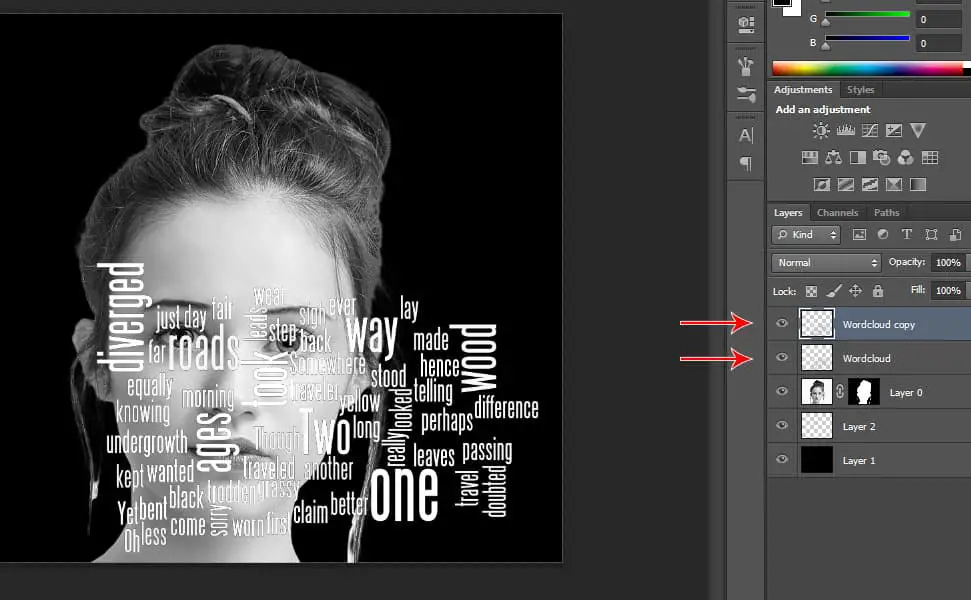
22 Step by Step Word Cloud Effect Tutorial in PhotoshopSelect the Word Cloud layer and duplicate it by pressing CTRL + J.

See related article: 13 Step by Step 3D Pop Out Effect Tutorial in Photoshop

14. Add Drop Shadow

22 Step by Step Word Cloud Effect Tutorial in Photoshop
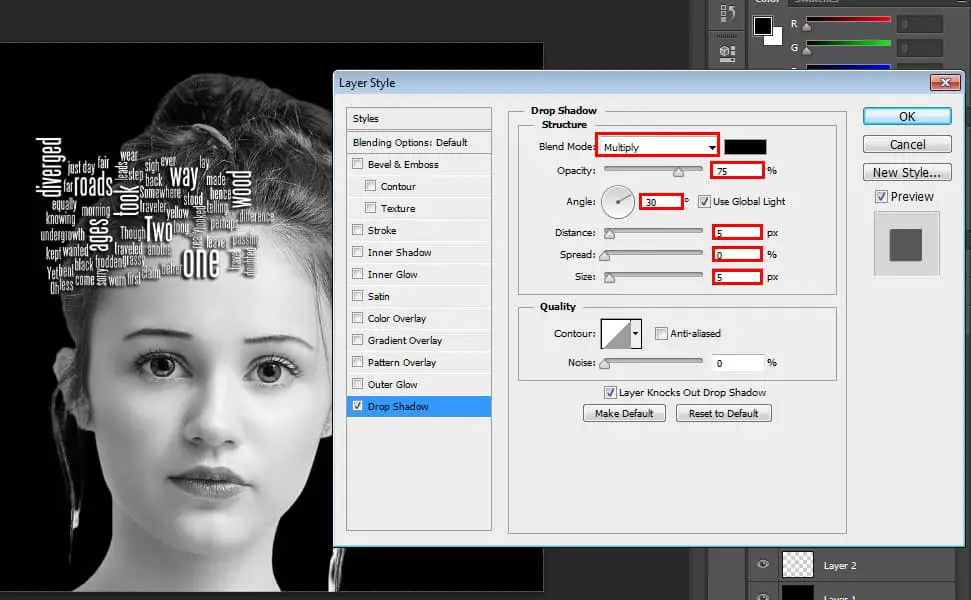
But first, duplicate the Word Cloud layer and Double-click the Word Cloud layer to open the ‘Layer Style’ window. Click ‘Drop Shadow’. Set the ‘Blend Mode’ to ‘Multiply’, the ‘Opacity’ is 75% and the Angle is 30 degrees. The Distance is 5px, the Spread is 0px and the size is 5px then click OK.


15. Make lots of Word Cloud Copy

22 Step by Step Word Cloud Effect Tutorial in Photoshop
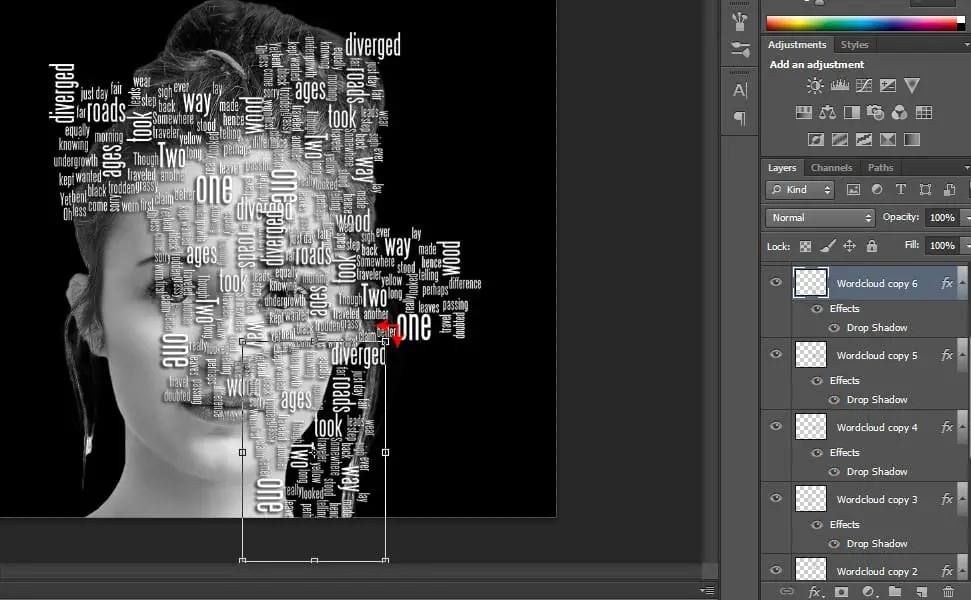
First, resize it by pressing CTRL + T and make it smaller then press CTRL + J to duplicate and move it to fill the other side of the face then rotate it 90 degrees by pressing Shift while you click and rotate it to retain its proportion. Then press CTRL + J to duplicate then move it and fill the face with the text by
repeating this step.


16. Group the Word Cloud Copies

22 Step by Step Word Cloud Effect Tutorial in Photoshop
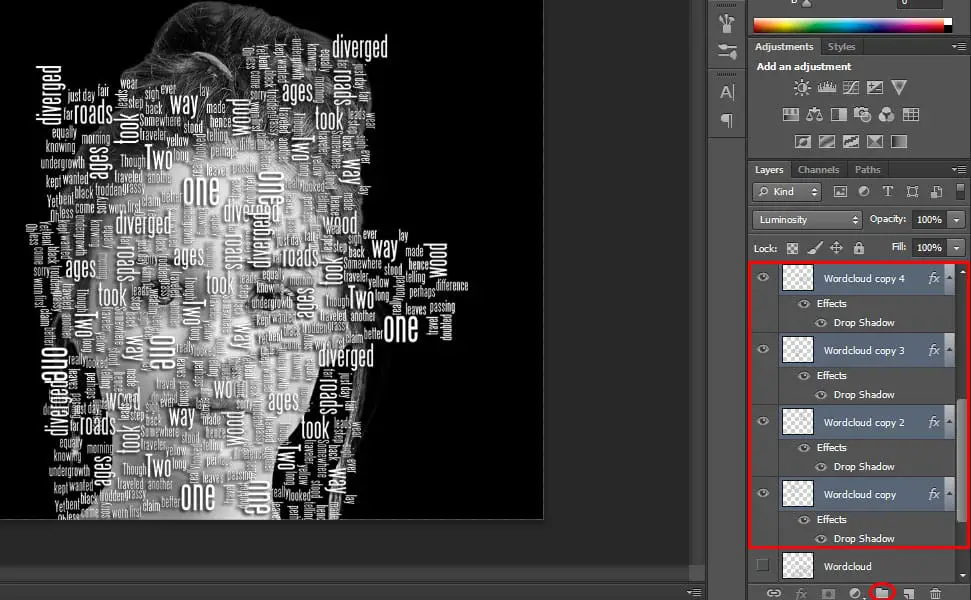
Select the top layer and press ‘Shift’ till the bottom of the Word Cloud copy make sure you don’t include the original word cloud in your selection. Then click the ‘Create a New Group’ icon located below the layer tab or press CTRL + G to group them all together.


17. Make a Copy of the Word Cloud Group Folder

22 Step by Step Word Cloud Effect Tutorial in Photoshop
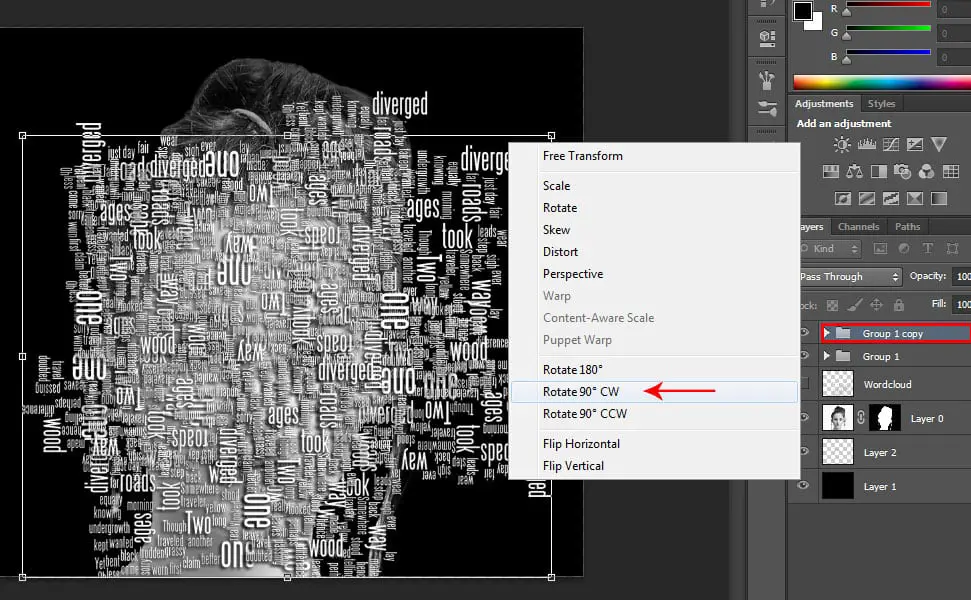
Press CTRL + J to duplicate the word cloud folder, then press CTRL + T and rotate it right clicking then select Rotate 90* CW then press Enter.


18. Convert to Smart Object 

22 Step by Step Word Cloud Effect Tutorial in Photoshop
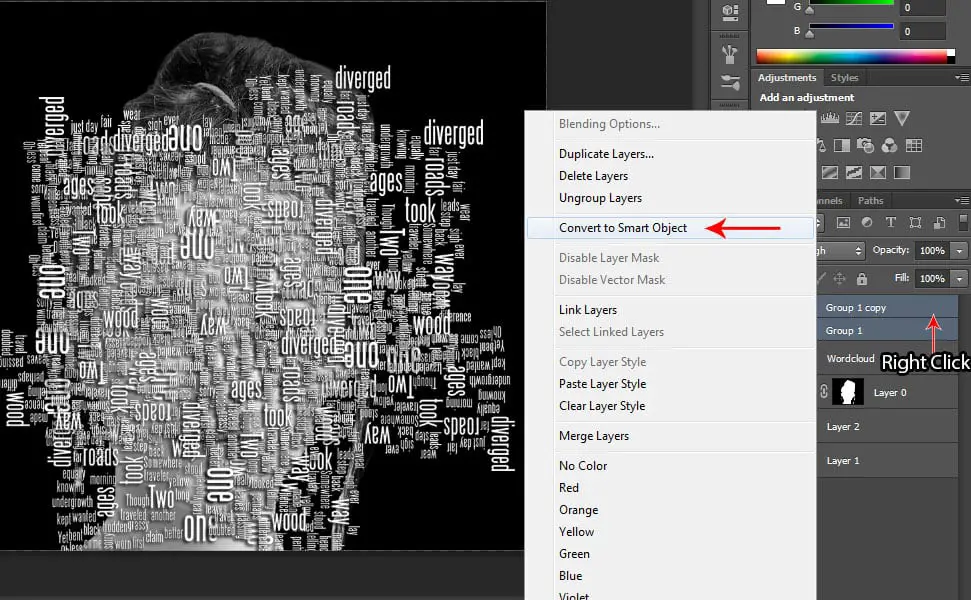
Now SHIFT + Click the Group 1 and Group copy to select them both. Then right-click and ‘select Convert to Smart Object’. Then make duplicate it by pressing CTRL + J then hide the visibility of the lower Smart Object by clicking the eye beside the layer. Then rename the top layer ‘Displacement’.
See related article: 13 Step by Step Transparent Clothes Effect Tutorial in Photoshop

19. Add Displacement Map Filter 

22 Step by Step Word Cloud Effect Tutorial in Photoshop
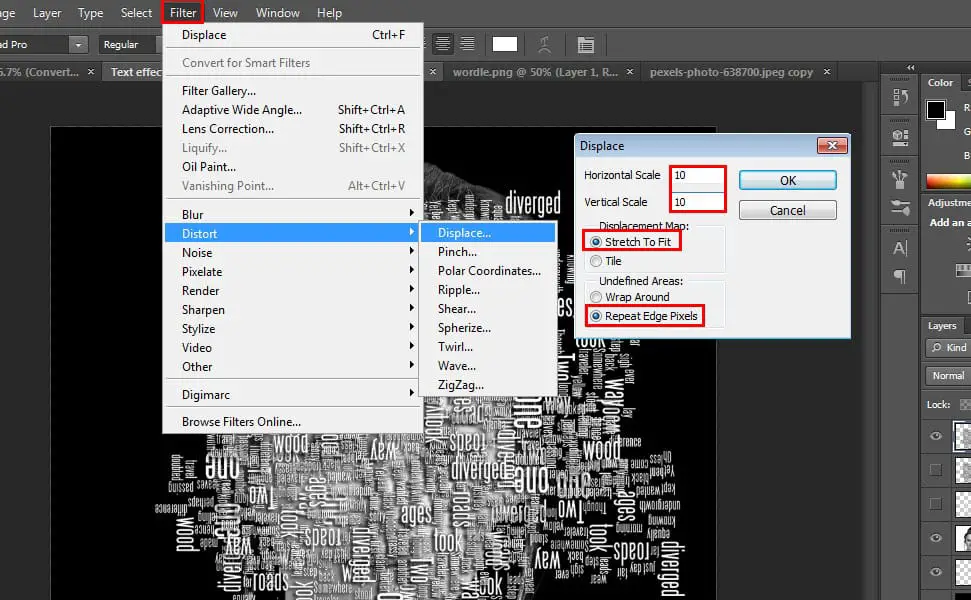
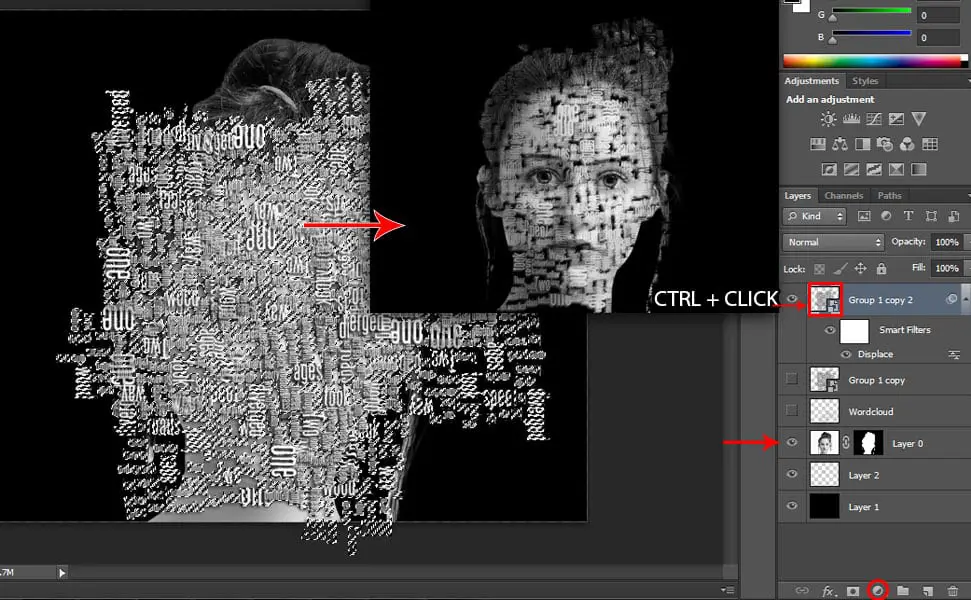
Go to ‘Filter’ then select ‘Distort’ then click ‘Displace’. You will see a popup box where you will set the ‘Horizontal Scale’ and ‘Vertical Scale’ to 10 each and select ‘Stretch to Fit’ and ‘Repeat Edge Pixels’ then press OK then select the Displacement PSD file you saved earlier in Step 6 then click Open.


20. Make a Selection of your Displacement Layer

22 Step by Step Word Cloud Effect Tutorial in Photoshop
CTRL + click the thumbnail of the Displacement Layer to make a selection. Then hide the visibility of the ‘Displacement’ layer. Then right click your ‘Subject’ layer and select ‘Convert to Smart Object’. After converting it to Smart Object, click the ‘Add Layer Mask’icon located below the layer tab.


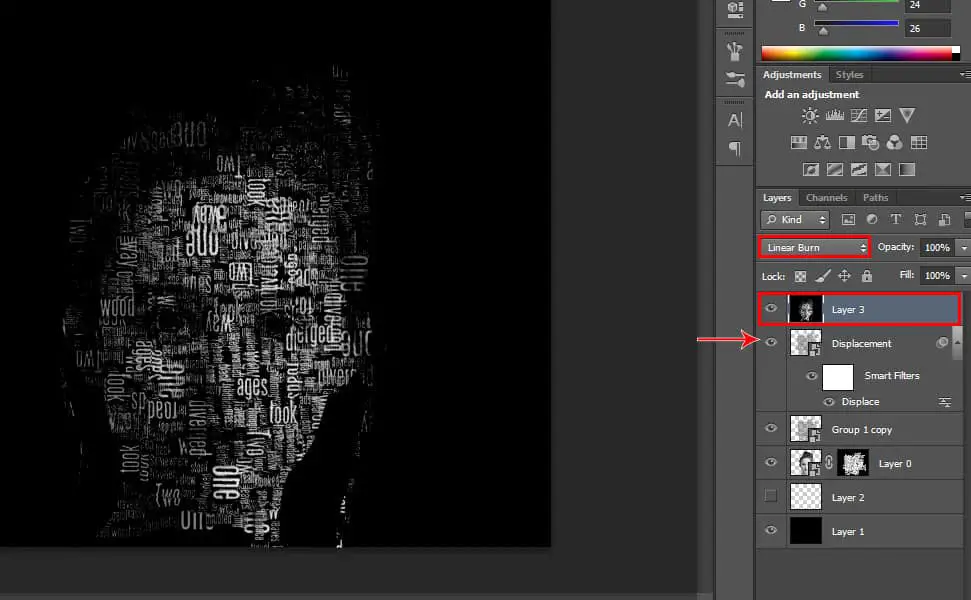
21. Change the Blending Mode to Linear Burn

22 Step by Step Word Cloud Effect Tutorial in Photoshop
Press CTRL + SHIFT + ALT + E to flatten the image. Then hide the layer below the flattened layer. Then drag the flattened layer to the top of the layer’s tab. Make the ‘Displacement’ layer visible again by clicking the box beside it. Then change the blending mode of the Flattened layer to Linear Burn.

See related article: 14 Step by Step Brick Wall Graffiti Tutorial in Photoshop

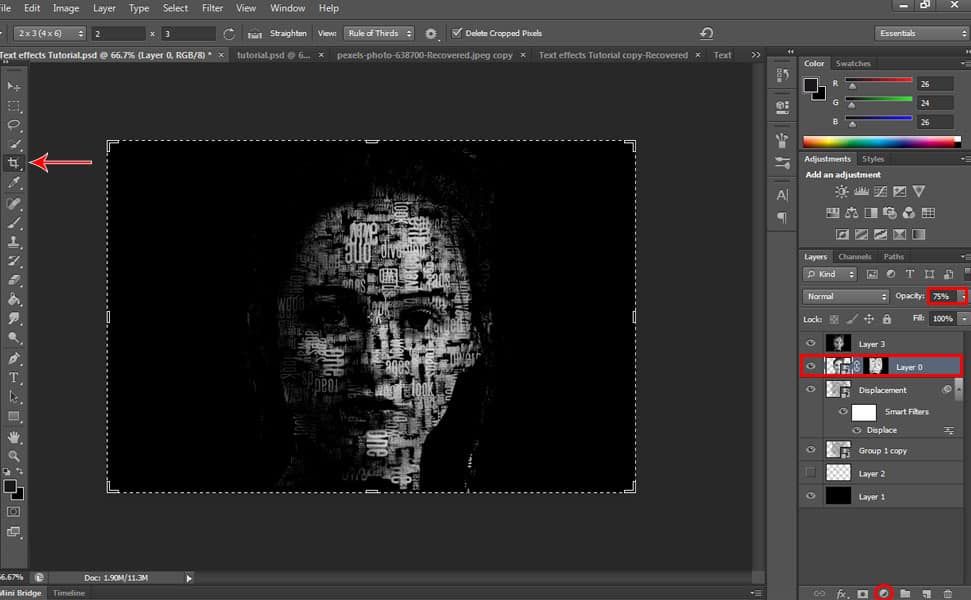
22. Finishing Touches 

22 Step by Step Word Cloud Effect Tutorial in Photoshop
Drag the Subject Layer below the top layer and make the layer’s opacity to 75%. Then Select the Crop Tool to resize it. Then click the ‘Create New Fill’ icon located at the bottom of the layer tab and select ‘Color Look Up’ then at the ‘3DLUT FILE’ choose ‘FuturisticBleak.3DL’ to add dramatic color.

So that’s it, I hope you learned a lot of new things from this tutorial and got the output that you were expecting!

13 Step by Step 3D Pop Out Effect Tutorial in Photoshop

13 Step by Step 3D Pop Out Effect Tutorial in Photoshop

13 Step by Step 3D Pop Out Effect Tutorial in Photoshop

Are you a fan of iPhones and would love your photos to look 3D that pops out of your screen? Sure this tutorial will help you achieve that 3D Pop Out effect!

In this article, you will learn 13 step by step 3D Pop Out Tutorial in Photoshop, I tell you it’s very easy to learn and you can apply this technique to anything else like using not just your phone but also television, iPad, MacBook or whatever you can think of, depending on your creativity!

Btw, if you want to use the images that I’m using, feel free to download it below:

Model Image: https://pretty-as-a-picture.deviantart.com/art/summer-suburbia-117451078

Background Image: https://drive.google.com/file/d/1CoSb6LOSJ7Ul0Tju_dXM9ols3_az915F/view?usp=sharing

So let’s get to it!

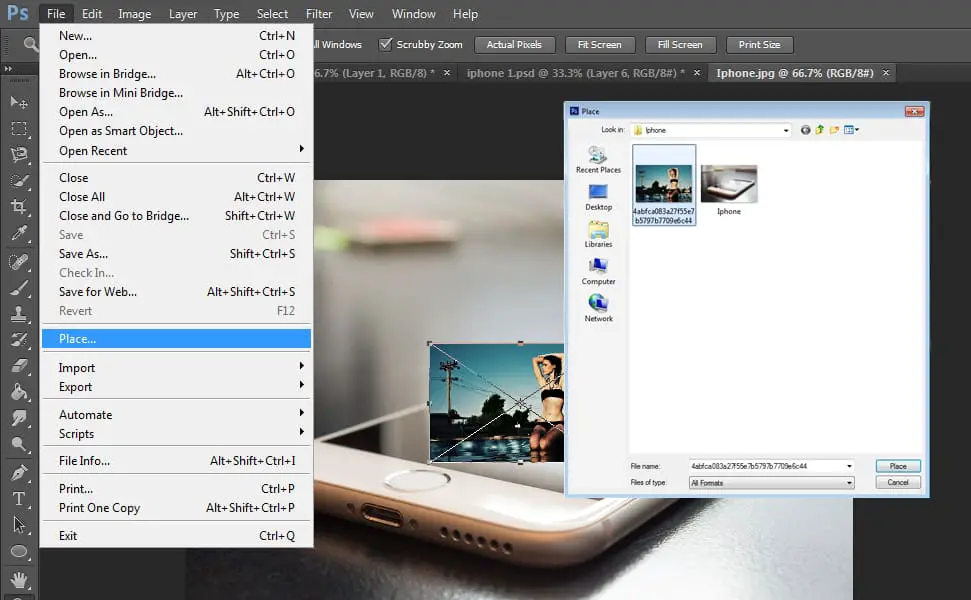
1. Place the Model Image in the Background Image

13 Step by Step 3D Pop Out Effect Tutorial in Photoshop
Open the iPhone image that you are going to use. Then click the ‘File’ menu and select ‘Place’ and you will see a popup box where you will have to select the model image that you are going to use then click ‘Place’.

2. Position the Model Image

13 Step by Step 3D Pop Out Effect Tutorial in Photoshop
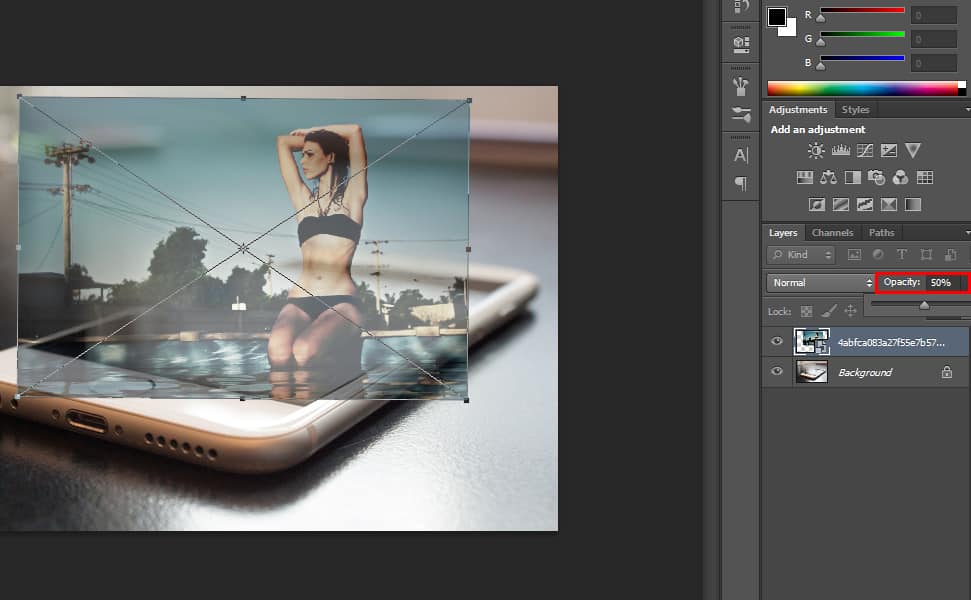
Press CTRL + T and resize it by pressing Shift to retain the proportion while you are expanding the image then press Enter when you’re done resizing. You can also decrease the opacity to 50% so you can see where to position the model and then make it 100% after you’re done.

3. Make Selection of the Model

13 Step by Step 3D Pop Out Effect Tutorial in Photoshop
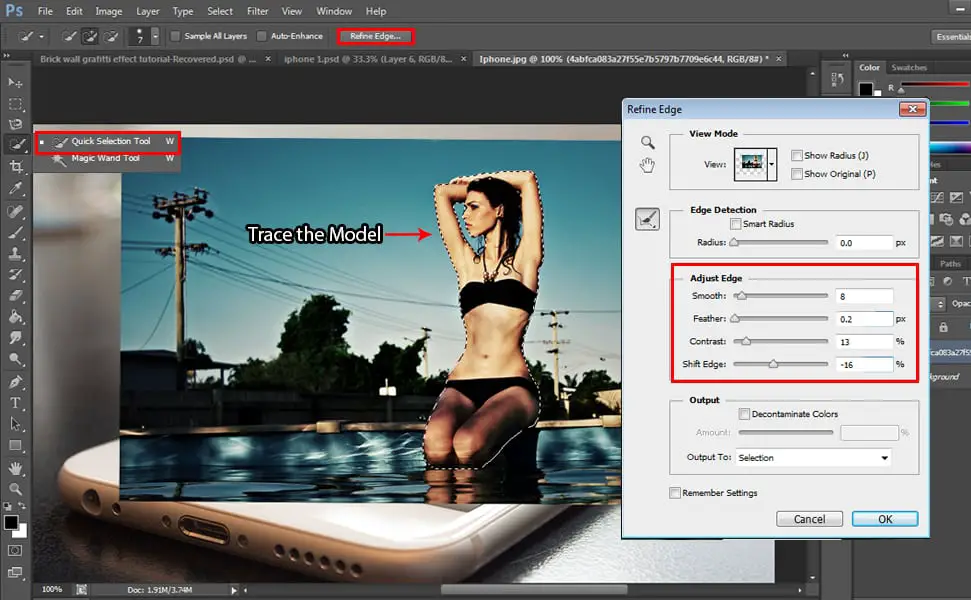
Use ‘Quick Selection Tool’ to trace the model then click Refine Edge to smoothen the edges. Adjust edge by setting Smooth: 8, Feather: 0.2, Contrast: 13 and shift Edge: -16.

4.Add a Layer Mask

13 Step by Step 3D Pop Out Effect Tutorial in Photoshop
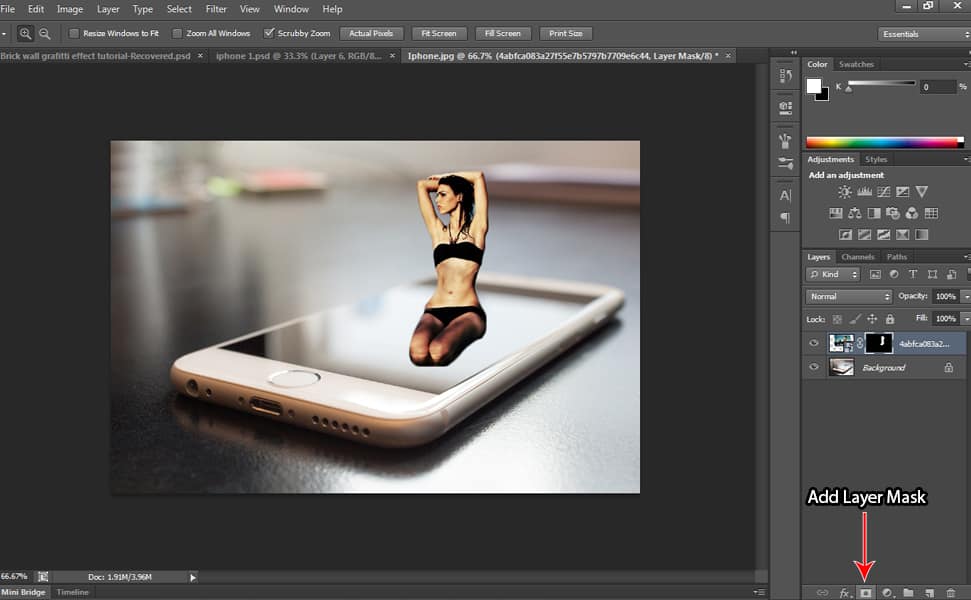
Click the ‘Add a Layer Mask’ to cut out the model.

See related article: 14 Step by Step Brick Wall Graffiti Tutorial in Photoshop

5. Make a Copy of the Layer

13 Step by Step 3D Pop Out Effect Tutorial in Photoshop
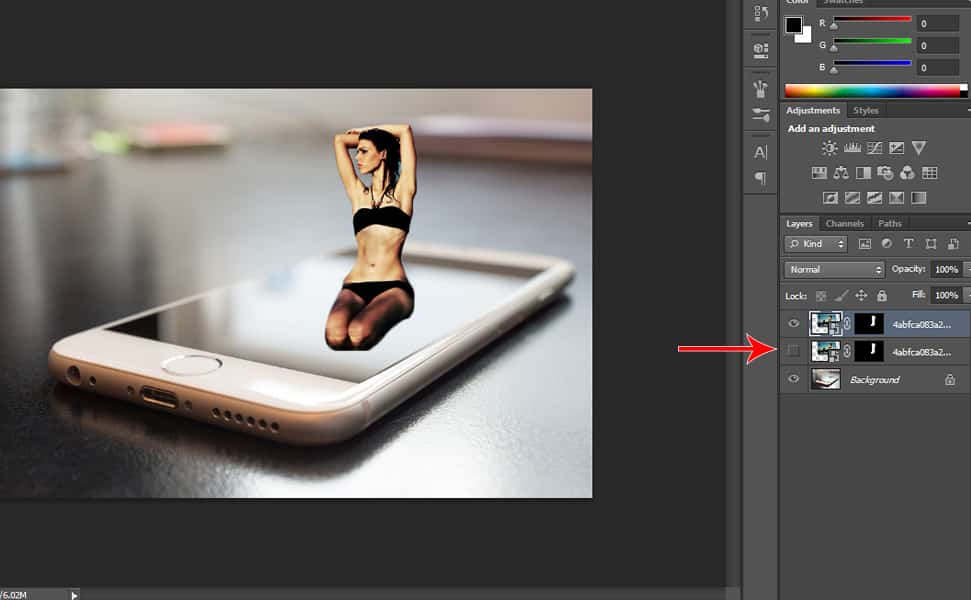
Press CTRL + J to duplicate the layer because we’re gonna use it for the background later. Then hide the visibility of the layer below it by clicking on the ‘eye’ icon beside the layer.

6. Make Selection of the Background

13 Step by Step 3D Pop Out Effect Tutorial in Photoshop
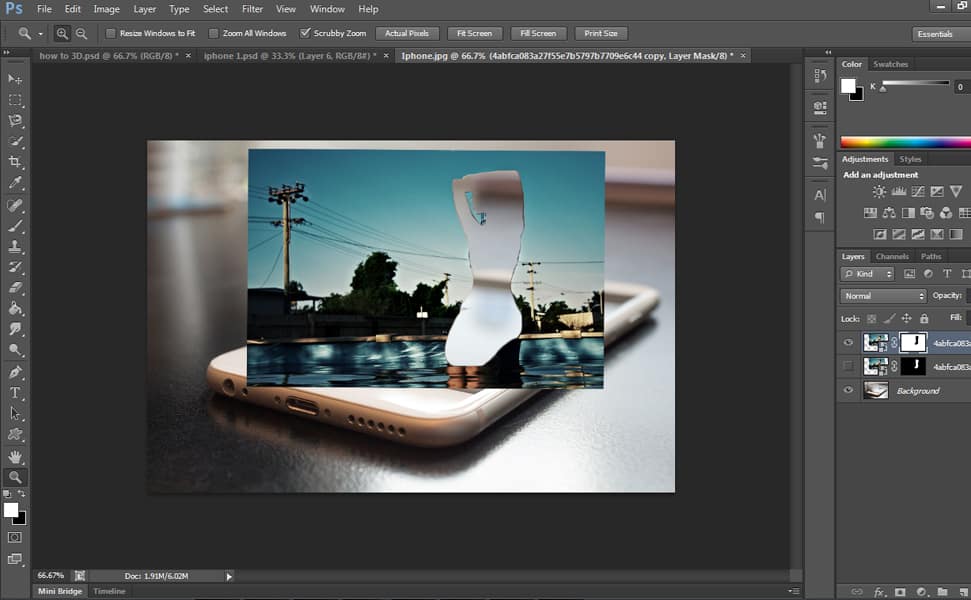
Select the new copy of layer mask then press CTRL + I. You can see that we have created a layer for the background and the other layer below,  it’s the pop out model.

7. Make Selection of the Phone’s Screen

13 Step by Step 3D Pop Out Effect Tutorial in Photoshop
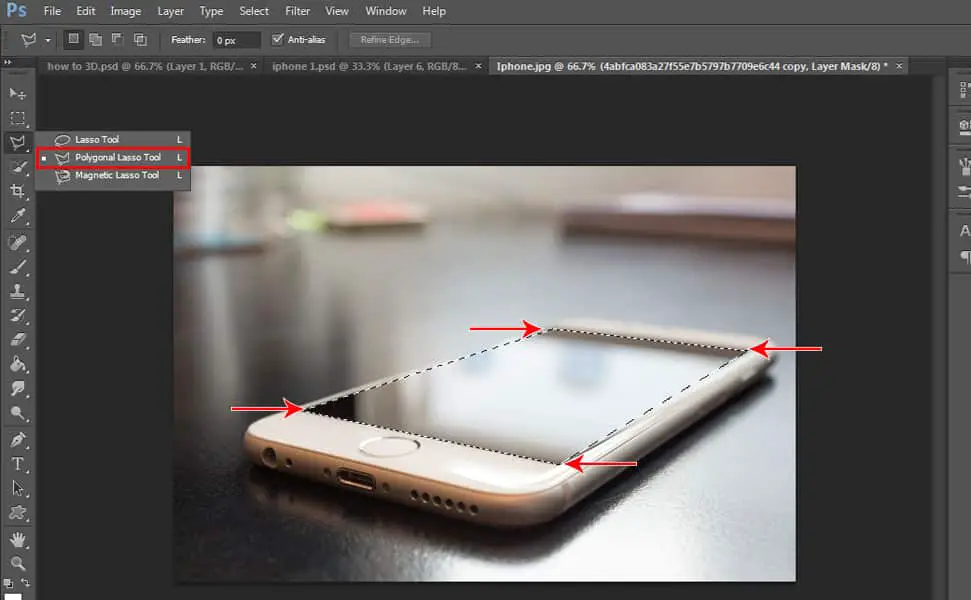
Turn off the visibility of the Background image by clicking the ‘eye’ at the left side of the layer so you will be able to see the screen. Then select ‘Polygonal Lasso Tool’ to make a selection of the phone’s screen.

8. Restore the Cutout Area

13 Step by Step 3D Pop Out Effect Tutorial in Photoshop
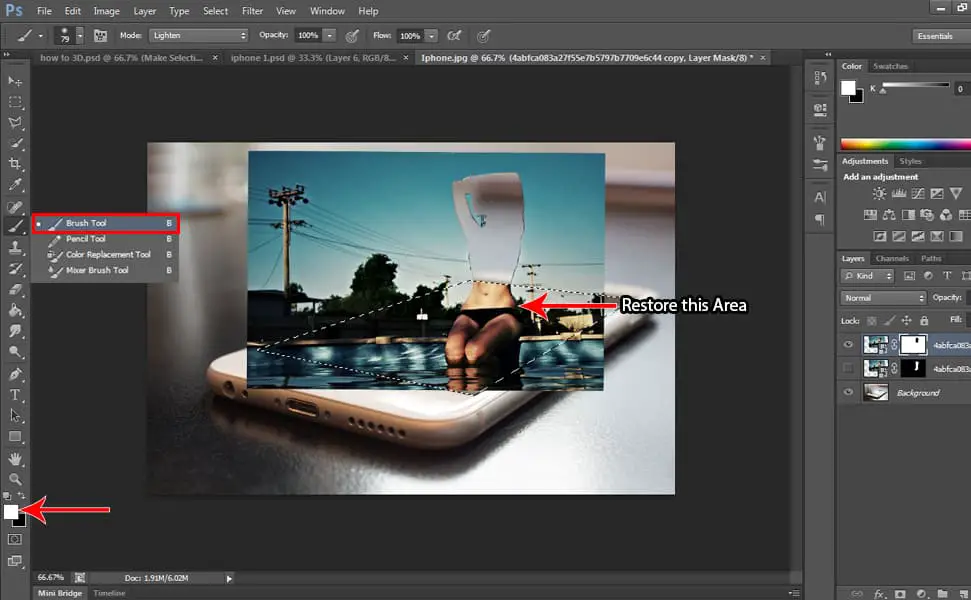
First, turn on the visibility of the background layer by clicking the box at the left side of the layer. Then select Brush Tool and make sure your foreground color is white color and paint where it has been cut out earlier.

9. Cut the Background Image to Fit the Screen

13 Step by Step 3D Pop Out Effect Tutorial in Photoshop
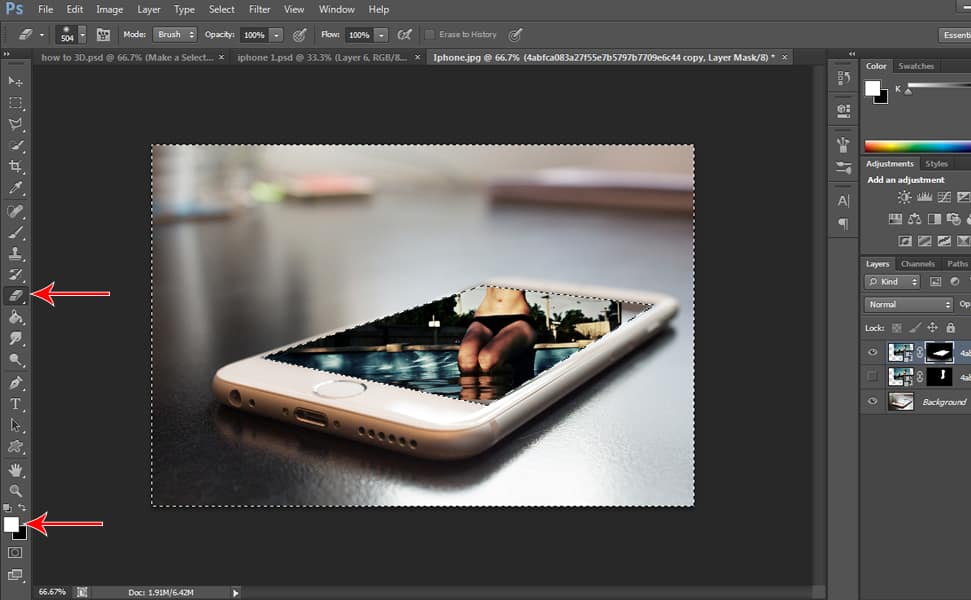
Then press Shift + CTRL + I to inverse it and delete the outer background by using your ‘Eraser Tool’, using ‘White’ as your foreground color then start erasing the outer background so that the only thing left will be the background inside the screen

10. Use Clone Stamp

13 Step by Step 3D Pop Out Effect Tutorial in Photoshop
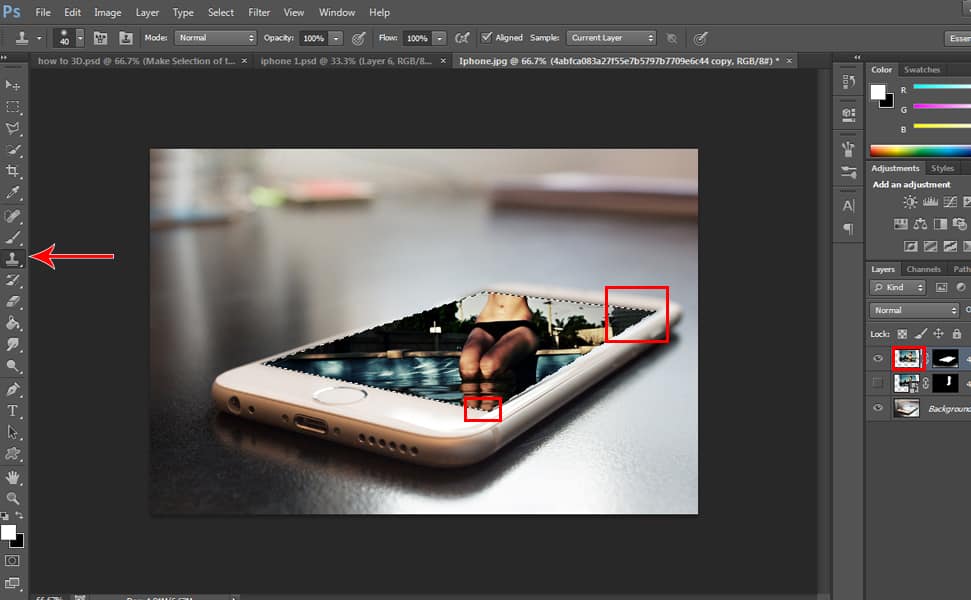
You notice at the upper and lower edge there’s a blank space, so let’s use the ‘Clone Stamp’ to extend our background image to fit the phone’s screen. Press SHIFT + CTRL + I to select the screen then click on the thumbnail of the layer then use your clone stamp by pressing Alt to copy the black area and expand it to the edges by clicking to the empty area. You will see a popup box saying “This smart object must be rasterized” so just click ok then just continue cloning your background. Then press CTRL + D to deselect it.

11. Smoothen the Edges

13 Step by Step 3D Pop Out Effect Tutorial in Photoshop
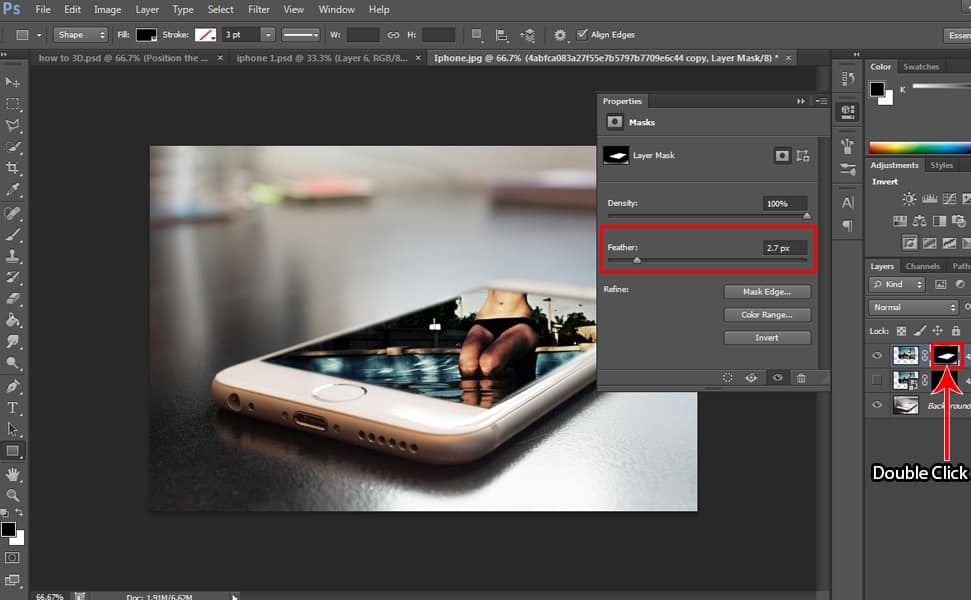
You can see that the edges look pretty sharp, so let’s smoothen the edges a bit by double-clicking the layer mask and adjust the ‘Feather’ to 2.7px so that it would look much better.

See related article: 13 Step by Step Transparent Clothes Effect Tutorial in Photoshop

12. Add Color Balance

13 Step by Step 3D Pop Out Effect Tutorial in Photoshop
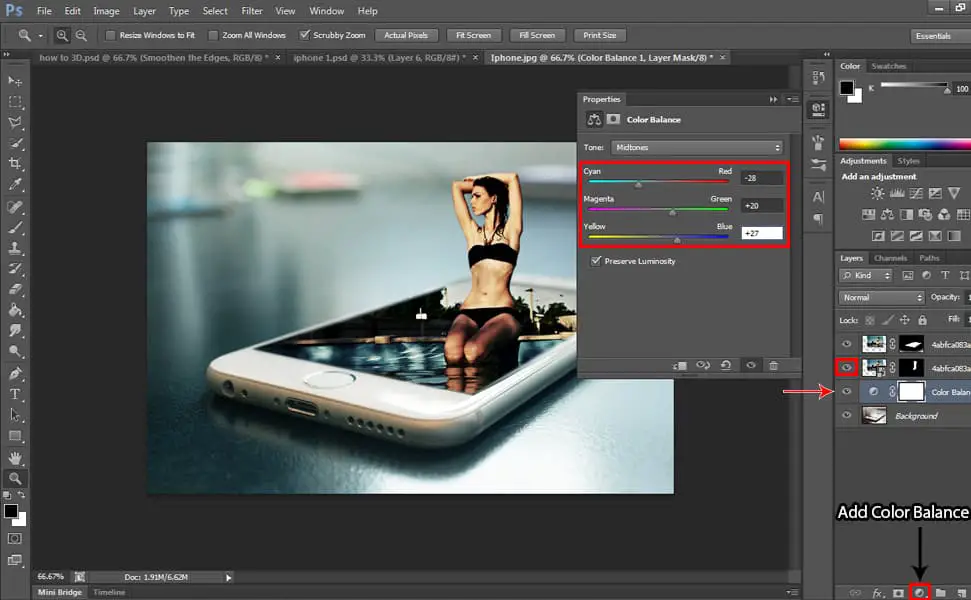
So let’s turn on the visibility of the model image by clicking on the box at the left side of the model layer image. Then select the ‘Background Layer’ and click the ‘Create New Fill or Adjustment Layer’ icon located below the layer tab and choose ‘Color Balance’ – you can play with the colors, it’s up to you how you want it to look like but for me I used -28 for Cyan to Red, +20 on Magenta to Green, and +27 on Yellow to Blue.

13. Add Dramatic Effects

13 Step by Step 3D Pop Out Effect Tutorial in Photoshop
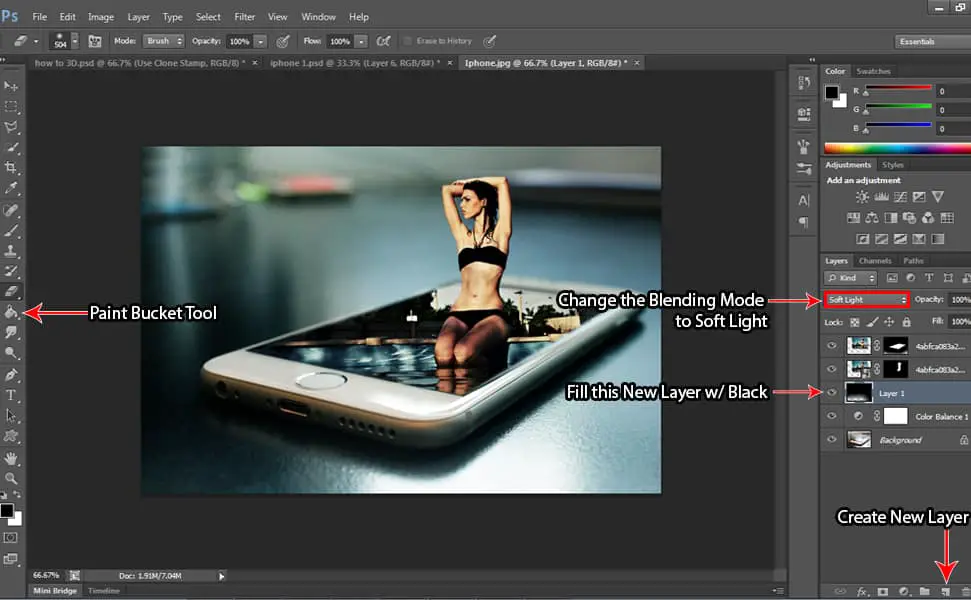
Add a new layer by clicking the ‘Add New Layer’ icon located below the layer tab and select the ‘Paint Bucket Tool’ and make sure your foreground color is black then paint black on the new layer by clicking on it using the Paint Bucket Tool. Then change the blending mode to ‘Soft Light’. You can also erase a little bit on the bottom so it won’t be too dark using the ‘Eraser Tool’.

So that’s it, I hope you learned a new technique from this tutorial! If you have any questions, feel free to comment below.

9 Tree Memes, That Are Actually Pretty Funny

At first glance, you may not think this article will be very funny. Tree memes? How can I laugh at those? Well, to be honest, tree memes are becoming increasingly popular, and you just might be surprised at how funny you think they are! They are indeed simple, however, the photo editing, captions, and titles used in these memes really help them out. So, whether you’re wanting to chuckle, or just wanting to look at some neat memes, be sure to check out the list below!

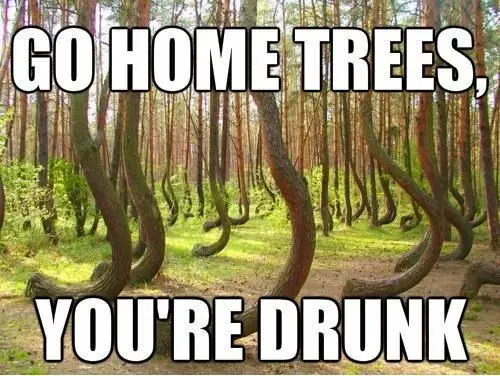
1. “Go Home Trees, You’re Drunk”

I am not too sure exactly where these trees are located, but believe it or not, they are in fact real, and are shaped exactly like the picture shows (year round).

“Go Home Trees, You’re Drunk”

2. “Junk In The Trunk”

Very funny, and perhaps the most literal meaning of “junk in the trunk”…

“Junk In The Trunk”

3. “Tree Stop That – No, I Must Dance”

Much like with the picture above, you may think this one is fake. However, I can certainly assure you that it is not. The tree you see in that funny meme below, is 100% real!

“Tree Stop That – No, I Must Dance”

4. “Judging Tree Is Judging You”

This tree does certainly look like it’s judging you. I mean, is it even possible to look at it and think anything else?

“Judging Tree Is Judging You”

5. A Very Funny, Very Weird, And Very Complex Tree…

There are so many captions that could be made here…I honestly don’t even know where to start. Wow!

A Very Funny, Very Weird, And Very Complex Tree…

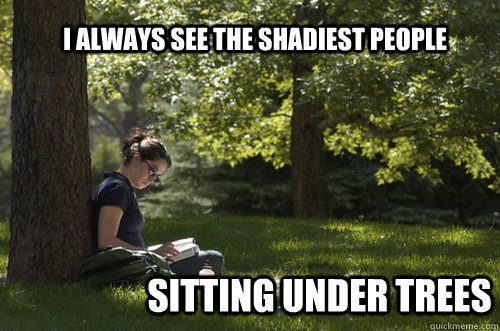
6. “I Always See The Shadiest People Sitting Under Trees”

This is not only very funny, but also very true…

“I Always See The Shadiest People Sitting Under Trees”

7. “Wife Said: Go Buy A Christmas Tree, And A Tree Stand. And Now She Looks All Mad For Some Reason.”

Wow, how funny! I don’t see a problem either! Do you?

“Wife Said: Go Buy A Christmas Tree, And A Tree Stand. And Now She Looks All Mad For Some Reason.”

8. “Come With Me If You Want To Live”

Well, come to think of it, trees to tend to live quite long lives…

“Come With Me If You Want To Live”

9. “Hey There, Wanna Leaf Me Your Number?”

Wow, this tree seems like a pretty smooth guy!

“Hey There, Wanna Leaf Me Your Number?”

11 Flip Off Pictures That Will Certainly Make Your Day

Though the middle finger may not be something you’re too keen on seeing, some of the internet’s “flip off” pictures are actually pretty hilarious. In fact, a lot of these pictures are amongst some of the funniest we’ve seen in a while. So, to prove just how hilarious these pictures really are, we put together the list below.

1. A Very Young, But Also Very Funny Sports Fan, Flipping Off The Players

To be honest, I don’t think this picture could have been taken at a more perfect time. Wow!

A Very Young, But Also Very Funny Sports Fan, Flipping Off The Players

2. A Thug Life Big Bird Flipping Off The Camera

Not only does this one feature Sesame Street’s “Big Bird”, but it is actually photoshopped very well. How funny!

A Thug Life Big Bird Flipping Off The Camera

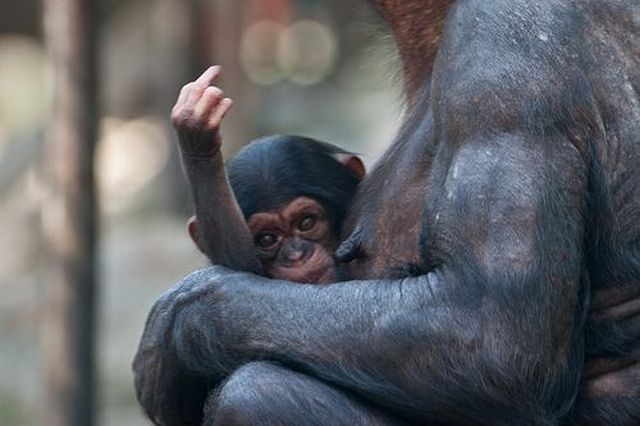
3. A Very Tired Baby Monkey, Flipping Off The Camera, While Laying In His Mother’s Arms

That’s right, even baby monkeys can give people the finger when necessary…

A Very Tired Baby Monkey, Flipping Off The Camera, While Laying In His Mother’s Arms

4. An Extremely Angry Cat, Letting This Photographer Just How He Feels About Getting His Picture Taken

Another very funny, perfectly timed photo, with some excellent photoshop edits!

An Extremely Angry Cat, Letting This Photographer Know Just How He Feels About Getting His Picture Taken…

5. The Very Popular “George W. Bush Flip Off Picture”

This was certainly not the pose or positioning that former U.S. President George W. Bush wanted to be photographed in…how unprofessional!

The Very Popular “George W. Bush Flip Off Picture”

6. “Hey Terrorist, F*** Off”

Very simple, very funny, and perhaps my favorite picture on the entire list!

“Hey Terrorist, F*** Off”

7. “If You Flip Off The Camera In Pictures, I Automatically Assume You’re Trashy And Suck At Life.”

Though the character in this photo isn’t flipping off the camera himself, it is still rather funny, and certainly worthy of making this list.

“If You Flip Off The Camera In Pictures, I Automatically Assume You’re Trashy And Suck At Life”

8. “Flipping Off Camera, Like A Boss”

For anyone who enjoys the “like a boss baby memes”, this picture should certainly get a laugh or two out of you!

“Flipping Off Camera, Like A Boss”

9. A Nice Young Girl Sitting In Santa’s Lap, While Her Mean Twin Sister Flips Off The Camera

Well someone is certainly getting coal for Christmas!

A Nice Young Girl Sitting In Santa’s Lap, While Her Mean Twin Sister Flips Off The Camera

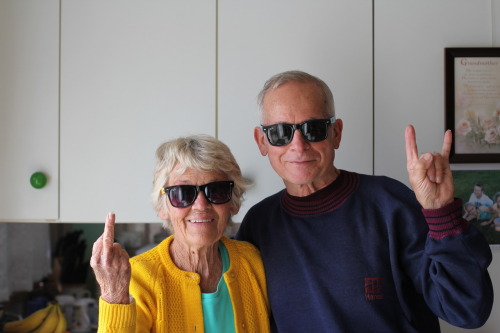
10. An Old Man Standing Next To His Wife, While She Very Rudely Flips Off The Camera

Wow, what an incredibly rude (yet funny) old lady!

An Old Man Standing Next To His Wife, While She Very Rudely Flips Off The Camera

11. The Old Lady From Wild Turkey, Kindly Flipping Off The Camera

Well, to be honest, I can’t tell if this picture is more funny or scary…what a strange face she is making!

The Old Lady From Wild Turkey, Kindly Flipping Off The Camera


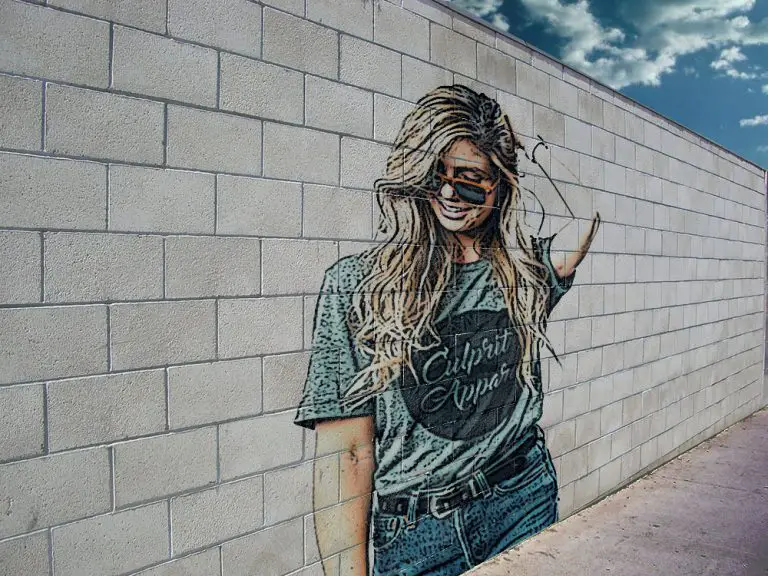
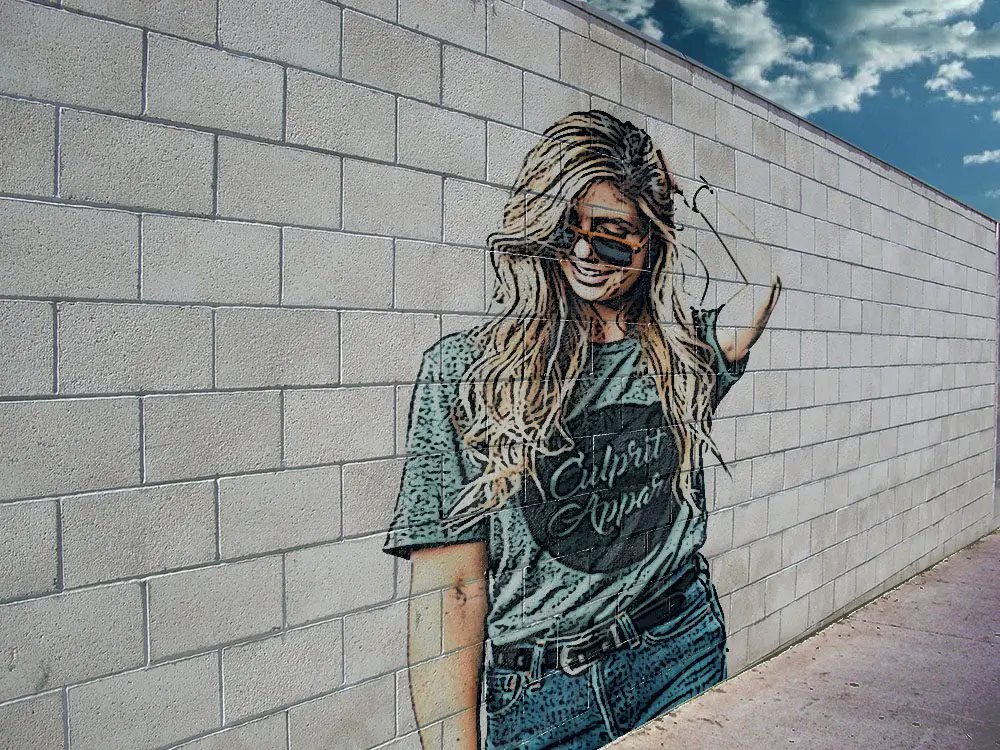
14 Step by Step Brick Wall Graffiti Tutorial in Photoshop

14 Step by Step Brick Wall Graffiti Tutorial in Photoshop

14 Step by Step Brick Wall Graffiti Tutorial in Photoshop

Have you ever admired beautiful graffiti on walls down the street? And have you ever thought about painting your own picture on the wall? In this article, I’m gonna show you 13 step by step brick wall graffiti tutorial in Photoshop so you can have the graffiti look on your pictures even without painting on real walls!

Btw, if you wanna use the images that I’m using, feel free download below:

Brick Wall Image: http://www.deviantart.com/art/Brick-Wall-Stock-55850996

Model Image: https://drive.google.com/file/d/15Cl97v0Hn62PD-Hx5VAEX4uHY38mcRTs/view?usp=sharing

Clouds Image: https://drive.google.com/file/d/1fd_bBMADgmbUzSN5HuVzPe0DtR7NFlQr/view?usp=sharing

(Additional info: I’m using Adobe Photoshop CS6 on Windows)

It’s very fun and easy to learn, so let’s get to it.

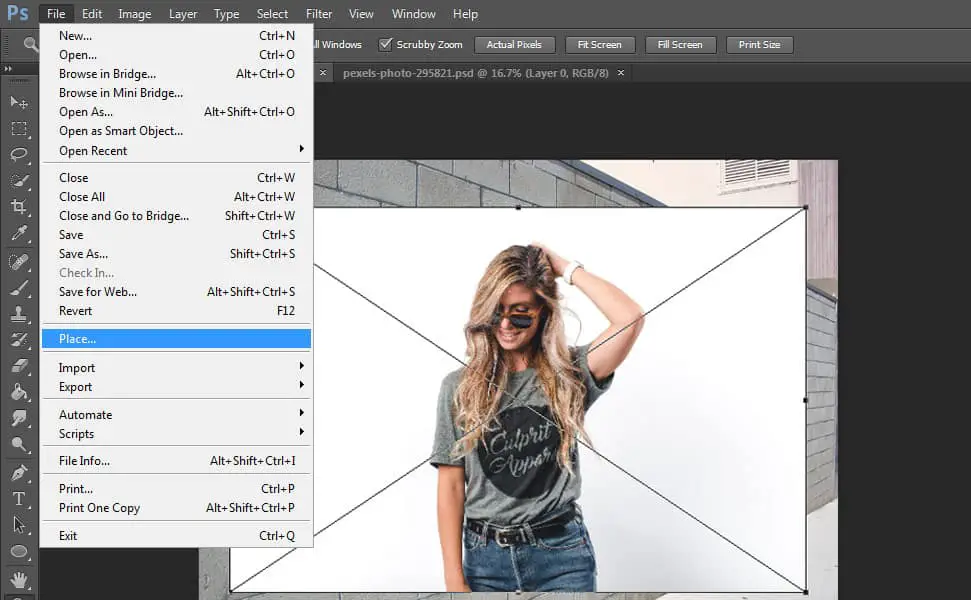
1. Positioning the Image

14 Step by Step Brick Wall Graffiti Tutorial in Photoshop
The first thing to do is, open the brick wall image
then click the ‘File’ menu and select ‘Place’ – you will see a popup box where you have to choose the model image you wanna use and press ok.

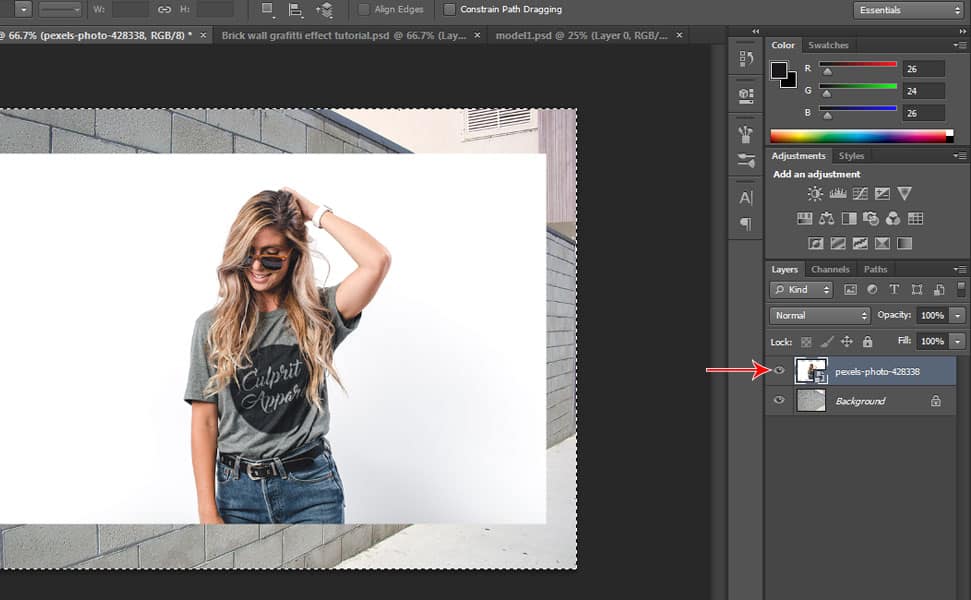
2. Copy the Model Image

14 Step by Step Brick Wall Graffiti Tutorial in Photoshop
Make sure you are selecting the model layer and then press CTRL + A to select the image and then press CTRL + C to copy it so we’re gonna paste it on the Vanishing Point Filter later. After that, hide the visibility of the image by clicking the ‘eye’ icon located on the left side of the model layer.

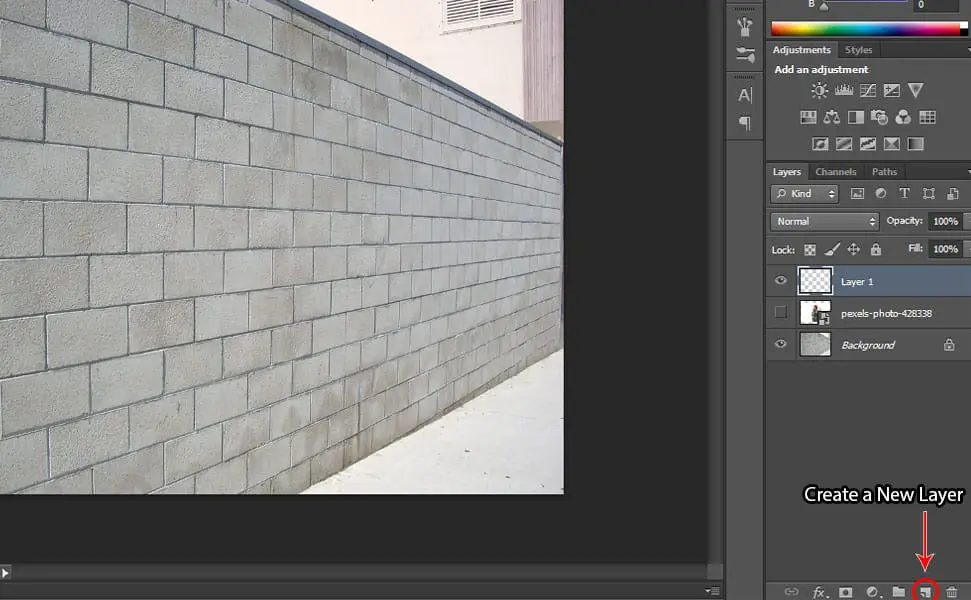
3. Create a New Layer

14 Step by Step Brick Wall Graffiti Tutorial in Photoshop
Click the ‘Create A new Layer’ icon located just below the layer tab, we are gonna use this for Vanishing Point Filter.

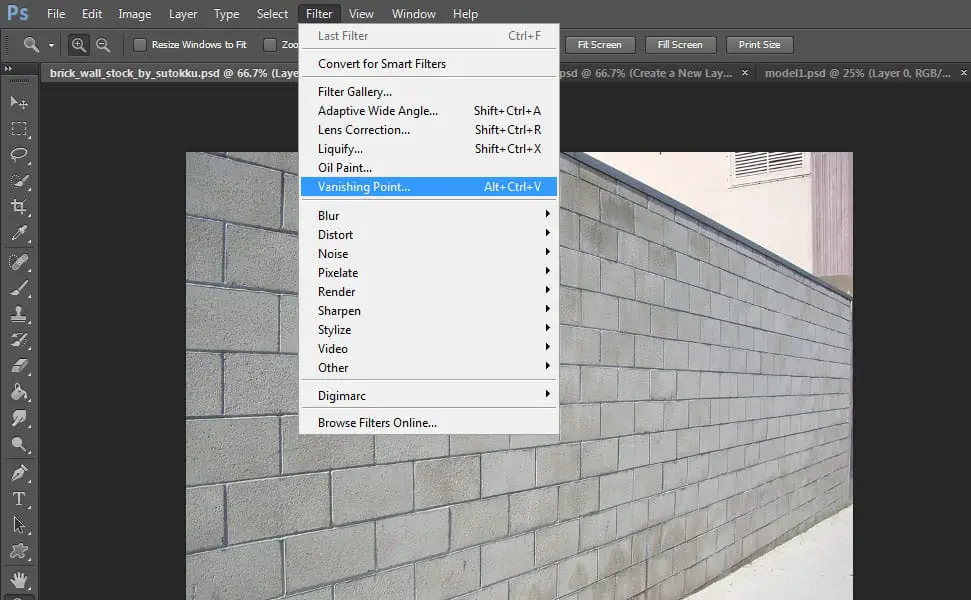
4. Apply Vanishing Point Filter

14 Step by Step Brick Wall Graffiti Tutorial in Photoshop
Click on Filter menu then select ‘Vanishing Point’ then make sure you select the ‘Create Plane Tool’, it’s actually on default, and you can zoom out simply by pressing CTRL – or + to zoom in.

See related article: 13 Step by Step Transparent Clothes Effect Tutorial in Photoshop

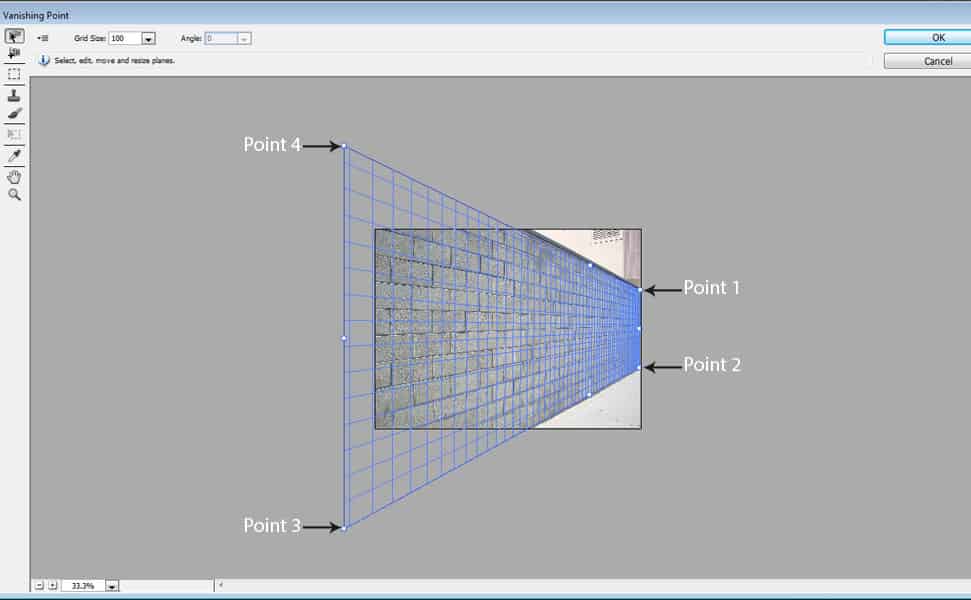
5. Use the Create Plane Tool

14 Step by Step Brick Wall Graffiti Tutorial in Photoshop
Trace the wall as shown in the picture above using the ‘Create Plane Tool’. Click at Point 1 then Point 2 then 3 till you get to 4.

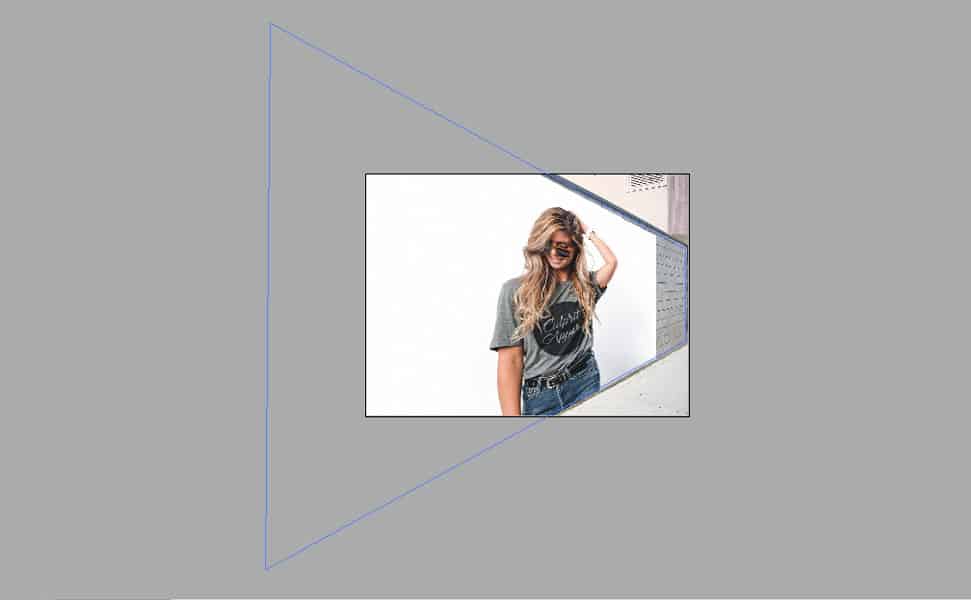
6. Paste the Model Image

14 Step by Step Brick Wall Graffiti Tutorial in Photoshop
After you trace the wall, paste the model image by pressing CTRL + V and then CTRL + T to transform and position the image then drag it anywhere you like or you can also follow what’s shown in the picture.

7. Change the Blending Mode

14 Step by Step Brick Wall Graffiti Tutorial in Photoshop
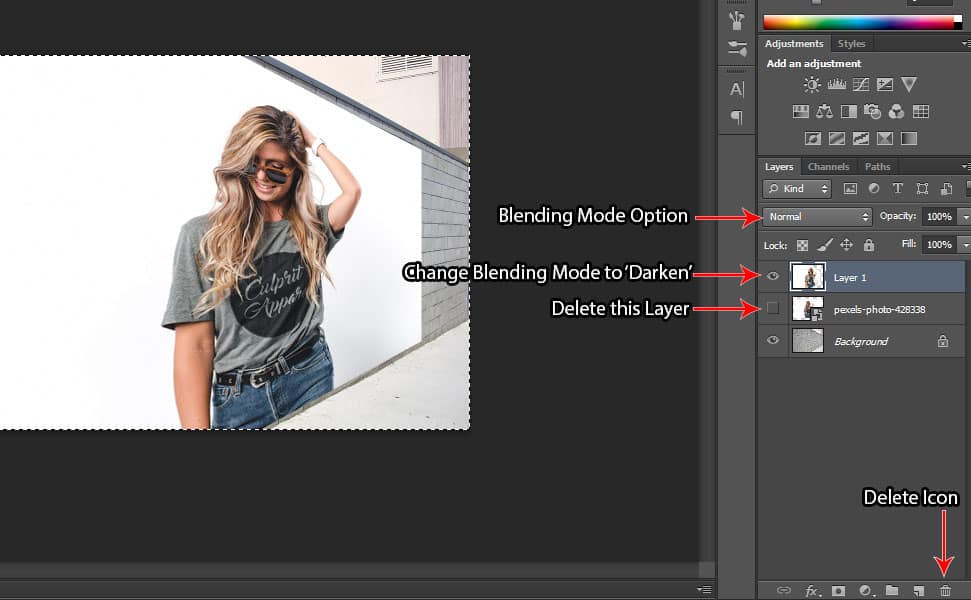
First, delete the model image so you will not be confused and select the new layer that we created earlier where we put the vanishing point filter. Then click on the Blending Mode option located at the upper part of the layer then select ‘Darken’.

8. Add Poster Edges Filter

14 Step by Step Brick Wall Graffiti Tutorial in Photoshop
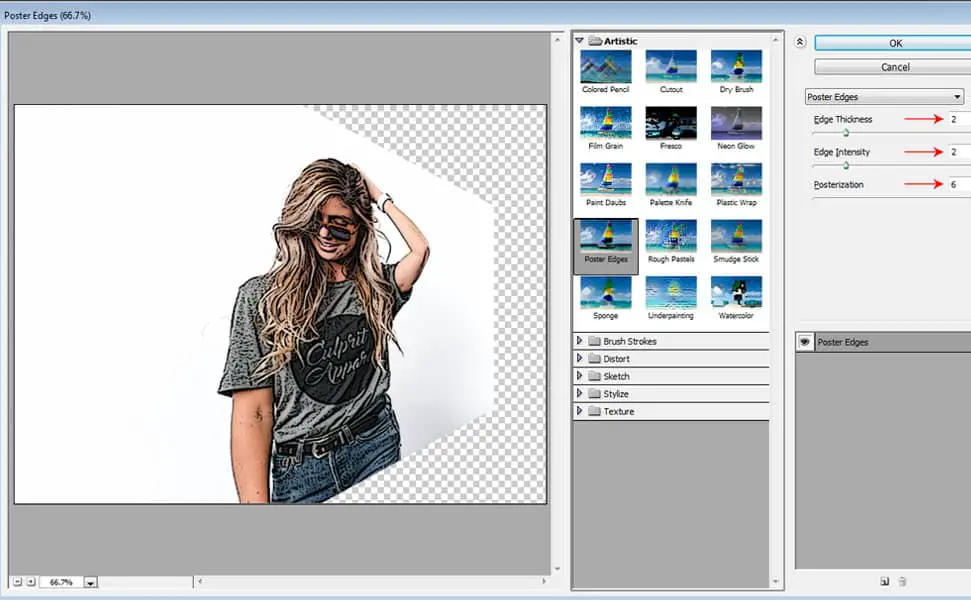
Click on the ‘Filter’ menu and select ‘Filter Gallery’ and at the ‘Artistic’ tab choose ‘Poster Edges’ and set the Edge Thickness to 2, Edge Intensity to 2 and Posterization to 6.

See related article: 14 Step by Step Comic Style Cartoon Effects Tutorial in Photoshop

9. Blend the Model Image with the Wall

14 Step by Step Brick Wall Graffiti Tutorial in Photoshop
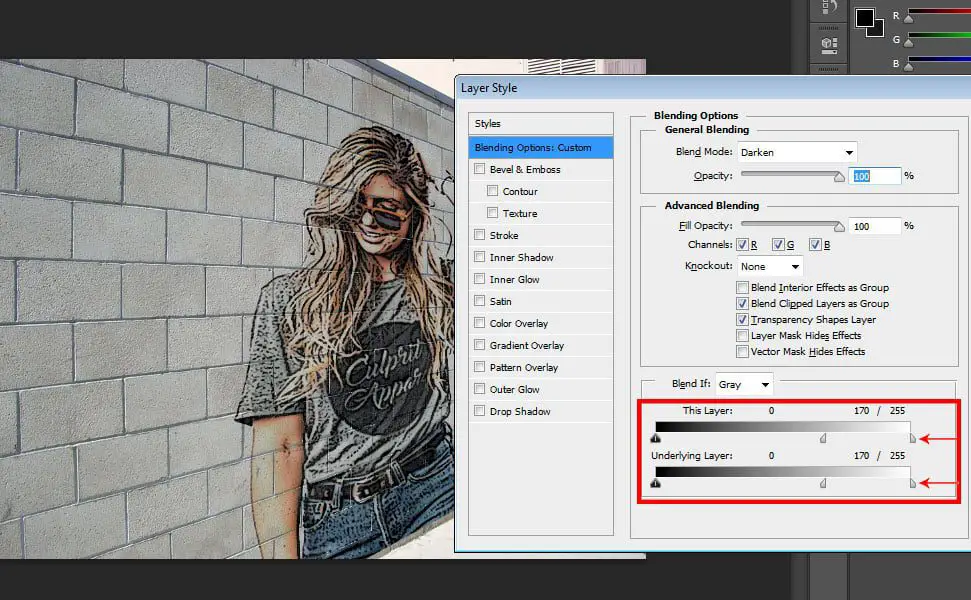
Double click on Layer 1 and you will see a popup box then at the bottom, adjust ‘This Layer’ by pressing ‘Alt’ while dragging to the left side till you reach it down to 170. Do the same for the ‘Underlying Layer’. Now it’s blending properly with the wall.

10. Drag the Model Image Down

14 Step by Step Brick Wall Graffiti Tutorial in Photoshop
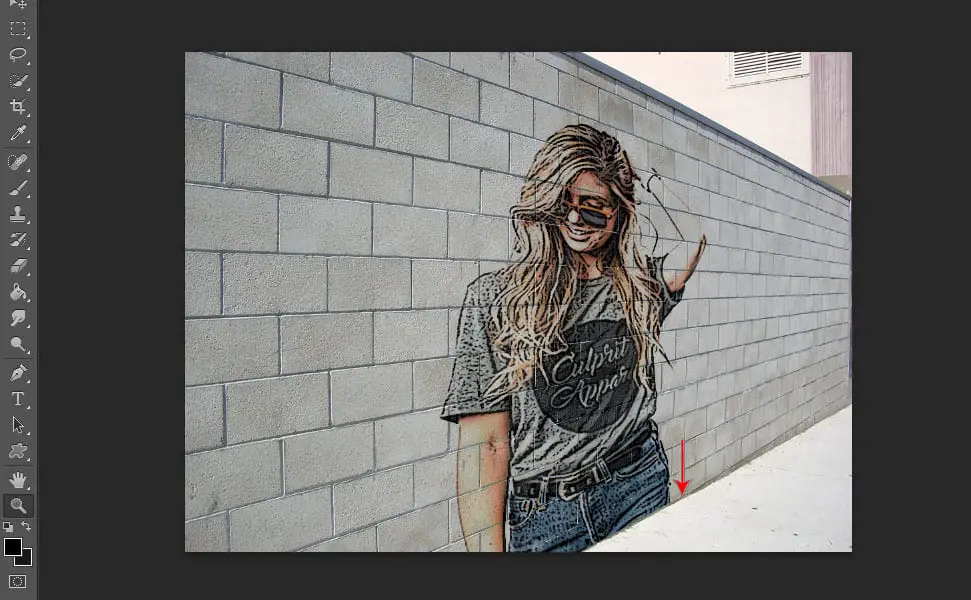
Select layer 1 first then press CTRL+ Arrow Down on your keyboard a couple times to drag it down a bit to reach the foot of the wall.

11. Add ‘Color Lookup’ Adjustment

14 Step by Step Brick Wall Graffiti Tutorial in Photoshop
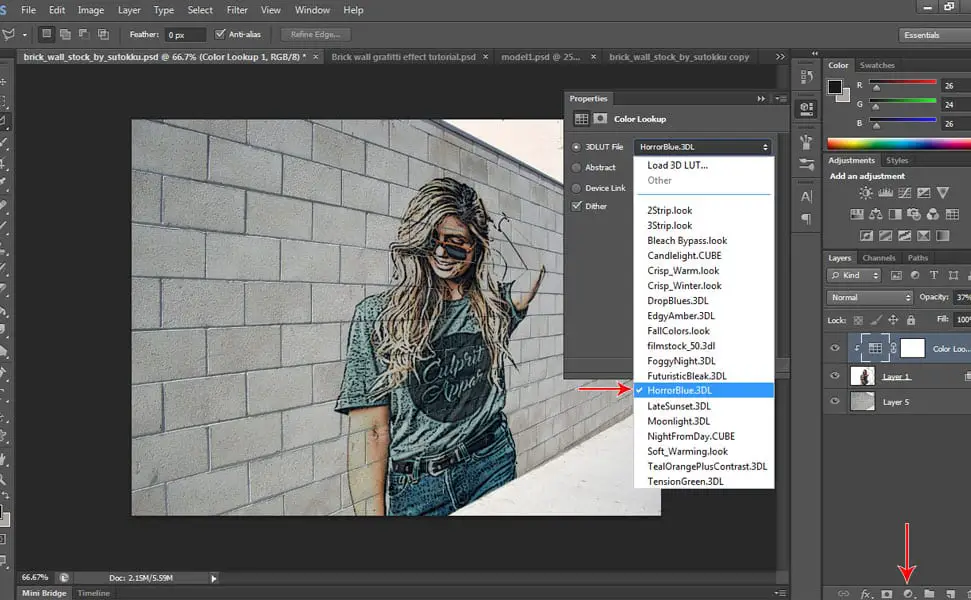
Click the ‘Create Adjustment Layer’ icon located below the layer tab and then select Color Lookup, and choose HorrorBlue.3DL or anything you want depending on your taste.

12. Delete the White Background of the Wall

14 Step by Step Brick Wall Graffiti Tutorial in Photoshop
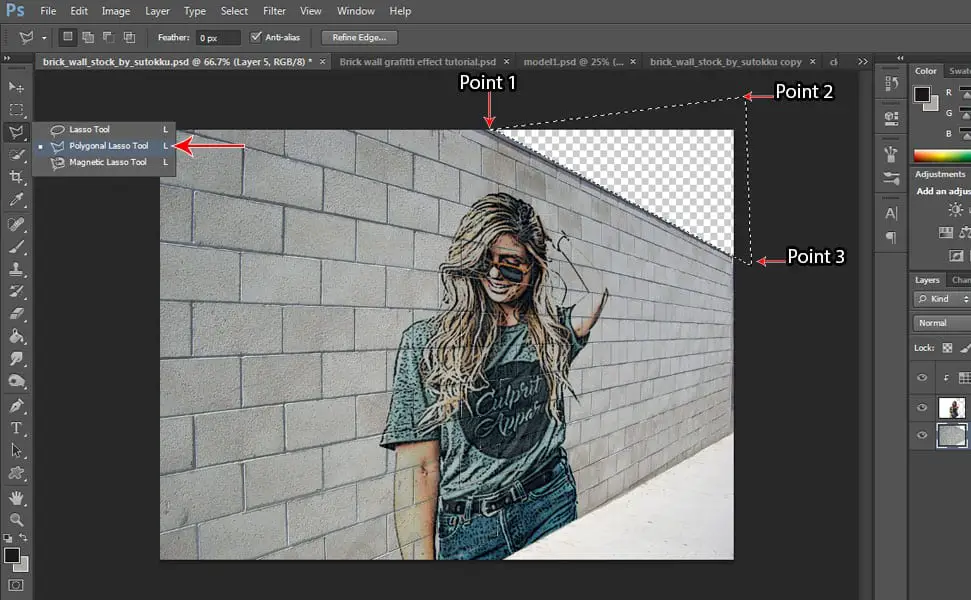
Select the ‘Polygonal Lasso Tool’ and then select the place where you wanna put the clouds by using the Polygonal Lasso Tool, click at point 1, 2 and 3 as shown in the picture then double click back on point 1 to make a selection then press delete, make sure you are selecting the background layer.

13. Place the Clouds Image in the Background

14 Step by Step Brick Wall Graffiti Tutorial in Photoshop
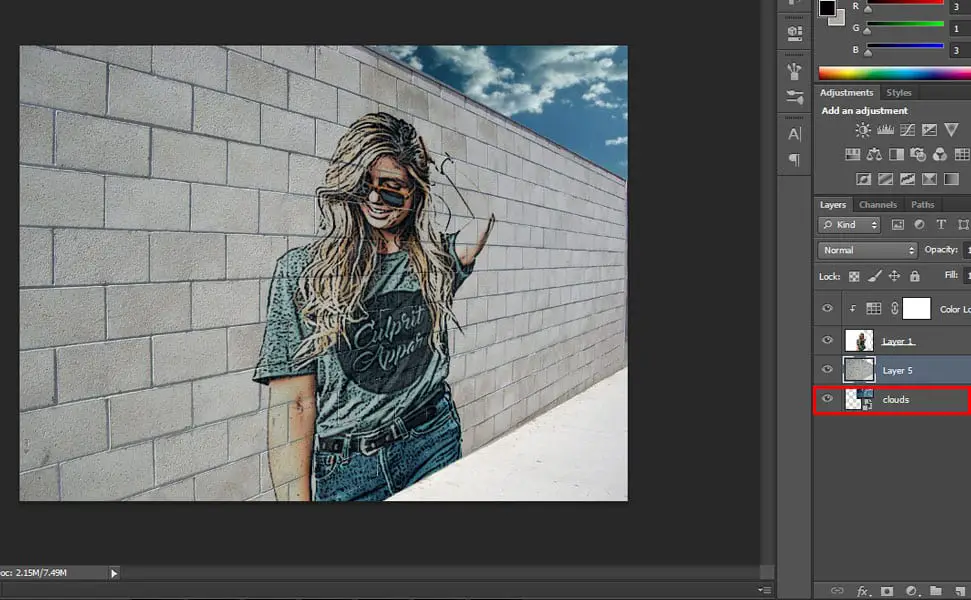
Click the ‘File’ menu and select ‘Place’ then click the Clouds image you downloaded and drag the Clouds layer below the ‘background’ layer then position it at the upper right corner by dragging it.

14. Darken the Ground

14 Step by Step Brick Wall Graffiti Tutorial in Photoshop
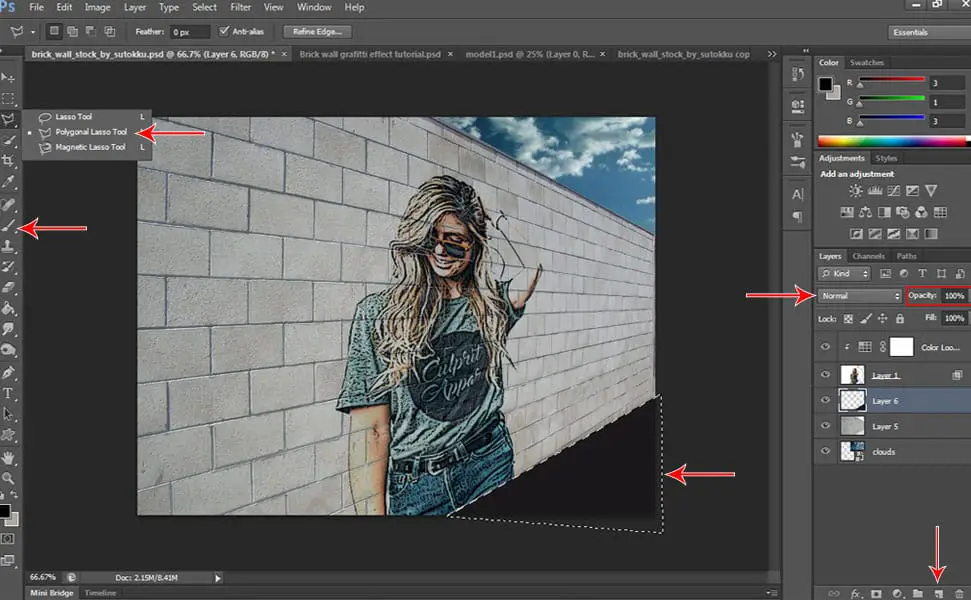
Click the ‘Polygonal Lasso Tool’ again and make a selection of the ground and click the ‘Create a New Layer’ icon located below the layer tab then use the ‘Brush Tool’ to paint the ground black, make sure your foreground color is set to black. Then, change the layer’s blending mode to ‘Vivid Light’ and change the opacity to 60%.

So that’s it! Hopefully, you followed the steps properly and achieved the awesome graffiti effects on your picture! You can also comment below if you made a different version, we will be happy to see it!