Have you been wanting to create a watercolor painting but never had watercolor skills? It could be frustrating to have something in mind which is so difficult to implement especially when you are lacking in skills. But I have a solution to your problem, we can do it in Photoshop because nothing is impossible in Photoshop!
In this article, I will teach you how to create a watercolor effect in photoshop in 11 steps!
Btw, if you want to download the images and Brush that I’m using, you can download it here:
Model
Watercolor Paper
Watercolor Brushes
Are you ready? Now let’s get started.
1. Duplicate the Layer
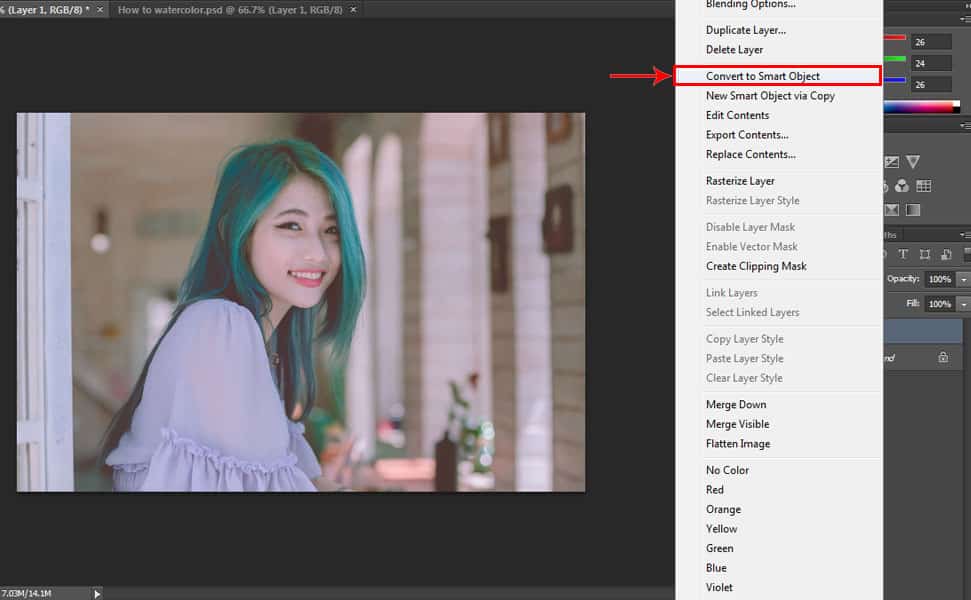
First, open the image that you want to use. Then make a copy of the model layer by pressing CTRL + J. Then right-click the duplicate layer and select ‘Convert to Smart Object’.
2. Add Dry Brush Filter
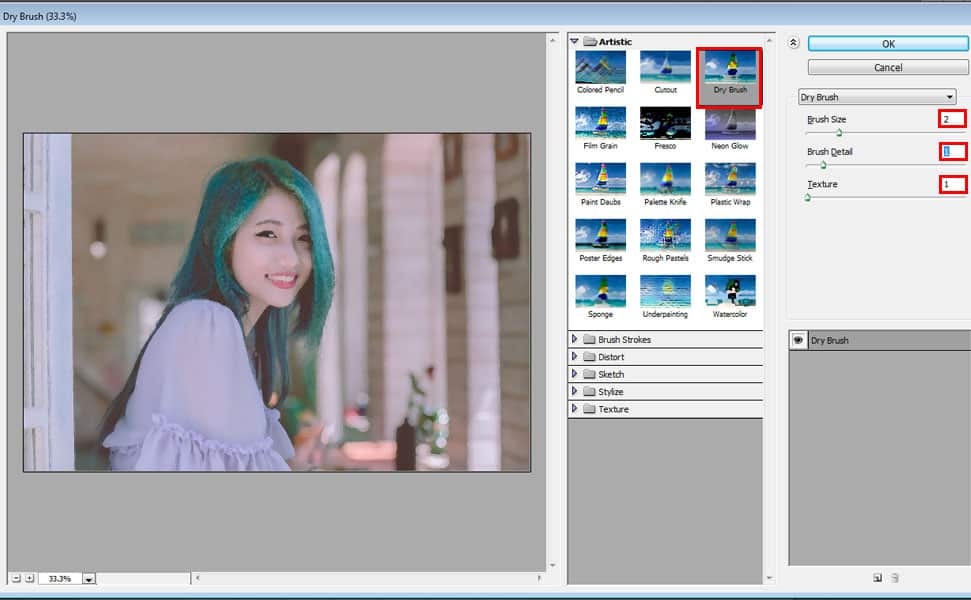
Go to ‘Filter’ menu then select ‘Filter Gallery’. Once you’ve opened the Filter Gallery, select Dry Brush in ‘Artistic’ tab. Then adjust the Brush Size to 2, Brush Detail to 1 and Texture to 1 then press Ok.
3. Add Cut out Filter
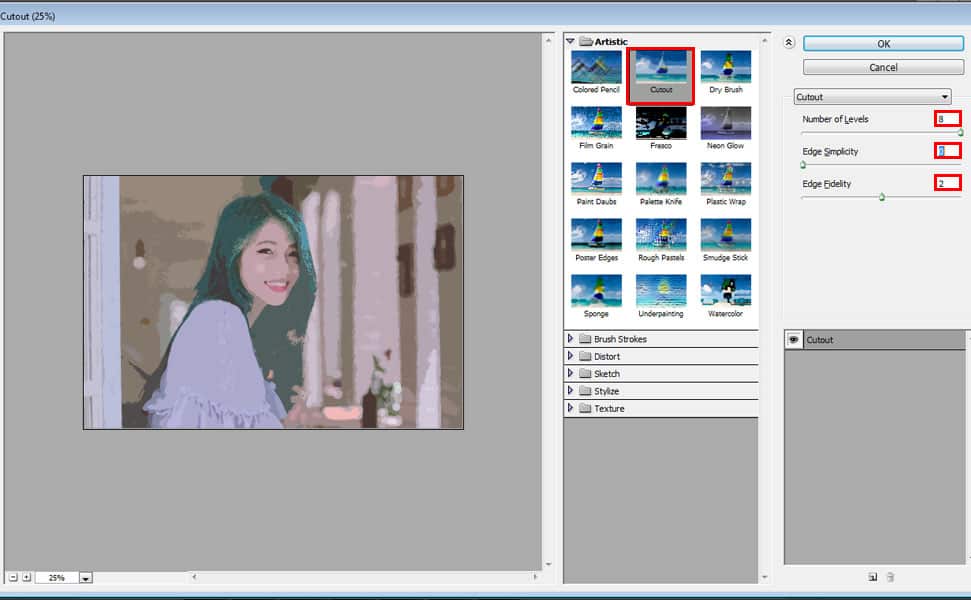
Go to ‘Filter’ menu again then select ‘Filter Gallery’ and select the ‘Cutout’ Filter under the ‘Artistic’ tab and adjust the Number of Levels to 8, Edge of Simplicity to 0 and Edge Fidelity to 2.
4. Change the Blending Mode
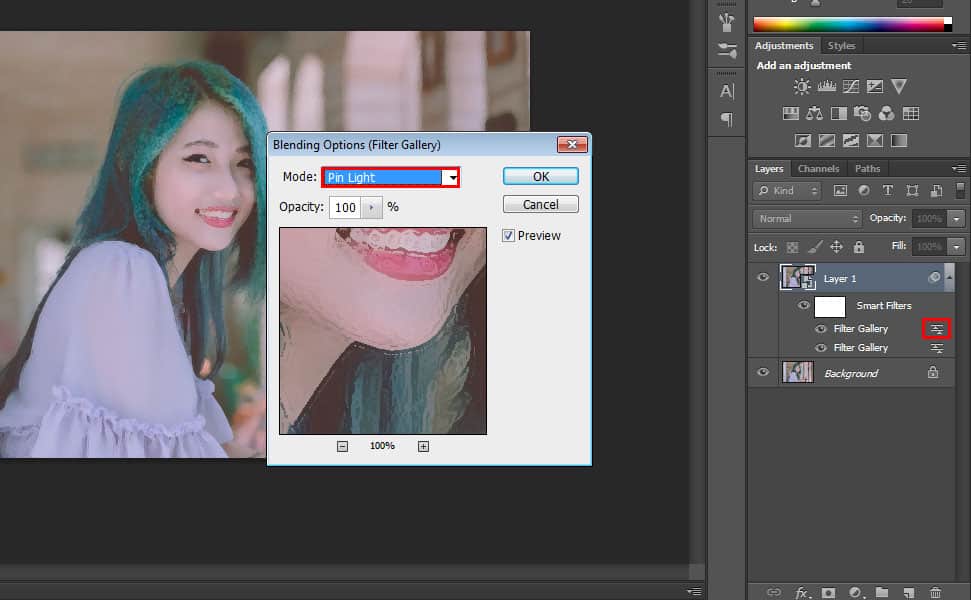
On your duplicate layer, double-click the ‘Blending options’ icon located below the Smart Filters, as shown in the image. Then once the Blending options box appears, change the Mode to ‘Pin Light’ then press OK.
5. Add Smart Blur Filter
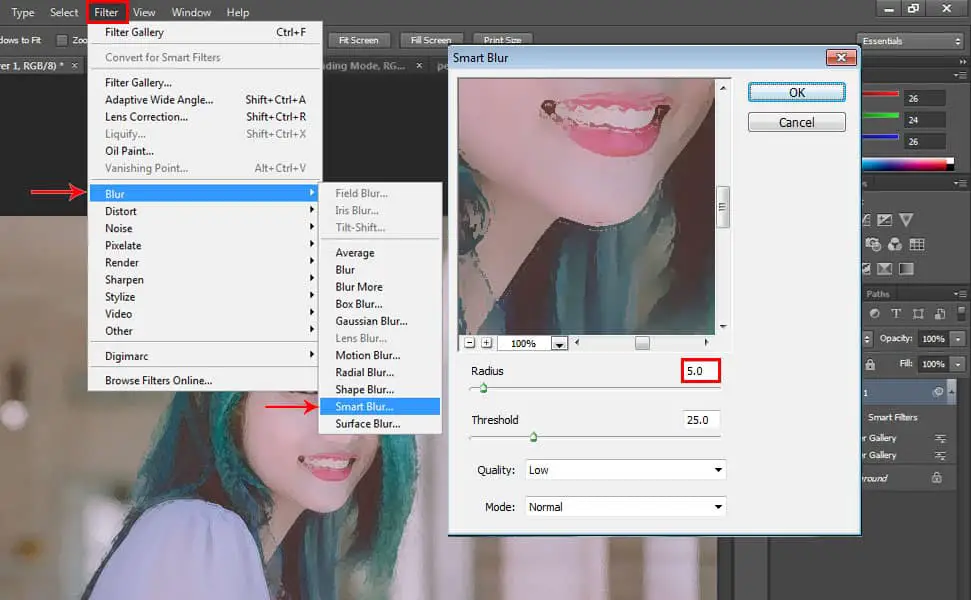
Go to ‘Filter’ menu then select ‘Blur’ then choose ‘Smart Blur’. Then adjust the ‘Radius’ to 5.0 then press Ok.
See related article: 15 Step by Step Typography Effects Tutorial in Photoshop
6. Change the Blending Mode to ‘Screen’
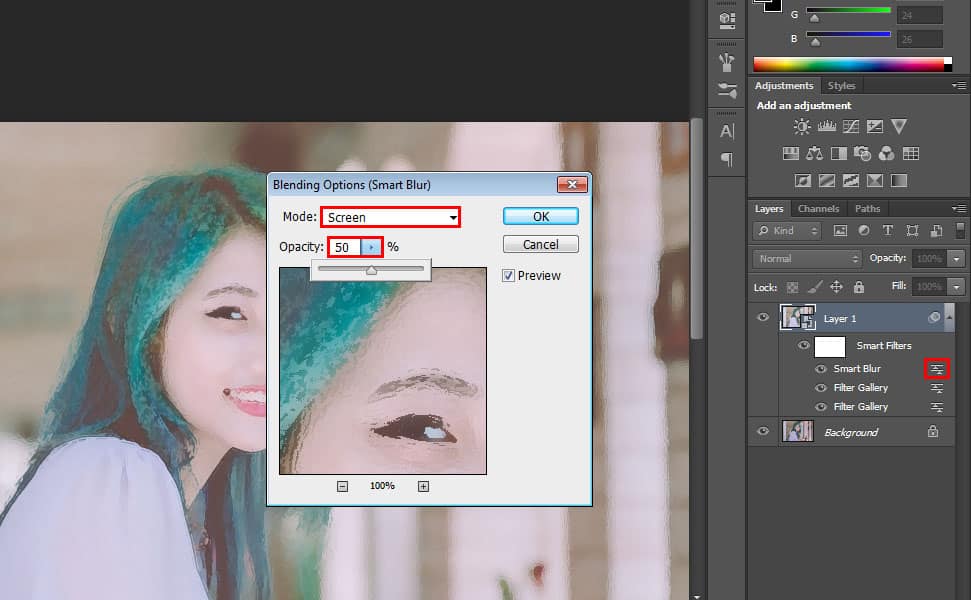
Under the duplicate layer beside Smart Blur, double-click the ‘Blending Option’ icon then change the Mode to ‘Screen’. Then adjust the ‘Opacity’ to 50%.
7. Add Stylize Filter
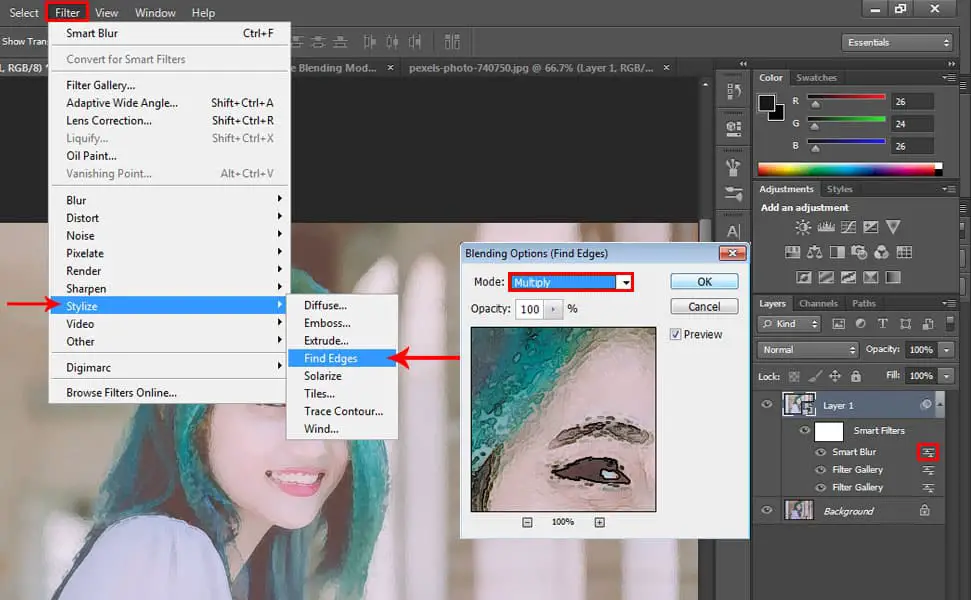
Go to ‘Filter’ menu then select ‘Stylize’ then choose ‘Find Edges’ and then change the ‘Find Edges’ blending mode to Multiply, same as you did with step 6 but this time it’s set to ‘Multiply’.
8. Open the Watercolor Paper
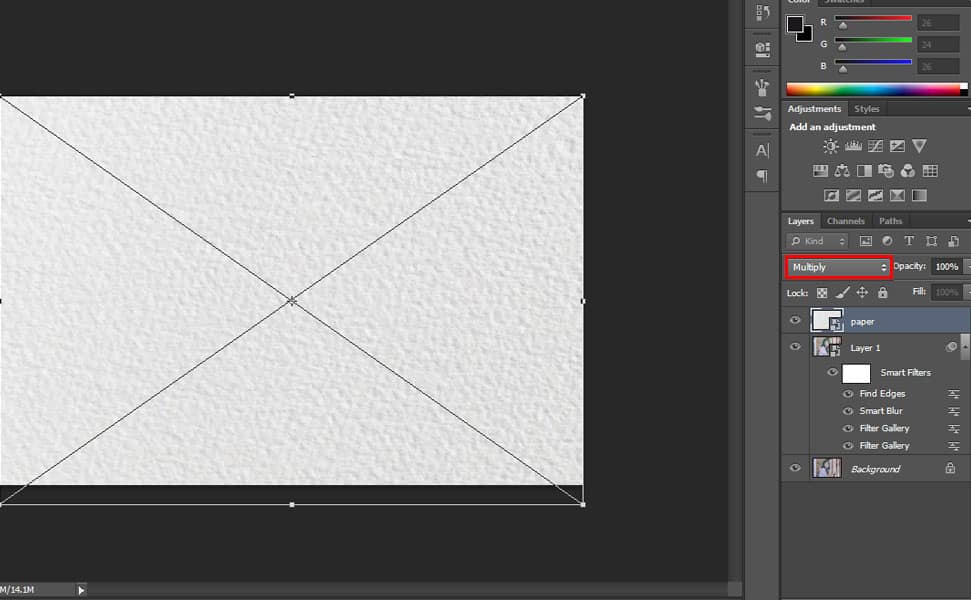
Drag the watercolor paper to your subject and press CTRL + T to resize it and expand it by dragging the corners while holding ‘Shift’ to retain its proportion then press Enter, make sure the whole area is covered with Watercolor paper. Then change its layer’s blending mode to ‘Multiply’.
9. Add Layer Mask to the Duplicate Model Layer
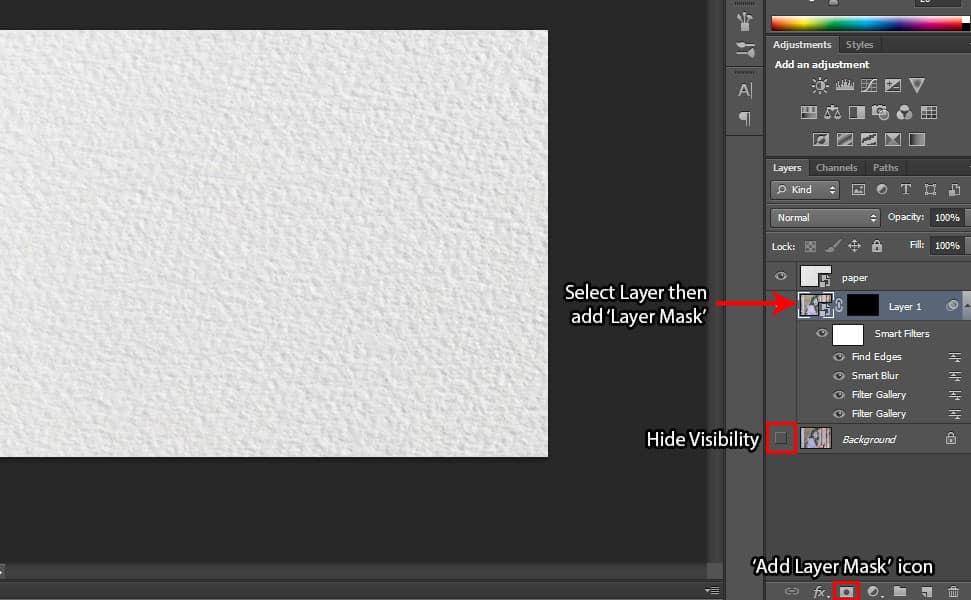
Select the Duplicate Model Layer first, then click the ‘Add Layer Mask’ icon located below the Layer panel. Then press CTRL+I to invert it. Also, hide the visibility of the Background Layer by clicking the ‘Eye’ icon located beside the Background Layer.
See related article: 17 Step by Step Double Exposure Effect Tutorial in Photoshop
10. Load the Brushes
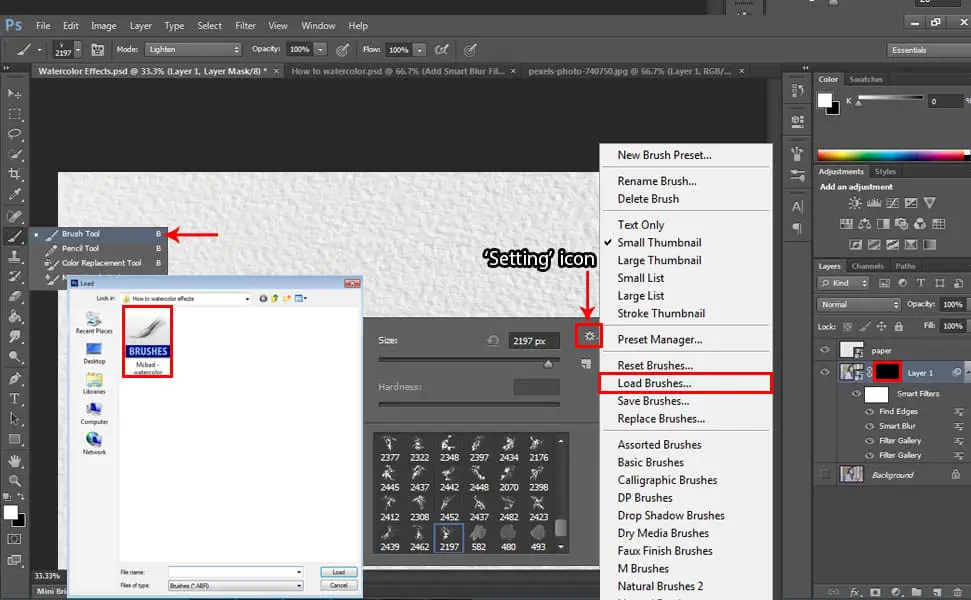
Click the Layer Mask thumbnail of the duplicate Model Layer, then click the Brush Tool then right click on the watercolor paper and click the ‘Setting’ icon and select ‘Load Brushes’ then select the brush you downloaded from here then click Load.
11. Brush off the Model Area
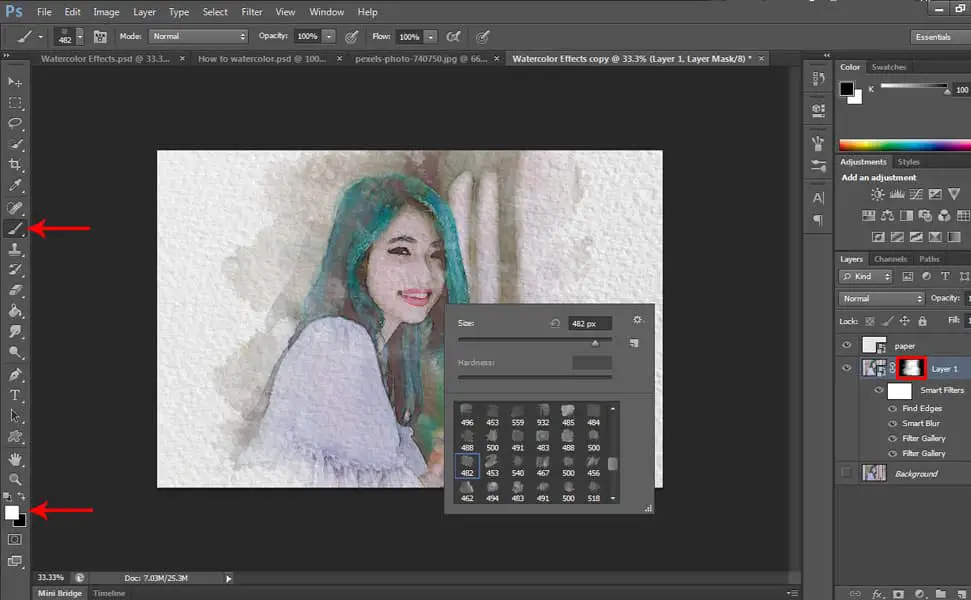
After loading the Brushes, make sure your foreground color is set to White then select the Brushes that you loaded and randomly brush off the area using random brushes until you create your masterpiece. Make sure you are still selecting the Layer mask thumbnail of the duplicate model layer so it will be effective.