22 Step by Step Word Cloud Effect Tutorial in Photoshop
Have you ever been motivated by an inspiring quote or poem or even lyrics that resonates a lot with you that you’re wanting to integrate it into your picture? See, I’m gonna teach you 22 step by step Word Cloud Tutorial in Photoshop to turn your text into a beautiful portrait. It is so hard to find photoshop tutorials that go straight to the point. Instead, we are left with “How to use Photoshop” videos that take an hour when the actual lesson could’ve been taught in less than five minutes. You don’t have to worry though for this one will take less than that for you to read.
Btw, if you wanna use the image that I’m using, feel free to download here:
Model Image: https://www.pexels.com/photo/woman-in-red-tank-top-638700/
So let’s get to it!
1. Crop the Photo
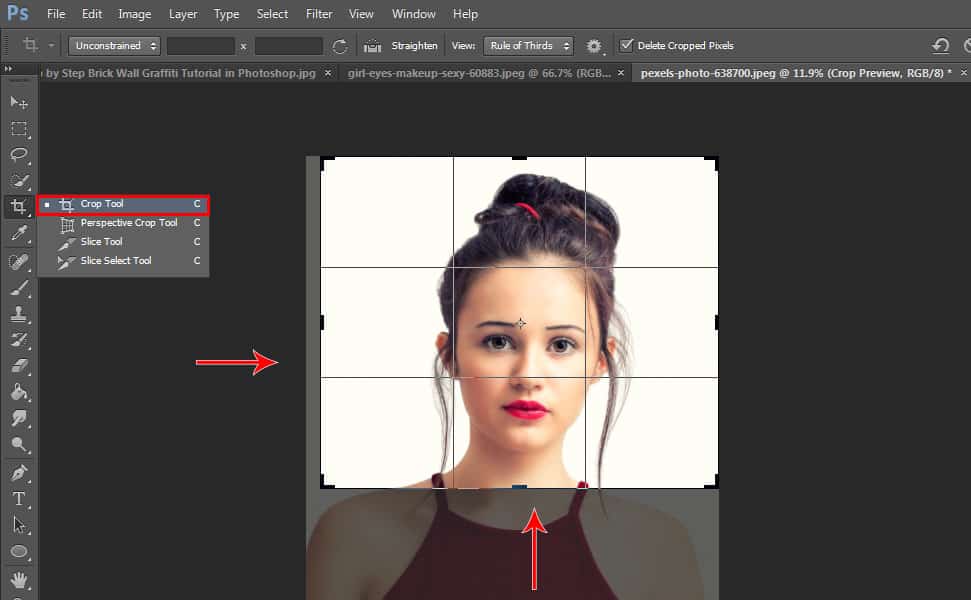 Open the photo you’d like to use for this project. The first step is to crop the photo cuz we need to focus on the face. So select the ‘Crop Tool’ and drag the corners in, to size the subject within the crop bounding box.
2. Quick Selection
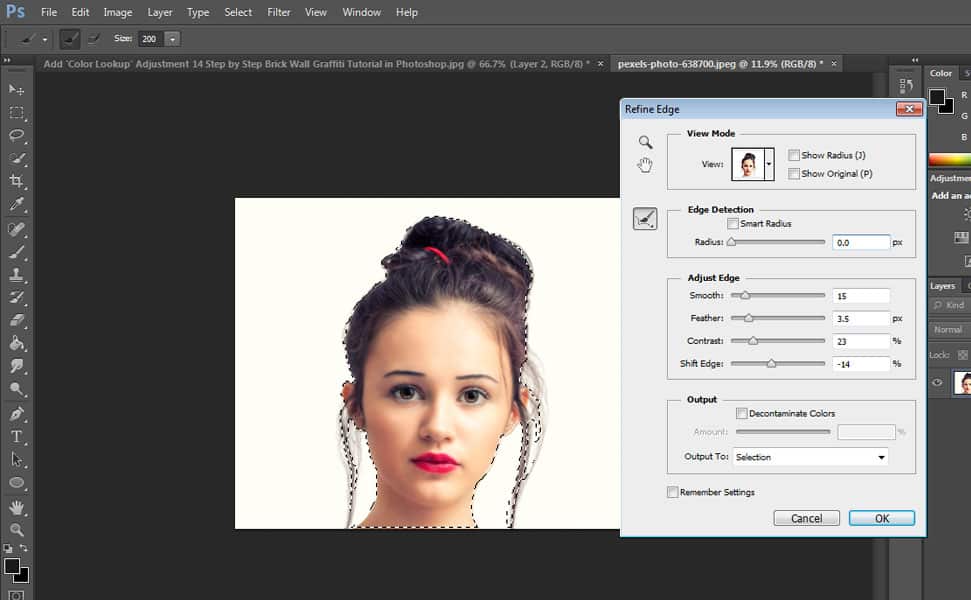
Then remove the background from the subject by making a selection of your subject. There are actually many ways to do this, but for this example, we will use the ‘Quick Selection Tool’. Drag the tool over your subject to make a selection around it. Make sure you trace it well. Then press Alt + Ctrl + R to refine the edges. You can see that the Refine Edge box pops up, so set the ‘Smooth’ to 15, Feather to 3.5px, Contrast to 23 and Shift Edge to -14 then press OK, but you can also experiment on it, depending on what picture you are using or how you traced it. Then click ‘Add Layer Mask’ icon to remove the background.
3. Make it Black and White
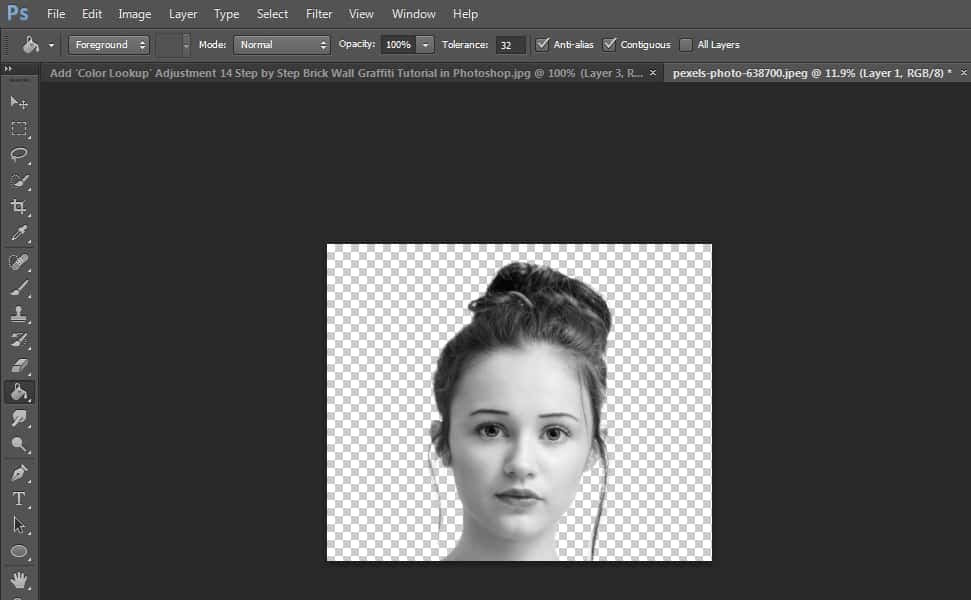
Press CTRL + Shift + U to remove its color.
4. Create a New Layer
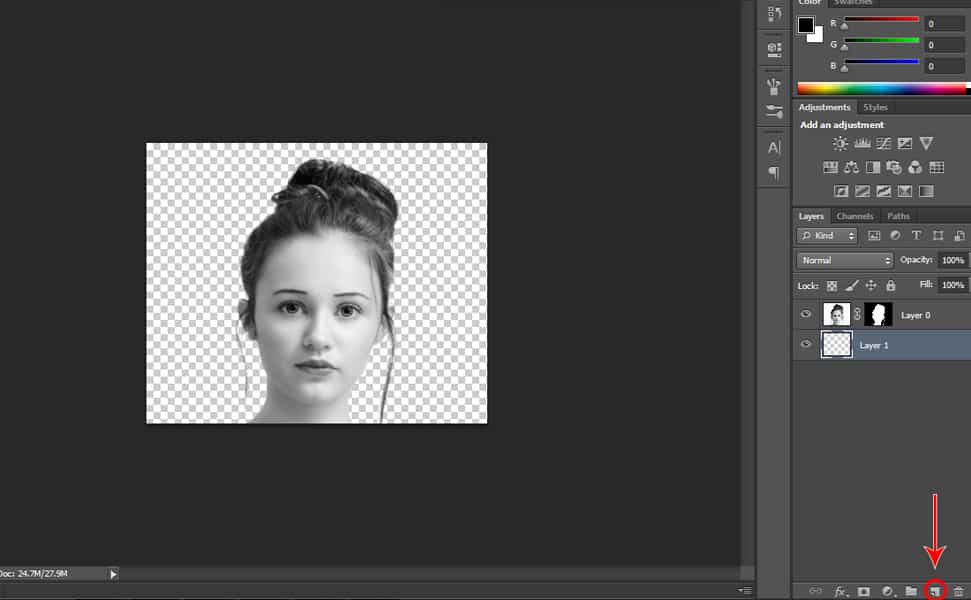
Click the ‘Create a New Layer’ icon located below the Layer tab. Drag the new layer that you created below the subject layer.
5. Make the New Layer Black
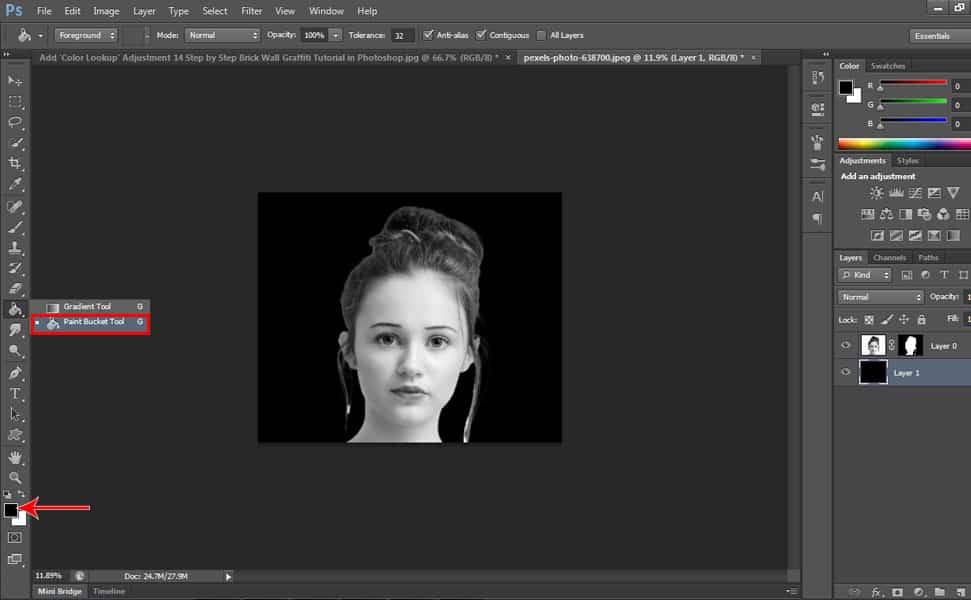
Before we make the layer black, make sure your foreground color is ‘Black’ then select the ‘Paint Bucket Tool’ and click on the blank layer to make fill it w/ black.
6. Duplicate the Layer for Displacement Map
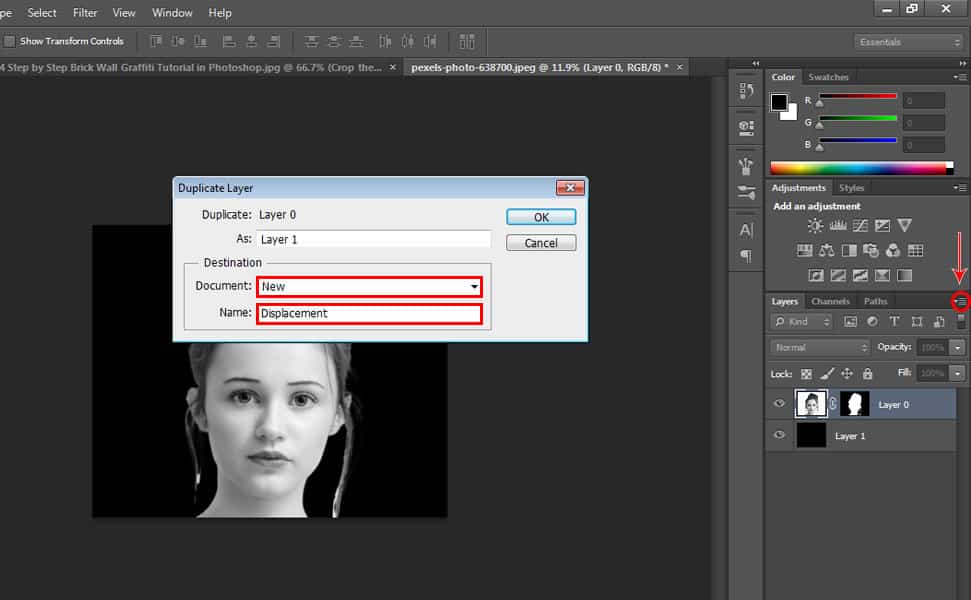
Make sure your top layer is active then click the icon in the upper right corner and select ‘Duplicate Layer’. Click the ‘Document’ list and select ‘New and name it Displacement and click OK. We’re gonna use it later.
7. Use Gaussian Blur Filter

You will be redirected to your duplicate layer that you created in step 6 so let’s blur it. Go to Filter, select ‘Blur’ then ‘Gaussian Blur’ and make it 3.0 pixels.
8. Save the Duplicate Layer
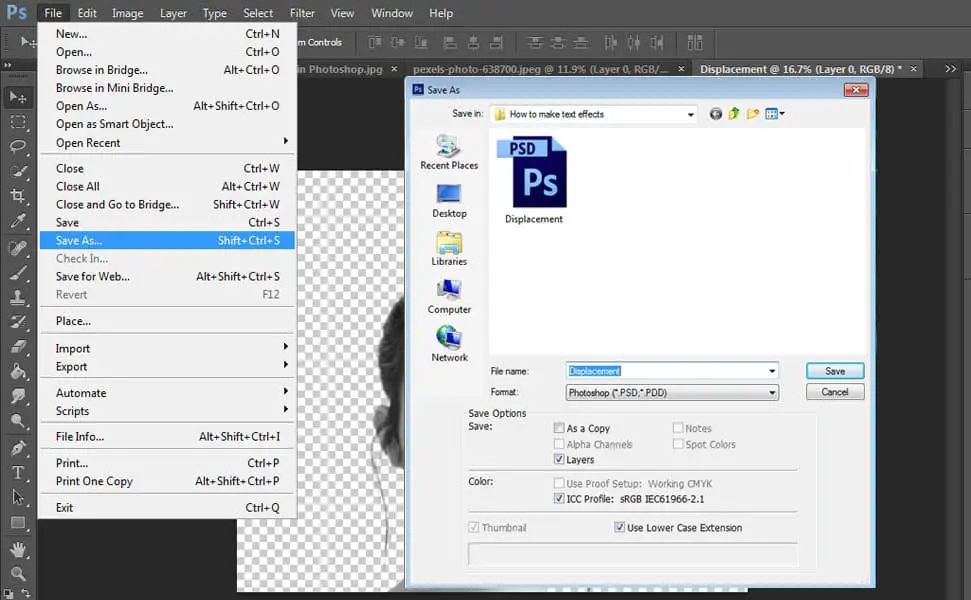
Go to ‘File’ then ‘Save as’, name it Displacement and save it as a Photoshop PSD file and click Ok. So you can close the PSD file now because we already saved it. Now let’s go back to the original file.
9. Add Text
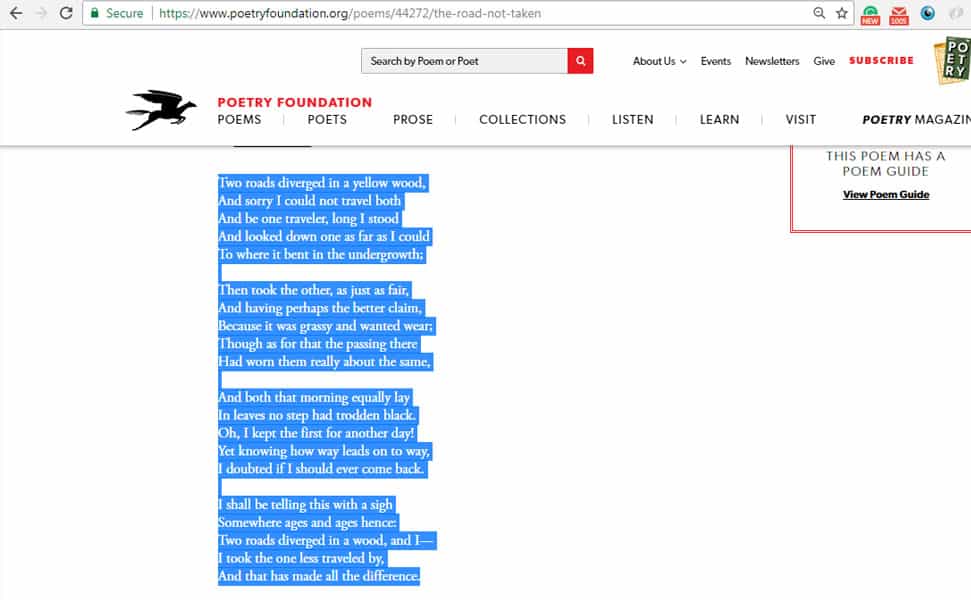
Now we’re ready to add text. You can either type it out on a notepad application or find a poem or a lyrics you can ultimately copy and paste. You can highlight it and press CTRL + C to copy it.
10. Create Word Cloud
We’re going to create a Word cloud from our text. There are many free websites that do this, however, the site I used is called Wordle.net. Unfortunately, sometimes Chrome or Firefox has trouble creating word clouds in Wordle but it works well in Explorer. So click ‘Create’.
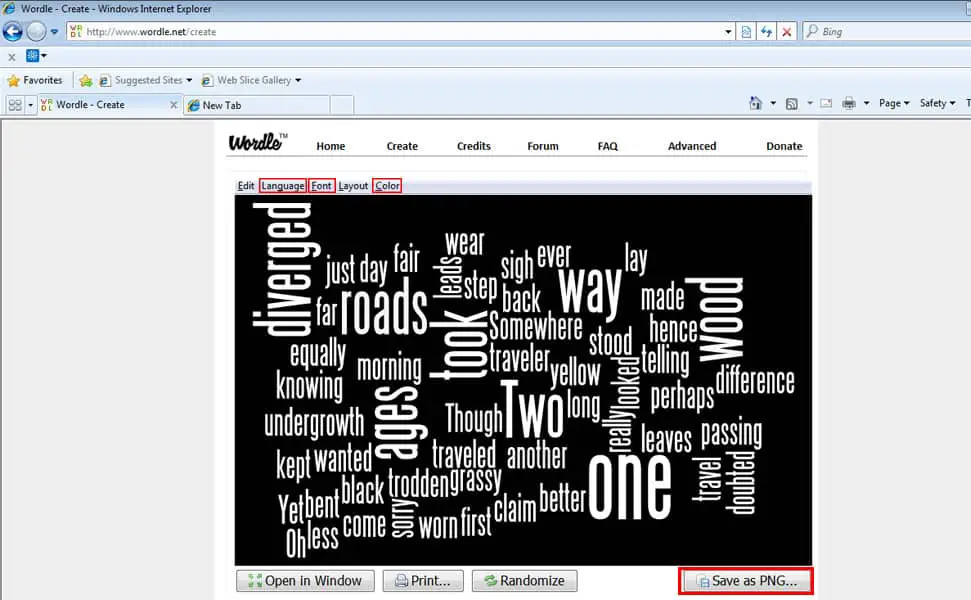
After clicking ‘Create’, paste the text inside the text box by pressing CTRL + V then click ‘Go’. Click ‘Language’ then choose Leave Words as Spelled and Remove Common English Words. Then open ‘Font’ and select ‘Steelfish’ font. Then open ‘Layout’ and choose ‘Straighter Edges’ and ‘Mostly Horizontal’. Then open ‘Color’ and select ‘WB’. Then click ‘Save as PNG’then save it.
11. Open your Wordle File
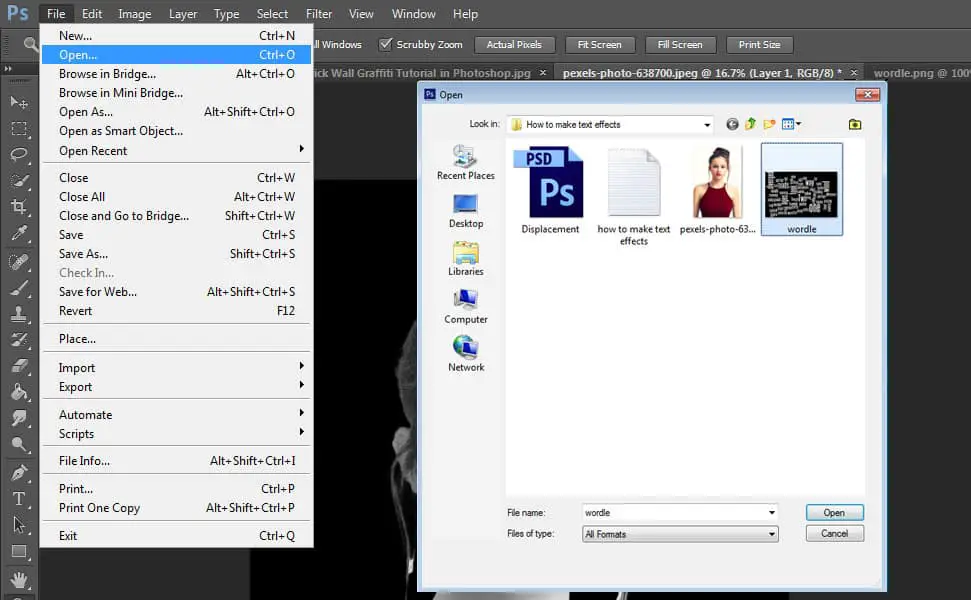
Click ‘File’ then select ‘Open’ and locate your Wordle File.
12. Make a Selection of the Text
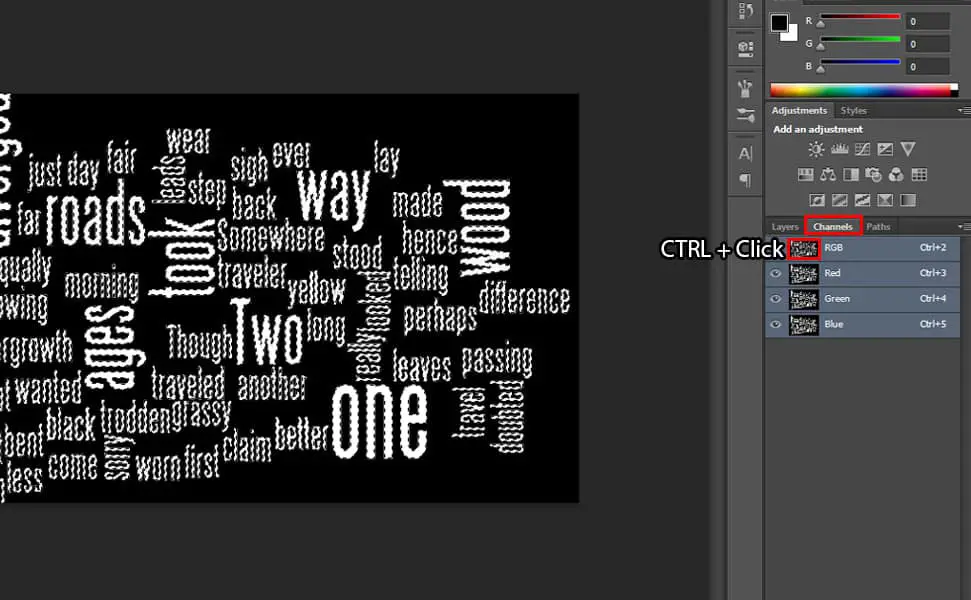
Open your ‘Channels’ panel and CTRL + click the thumbnail of the ‘RGB’ channel to make a selection of the text. And go back to ‘Layer’ panel to paste it there by pressing CTRL + J. Then press CTRL + A to select it and press CTRL + C to copy it then go to your subject tab then click your subject and paste it by pressing CTRL + V.
13. Duplicate the Word Cloud
 Select the Word Cloud layer and duplicate it by pressing CTRL + J.
See related article: 13 Step by Step 3D Pop Out Effect Tutorial in Photoshop
14. Add Drop Shadow
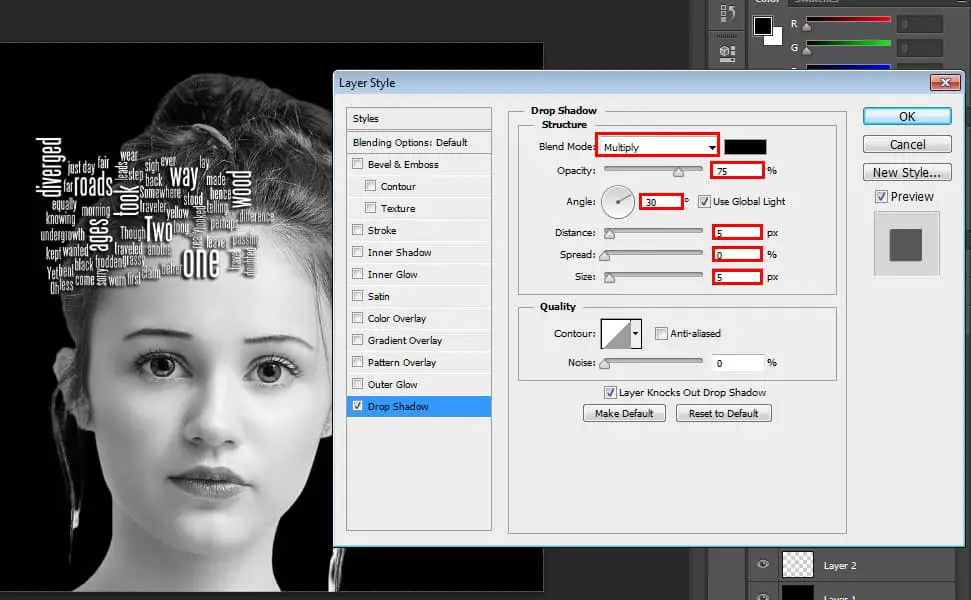
But first, duplicate the Word Cloud layer and Double-click the Word Cloud layer to open the ‘Layer Style’ window. Click ‘Drop Shadow’. Set the ‘Blend Mode’ to ‘Multiply’, the ‘Opacity’ is 75% and the Angle is 30 degrees. The Distance is 5px, the Spread is 0px and the size is 5px then click OK.
15. Make lots of Word Cloud Copy
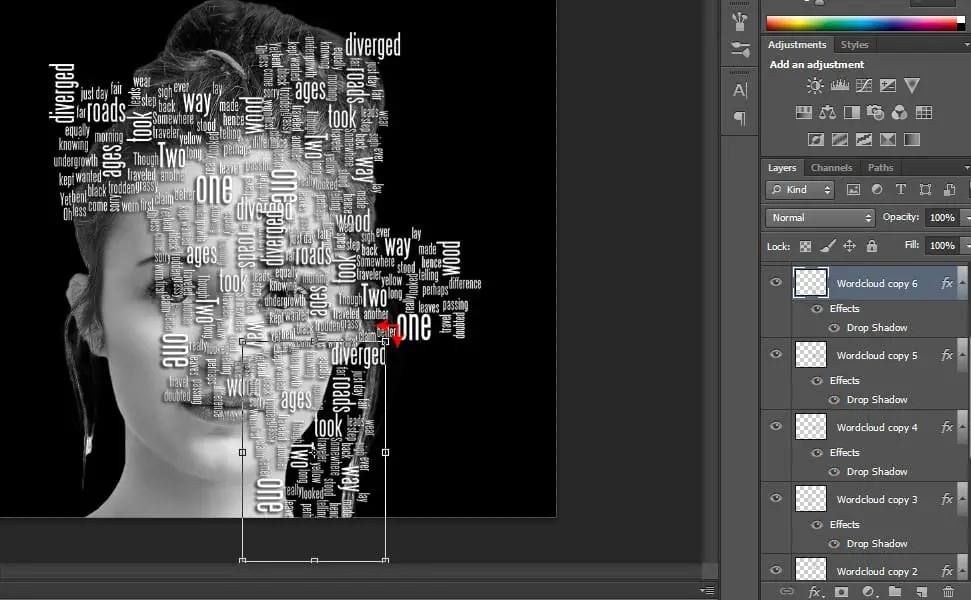
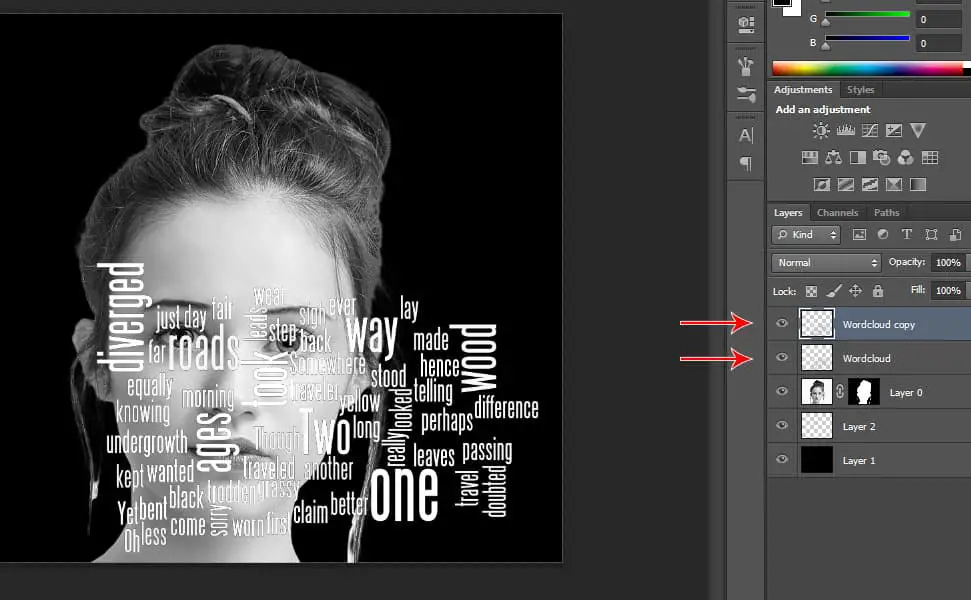
First, resize it by pressing CTRL + T and make it smaller then press CTRL + J to duplicate and move it to fill the other side of the face then rotate it 90 degrees by pressing Shift while you click and rotate it to retain its proportion. Then press CTRL + J to duplicate then move it and fill the face with the text by
repeating this step.
16. Group the Word Cloud Copies
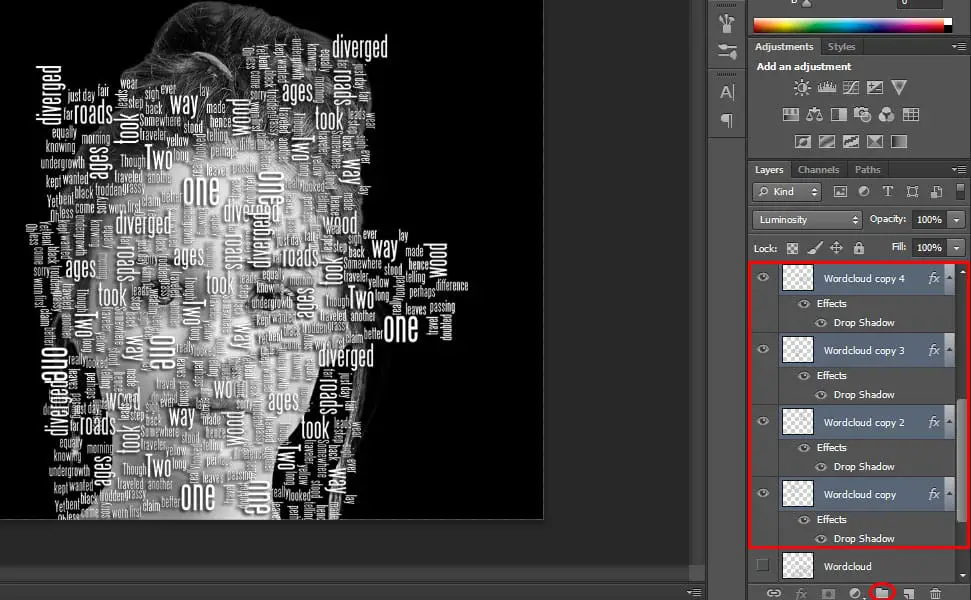
Select the top layer and press ‘Shift’ till the bottom of the Word Cloud copy make sure you don’t include the original word cloud in your selection. Then click the ‘Create a New Group’ icon located below the layer tab or press CTRL + G to group them all together.
17. Make a Copy of the Word Cloud Group Folder
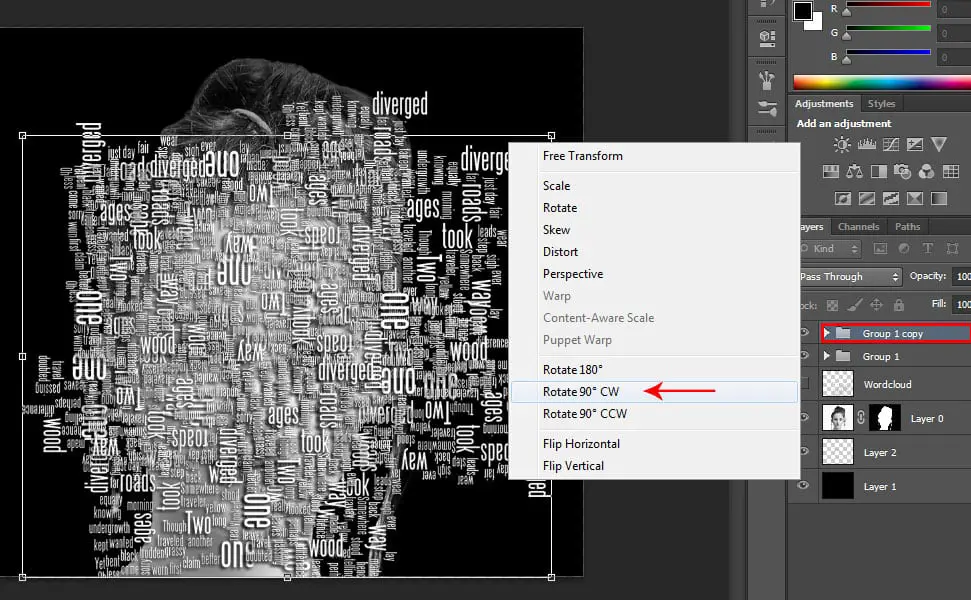
Press CTRL + J to duplicate the word cloud folder, then press CTRL + T and rotate it right clicking then select Rotate 90* CW then press Enter.
18. Convert to Smart Object
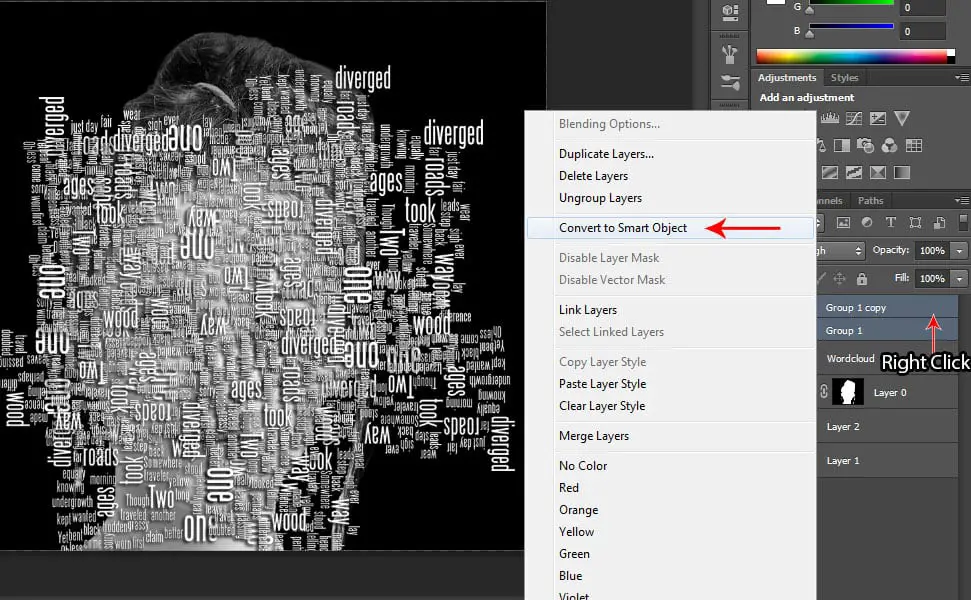
Now SHIFT + Click the Group 1 and Group copy to select them both. Then right-click and ‘select Convert to Smart Object’. Then make duplicate it by pressing CTRL + J then hide the visibility of the lower Smart Object by clicking the eye beside the layer. Then rename the top layer ‘Displacement’.
See related article: 13 Step by Step Transparent Clothes Effect Tutorial in Photoshop
19. Add Displacement Map Filter
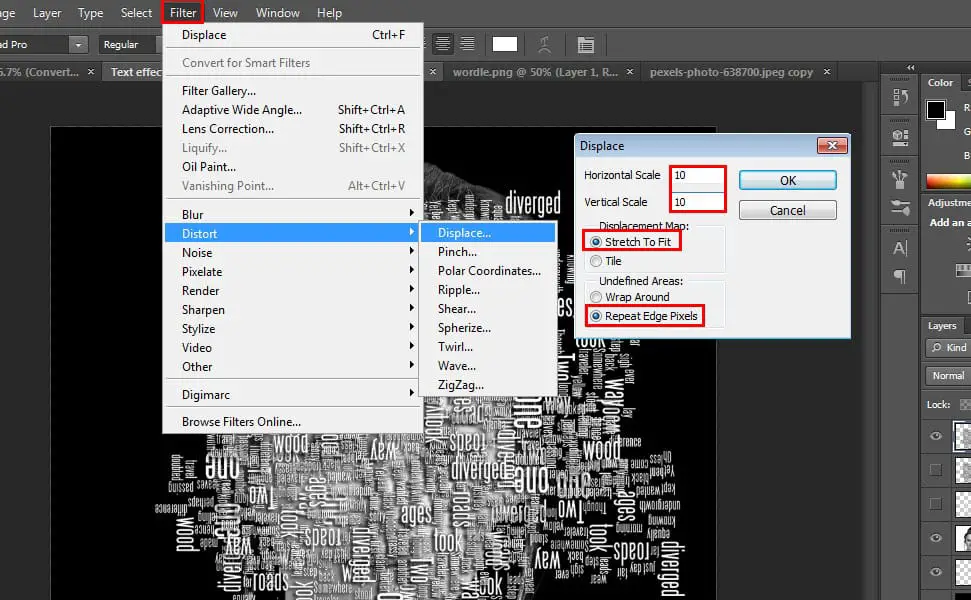
Go to ‘Filter’ then select ‘Distort’ then click ‘Displace’. You will see a popup box where you will set the ‘Horizontal Scale’ and ‘Vertical Scale’ to 10 each and select ‘Stretch to Fit’ and ‘Repeat Edge Pixels’ then press OK then select the Displacement PSD file you saved earlier in Step 6 then click Open.
20. Make a Selection of your Displacement Layer
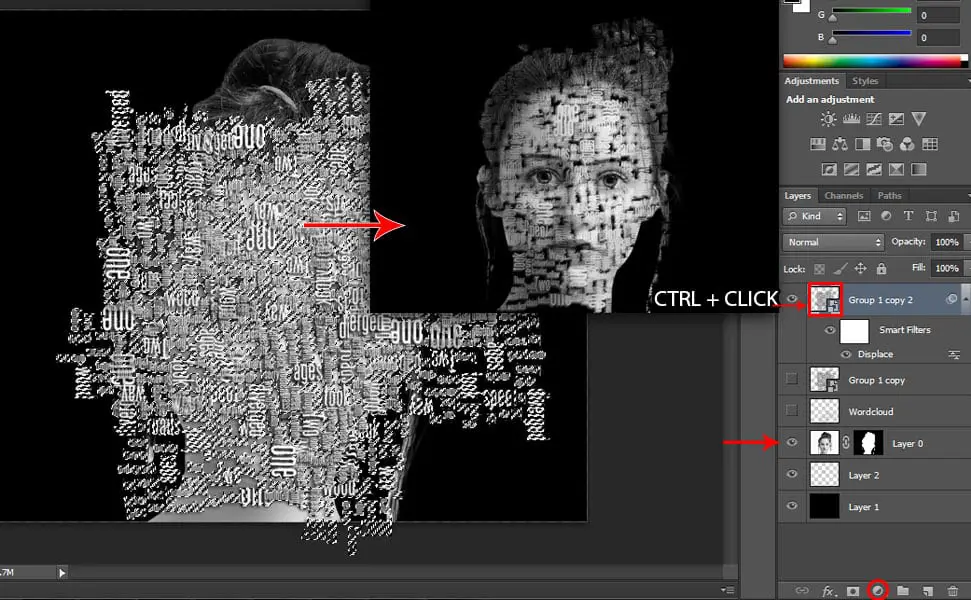
CTRL + click the thumbnail of the Displacement Layer to make a selection. Then hide the visibility of the ‘Displacement’ layer. Then right click your ‘Subject’ layer and select ‘Convert to Smart Object’. After converting it to Smart Object, click the ‘Add Layer Mask’icon located below the layer tab.
21. Change the Blending Mode to Linear Burn

Press CTRL + SHIFT + ALT + E to flatten the image. Then hide the layer below the flattened layer. Then drag the flattened layer to the top of the layer’s tab. Make the ‘Displacement’ layer visible again by clicking the box beside it. Then change the blending mode of the Flattened layer to Linear Burn.
See related article: 14 Step by Step Brick Wall Graffiti Tutorial in Photoshop
22. Finishing Touches

Drag the Subject Layer below the top layer and make the layer’s opacity to 75%. Then Select the Crop Tool to resize it. Then click the ‘Create New Fill’ icon located at the bottom of the layer tab and select ‘Color Look Up’ then at the ‘3DLUT FILE’ choose ‘FuturisticBleak.3DL’ to add dramatic color.
So that’s it, I hope you learned a lot of new things from this tutorial and got the output that you were expecting!