14 Step by Step Brick Wall Graffiti Tutorial in Photoshop
Have you ever admired beautiful graffiti on walls down the street? And have you ever thought about painting your own picture on the wall? In this article, I’m gonna show you 13 step by step brick wall graffiti tutorial in Photoshop so you can have the graffiti look on your pictures even without painting on real walls!
Btw, if you wanna use the images that I’m using, feel free download below:
Brick Wall Image: http://www.deviantart.com/art/Brick-Wall-Stock-55850996
Model Image: https://drive.google.com/file/d/15Cl97v0Hn62PD-Hx5VAEX4uHY38mcRTs/view?usp=sharing
Clouds Image: https://drive.google.com/file/d/1fd_bBMADgmbUzSN5HuVzPe0DtR7NFlQr/view?usp=sharing
(Additional info: I’m using Adobe Photoshop CS6 on Windows)
It’s very fun and easy to learn, so let’s get to it.
1. Positioning the Image
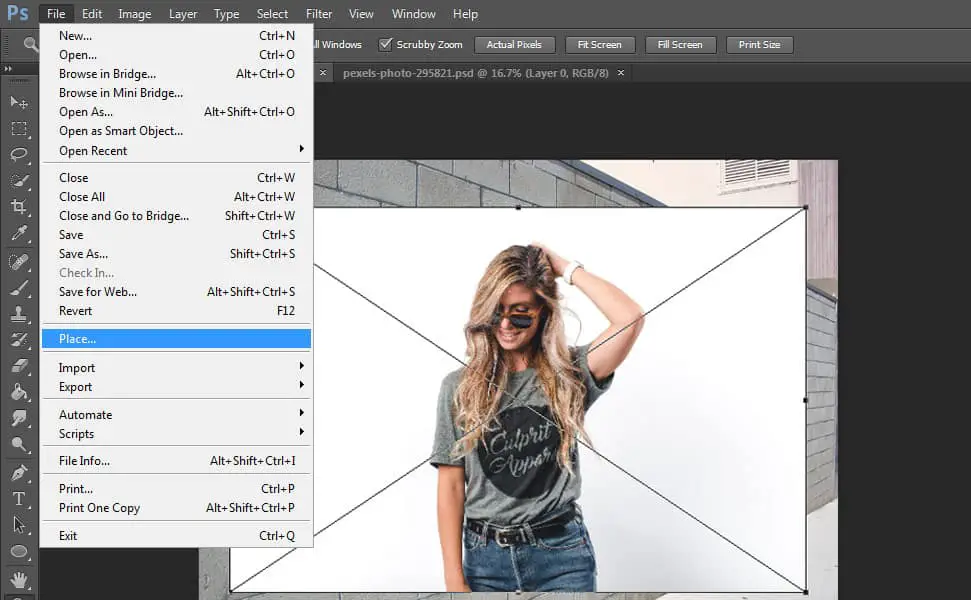
The first thing to do is, open the brick wall image
then click the ‘File’ menu and select ‘Place’ – you will see a popup box where you have to choose the model image you wanna use and press ok.
2. Copy the Model Image
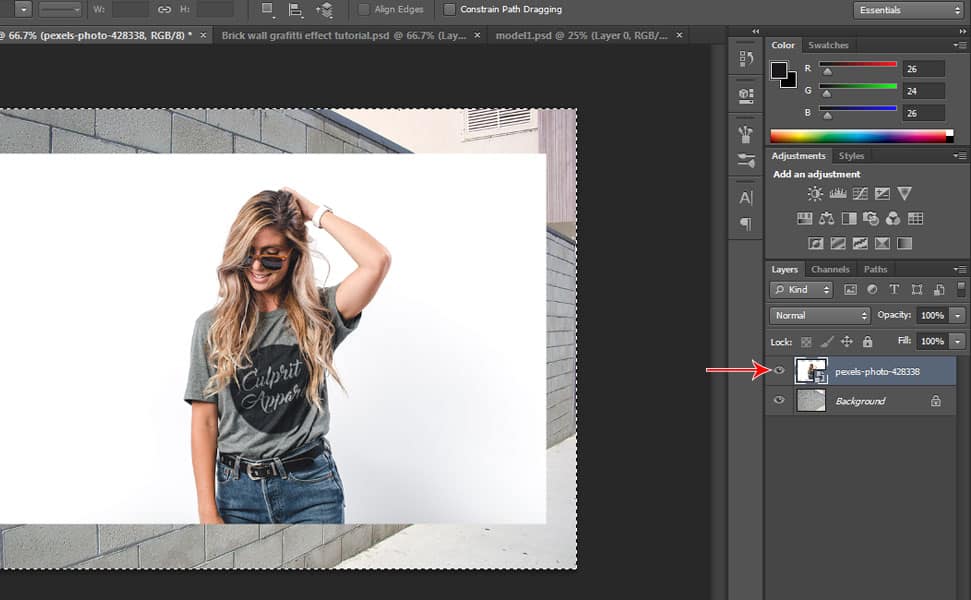
Make sure you are selecting the model layer and then press CTRL + A to select the image and then press CTRL + C to copy it so we’re gonna paste it on the Vanishing Point Filter later. After that, hide the visibility of the image by clicking the ‘eye’ icon located on the left side of the model layer.
3. Create a New Layer
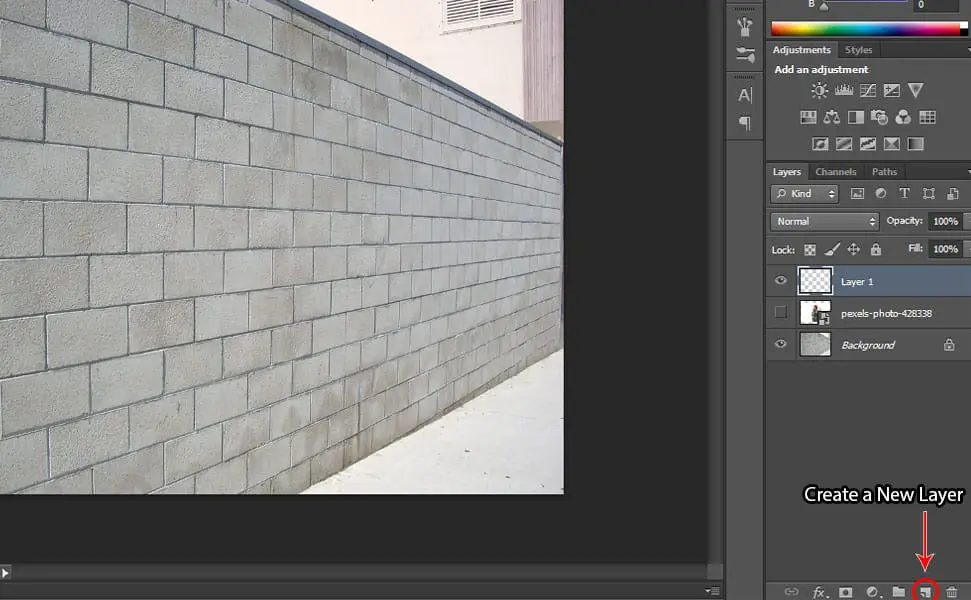
Click the ‘Create A new Layer’ icon located just below the layer tab, we are gonna use this for Vanishing Point Filter.
4. Apply Vanishing Point Filter
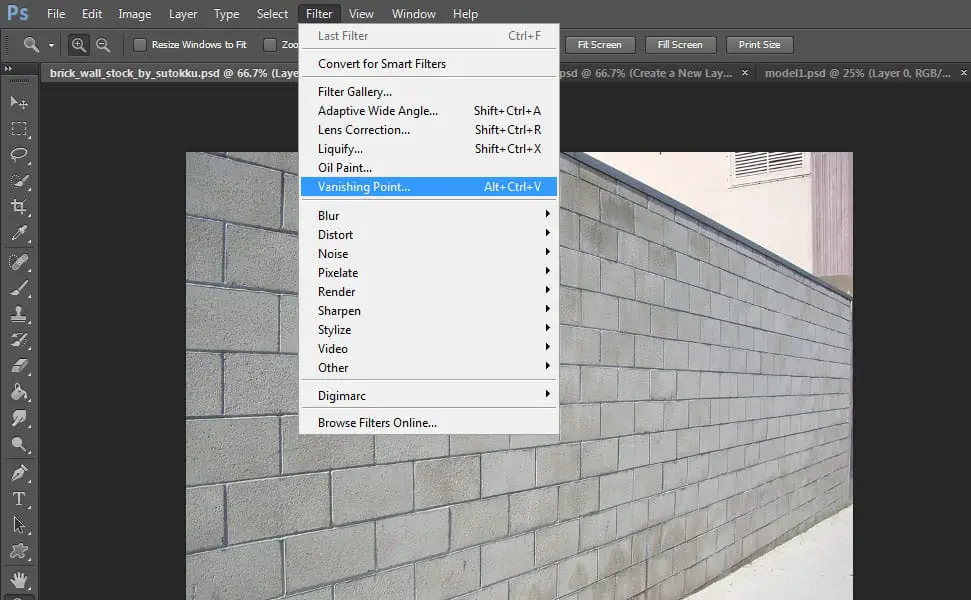
Click on Filter menu then select ‘Vanishing Point’ then make sure you select the ‘Create Plane Tool’, it’s actually on default, and you can zoom out simply by pressing CTRL – or + to zoom in.
See related article: 13 Step by Step Transparent Clothes Effect Tutorial in Photoshop
5. Use the Create Plane Tool
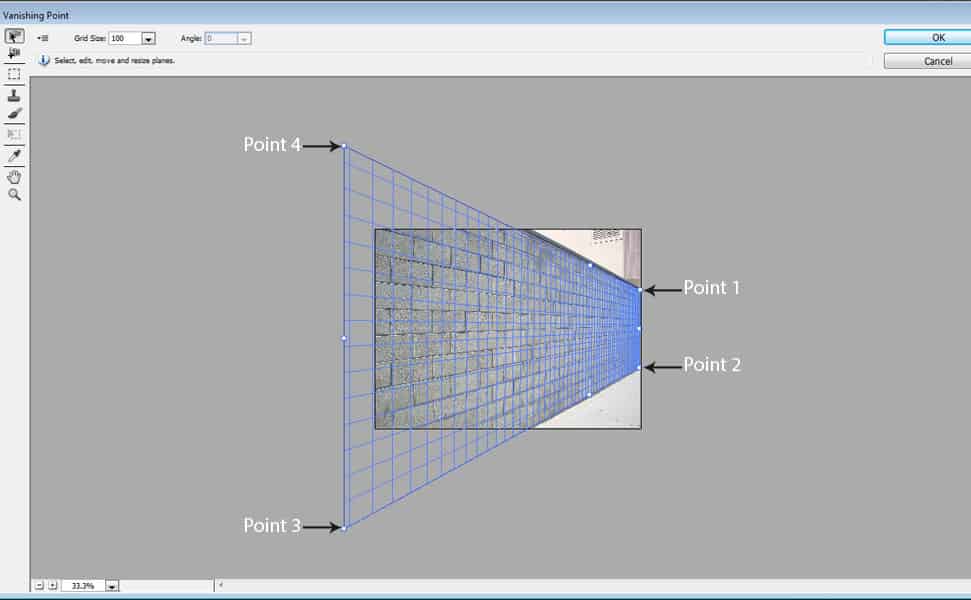
Trace the wall as shown in the picture above using the ‘Create Plane Tool’. Click at Point 1 then Point 2 then 3 till you get to 4.
6. Paste the Model Image
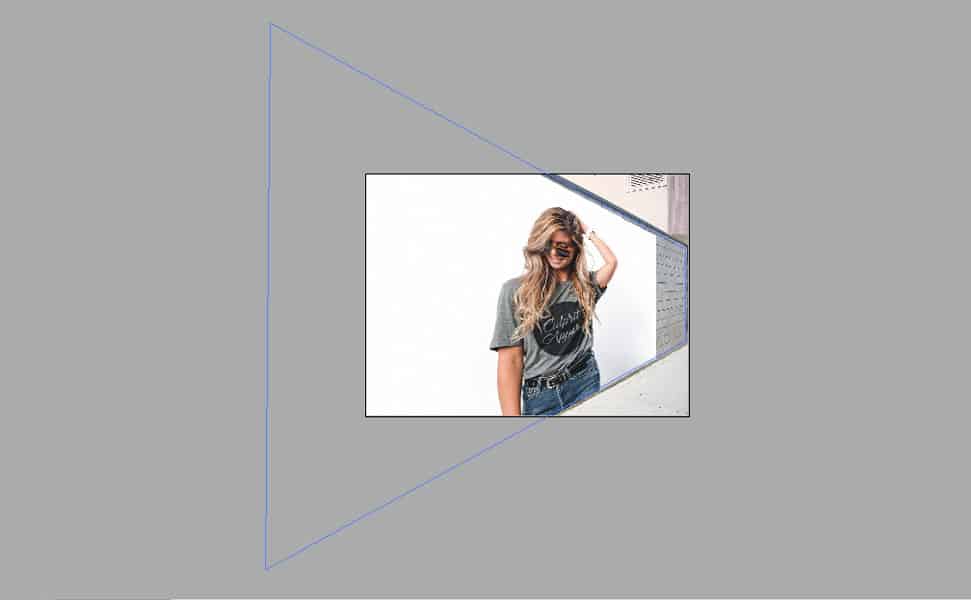
After you trace the wall, paste the model image by pressing CTRL + V and then CTRL + T to transform and position the image then drag it anywhere you like or you can also follow what’s shown in the picture.
7. Change the Blending Mode
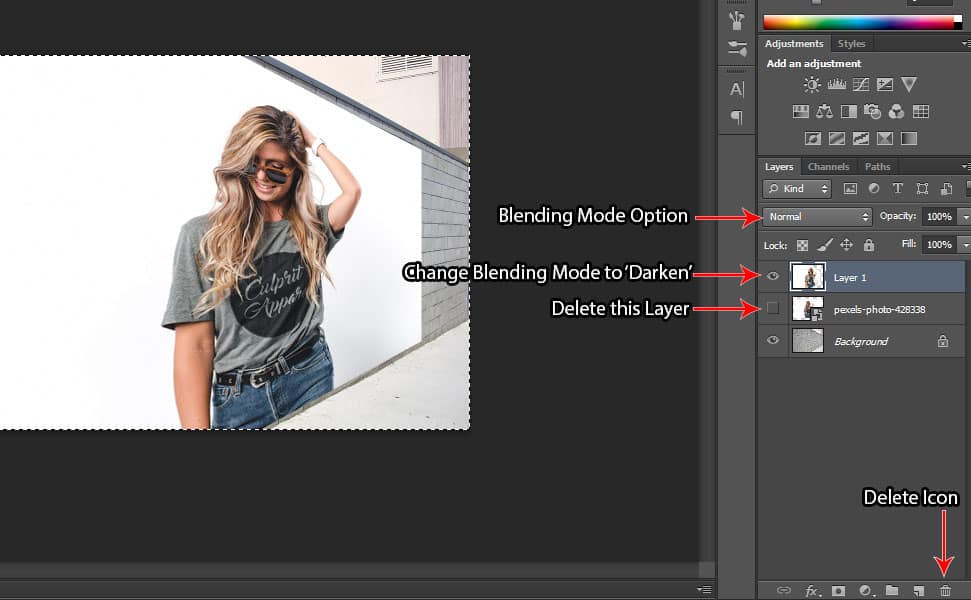
First, delete the model image so you will not be confused and select the new layer that we created earlier where we put the vanishing point filter. Then click on the Blending Mode option located at the upper part of the layer then select ‘Darken’.
8. Add Poster Edges Filter
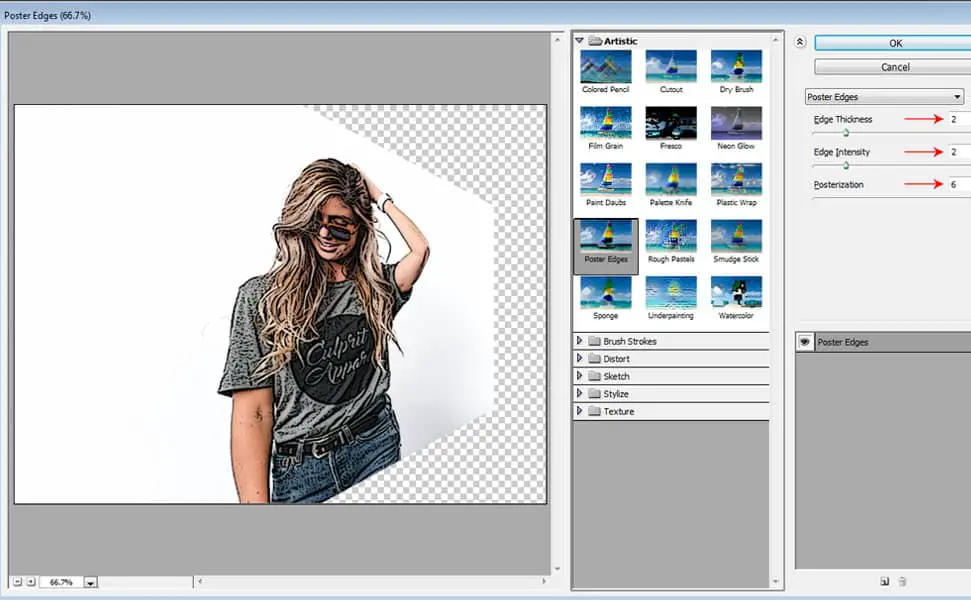
Click on the ‘Filter’ menu and select ‘Filter Gallery’ and at the ‘Artistic’ tab choose ‘Poster Edges’ and set the Edge Thickness to 2, Edge Intensity to 2 and Posterization to 6.
See related article: 14 Step by Step Comic Style Cartoon Effects Tutorial in Photoshop
9. Blend the Model Image with the Wall
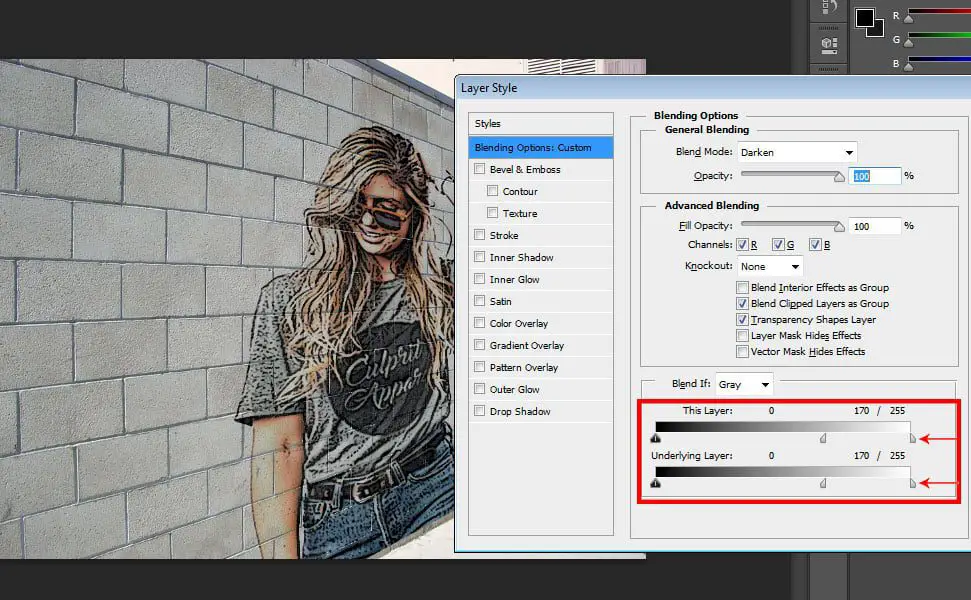
Double click on Layer 1 and you will see a popup box then at the bottom, adjust ‘This Layer’ by pressing ‘Alt’ while dragging to the left side till you reach it down to 170. Do the same for the ‘Underlying Layer’. Now it’s blending properly with the wall.
10. Drag the Model Image Down
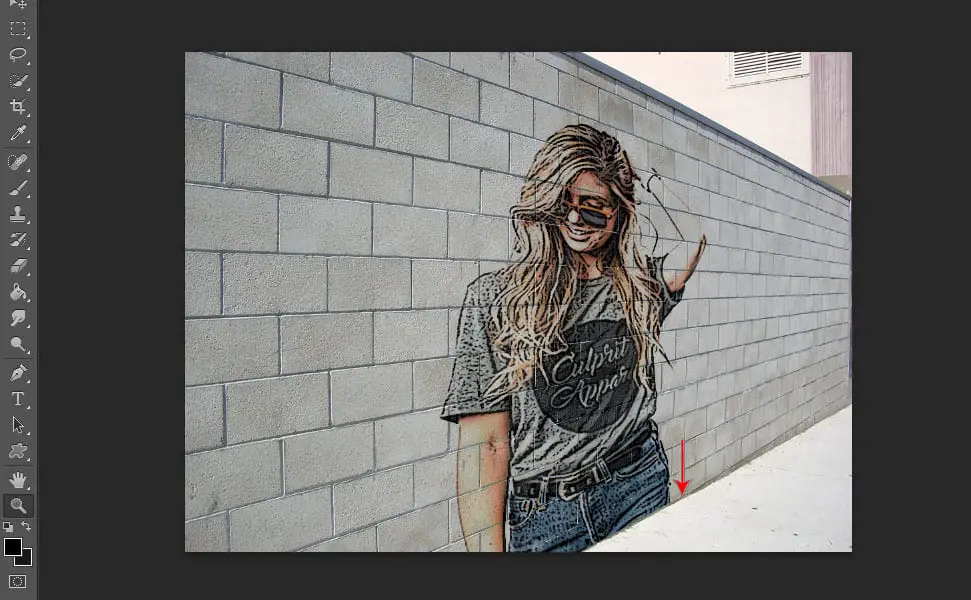
Select layer 1 first then press CTRL+ Arrow Down on your keyboard a couple times to drag it down a bit to reach the foot of the wall.
11. Add ‘Color Lookup’ Adjustment
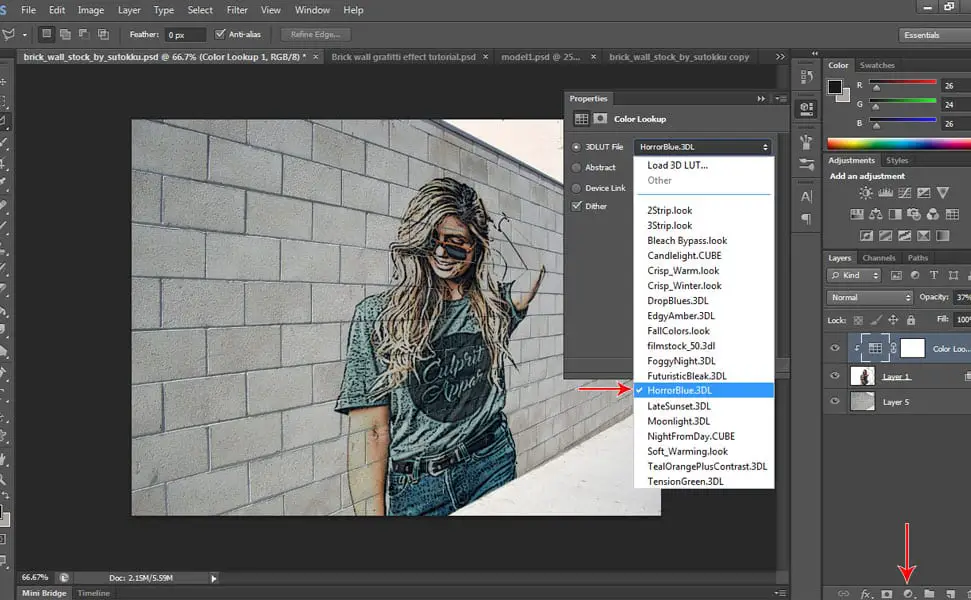
Click the ‘Create Adjustment Layer’ icon located below the layer tab and then select Color Lookup, and choose HorrorBlue.3DL or anything you want depending on your taste.
12. Delete the White Background of the Wall
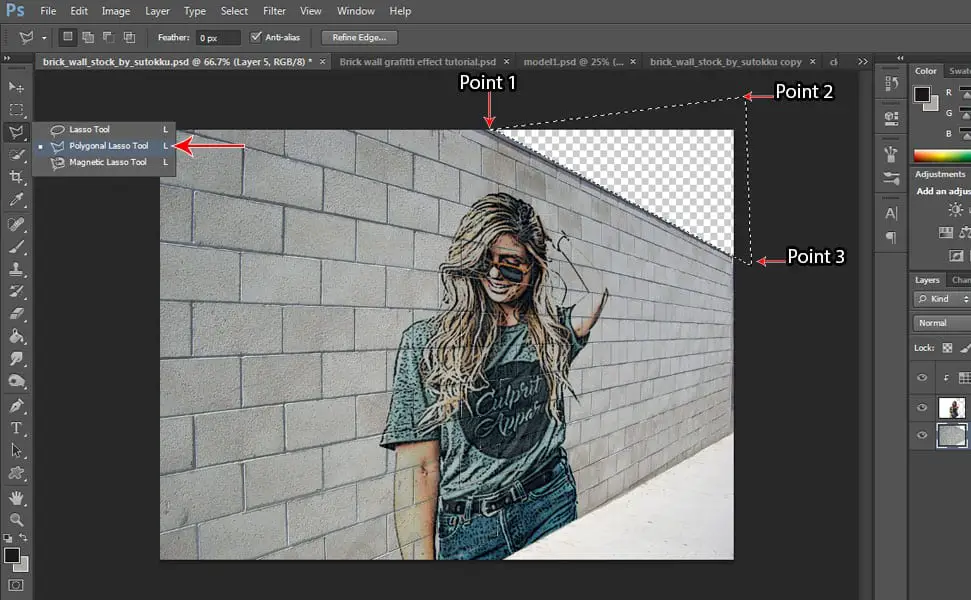
Select the ‘Polygonal Lasso Tool’ and then select the place where you wanna put the clouds by using the Polygonal Lasso Tool, click at point 1, 2 and 3 as shown in the picture then double click back on point 1 to make a selection then press delete, make sure you are selecting the background layer.
13. Place the Clouds Image in the Background
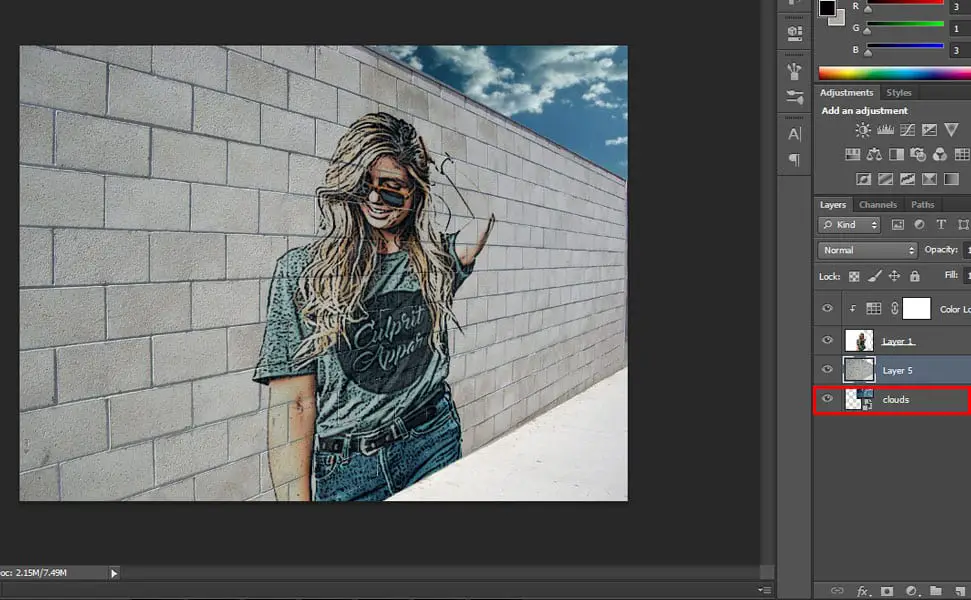
Click the ‘File’ menu and select ‘Place’ then click the Clouds image you downloaded and drag the Clouds layer below the ‘background’ layer then position it at the upper right corner by dragging it.
14. Darken the Ground
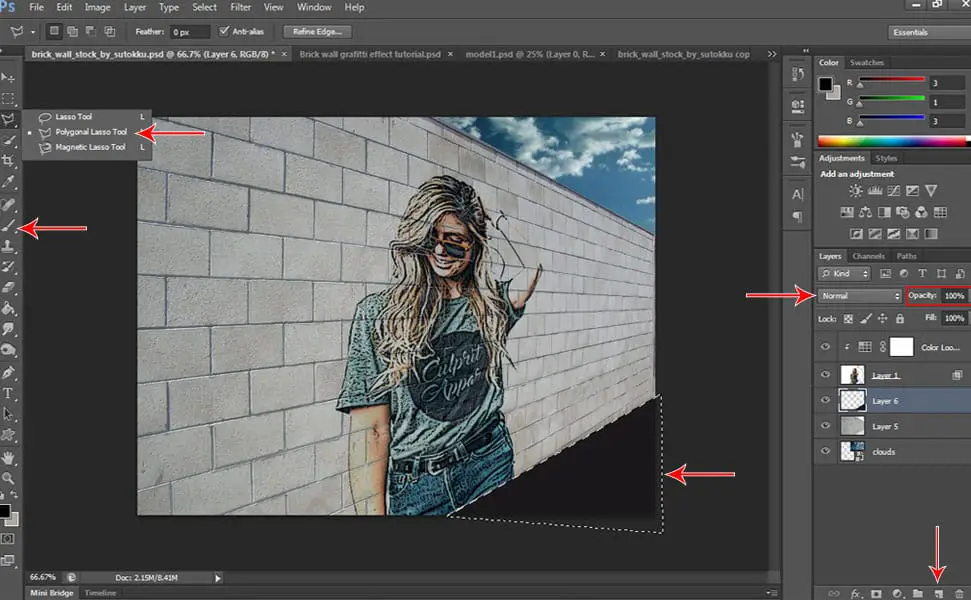
Click the ‘Polygonal Lasso Tool’ again and make a selection of the ground and click the ‘Create a New Layer’ icon located below the layer tab then use the ‘Brush Tool’ to paint the ground black, make sure your foreground color is set to black. Then, change the layer’s blending mode to ‘Vivid Light’ and change the opacity to 60%.
So that’s it! Hopefully, you followed the steps properly and achieved the awesome graffiti effects on your picture! You can also comment below if you made a different version, we will be happy to see it!