13 Step by Step 3D Pop Out Effect Tutorial in Photoshop
Are you a fan of iPhones and would love your photos to look 3D that pops out of your screen? Sure this tutorial will help you achieve that 3D Pop Out effect!
In this article, you will learn 13 step by step 3D Pop Out Tutorial in Photoshop, I tell you it’s very easy to learn and you can apply this technique to anything else like using not just your phone but also television, iPad, MacBook or whatever you can think of, depending on your creativity!
Btw, if you want to use the images that I’m using, feel free to download it below:
Model Image: https://pretty-as-a-picture.deviantart.com/art/summer-suburbia-117451078
Background Image: https://drive.google.com/file/d/1CoSb6LOSJ7Ul0Tju_dXM9ols3_az915F/view?usp=sharing
So let’s get to it!
1. Place the Model Image in the Background Image
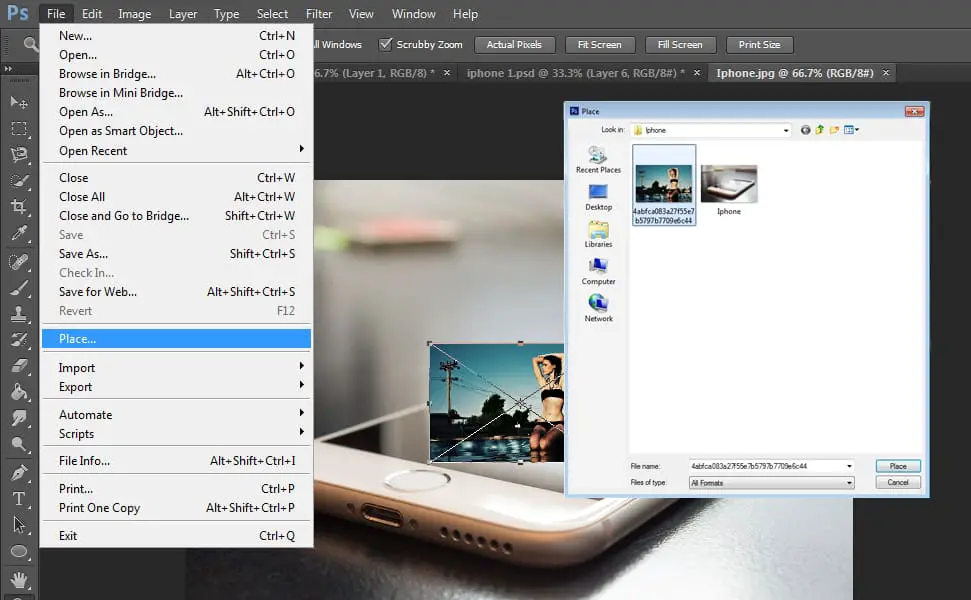
Open the iPhone image that you are going to use. Then click the ‘File’ menu and select ‘Place’ and you will see a popup box where you will have to select the model image that you are going to use then click ‘Place’.
2. Position the Model Image
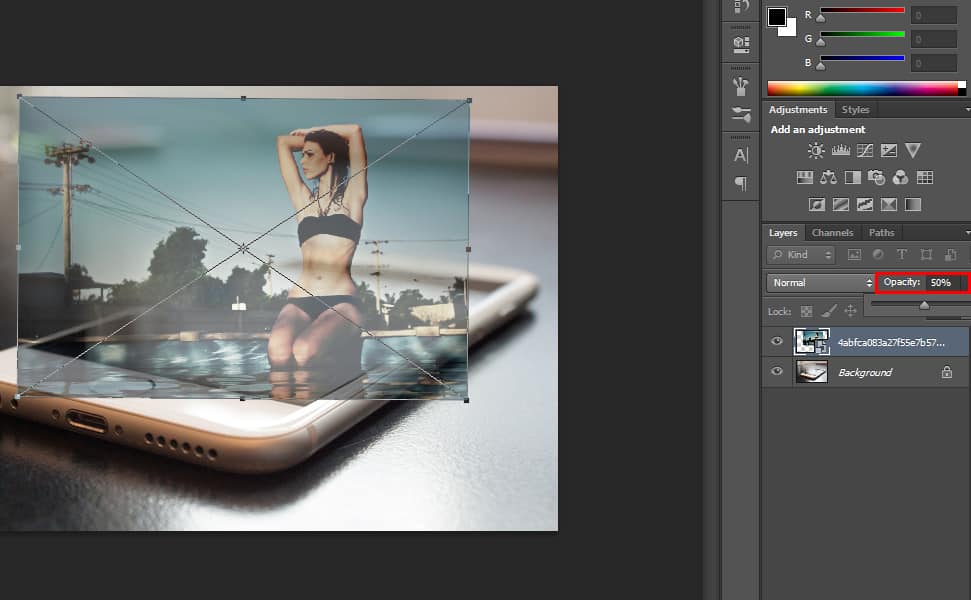
Press CTRL + T and resize it by pressing Shift to retain the proportion while you are expanding the image then press Enter when you’re done resizing. You can also decrease the opacity to 50% so you can see where to position the model and then make it 100% after you’re done.
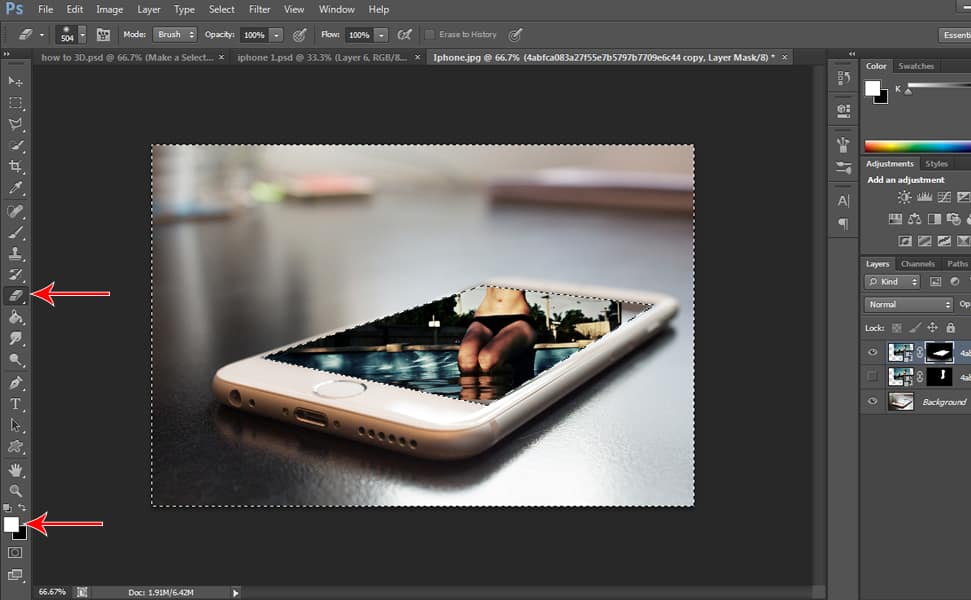
3. Make Selection of the Model
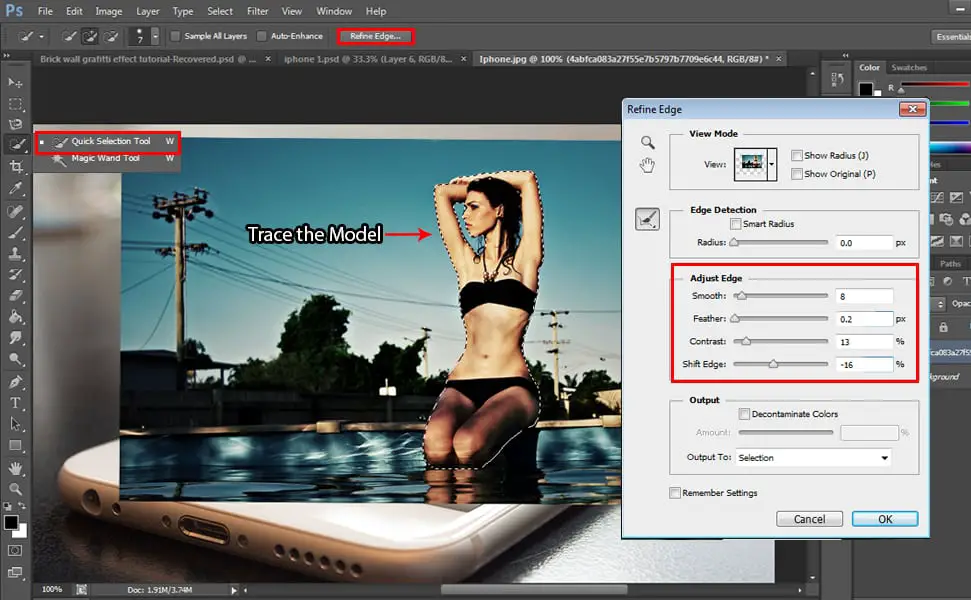
Use ‘Quick Selection Tool’ to trace the model then click Refine Edge to smoothen the edges. Adjust edge by setting Smooth: 8, Feather: 0.2, Contrast: 13 and shift Edge: -16.
4.Add a Layer Mask
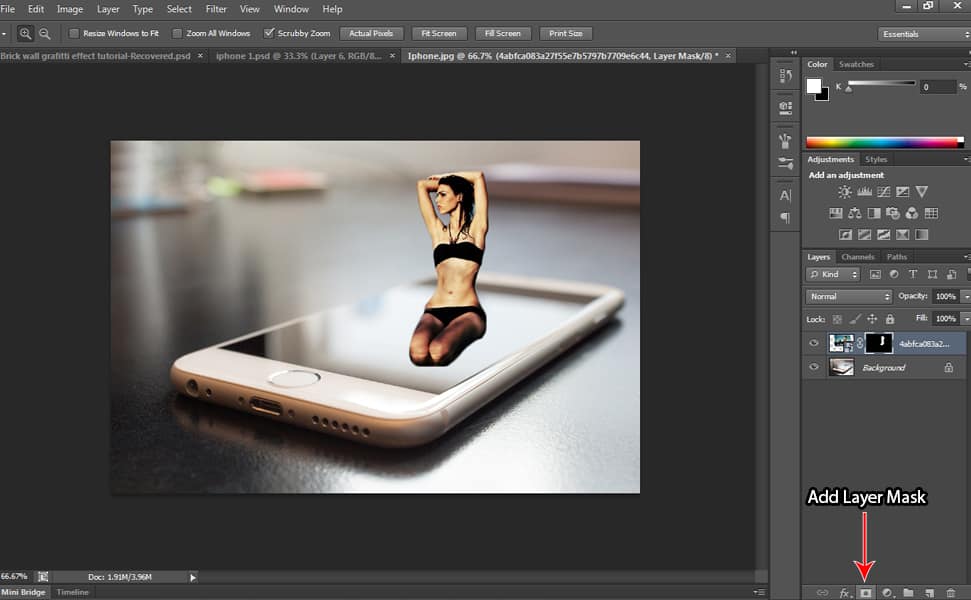
Click the ‘Add a Layer Mask’ to cut out the model.
See related article: 14 Step by Step Brick Wall Graffiti Tutorial in Photoshop
5. Make a Copy of the Layer
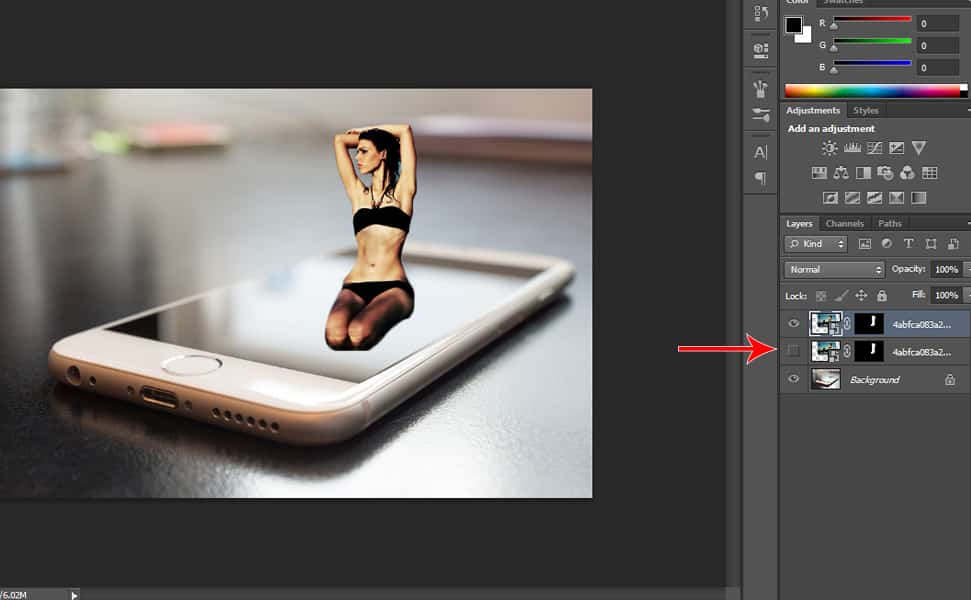
Press CTRL + J to duplicate the layer because we’re gonna use it for the background later. Then hide the visibility of the layer below it by clicking on the ‘eye’ icon beside the layer.
6. Make Selection of the Background
Select the new copy of layer mask then press CTRL + I. You can see that we have created a layer for the background and the other layer below, it’s the pop out model.
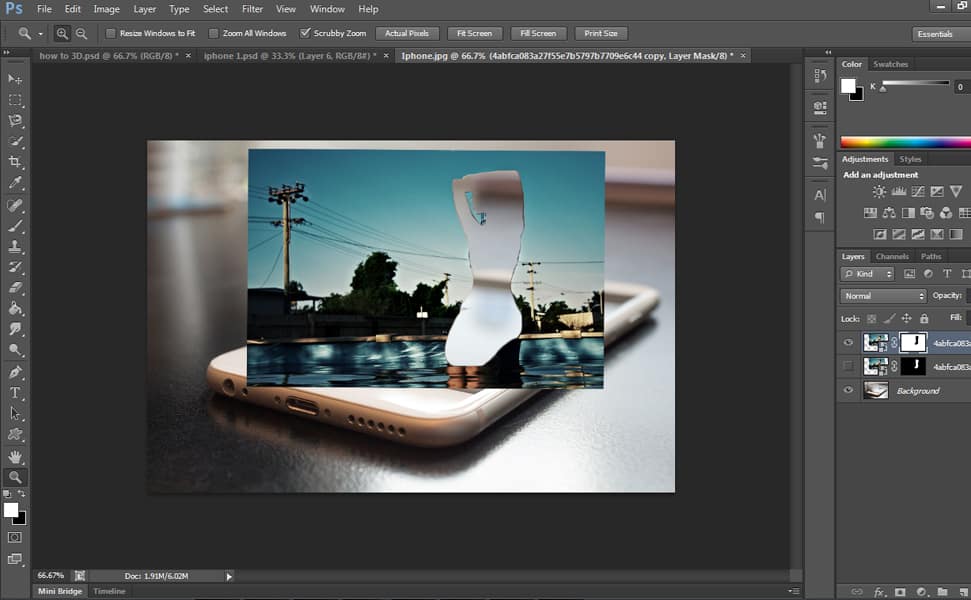
7. Make Selection of the Phone’s Screen
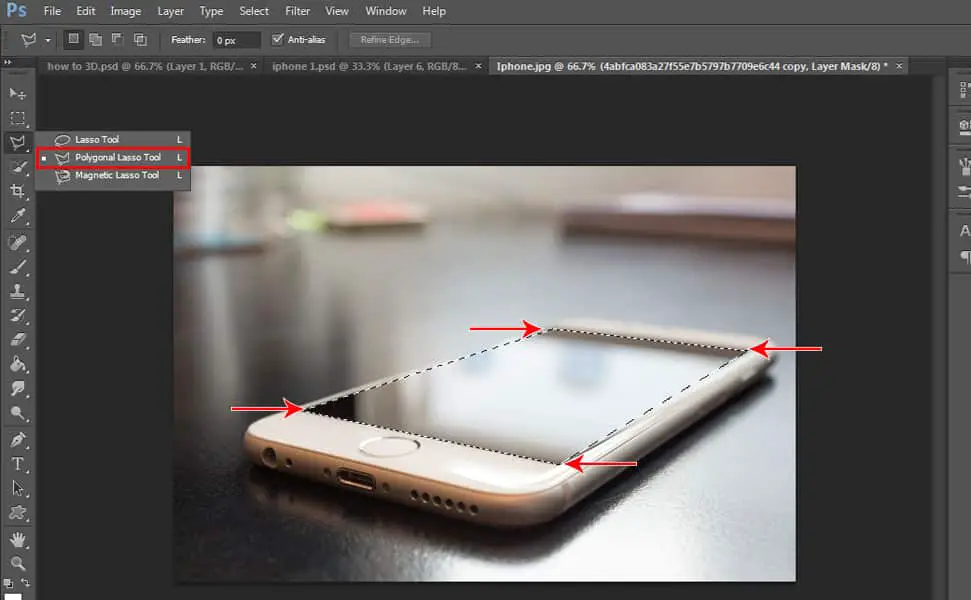
Turn off the visibility of the Background image by clicking the ‘eye’ at the left side of the layer so you will be able to see the screen. Then select ‘Polygonal Lasso Tool’ to make a selection of the phone’s screen.
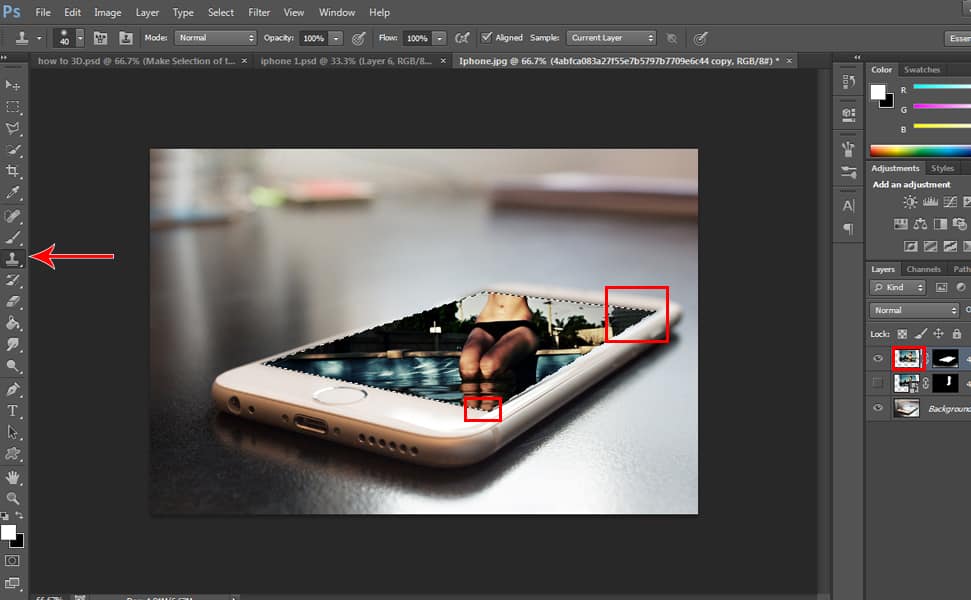
8. Restore the Cutout Area
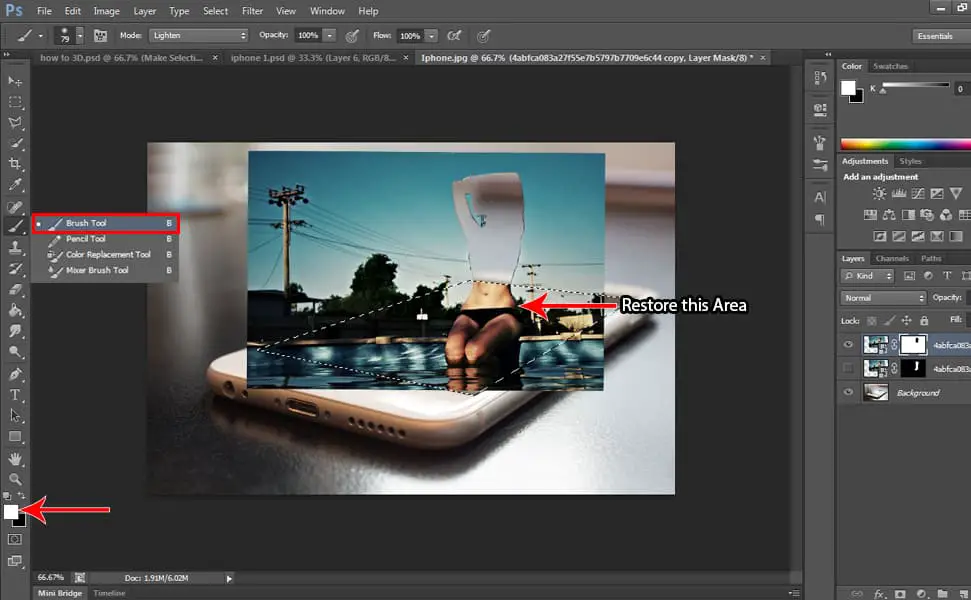
First, turn on the visibility of the background layer by clicking the box at the left side of the layer. Then select Brush Tool and make sure your foreground color is white color and paint where it has been cut out earlier.
9. Cut the Background Image to Fit the Screen
Then press Shift + CTRL + I to inverse it and delete the outer background by using your ‘Eraser Tool’, using ‘White’ as your foreground color then start erasing the outer background so that the only thing left will be the background inside the screen
10. Use Clone Stamp
You notice at the upper and lower edge there’s a blank space, so let’s use the ‘Clone Stamp’ to extend our background image to fit the phone’s screen. Press SHIFT + CTRL + I to select the screen then click on the thumbnail of the layer then use your clone stamp by pressing Alt to copy the black area and expand it to the edges by clicking to the empty area. You will see a popup box saying “This smart object must be rasterized” so just click ok then just continue cloning your background. Then press CTRL + D to deselect it.
11. Smoothen the Edges
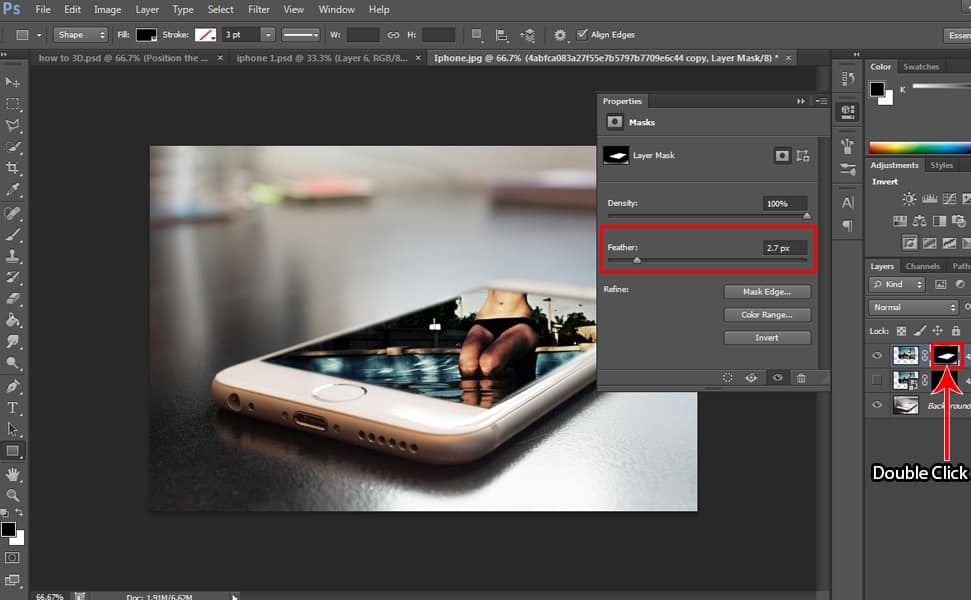
You can see that the edges look pretty sharp, so let’s smoothen the edges a bit by double-clicking the layer mask and adjust the ‘Feather’ to 2.7px so that it would look much better.
See related article: 13 Step by Step Transparent Clothes Effect Tutorial in Photoshop
12. Add Color Balance
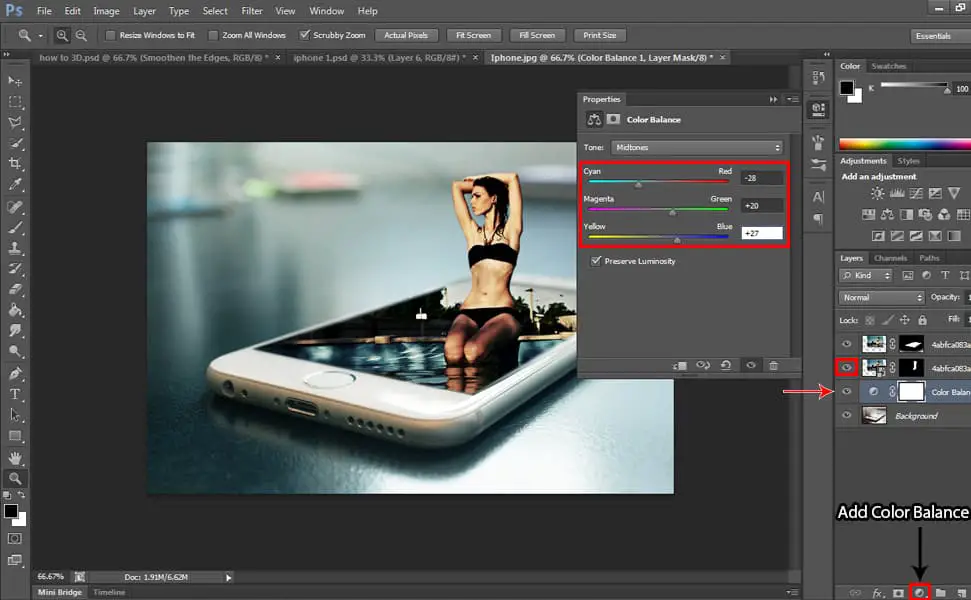
So let’s turn on the visibility of the model image by clicking on the box at the left side of the model layer image. Then select the ‘Background Layer’ and click the ‘Create New Fill or Adjustment Layer’ icon located below the layer tab and choose ‘Color Balance’ – you can play with the colors, it’s up to you how you want it to look like but for me I used -28 for Cyan to Red, +20 on Magenta to Green, and +27 on Yellow to Blue.
13. Add Dramatic Effects
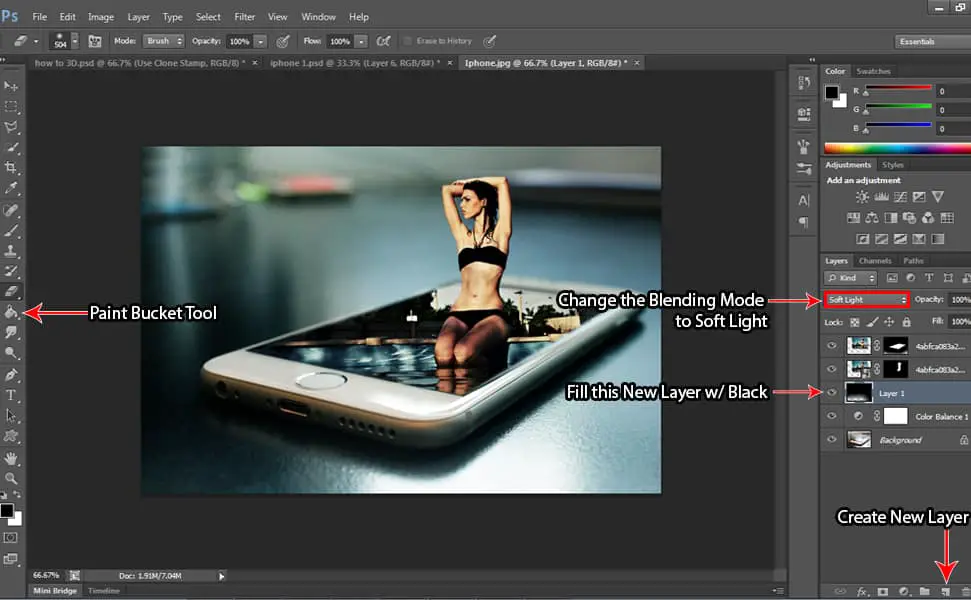
Add a new layer by clicking the ‘Add New Layer’ icon located below the layer tab and select the ‘Paint Bucket Tool’ and make sure your foreground color is black then paint black on the new layer by clicking on it using the Paint Bucket Tool. Then change the blending mode to ‘Soft Light’. You can also erase a little bit on the bottom so it won’t be too dark using the ‘Eraser Tool’.
So that’s it, I hope you learned a new technique from this tutorial! If you have any questions, feel free to comment below.