
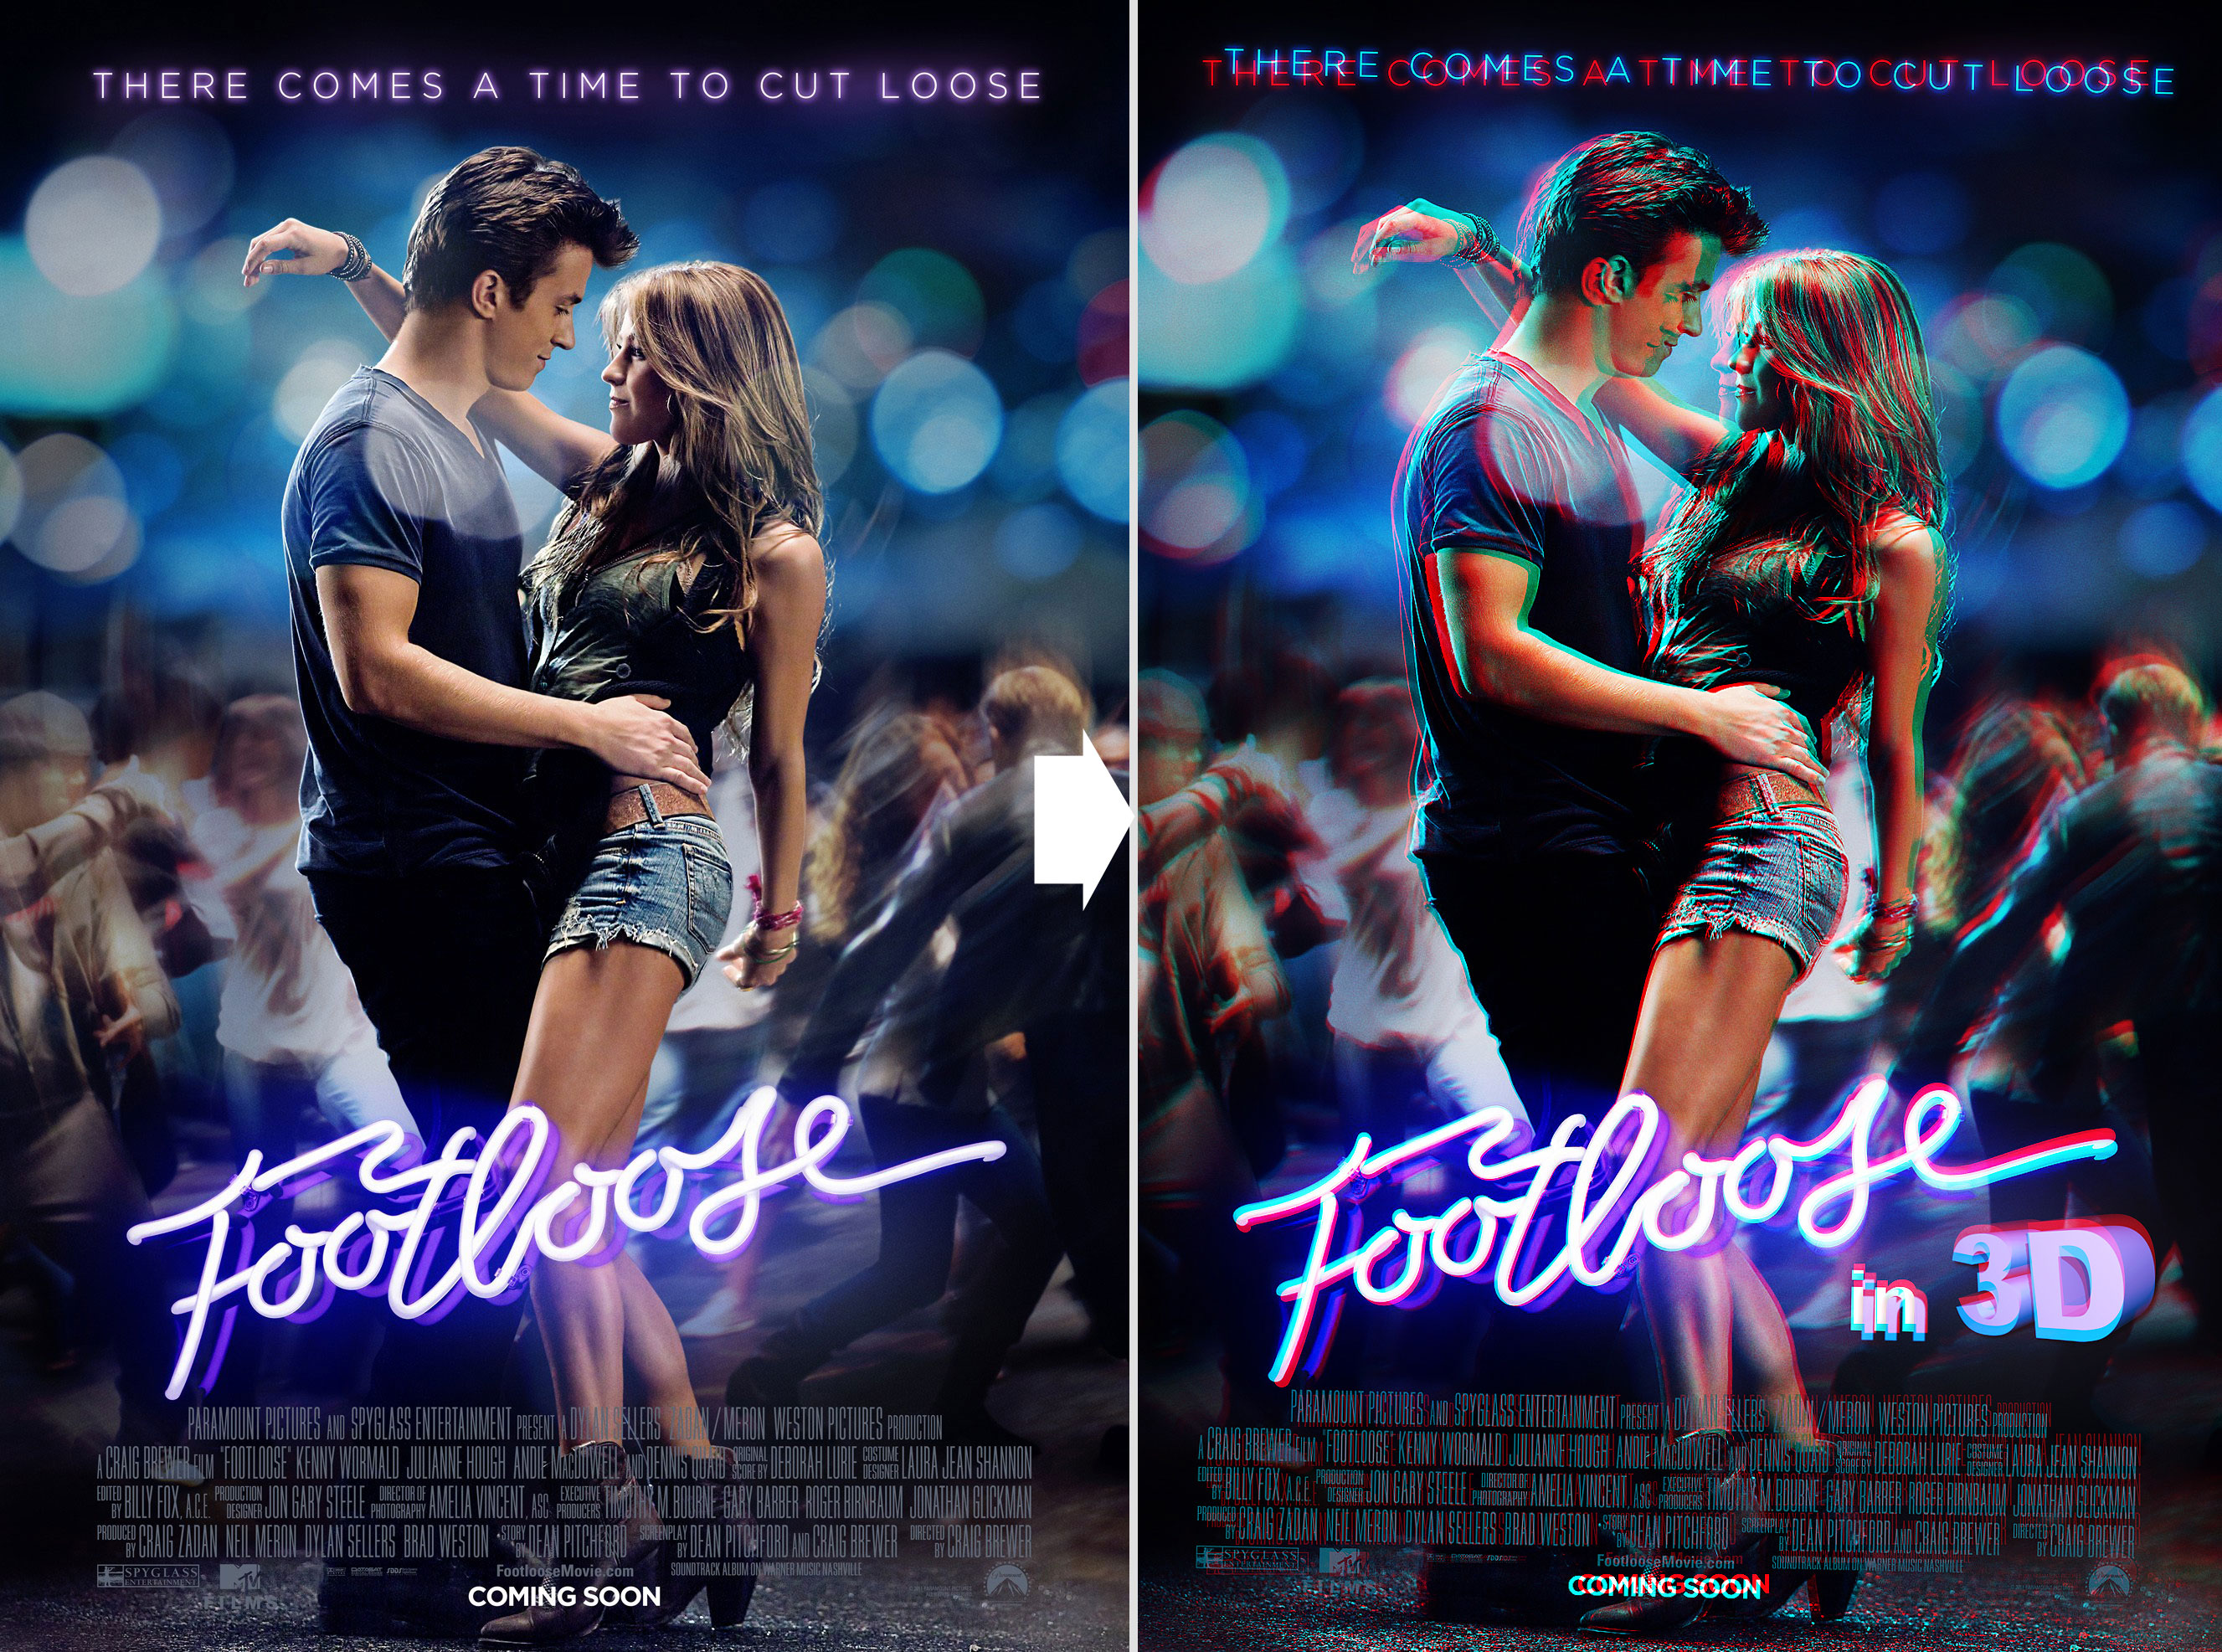
Want to know how to create a 3D movie poster in Photoshop? If so, you’re in the right place as we’re going to walk you through the entire process, one step at a time. That means that as long as you have basic Photoshop knowledge, you should be just fine with this tutorial. We’re also confident that there will be helpful feedback in the comments section below in the event that you get stuck.
Now, what in the world would you possibly need to create a 3D movie poster in Photoshop for? Well, it’s kind of the “in” thing right now. This tutorial will work great for filmmakers (especially indie filmmakers who can’t afford to have someone design a poster) or someone that just wants to try their hand at something new in Photoshop. Either way, you’ll find multiple uses for the skills that you’ll obtain once you master what we are going to teach you below. Now, if you’re ready to get started and be on your way with learning how to create a 3D movie poster, scroll down and view the tutorial below. Don’t worry. With time, you’ll be able to do it with no trouble at all!
Step 1
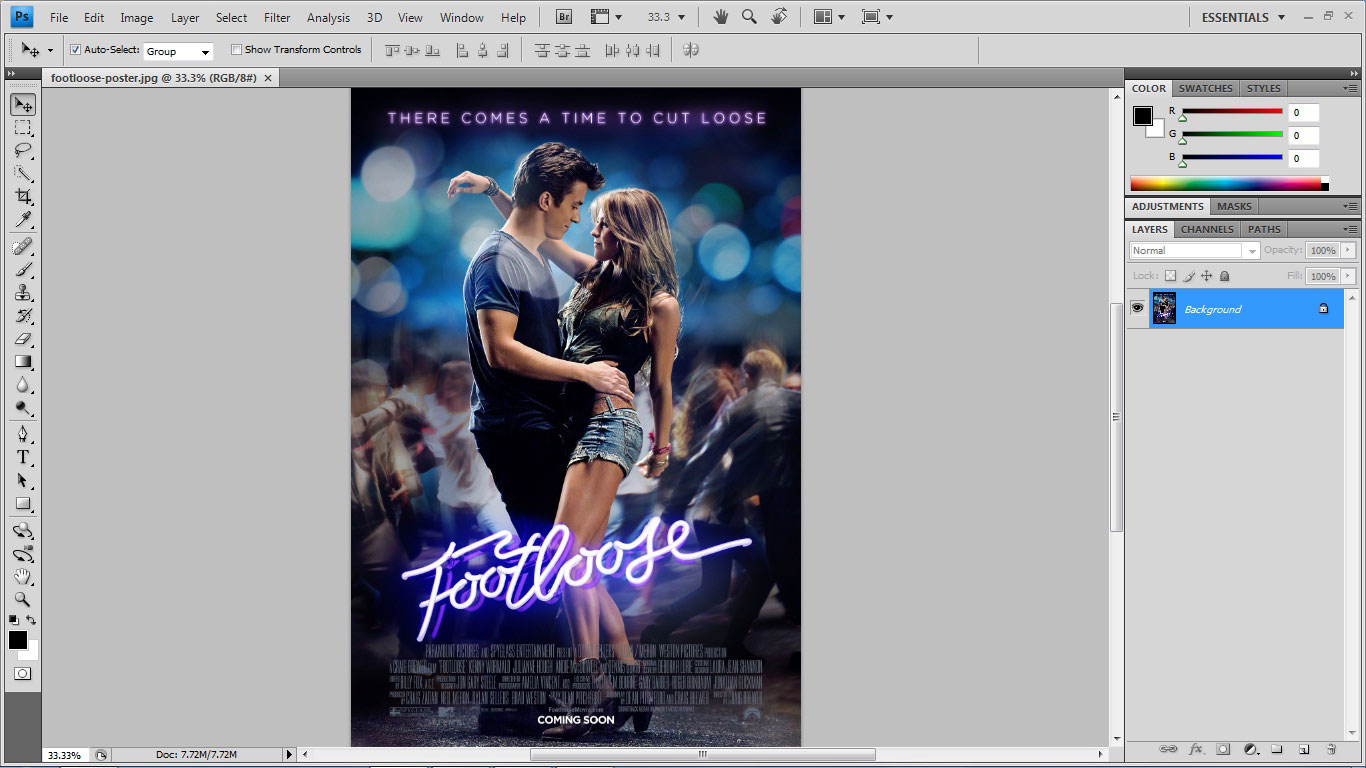
Open Photoshop and open (ctrl + o) the image in it.
Step 2
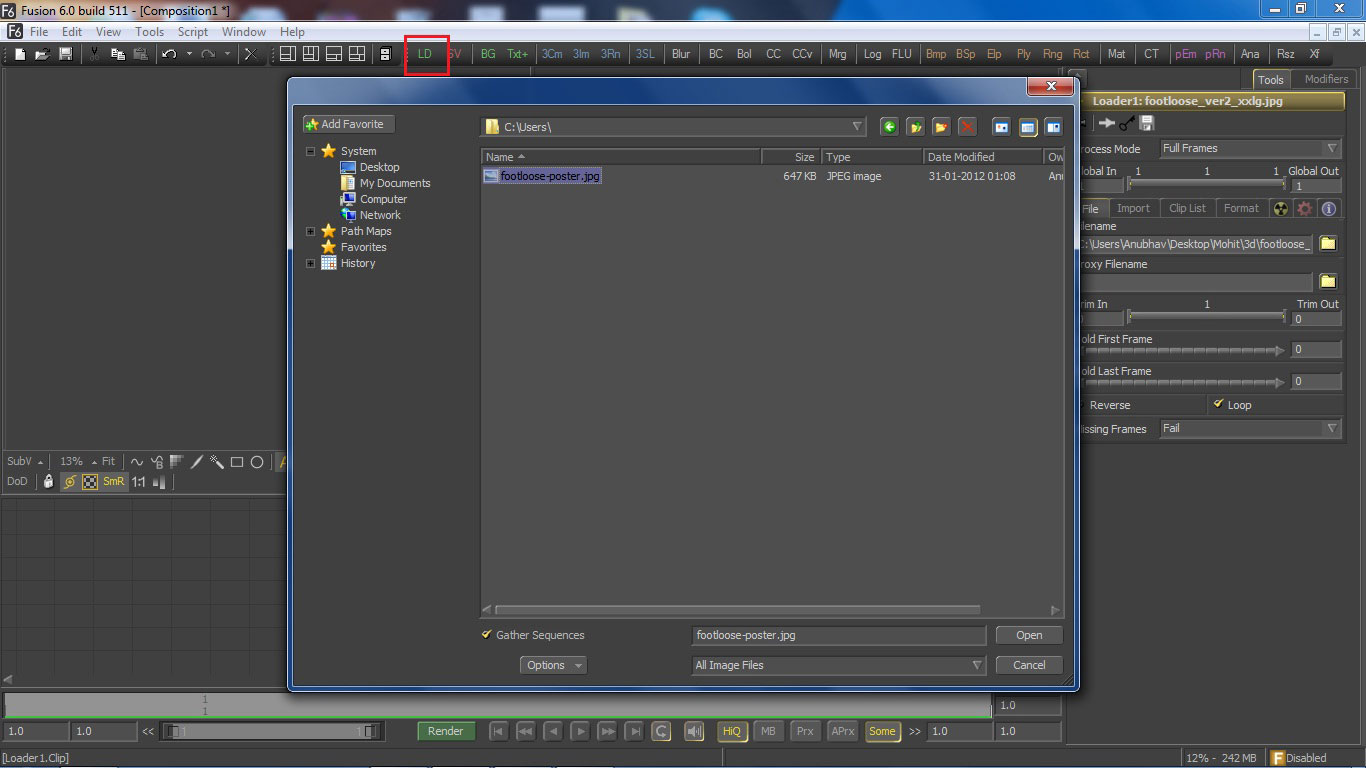
To make the image look more better and interesting, lets make some changes to the image. To start with open eye on fusion and call the image into it with the loader tool.
Step 3
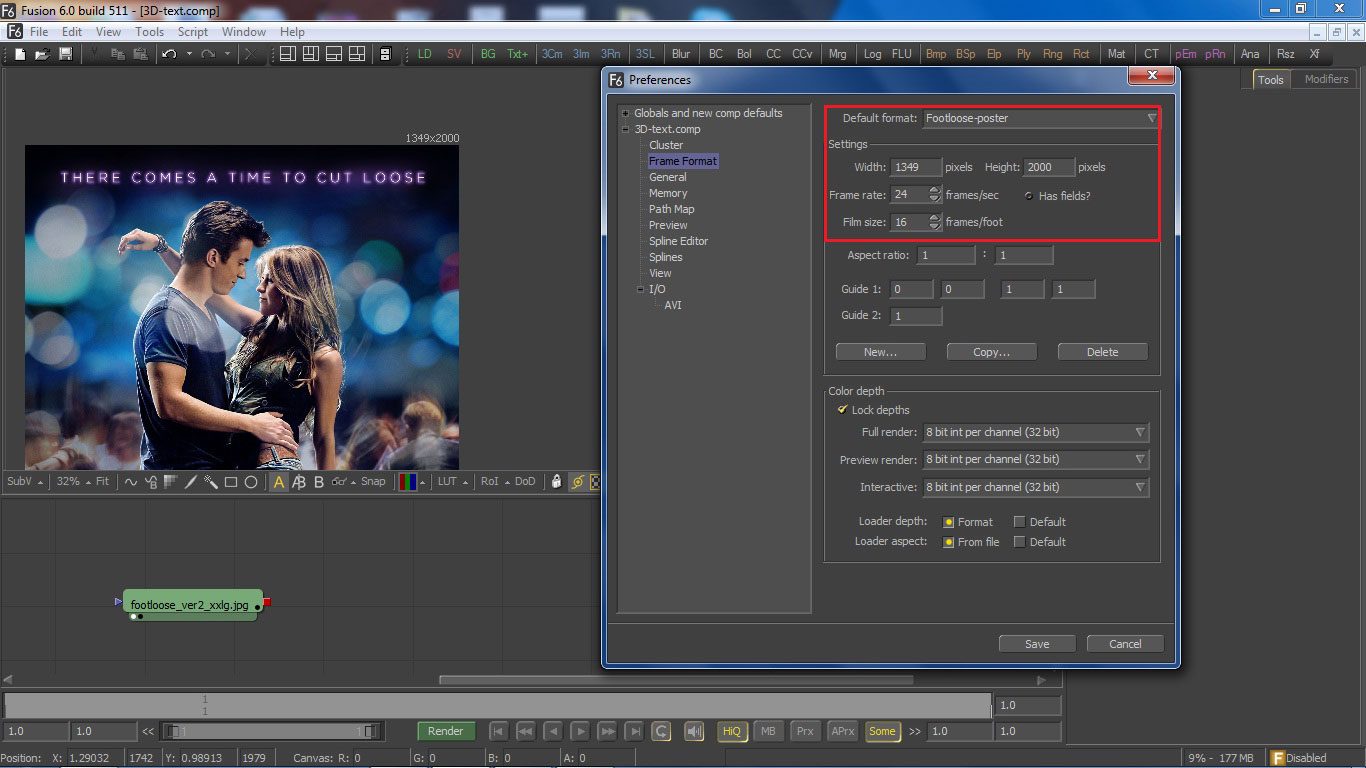
Go to file> preferencesGoto frame format> create a new profile> Name it ‘Footloose Poster‘ and make the following changes: Width = 1349 Height = 2000 Frame rate = 24 File size = 16(Same as the Image size)
Step 4
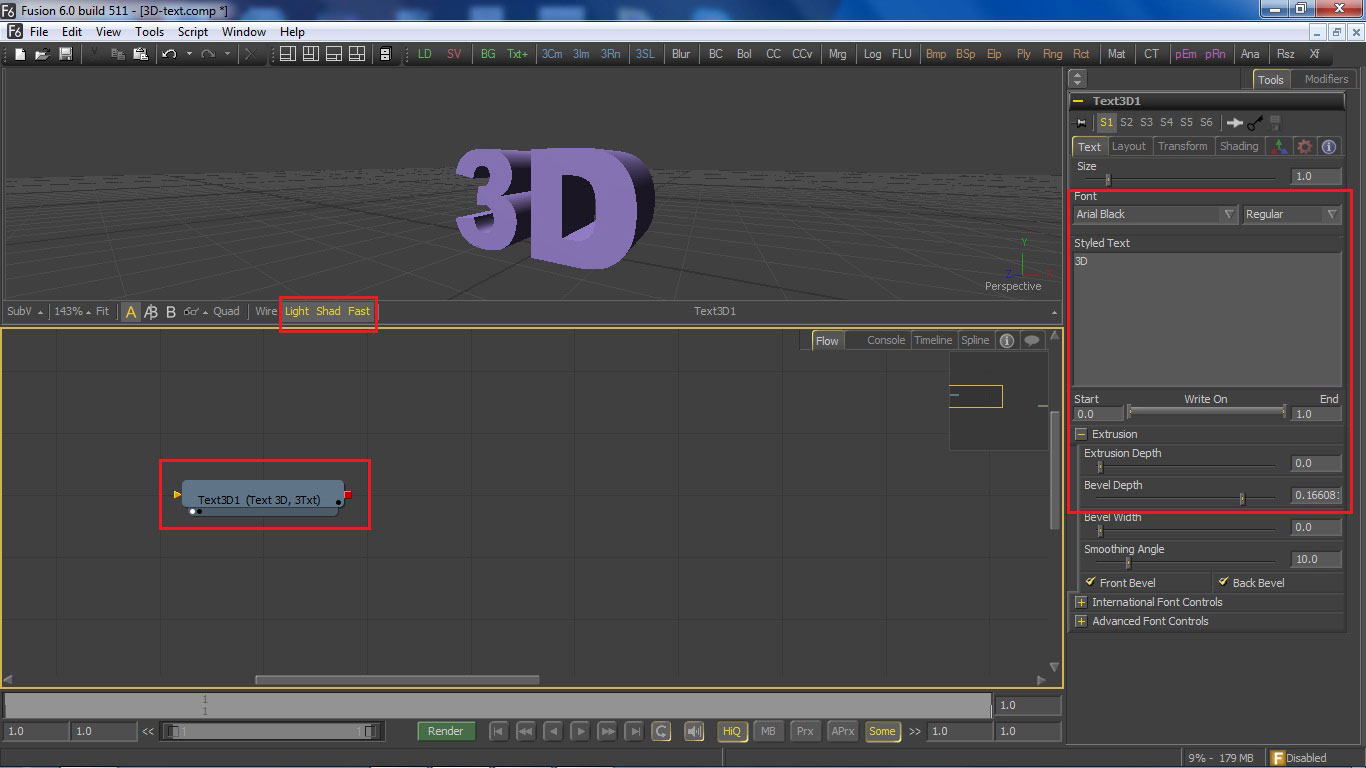
Add a Text 3D Tool (Tools>3D>Text 3D) Write down 3D in it with an Arial Black FontChange the Bevel depth to ‘0.1660819‘ Also in the shading section change the colour to Red = 0.6823529411765 Green = 0.5764705882353 Blue = 0.9411764705882 And specular settings to Red, Green and Blue to 0.5686274509804 each. Specular Intensity = 0.1052632
Step 5
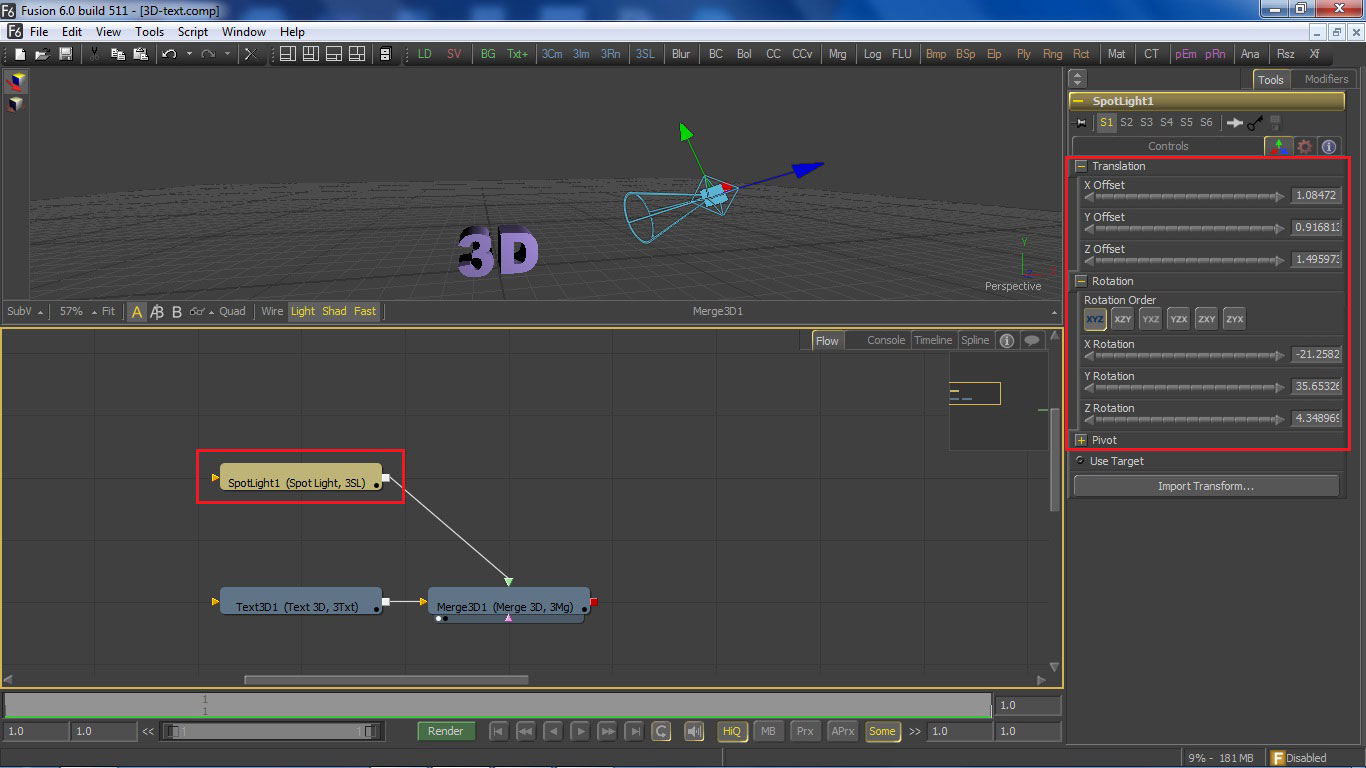
Add a spot light (Tools>3D>Light> SpotLight), connect it to Text 3D (join both the Red Outputs so that a merge 3D is created) and move it to Translate X = 1.08472 Translate Y = 0.9168134206591 Translate Z = 1.495973 Rotation X = -21.25822 Rotation Y = 35.65326 Rotation Z = 4.348969
Step 6
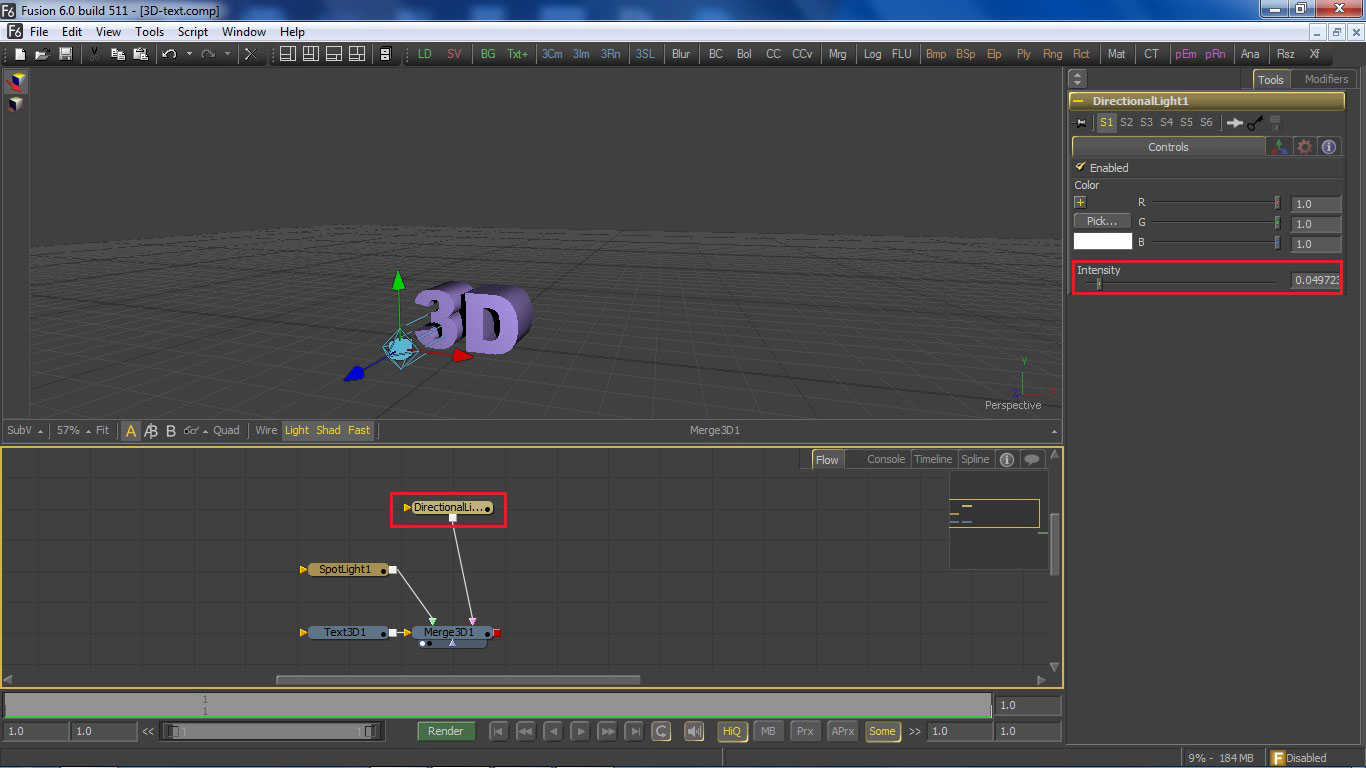
Add a Direction Light(Tools> 3D> Light> Direction Light) and reduce its intensity to 0.0497238
Step 7
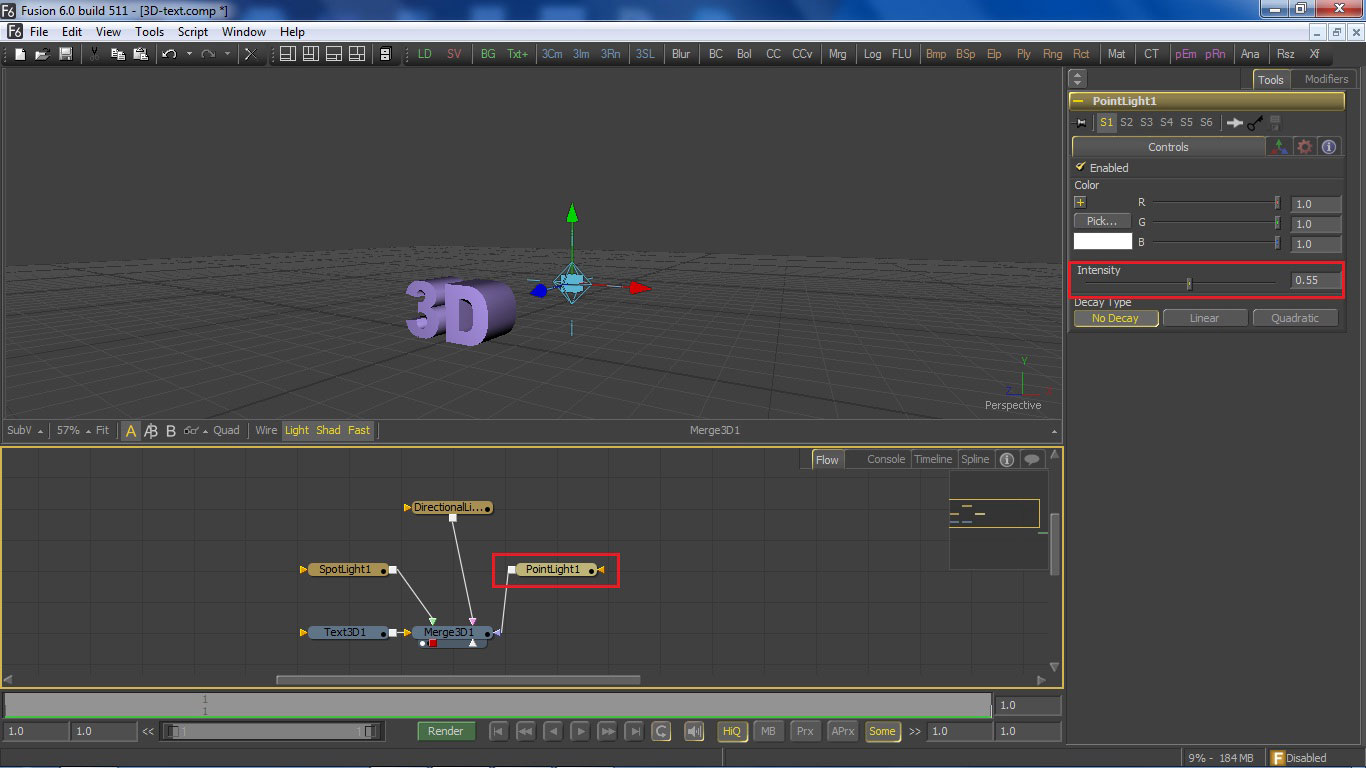
Add a point light(Tools>3D>Light>Point Light) and change intensity to 0.55
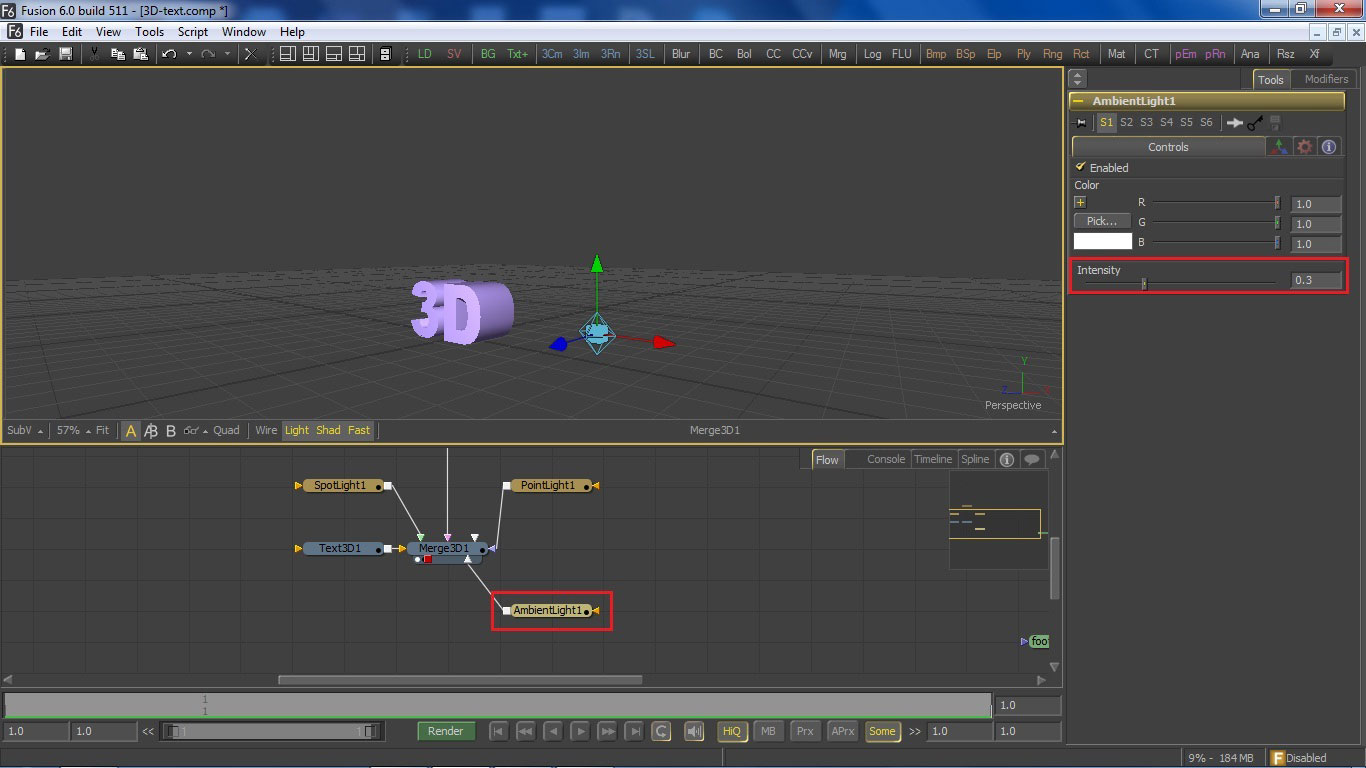
Step 8
Add an Ambient Light(Tools>3d>Light>Ambient Light) and change intensity to 0.0497238
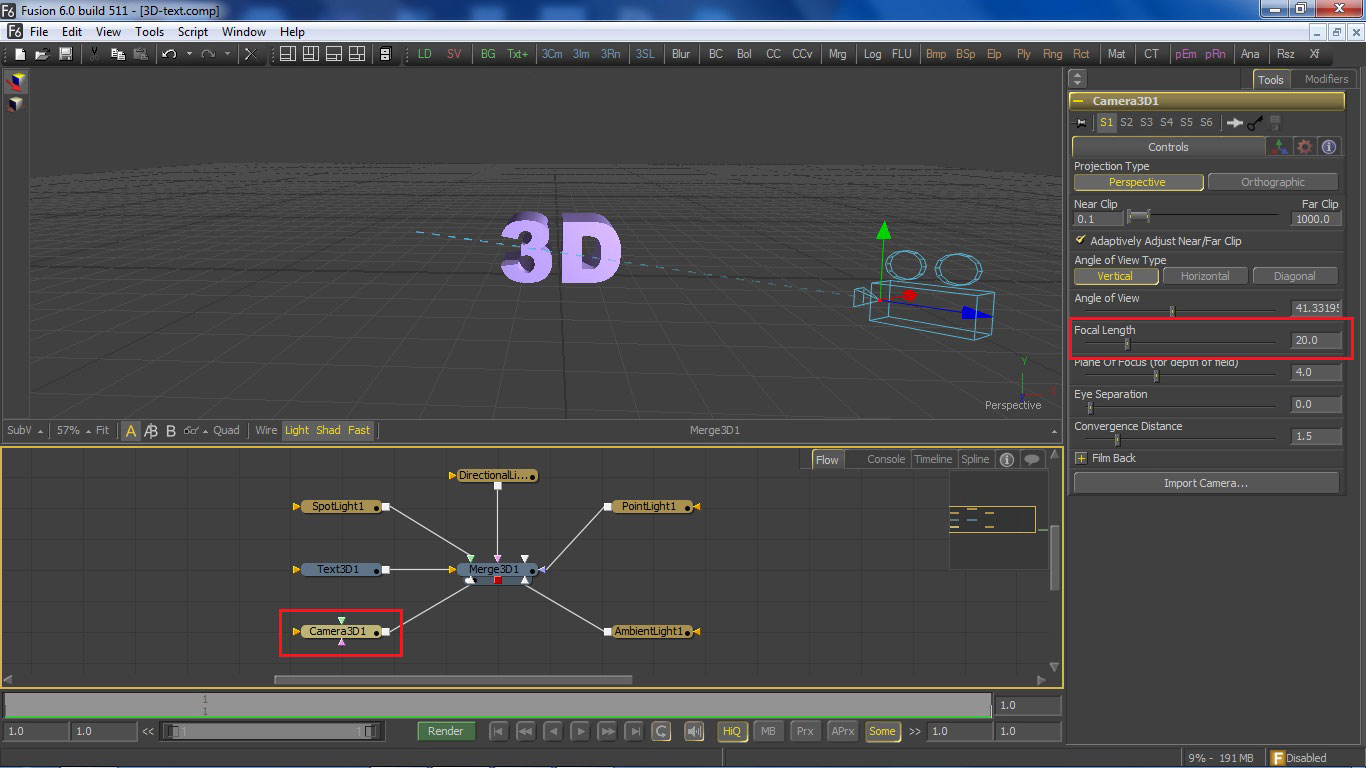
Step 9
Add a Camera 3D tool (Tools> 3D> Camera 3D) and move it toTranslate X = 0.954627793541 Translate Y = 0.4419056094258 Translate Z = 1.53529 Rotation X = -12.32788 Rotation Y = 29.839 Rotation Z = -6.02046Also change the focal length to 20
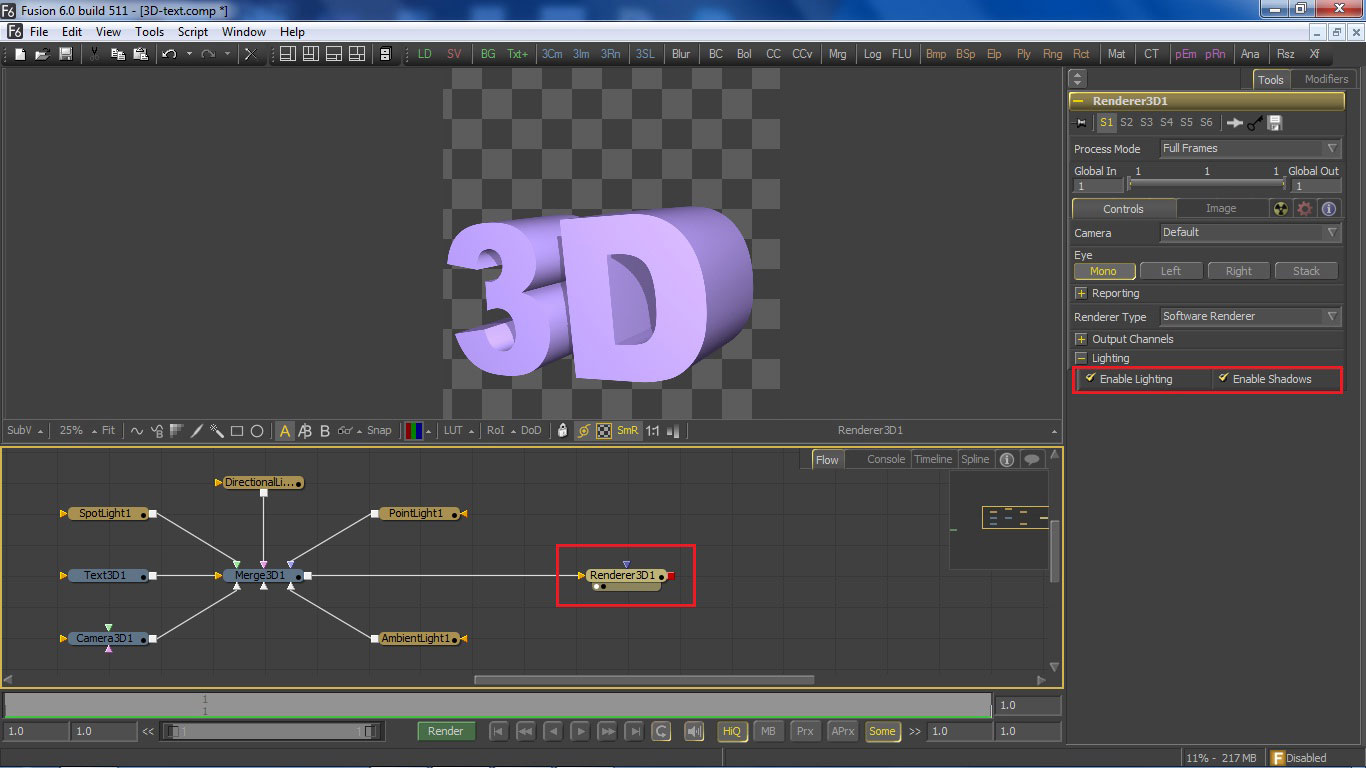
Step 10
Add a Renderer 3D and check on enable lights and enable shadows
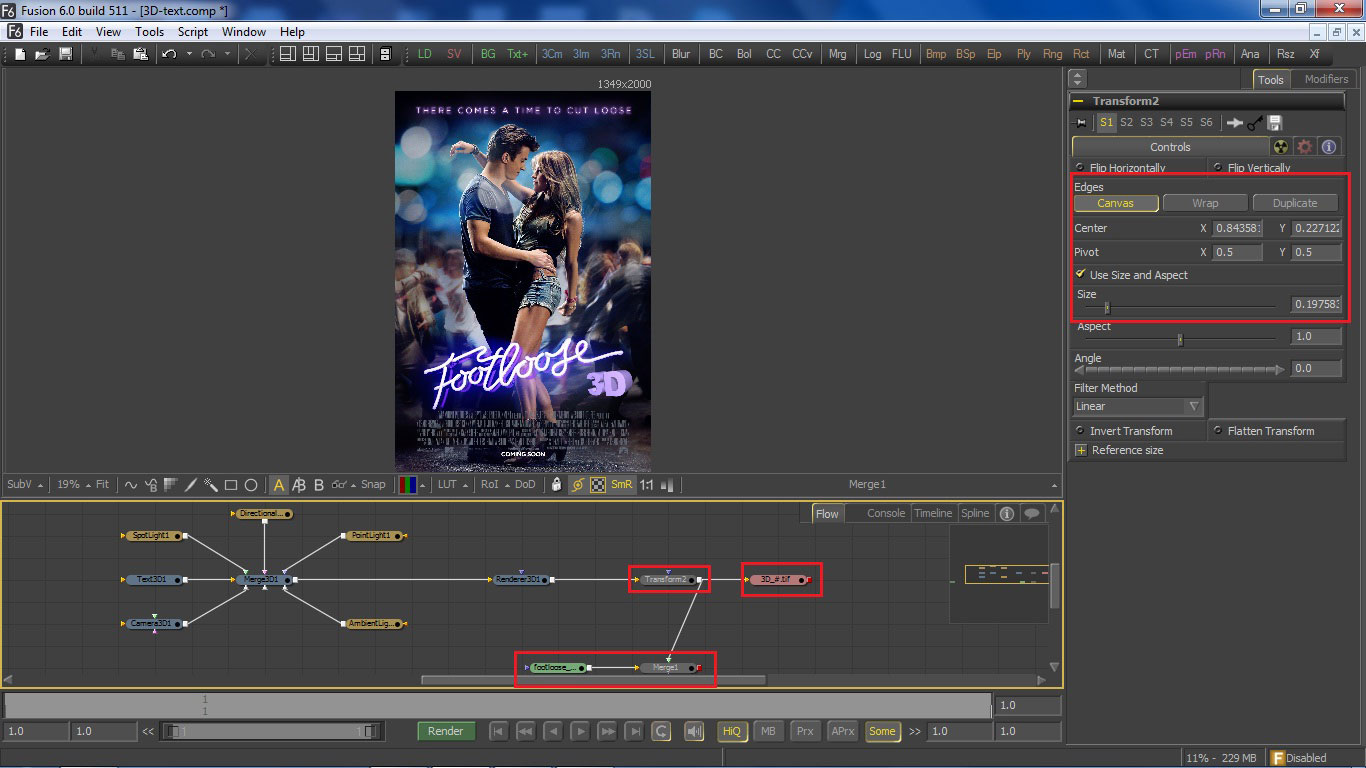
Step 11
Add a Transform tool (Tools> Transform> Transform) and change the centre X and Centre Y to 0.8435812813026 and 0.2271221779609 respectively.Change the size to 0.197583572621Check the changes made by placing the original footloose image into the Background of this output.

Step 12
After finalizing the position and angle of the text, make a Render by placing a Saver tool to the flow in front of the Transform Tool
Step 13
Now import the newly created 3D text image into Photoshop and place it over the footloose poster.
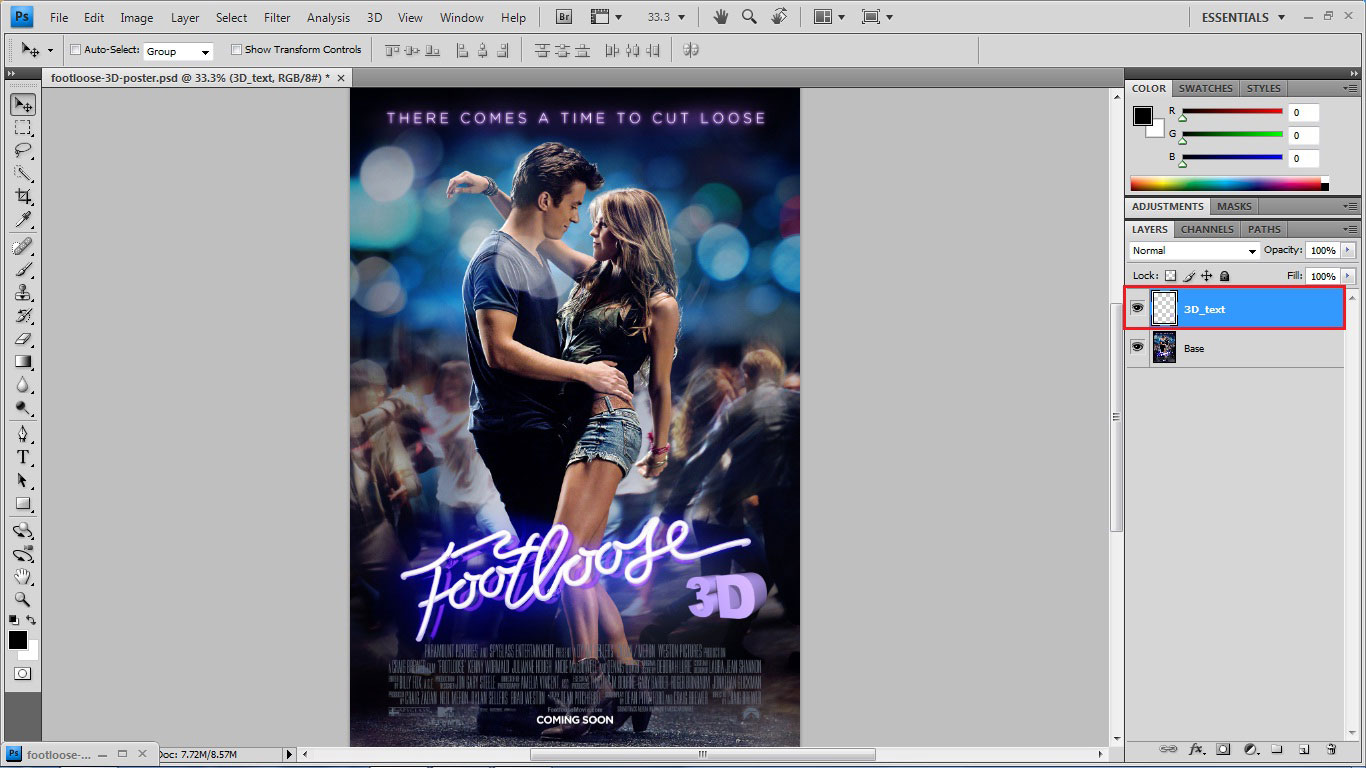
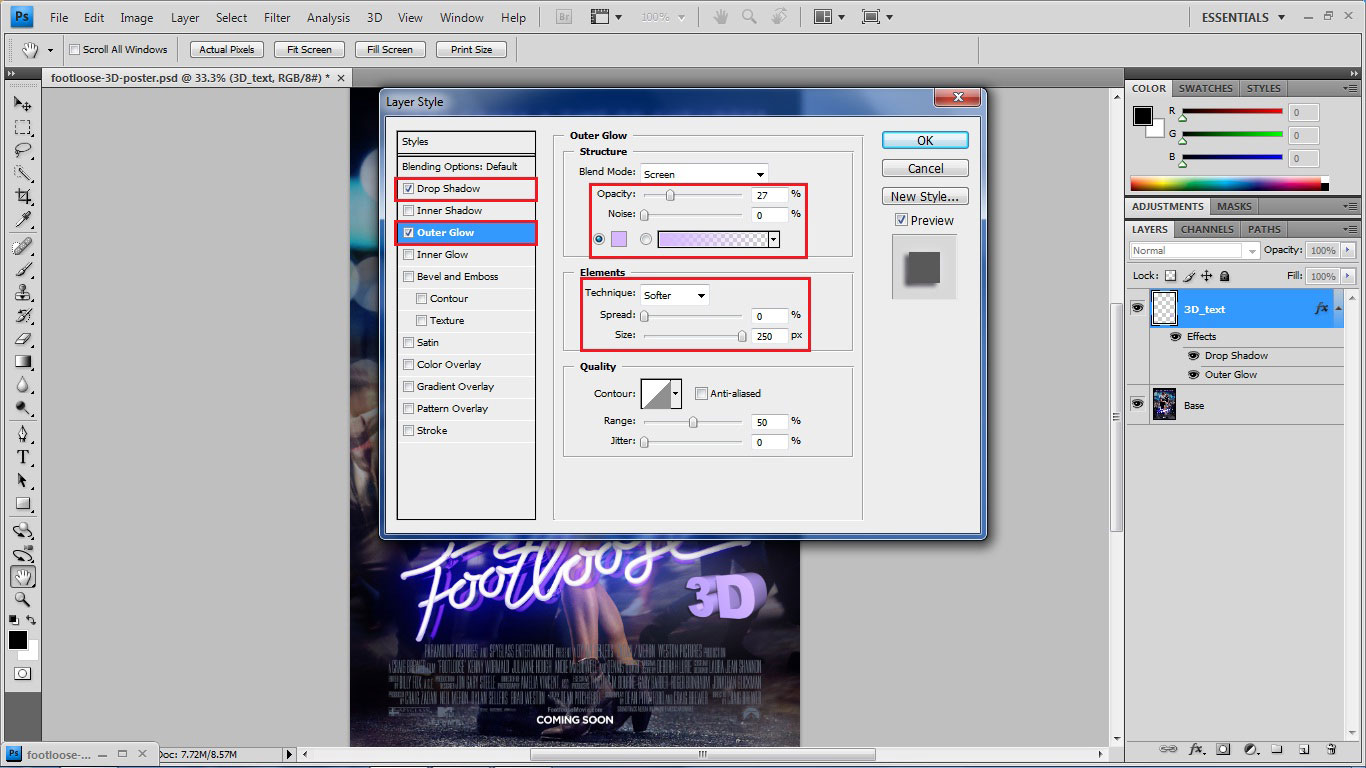
Step 14
Change its layer style toDrop shadow:Blend mode: Multiply, opacity: 75%, angle 139 degrees.Distance, spread and size to 5, 0 and 5 respectively.Outer Glow:Blend Mode: Screen opacity: 27%Color: d7b8ffSpread and size to 0 and 250 respectively.
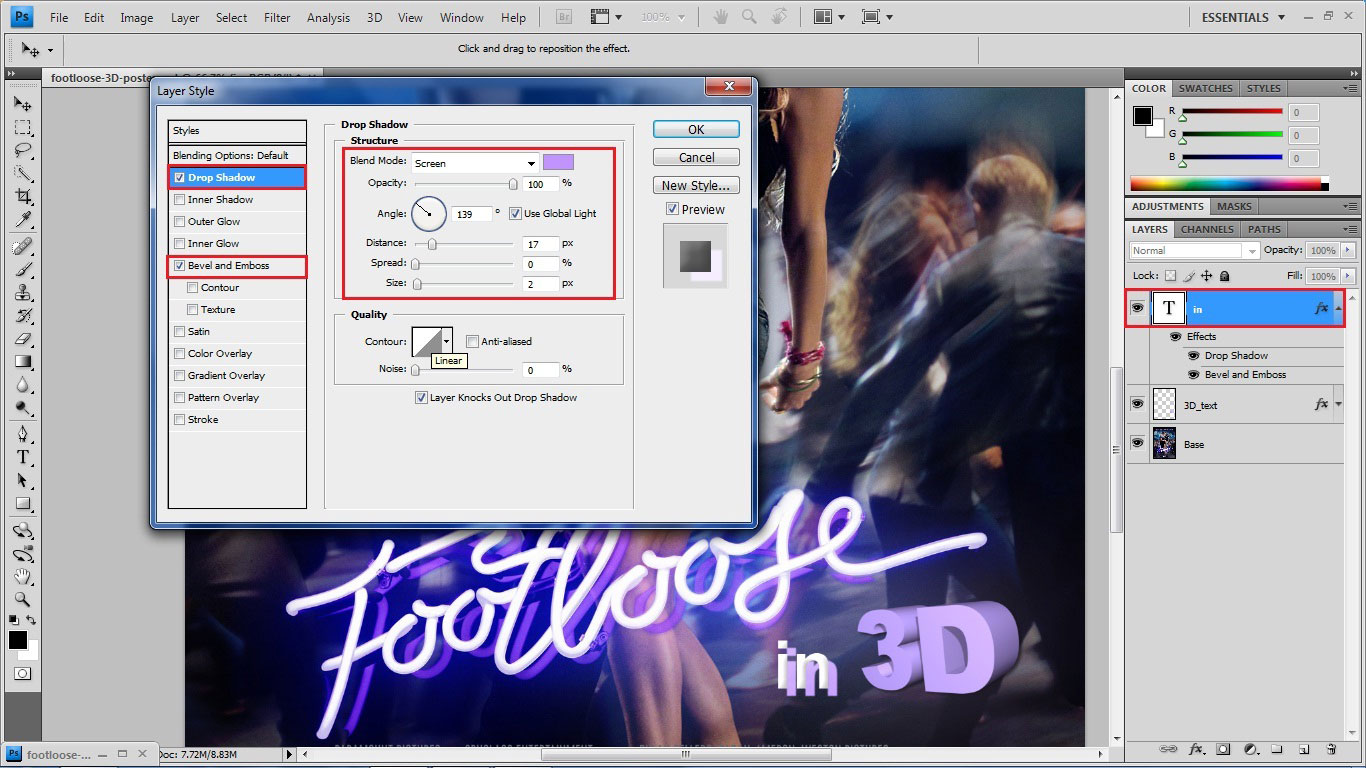
Step 15
Add a text layer with text ‘in‘ and font Arial, bold and size 100Change the layer style toDrop Shadow:Blend Mode: Screen, colour: c093ffAngle: 139 degreesDistance, spread and size to 17,0 and 2 respectively.Bevel and emboss:Style: inner bevelTechnique: smooth and depth 42 degrees.Size: 13 and Soften: 3Highlight mode opacity: 54Shadow mode opacity: 40
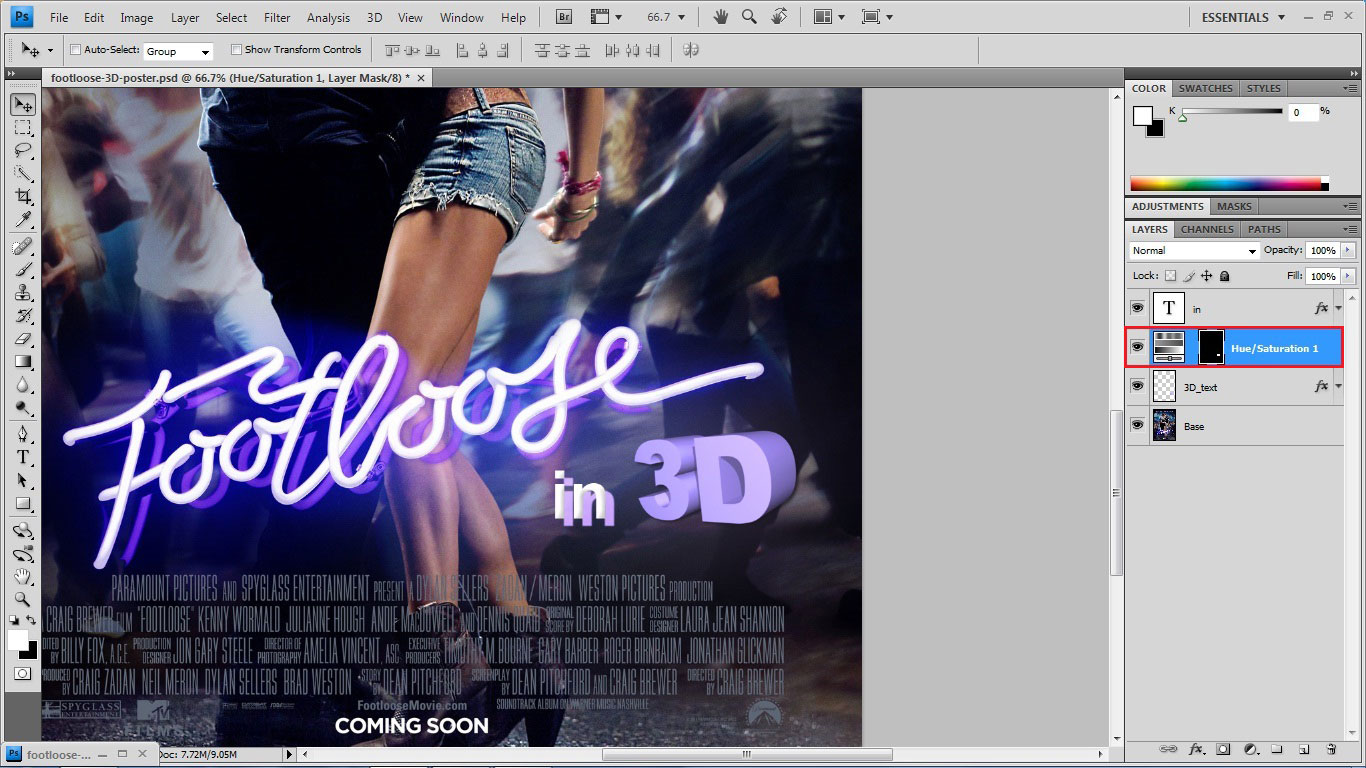
Step 16
Add an adjustment layer Hue/ Saturation below the in layer and mask 3D text layer by selecting the 3D text layer and painting the mask inverted to blackChange the Hue, Saturation and Lightness to -6, 27 and 7
Step 17
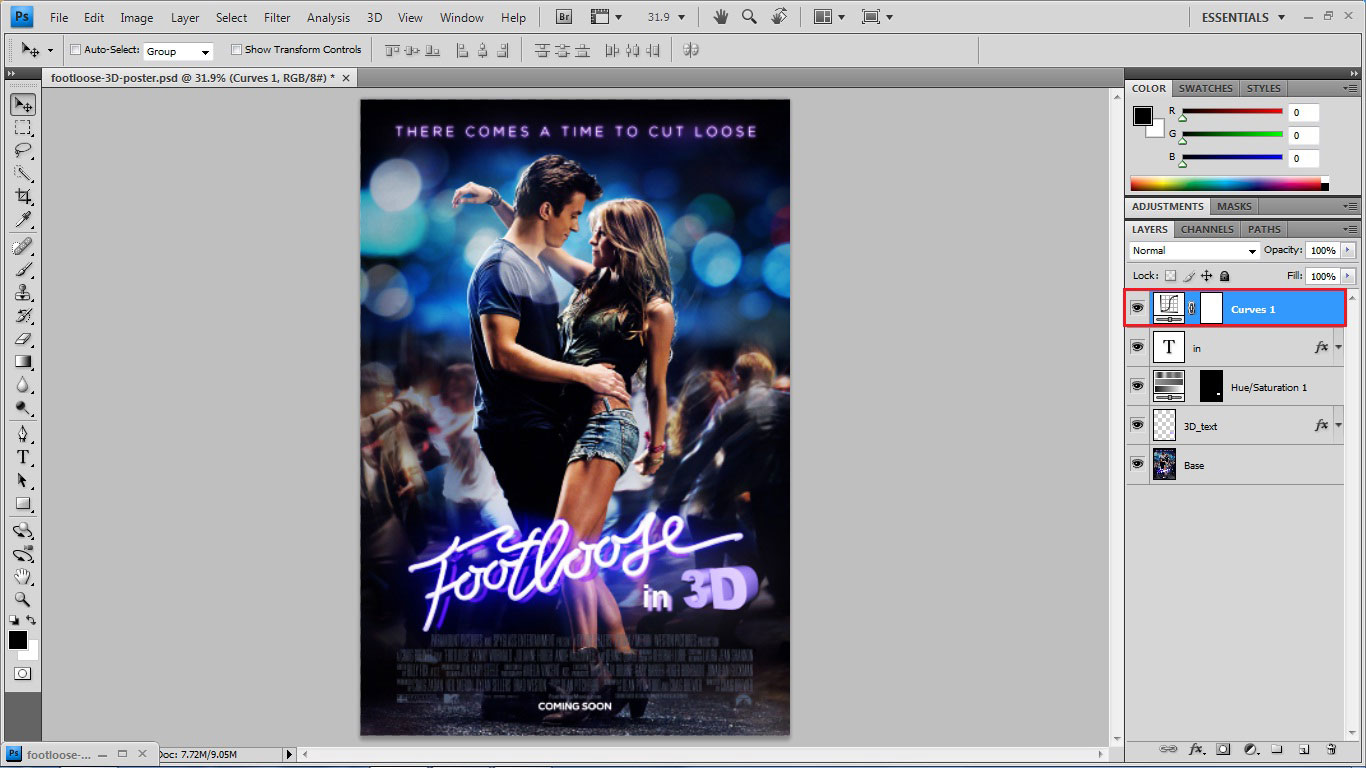
Add another adjustment layer curves on top of all and change the curve to an S shape curve so that the contrast of the image increases.
Step 18
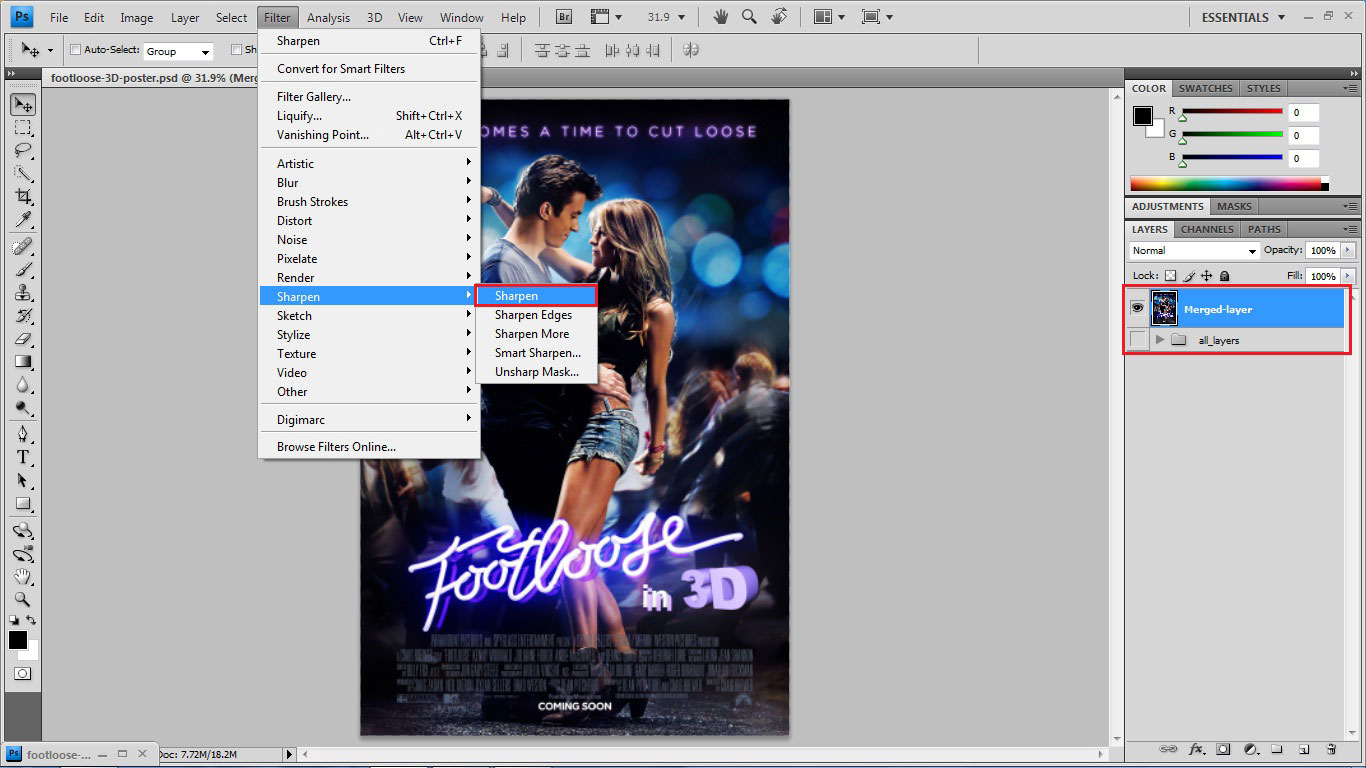
Merge all the layers and add sharpen(Filters> Sharpen> Sharpen) on the image
Step 19
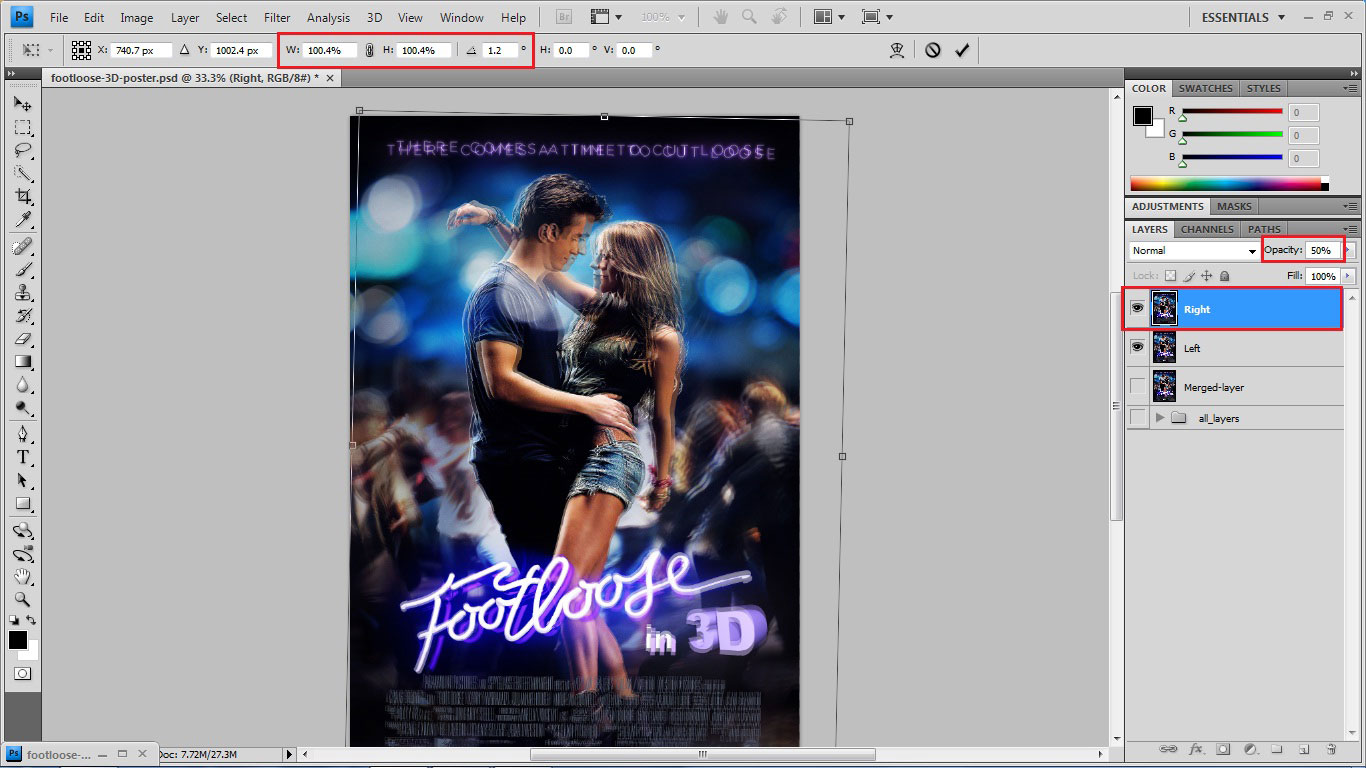
Duplicate this layer and rename the layers as right and leftReduce the opacity of the top layer to 50%Move it 3 pixels right and 3 pixels down and rotate it around 1 degree clockwise to get a blurry image.
Step 20
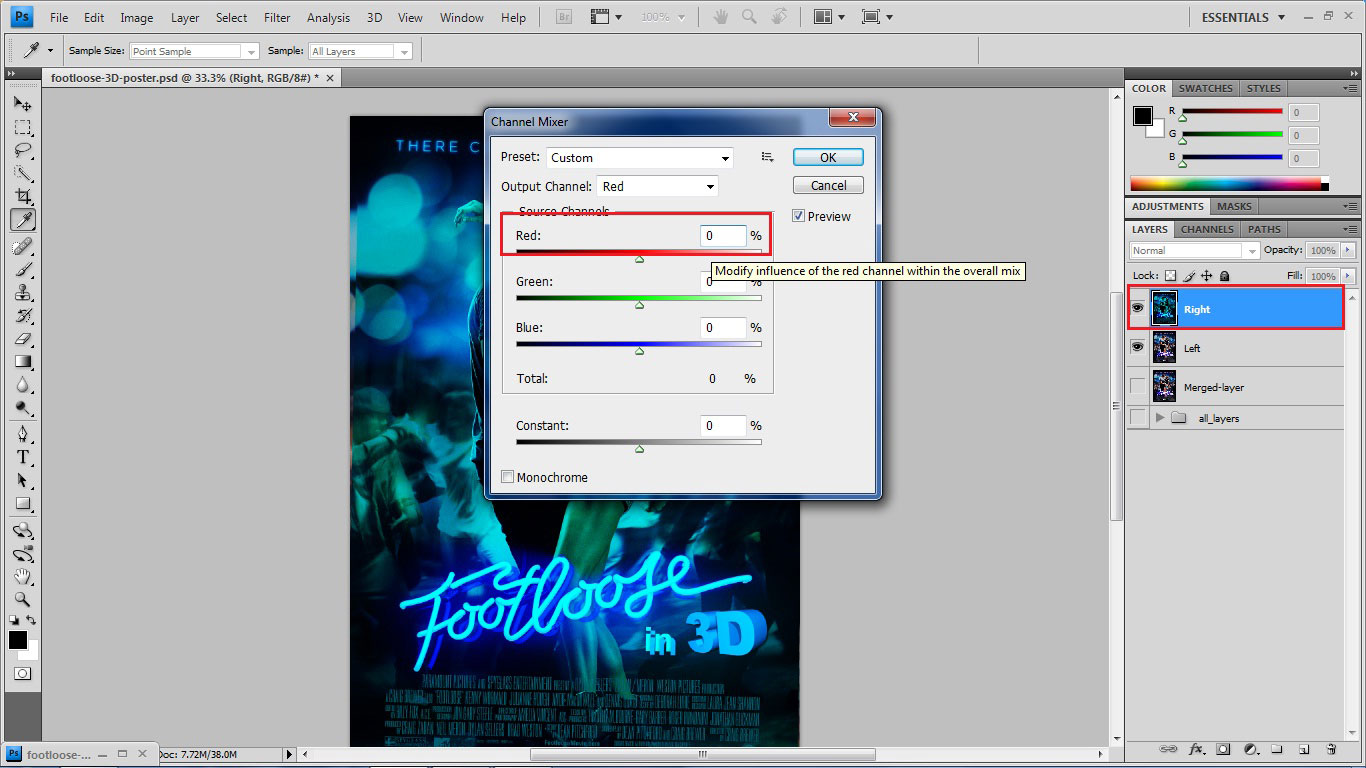
Bring the opacity of the top layer back to 100Go to Image> adjustment> Channel Mixer and reduce the red to 0; this will make your image cyan
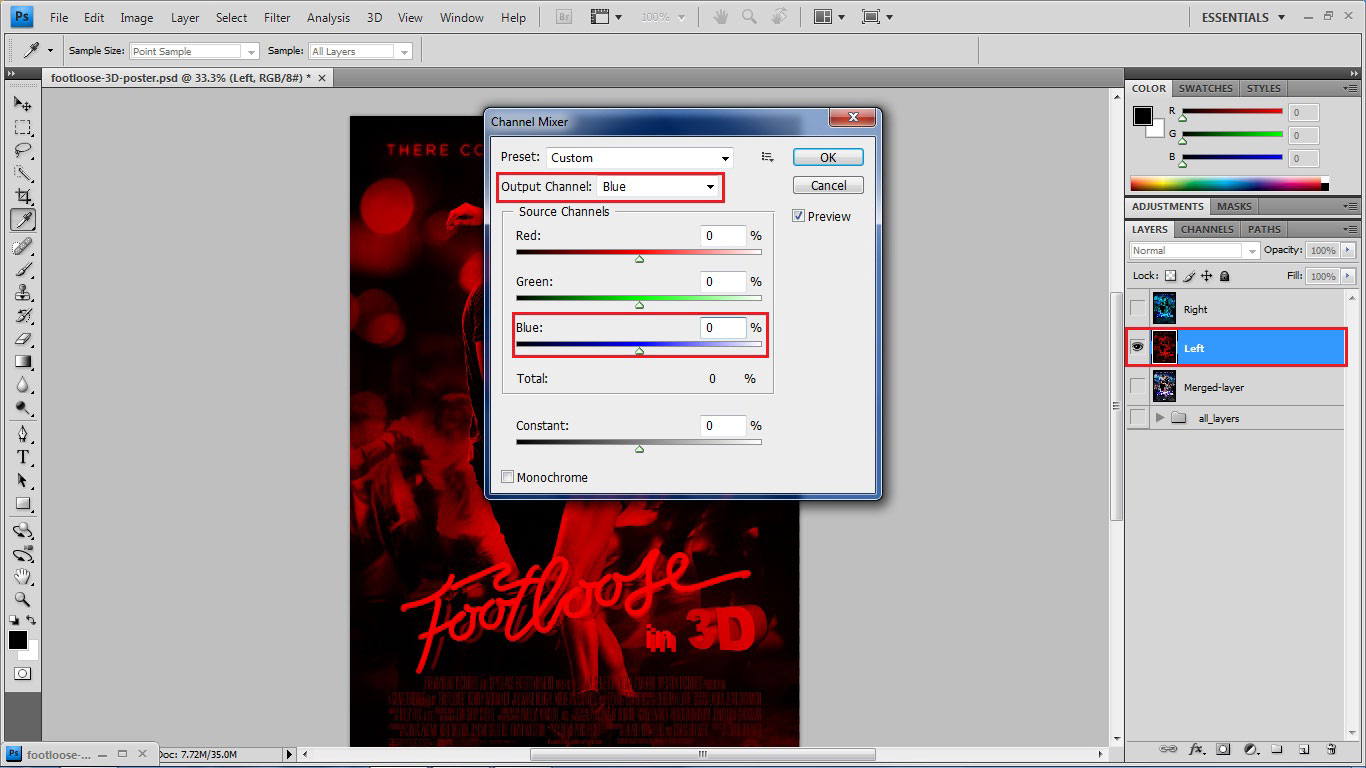
Step 21
Now Hide the top layer and select the bottom layerGo to Image> adjustment> Channel Mixer and change the output channel to Blue and reduce the blue to 0Now change the output channel to green and reduce the green to 0Doing this will make your image red.
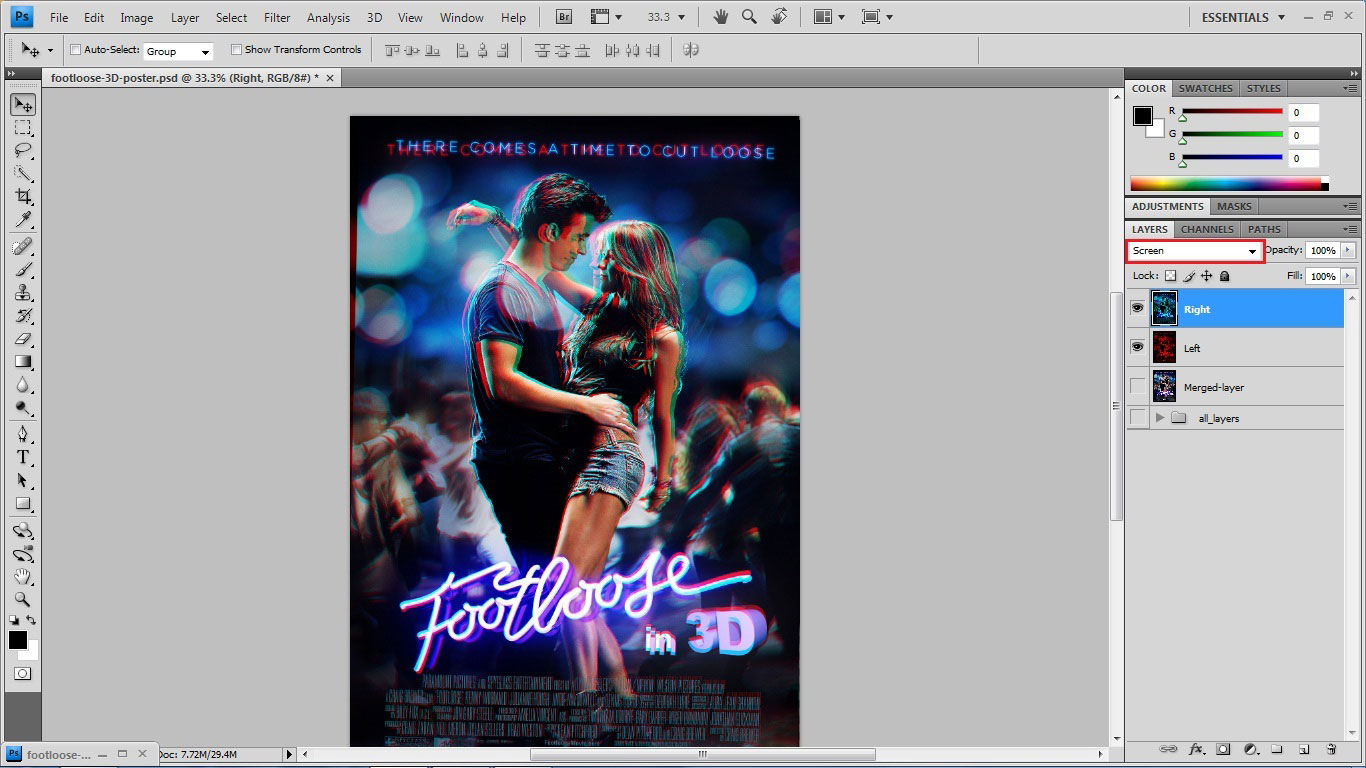
Step 22
Now go back to the top layer and unhide this layer.Change the blending mode to screen.
Step 23
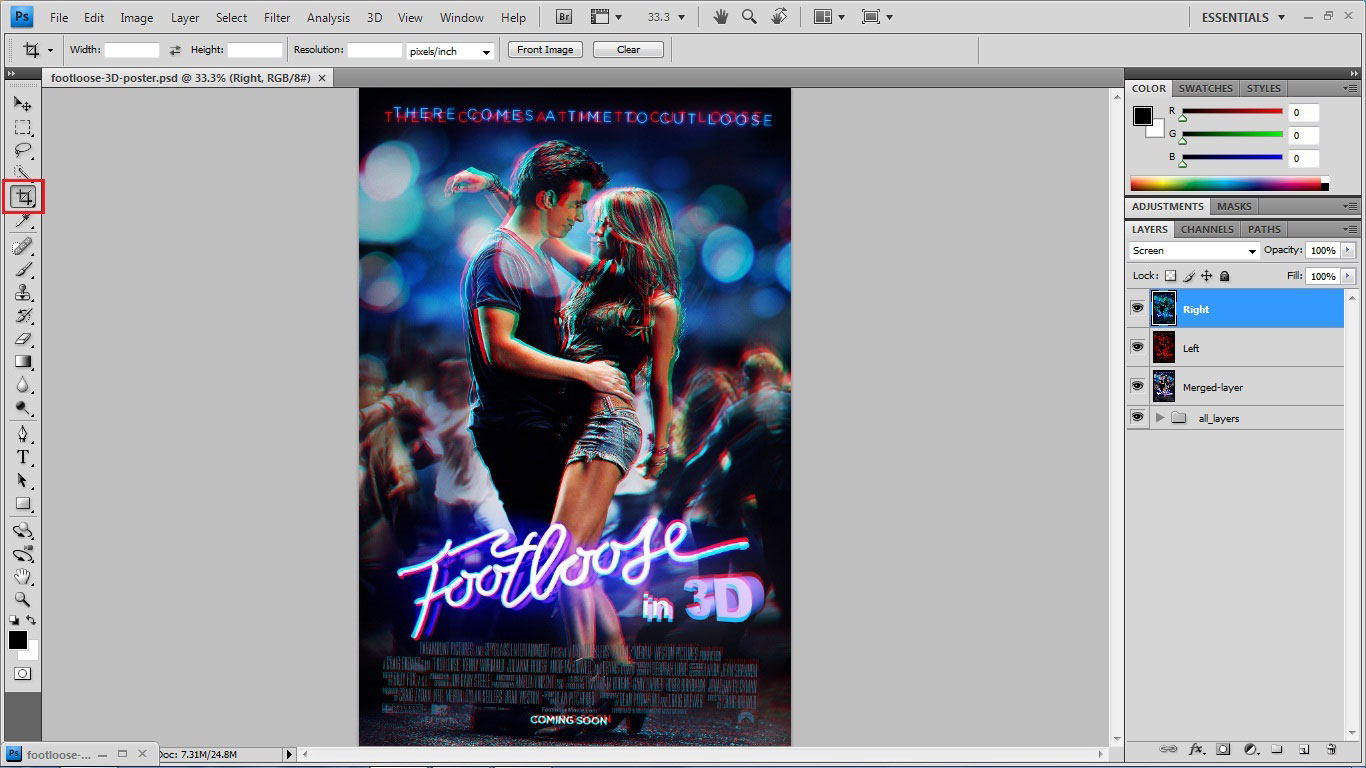
Just crop the image to remove the side cuttings and now you are ready with a 3d poster.
Final Result
Resources

So, what did you think? Hopefully you learned a thing or two from this tutorial and will be able to create your very own 3D movie poster in Photoshop. It’s nowhere near as hard as it looks and with a little practice, you’ll do just fine. Also, be sure to share this list with your friends and check out some of our other lists similar to this one at one of the links below. Enjoy!
If you like this article, you might be interested in some of our other articles on Create Realistic JAWS Movie Poster, Farewell Presentation Illustration Tutorial, Create a DVD Cover For Your Digital Product and Add Beams to Your Photo and Electrify it.


amazing technique in this tutorial.
Getting this into practice, I really love the tut
Nice tutorial ..thanks..
Best suits for Text purpose. PS is an ultimate product to manipulate.
I thought it was inspired by the Step Up 3D poster. The mood is the same but anyway, helpful tutorial. Thanks.
Of course, it seems the same.. But I think Photoshop can’t be fully used to create 3D effects
This is one awesome blog post.Really thank you! Fantastic.
it would be a great help for the text effects to be placed in any pic..thanks for the tutorial:)
Very useful tutorial. I would definitely try this tutorial and practice to do it best. ^^
Wow, I didn’t know that was even possible. Thanks for the insight on 3D poster design.
This is a really great tutorial. I would really try it myself. Thanks for this post.
Today I learnt how to create a 3D movie poster in Photoshop easily with the help of this tutorial. Thanks for sharing!! Keep sharing such kind of techniques.
Very beautiful tutorial of photoshop now with the help of this tutorial i can make my pictures 3d.
This tutorial is awesome and the effect is simply superb. Thanks for sharing such an useful and easy tutorial.
Yes Nikhil the effects used in this poster are amazing.
Again a cool tutorial, Will try it in spare time.
That’s really a cool step by step tutorial. Thanks for sharing it.
WOW amazing i cant believe these , these tutorial are simply amazing and it will help my brother a lot to make a real 3d movie poster.