
Adding effects to photos is more fun than taking those creative snaps. It‘s every designer hobby to add different kind of effects to photos. The Photoshop community is always helpful with those creative brushes and filters around.
Let‘s polish our skills by choosing an awesome dancer picture and adding beams to it. We’ll be wrapping this dancer‘s body with a set of light beams, adding sparkles, and colors to make it magical.
If you like this article, you might be interested in some of our other articles on Create a DVD Cover For Your Digital Product, Realistic JAWS Movie Poster in Photoshop, Enhance Photos and Still Keeping Skin Pores and Create A Realistic Moon.
- Program: Adobe Photoshop CS3
- Difficulty: Intermediate
- Estimated Time: 1 – 2 hrs
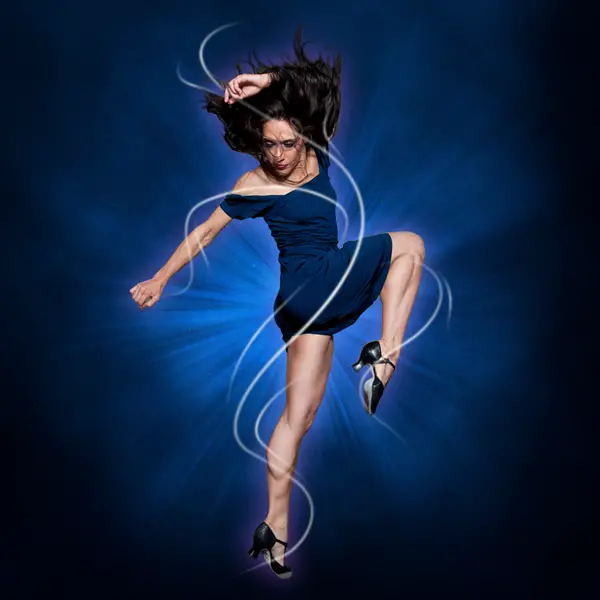
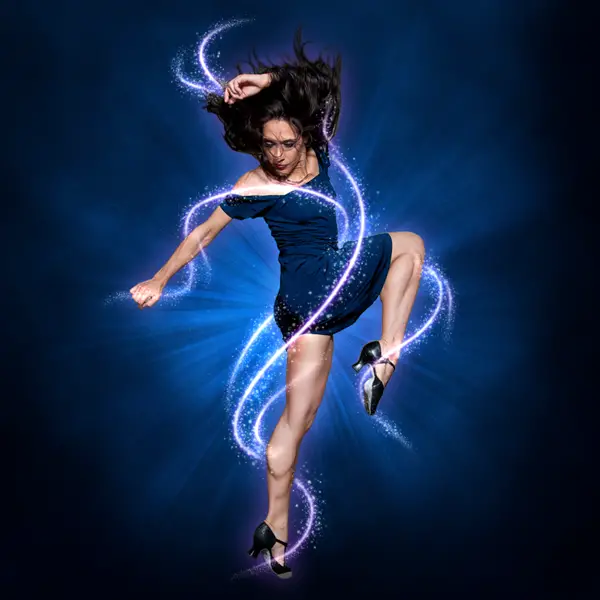
Final Result

We will just take the character and one brush from outside. Everything else is handmade here in Photoshop itself. Let‘s start the fun.
Tutorial Resources
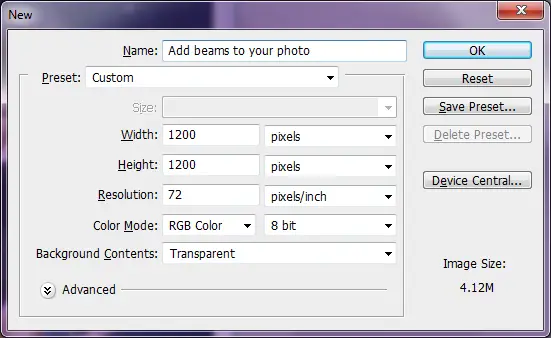
STEP-1 (New Photoshop Image File)
Let‘s start by creating a new document. Set the dimensions of the canvas to 1200×1200 px.
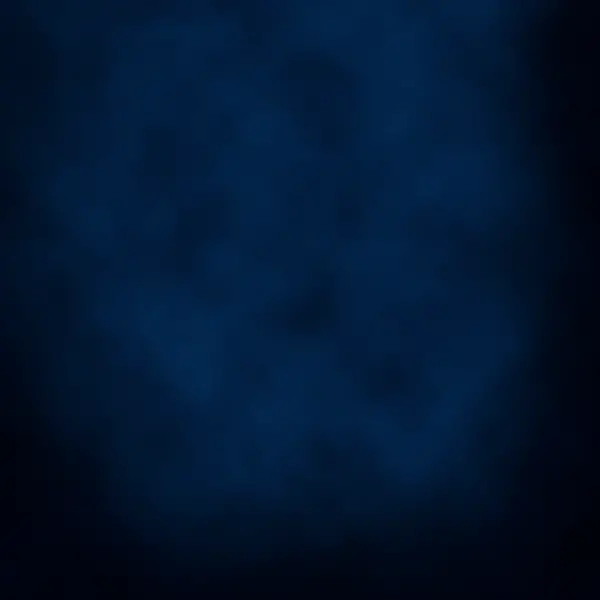
STEP-2 (Blue dust background)
Set the background color # 001520 and foreground color # 03223a in the bottom of tool palate, then select Filter > Render > Clouds. Background will look like this

Then double click on the layer to access Layer Style and add Pattern Overlay as shown below:

Background will look like this after adding pattern

Now in a new layer take Soft Round Brush (B) with black color and brush across corners of canvas and Change the Blend Mode to Hard Light
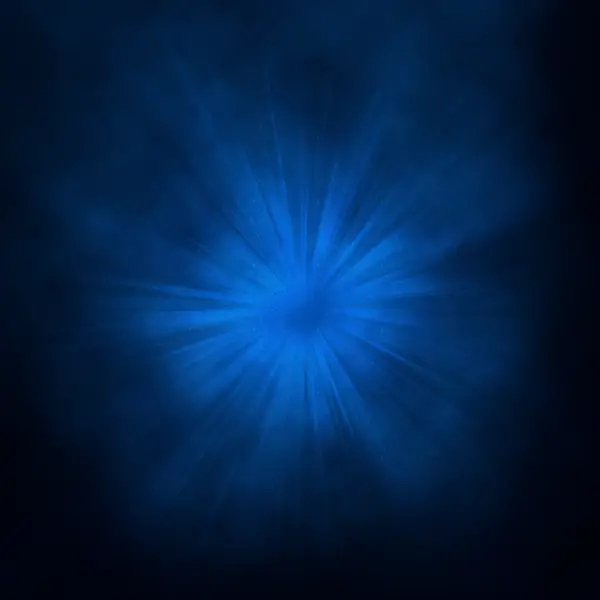
STEP-3 (Background lighting)
Create a new layer and take Soft Round 700 pixel Brush (B) with white color (#ffffff) and hit twice in the middle of canvas. Change the layer mode to Overly
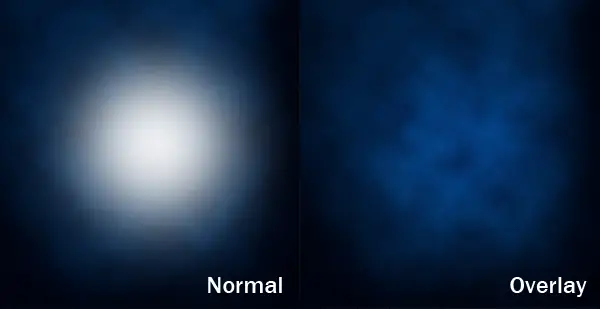
Take a new layer for SS-light-beams Brush No. 2000 from source with white color(# ffffff) and brush at middle of canvas. Change the mode to Overlay
STEP-4 (Place Dancer)
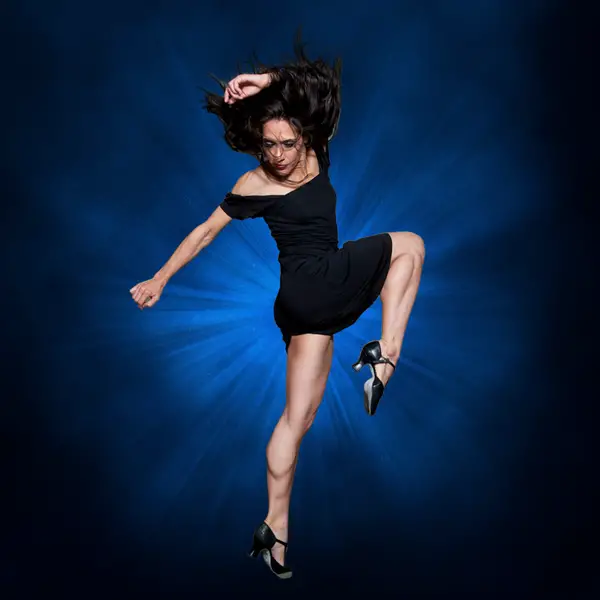
Choosing the character is very important for this kind of tutorials. Right action character will make it attractive along with beams. Select character of your choice and place it in middle of canvas:
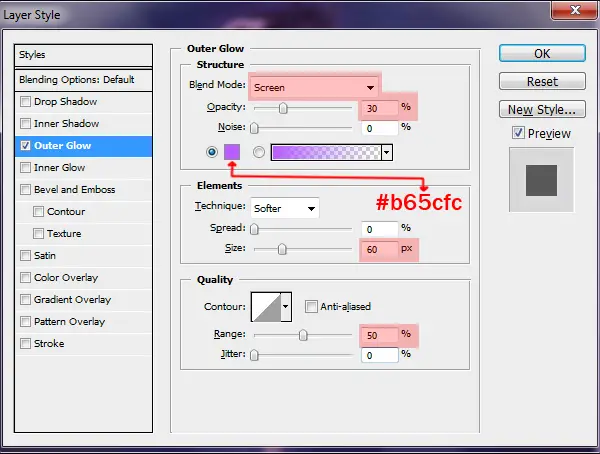
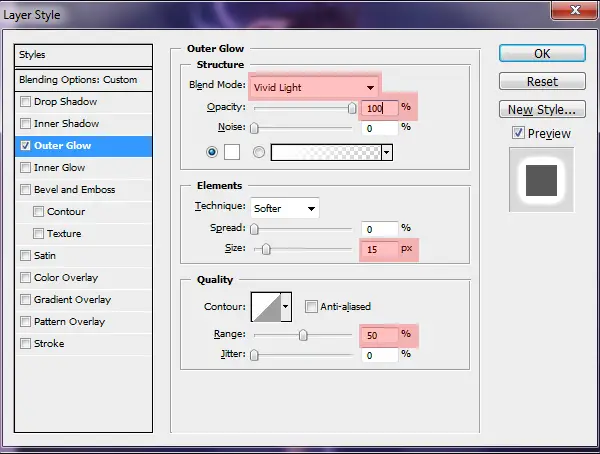
Let‘s add outer glow to the character, for that double click on the character‘s layer to access the layer style and give the values as shown below:
Character will look like this:

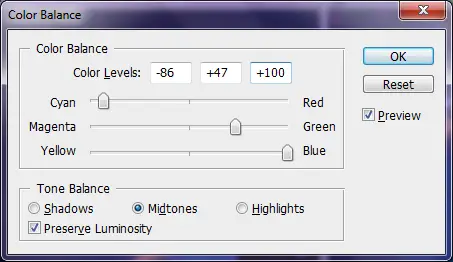
Then select the characters dress using Pen Tool (P) and change color (Ctrl+B) with values (+86, +47 ,+100):
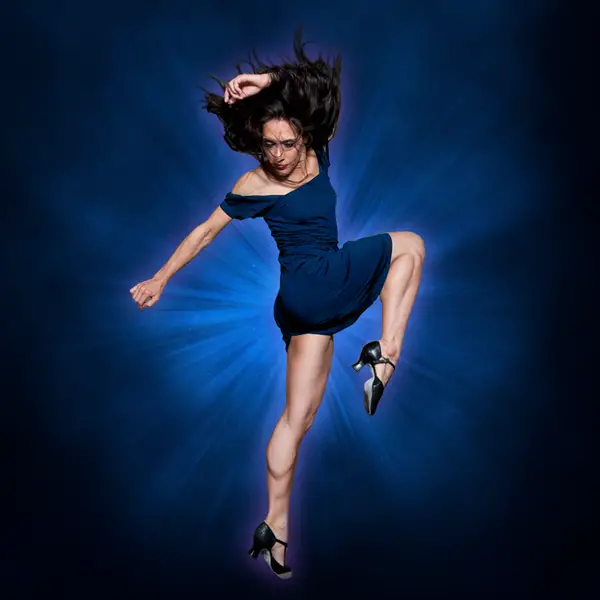
It looks like this after makeover:
STEP-5 (Create beams on character)
In a new layer using Pen Tool (P) draw curved lines rhythmically according to characters movement:

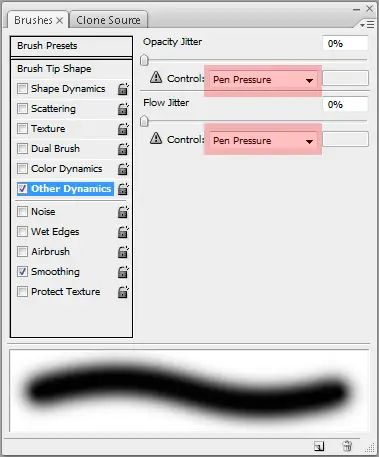
After creating the curves right click on curve line, select Stroke path, select Brush and click Ok. Select Soft Round 4-5 pixel brush (B) with white color and hit F5 to see Other Dynamics of Brushes and follow setting as shown below:
The Brush strokes will look like this:
Using Eraser Tool (E) erase the strokes passing over the character:

Let‘s add outer glow to the beams for that double click on the curves layer to access layer style and give values as shown below:
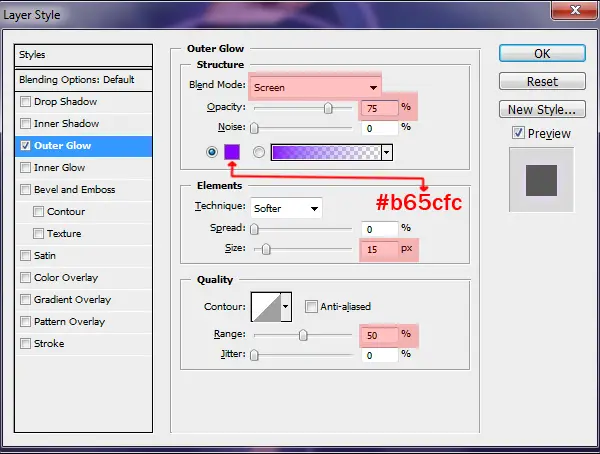
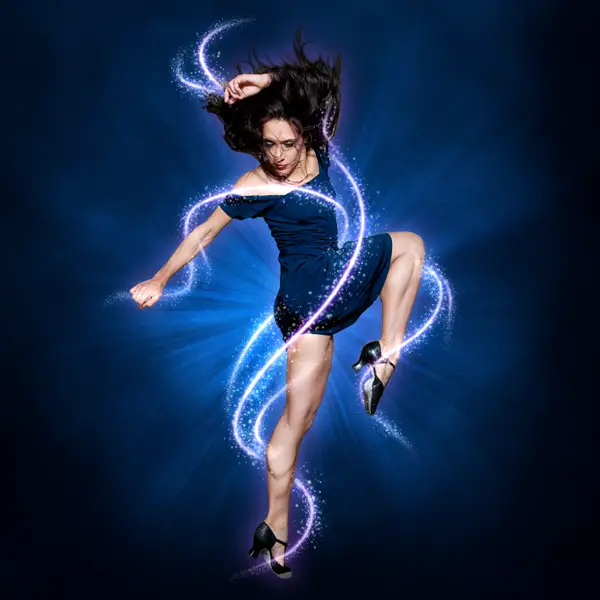
Image will look like this after adding outer glow to beams:

STEP-6 (Add sparkles on beams)
To give sparkle effect I have created my own brush using default Assorted brushes (Star, Star Burst) & Soft Round. For that let‘s create a new document, Set the dimensions of the canvas to 600×600 px. Create shapes like this:
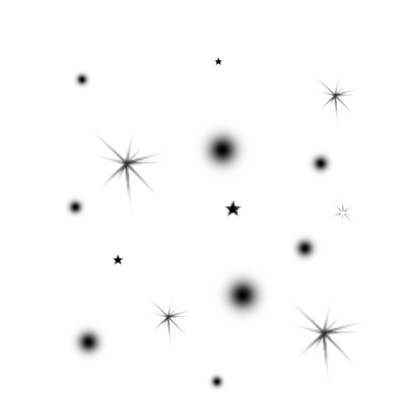
Load selection around the shapes by Ctrl-Click on the layer‘s thumbnail. Then go to Edit > Define Brush Preset. Now new brush will be added in your default brushes. Create sparkles on beams using this brush and white color. Use small brush to add sparkles at the end points of beam:
Let‘s add outer glow to the sparkles by double clicking on layer and using values as shown below:
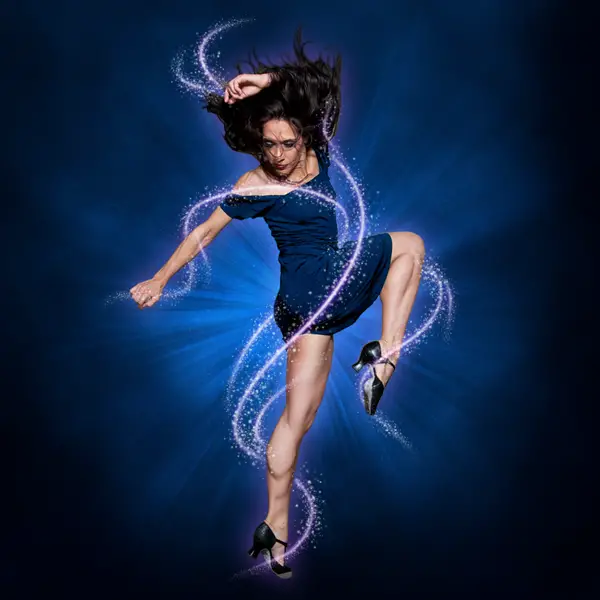
Then the image will look like this:
STEP-7 (Add glow to the character)
Lets create a new layer and use Soft Round Brush(B) to paint the body parts where the beams are passing through(Face, hands and legs). Then reduce the opacity of layer to 30% and change the mode to Overlay:
STEP-8 (Creating space environment)
To make it more attractive lets add some colorful stars around the character. I used same brush which we created for sparkles. Take a new layer and create stars around the character:

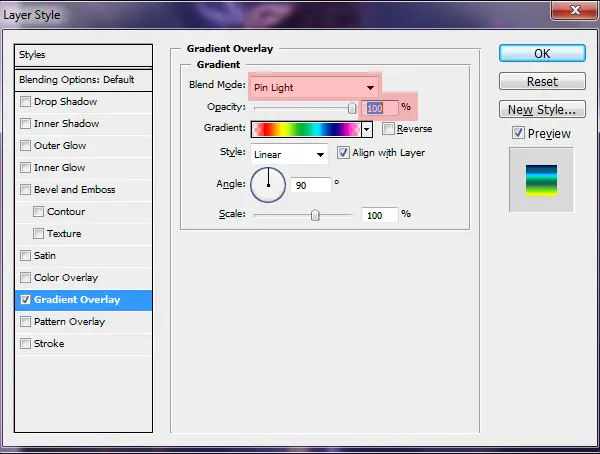
Lets add Gradient Overlay to the stars by double click on layer thumbnail and values as shown below:
Here is how it looks:
Try to erase stars slightly across corners by using soft round brush.
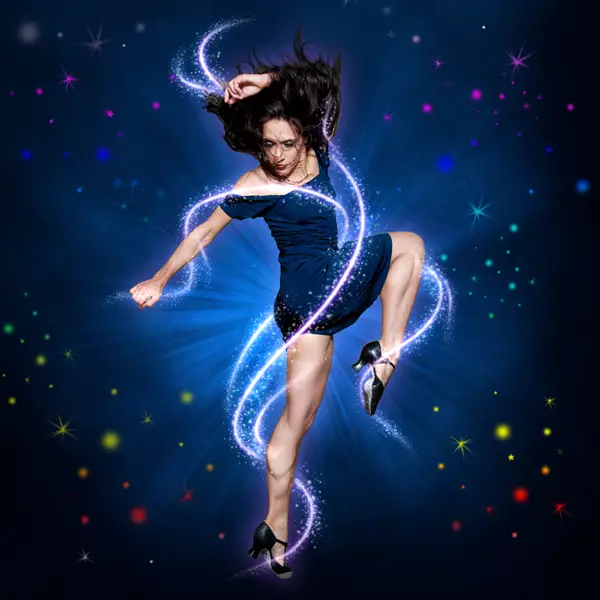
Final Image:
Here is how our final photo looks:
Hope you enjoyed going through this tutorial. Have you ever added beams to your photo? What are you waiting for, just take out an image and start the makeover.


is very beautyful 10000000000000000000 tahnks
:*
Went through this for a second time. Simple, engaging and easy to understand.
Tried the tutorial, took around 50min.. Thank for the obvious tutorial.
Oh, quick yet helpful tutorial. I’ll try to replicate this effect If I will have more time later.
Many of the items you are not taught in universities. I’m special.
veeeery goood. congratulations
had tried this effect before by learning from a tutorial site ..but found this easier and more appealing !!
This tutorial is lot more easy than other i find in the sites ..thanks really great tut..
I can’t get the tutorial right. I’m not really good at photoshop. ^^
With this tutorial a great effect can be created, thanks for the post and helping me to learn a new Photoshop skill.
I have been trying to design my own logo since the last few days. And I got stunning results using the site by step tutorial given here. All credit to the writer, Uzair, for giving such easy-to-follow instructions!
This tutorial is awesome and the effect is simply superb. Thanks for sharing such an useful and easy tutorial..
For trying this photoshop tutorial i have to get my photo clicked in different pose somewhat displayed here. But its a nice tutorial.
Great tutorial, will try it for sure. Thanks for sharing :)
Very useful tutorials. I might use this in the future. Bookmarked the page. Thanks.
Nice tutorial are shared here at lest i will try it one time because they are simple and creative one.
Wow this is an amazing tutorial, I’ll try this tutorial on one of my photo.