
16 Step by Step Smoke Effect Tutorial in Photoshop
In this tutorial, you’ll learn how to transform an image into a Smoke Photo Effect by following these 16 Step by Step Smoke Effect Tutorial in Photoshop. It’s very easy to learn and you will be satisfied with the awesome results and you can even experiment how you’d want to combine the smoke brushes and the image you’ll be using.
If you want to use the image and the smoke brush that I’m using you can download it from here:
Model: https://reine-haru.deviantart.com/art/Rowena-Braids-Stock-268905936
Smoke Brushes:
https://www.brusheezy.com/brushes/48403-25-hi-res-smoke-brushes
https://xresch.deviantart.com/art/22-Normal-Smoke-Brushes-197982419
So let’s get started.
1.Quick Selection
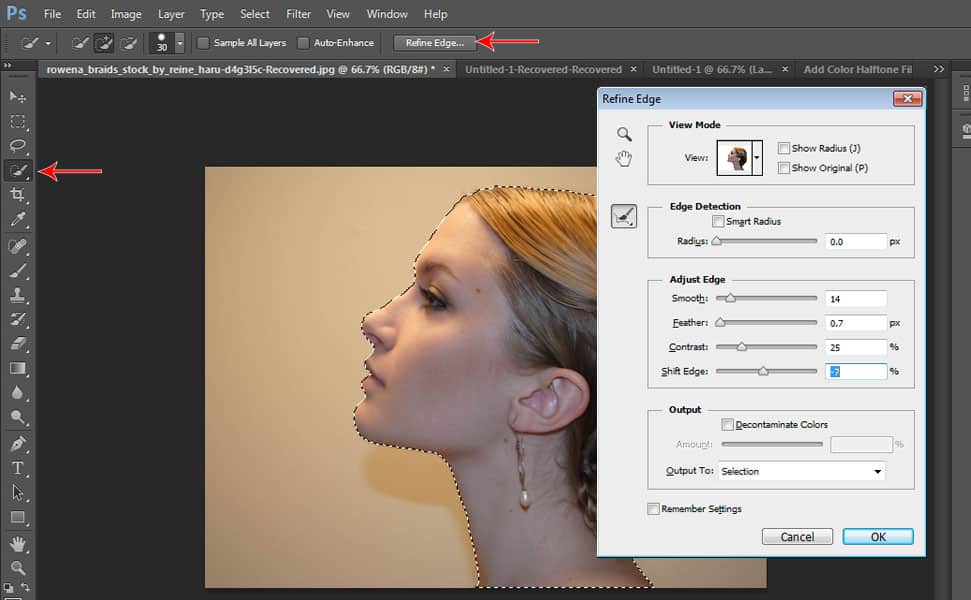
Open the image that you want to use then trace the model using the ‘Quick Selection Tool’. Make sure you properly trace it. Then click ‘Refine Edge’ then set the ‘Smooth’ by typing 14, then the ‘Feather’ 0.7, then Contrast 25, shift edge -7.
2. Add a Layer Mask
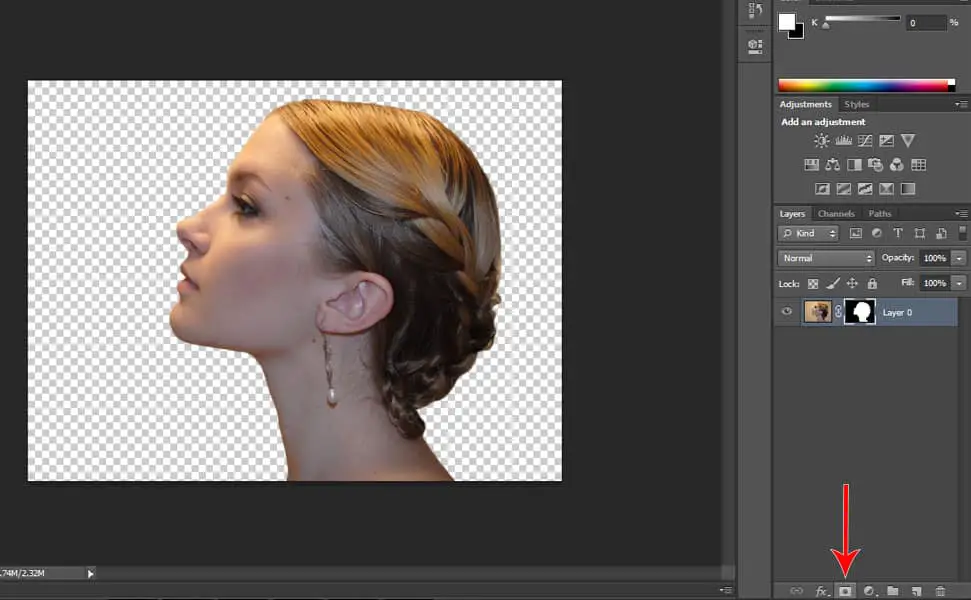
Crop the model from the background by selecting the model layer then click the ‘Add a Layer Mask’ icon, located below the layer’s tab as seen in the picture.
3. Resize the Canvas
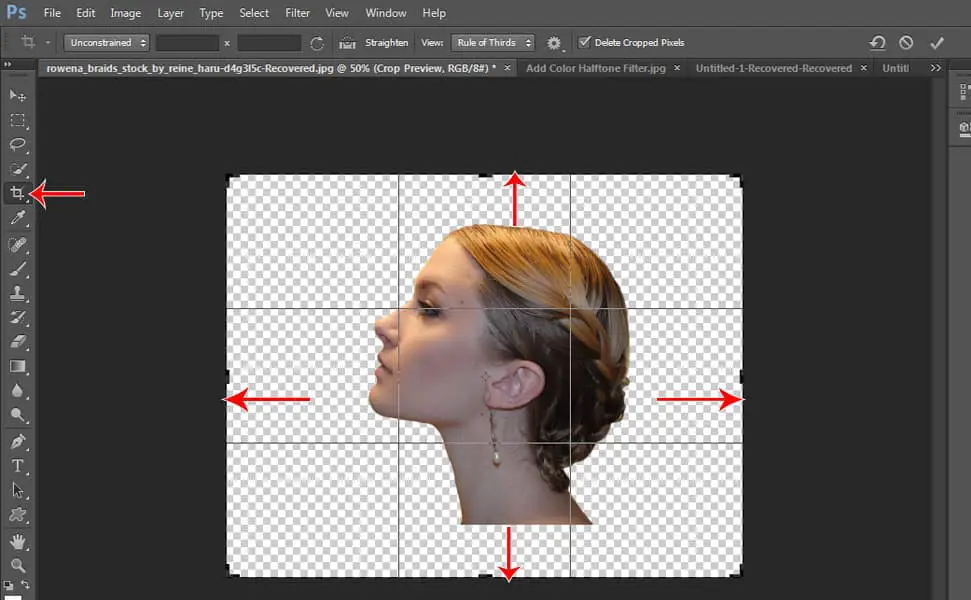
By selecting the crop tool, expand the image’s canvas, make it wider and increase the upper and the bottom. Just drag the corners to increase the canvas.
3. Convert to Smart Object
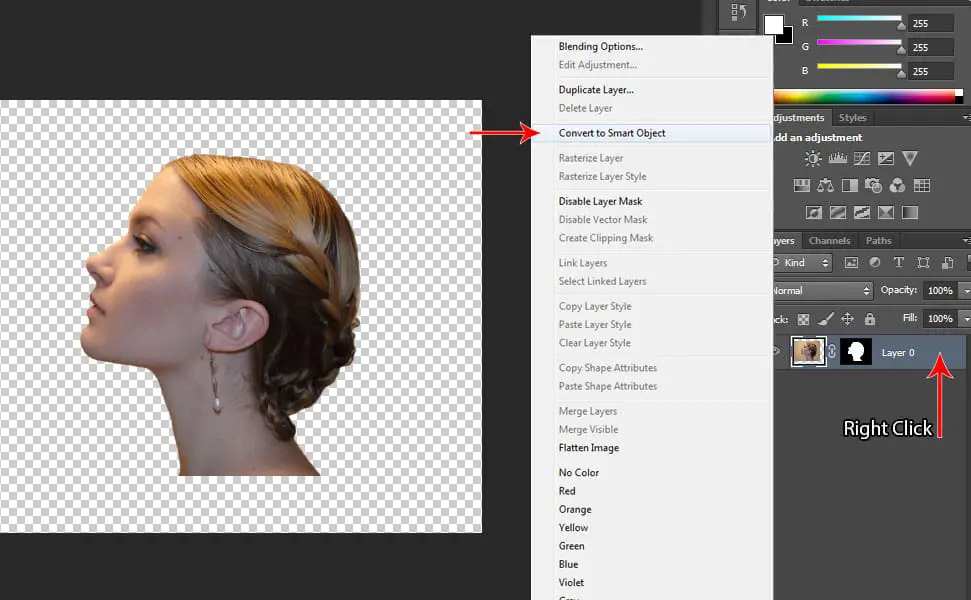
Right-click the layer then select ‘Convert to Smart Object’.
4. Resize the Model Image
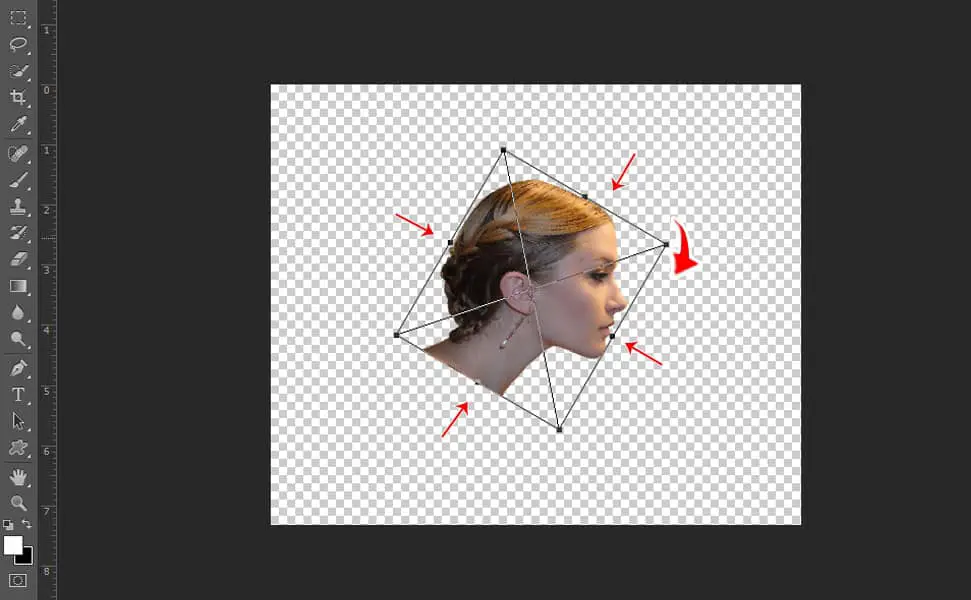
Make it a bit smaller by pressing CTRL + T while holding ‘Shift’ on your keyboard to retain the proportion, this way we’ll have space for our effects later, then right click and select ‘Flip Horizontal’ and rotate it a little bit by pressing ‘Shift’ then click the sides and find the rotate cursor and drag it around 30 degree angle then press enter.
5. Make a Gradient Fill Background
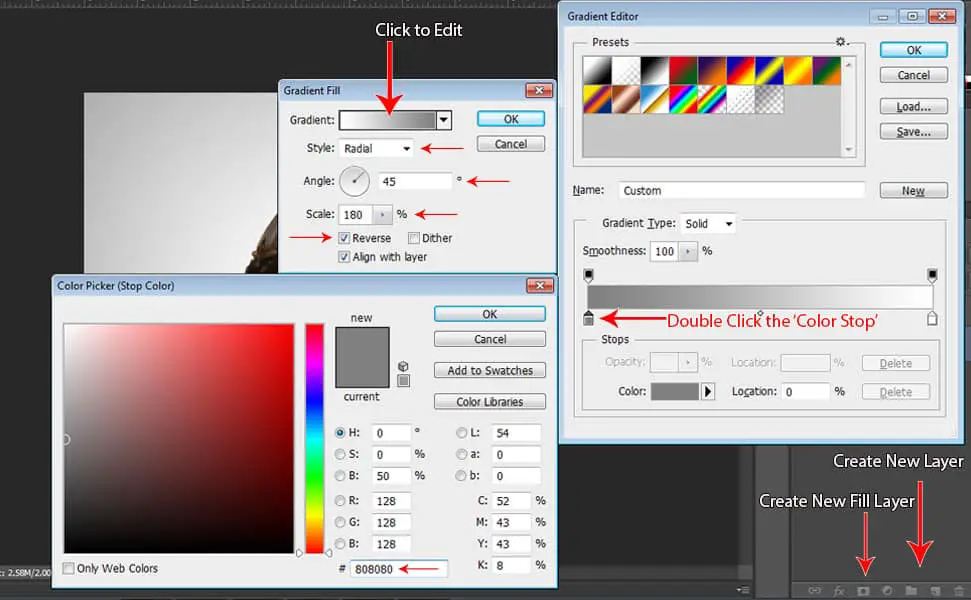
Add a new layer for the background by pressing the ‘Create New Layer’ icon, located below the layer’s tab then drag the new layer you created just below the model’s layer. Next is, click on ‘Create New Fill Layer’ icon located on the left side of the ‘Create New Layer’ icon then select ‘Gradient’. Then select the black and white gradient then change the black color to 808080 by double-clicking the ‘Color Stop’ and change the color number. Then set the ‘Angle’ to 45 degrees, 180 for ‘Scale’, then check the ‘Reverse’ box, then choose Radial for ‘Style’.
6. Duplicate the Model Layer
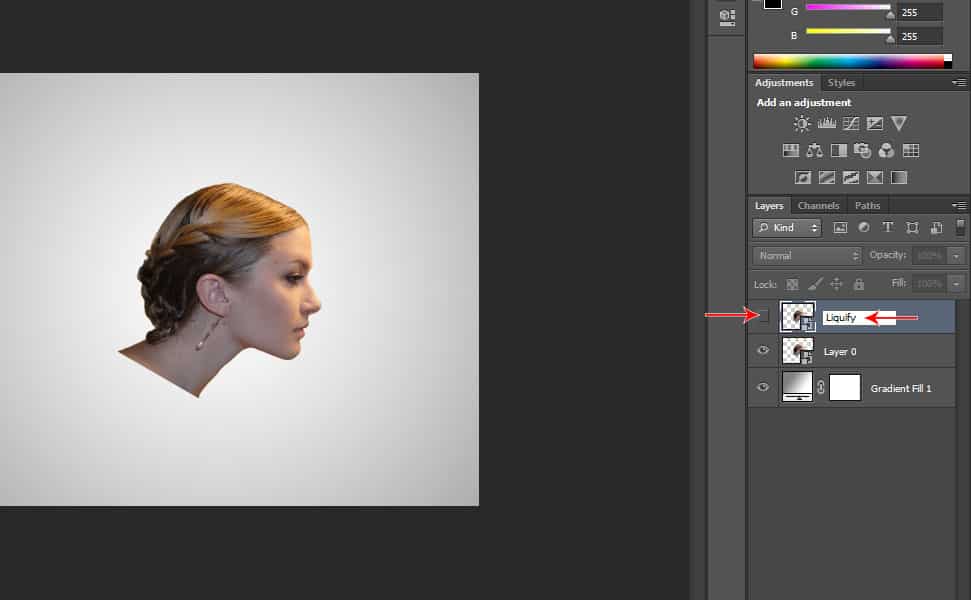
Press CTRL+J to duplicate the model’s layer then rename it to ‘Liquify’. We’re gonna need this ‘Liquify’ layer for the effects later. For now, let’s just hide the visibility of the ‘Liquify’ layer by unchecking the visibility box located at the left side of the layer.
7. Add Gradient Map Fill Layer
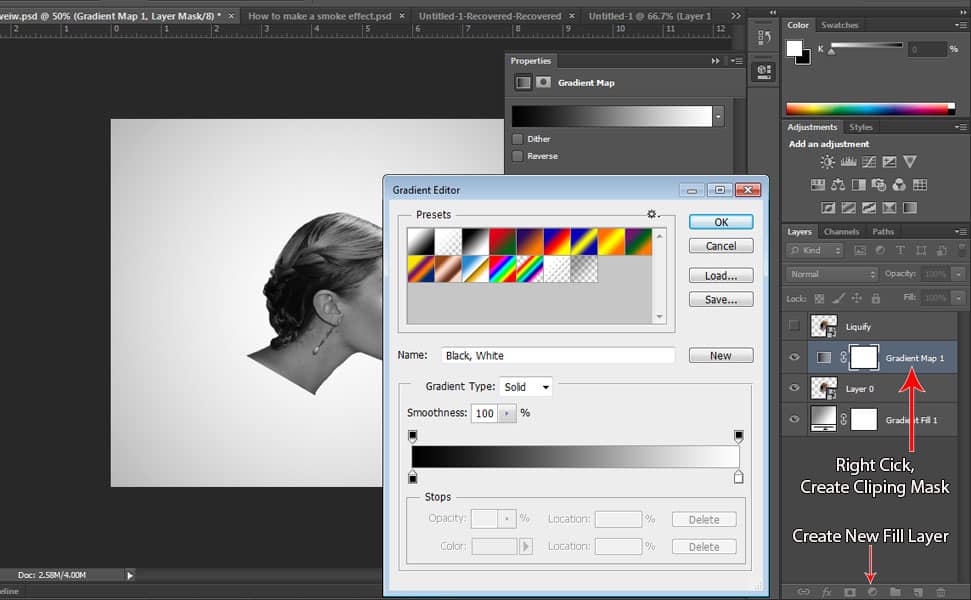
Select the model layer then click the ‘Create New Fill Layer’ icon and select ‘Gradient Map’ then choose the black and white gradient. After that clip it to the model layer by right-clicking on the ‘Gradient Map Layer’ that you just created then select ‘Create Clipping Mask’.
9. Add Black and White Fill Layer
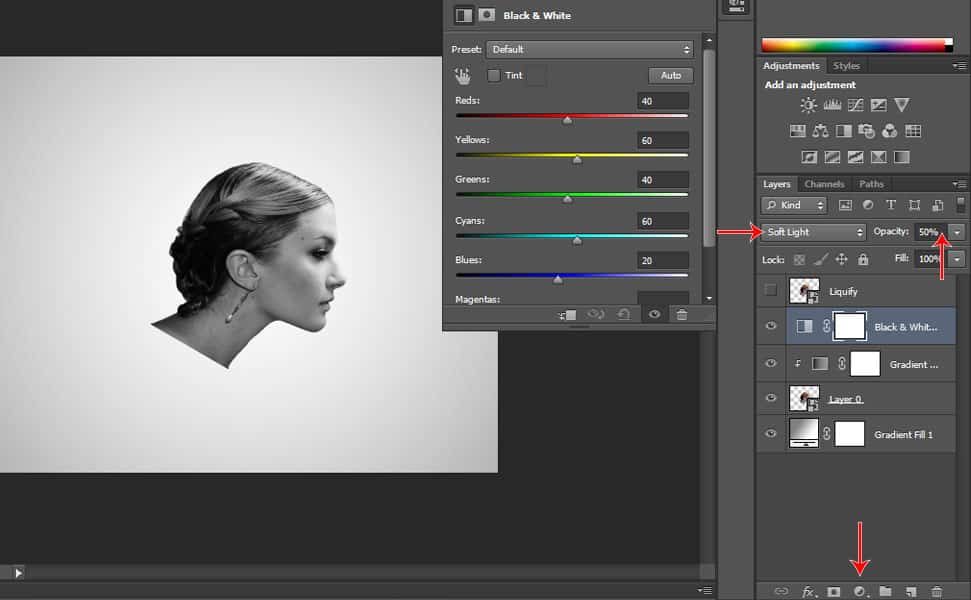
Go to ‘Create New Fill Layer’ again but this time, select ‘Black and White’ then change the Blending Mode to ‘Soft Light’ and change the Opacity to 50% as shown in the picture. Then right-click on the Black & White Layer then select ‘Create Clipping Mask’.
11. Apply a Black Layer Mask
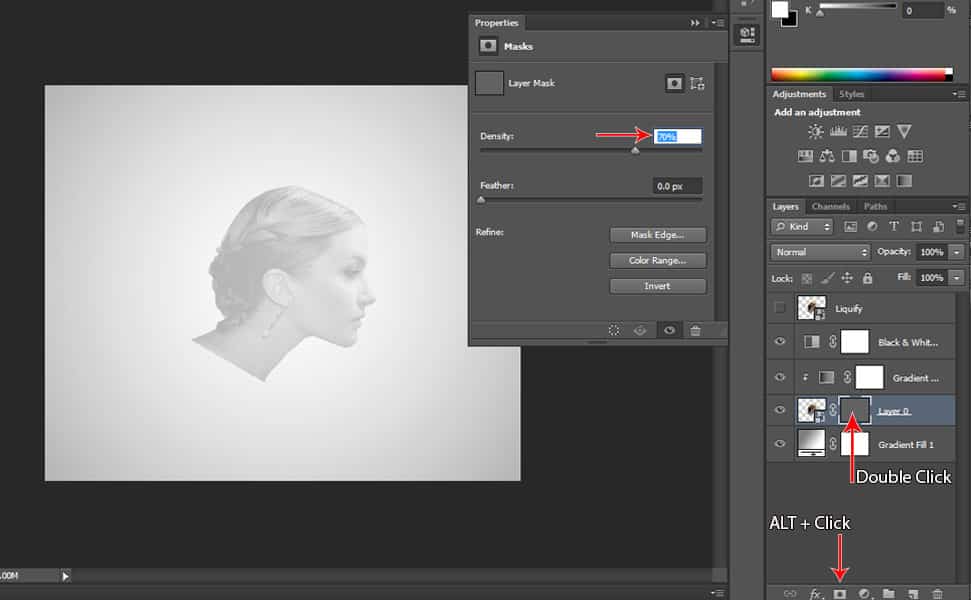
Click on the Model Layer then Press Alt + Click on the ‘Add Layer Mask’ icon to apply a black layer mask on the model layer. I applied a technique where I can see a little bit of the model’s face by double-clicking on the layer mask then change the ‘Density’ to 70% so I will be able to see which part of the face I am painting my smoke brush.
12. Brush off a bit of the Model’s Face
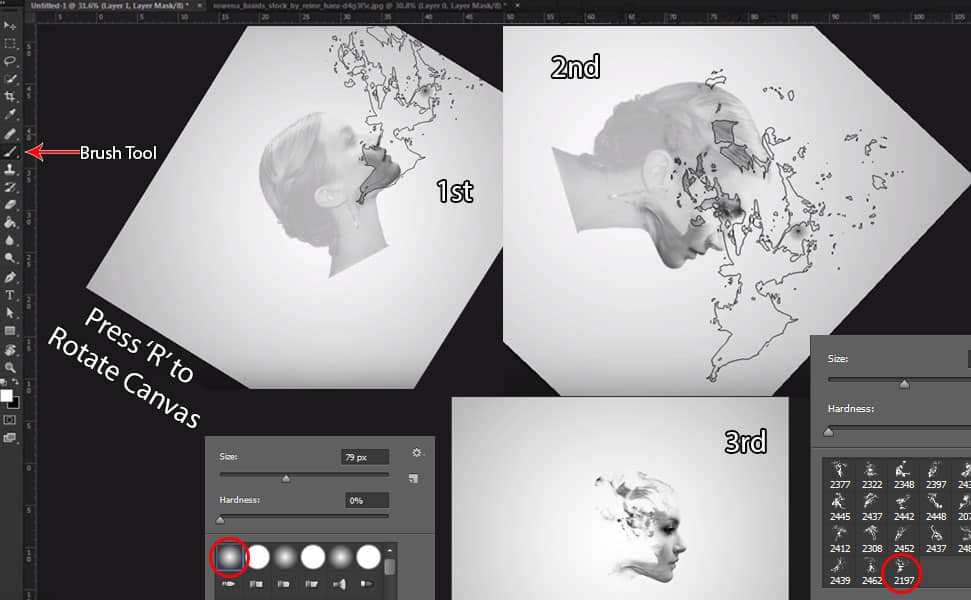
Click the Brush Tool then select 2197 Smoke Brush you downloaded from here. (if you don’t know how to load your brushes check this 13 Step by Step Dispersion Effect Tutorial in Photoshop @ step 11 will teach you how to load brushes that you just downloaded.) It’s up to you how you want it to look like but I like to rotate the canvas by pressing R then brush the model’s face as shown in the picture. As you can see first, I brushed at the mouth area, 2nd I brushed around the eyes then the 3rd one, I changed the layer mask’s density back to 100% then brush off the eyes and nose to reveal it using a Soft Round Brush.
13. Duplicate the Fill Layers
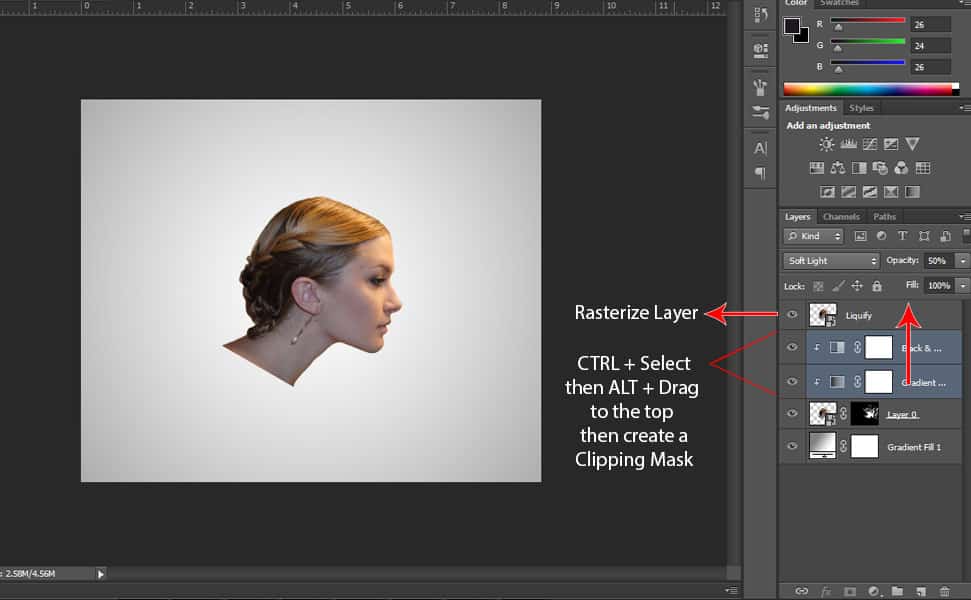
The first thing to do is make the liquify layer visible by clicking the visibility box located at the left side of the liquify layer. Then duplicate the Gradient Map and Black and white Fill Layer by pressing CTRL + select both layers then press ALT then drag it to the top of ‘Liquify’ layer. Then create a clipping mask for both fill layers by pressing CTRL + ALT + G. Next thing to do is right-click on the ‘Liquify’ layer then select ‘Rasterize Layer’.
14. Add ‘Levels’ Layer
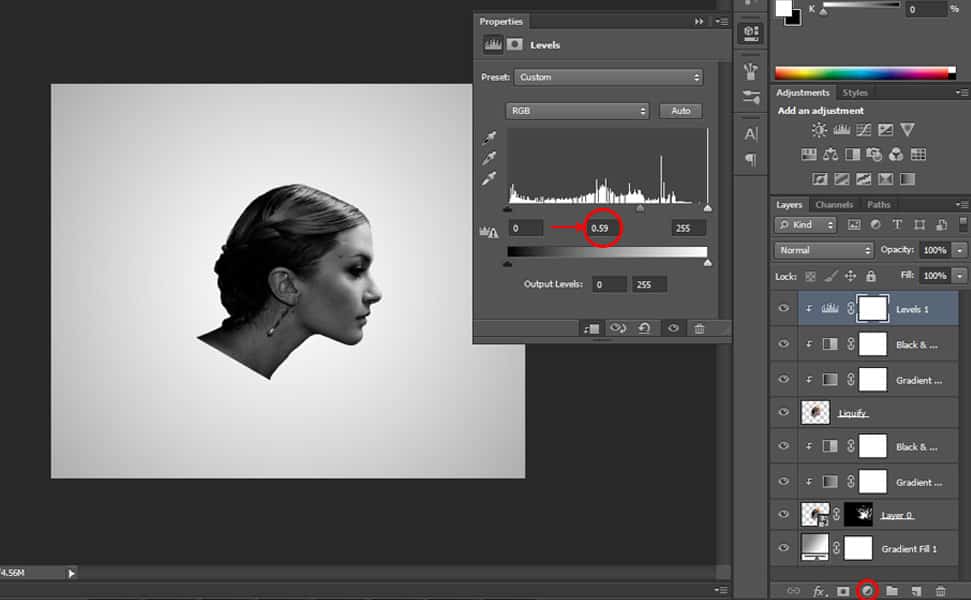
To make it a little bit darker, add a new fill layer by clicking on the ‘Create New Fill’ icon located below the layer tab then select ‘Levels’ then make it a little bit darker by typing 0.59 at the mid-level as shown in the picture.
14. Liquify the ‘Liquify’ Layer
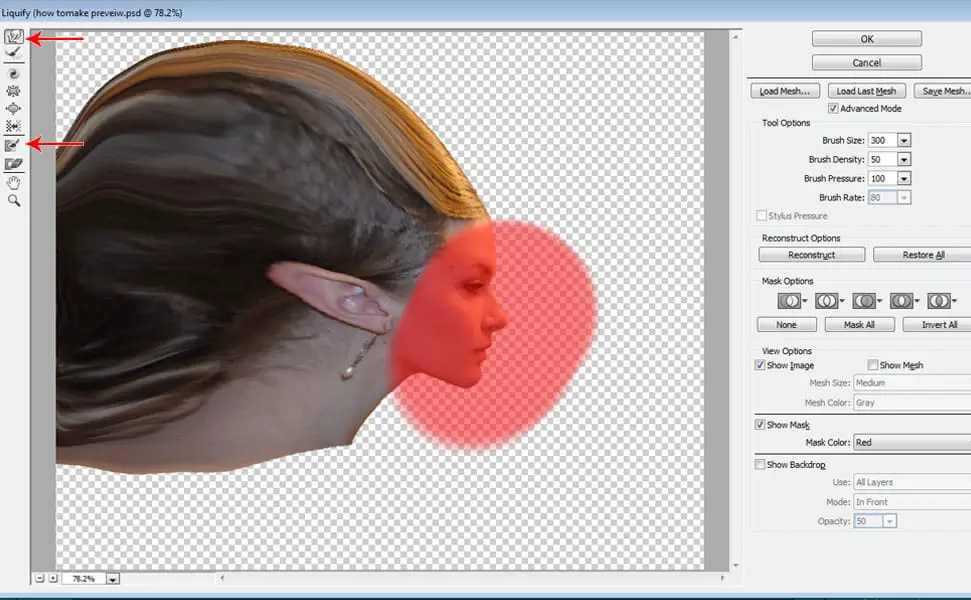
Now we’re ready to liquify our ‘liquify’ layer so make sure you select the liquify layer then go to Filter tab then select ‘Liquify’ (for shortcut press Shift + CTRL + X). Select the ‘Freeze Mask Tool’ and brush it on the face so that when we use ‘Forward Warp Tool’ later, you won’t be able to warp the face. Then select ‘Forward Warp Tool’ and warp the left side of the head and spread it to the sides as shown in the picture.
15. Add a Black Layer Mask
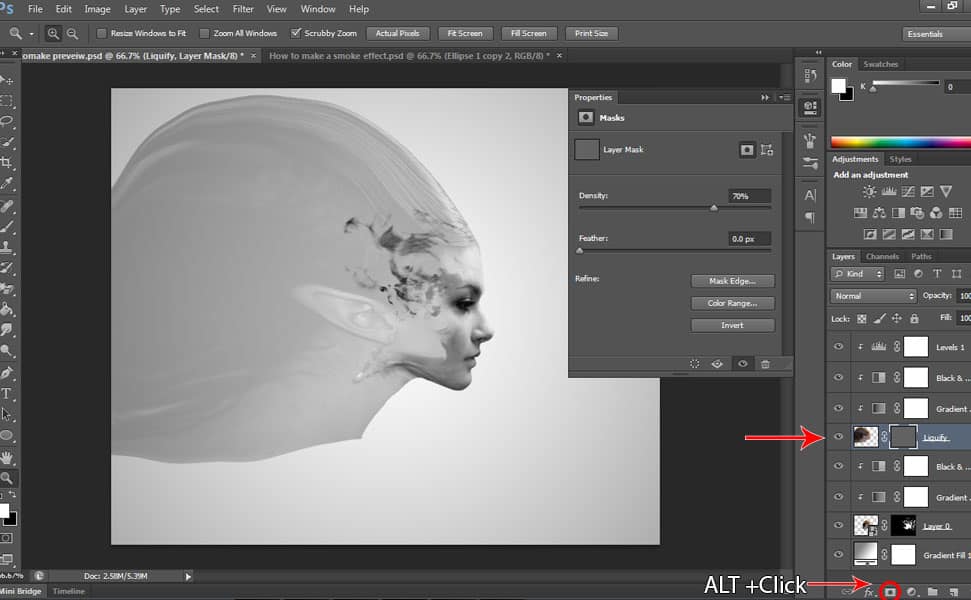
Select the ‘Liquify’ layer then Press ALT + click the ‘Add Layer Mask’ icon located below the layer tab, then change the ‘Density’ by double-clicking the black layer mask then change the ‘Density’ to 70% so you will know where to brush your smoke brush for the effects.
16. Use the Smoke Brush
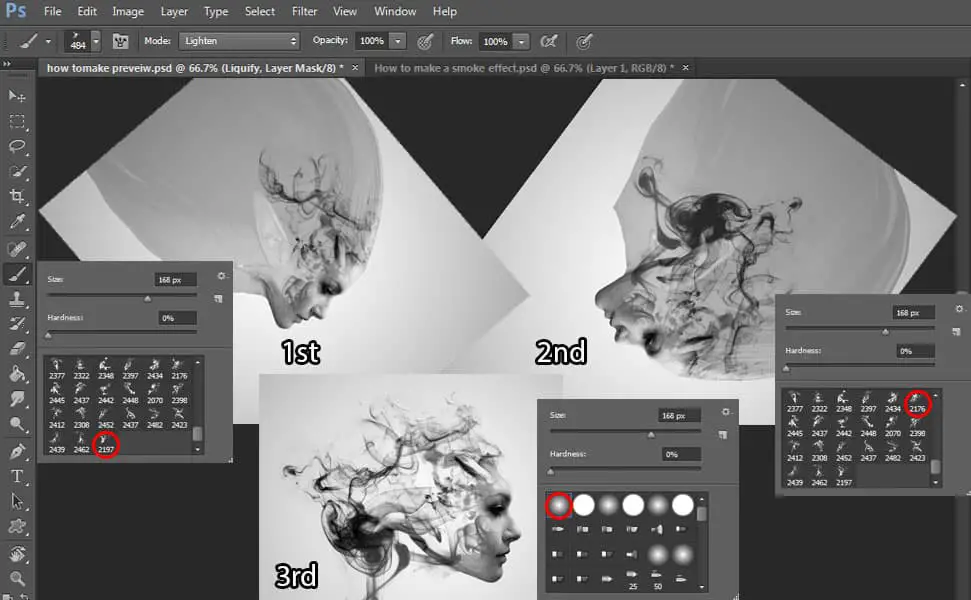
After creating the black layer mask, select the 2482 Smoke Brush then brush it off the liquify black layer mask as shown in the 1st picture, again I rotated the canvas then used 2176 Smoke Brush for the 2nd picture then I changed back the layer mask’s density to 100%. Then I choose the soft round brush and change the foreground to white then brush off a little at the nose, mouth, and eyes to make it a bit clear.
So we’re finally done! I hope you accurately followed the step by step smoke effect tutorial and if you have any questions, feel free to comment below.


Great tutorial! Liquify’Layer and adding Black layer mask (14. & 15.) are top tips.
Tx